
Welcome to Week 2 of our transformative Pie Making Boot Camp! This week, we’re diving deep into the heart of any truly spectacular pie: the crust. Forget those nervous twitches or past struggles with homemade dough – today, our goal is to demystify the process and equip you with the skills to create perfect, flaky pie crusts every single time. With a focus on clarity, proven techniques, and a brand-new, no-fail recipe, you’re about to become a homemade pie dough rock star.
A pie is only as good as its foundation, and the crust undeniably sets the stage. While many find the idea of making pie crust from scratch daunting, it’s a deeply rewarding culinary skill that elevates any pie from good to unforgettable. This comprehensive guide, complete with detailed explanations and visual aids, will walk you through every critical step, ensuring your journey to pie perfection is smooth and enjoyable.
Whether you’re a complete novice or have attempted pie crusts with mixed results, this tutorial is designed for you. We’ll cover everything from selecting the right ingredients to mastering the rolling technique and achieving that beautifully crimped edge. We’ll also address common pitfalls and offer practical troubleshooting tips to keep you on track, ensuring that stress and angst are replaced with confidence and a sense of accomplishment.
The Importance of a Great Pie Crust
Why bother with homemade pie crust when store-bought options are readily available? The answer lies in an unparalleled difference in taste and texture. A homemade pie crust offers a delicate flakiness, a rich buttery flavor, and a tender crumb that simply cannot be replicated by pre-made alternatives. It provides a robust yet tender vessel that perfectly complements any filling, creating a harmonious balance that defines a truly exceptional pie. Mastering this skill not only enhances your baking repertoire but also imbues your pies with a personal touch that guests will undoubtedly notice and appreciate.
Choosing Your Pie Crust Recipe: A No-Fail Option
The quest for the perfect pie crust often begins with the right recipe. While many of you may be familiar with my beloved sour cream pie crust recipe, which I use 90% of the time for its superior flavor and tenderness, today I’m excited to share another fantastic standby: a no-fail, flaky pie crust recipe. This particular recipe is incredibly user-friendly, making it ideal for those new to pie making or anyone seeking a reliable and straightforward method.
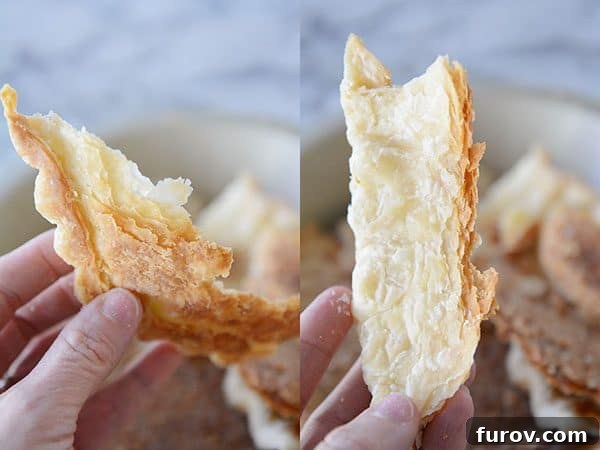
This “new” recipe, which we’ll be using in today’s step-by-step tutorial, yields an enviably flaky and tender crust. It strikes a perfect balance, offering the rich flavor you crave while being exceptionally easy to handle. While the sour cream version holds a special place for its nuanced flavor, this recipe provides outstanding results with minimal fuss. For visual proof of its flakiness, I even sacrificed a baked crust to reveal its gorgeous, layered structure – the very definition of pie crust amazingness!
You might be wondering about the inclusion of shortening in this recipe. While I generally favor butter, a small amount of shortening in this specific formula contributes significantly to a light, flaky texture that can be challenging to achieve with 100% butter, especially for beginners. It makes the dough more forgiving and easier to work with without compromising the delicious buttery flavor. This blend hits the sweet spot for a truly perfect crust.
The Golden Rule: Cold Ingredients, Cold Dough
Before we delve into the instructions, let’s establish the most crucial principle for pie crust success: **always use cold ingredients and keep the pie dough cool throughout the entire process.** Warm fats (butter and shortening) will quickly lead to a dense, heavy, and potentially shrunken crust. Ideally, your kitchen temperature should be between 68-72 degrees F. If you’re sweating, your pie dough will be too!
To prepare, place 10 tablespoons of butter in the freezer for 20-30 minutes. Also, chill 2 tablespoons of shortening in the refrigerator for several hours. A quick cheat for shortening is to scoop it onto a lightly greased plate and freeze it for 15-20 minutes. These steps are vital for ensuring the fats remain solid, creating those essential pockets of steam during baking that result in a wonderfully flaky crust.
Step-by-Step Guide to Perfect Homemade Pie Crust
1. Combine Dry Ingredients
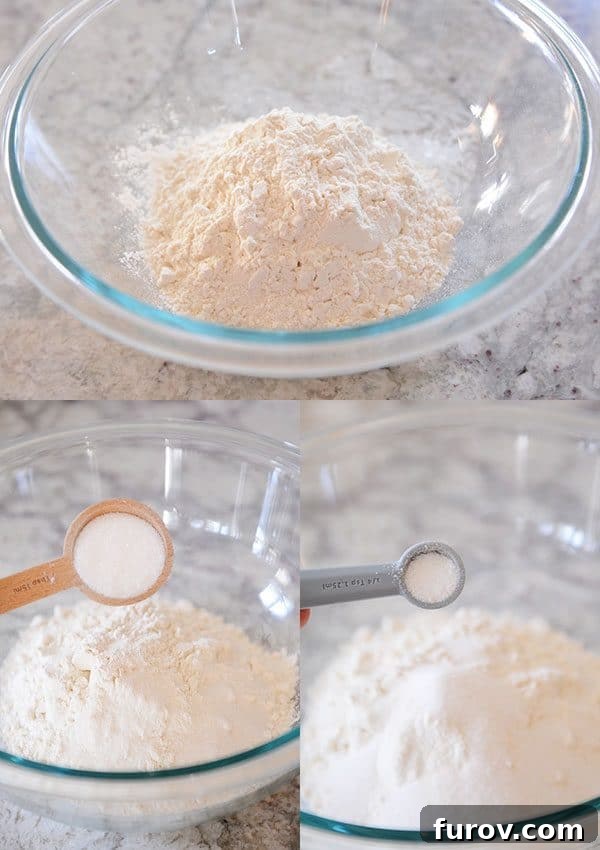
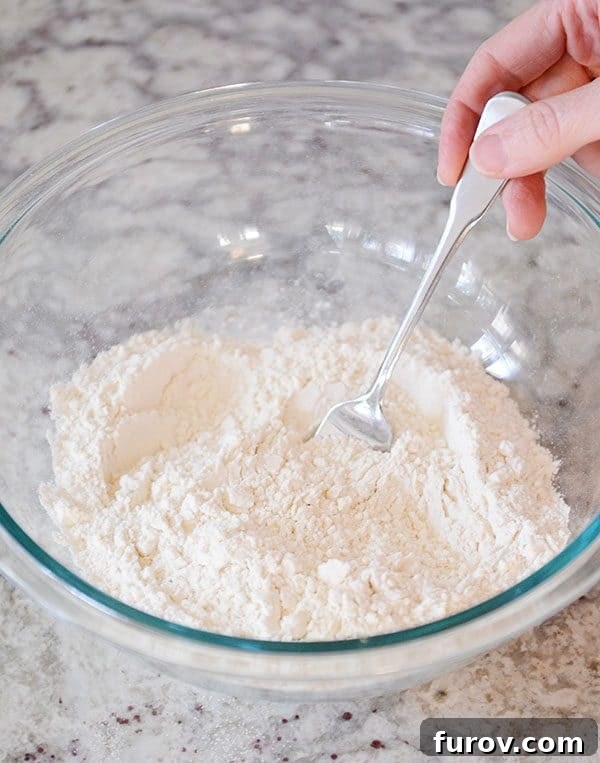
In a medium-sized bowl, measure out 1 1/2 cups of all-purpose flour, 2 tablespoons of granulated sugar, and 1/4 teaspoon of salt. Give this mixture a quick whisk with a fork to ensure everything is well combined. This initial step helps distribute the leavening agents and flavorings evenly throughout the dough.
2. Incorporate Chilled Shortening
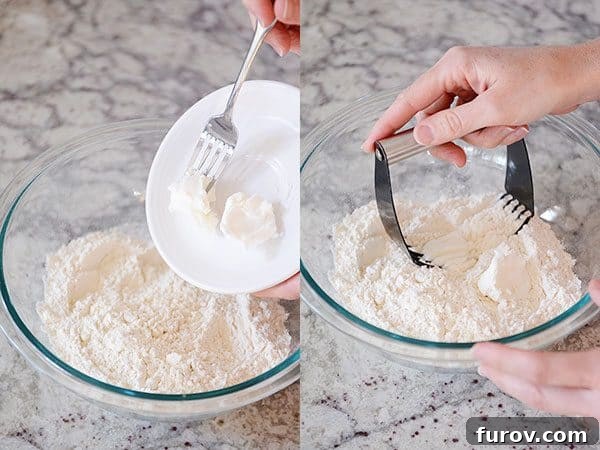
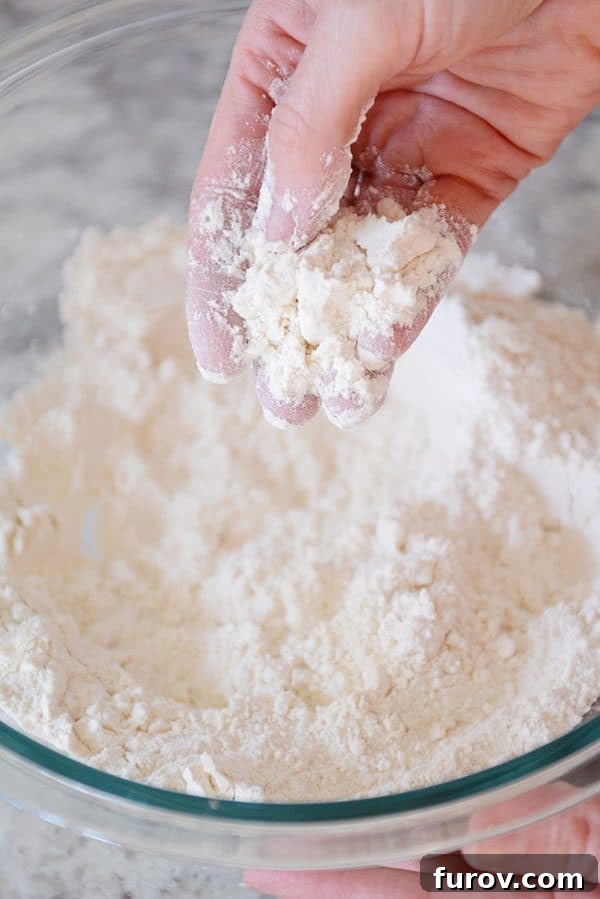
Now, add the two tablespoons of thoroughly chilled shortening to your dry ingredients. Using a pastry blender, two butter knives, or even a fork, cut the shortening into the flour mixture. Work quickly to prevent the shortening from warming up. Your goal here is to break the shortening into pea-sized pieces, creating a coarse, crumbly texture. This process should only take a minute or two. These small pieces of fat are crucial; they melt during baking, releasing steam and creating air pockets that give the pie crust its desirable flakiness.
3. Add Frozen Butter
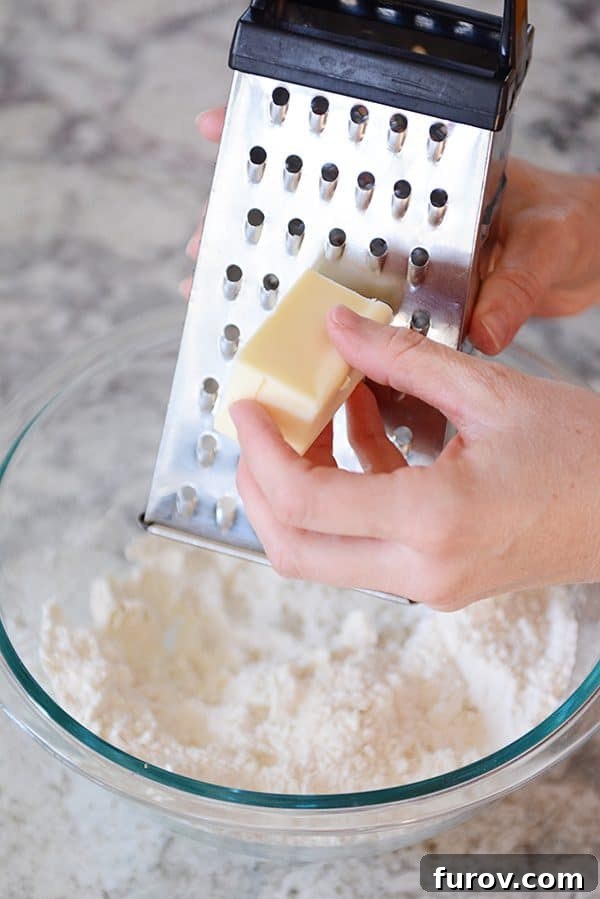
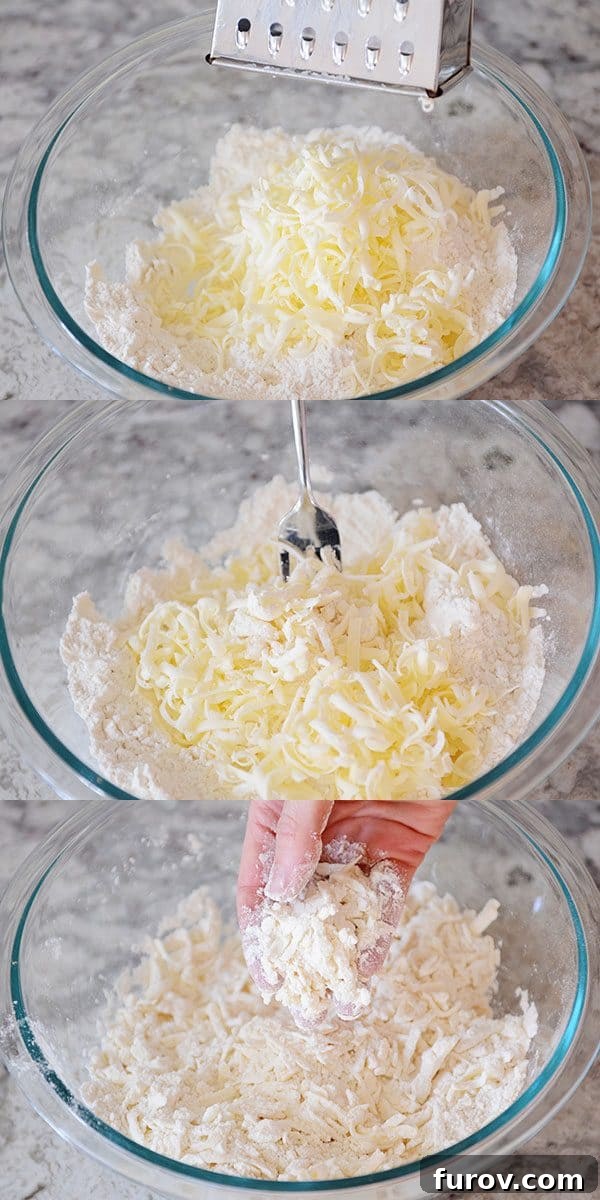
Next, take your frozen butter and grate it directly into the bowl using a box grater. This method is far easier and more efficient than cutting in cold butter, and it ensures the butter remains incredibly cold and in small, consistent pieces. Grate half the butter, gently toss the mixture to coat the strands, then grate the remaining butter. Once all the butter is in, lightly toss with your hands or a fork until the butter strands are evenly coated with the dry ingredients. Be mindful not to overwork the mixture or allow the warmth from your hands to melt the butter.
Troubleshooting Tip: No Box Grater? If you don’t have a box grater, ensure your butter is well-chilled (not frozen). Cut it into 1/4-inch pieces and add it to the dry ingredients. Use a pastry blender, two forks, or butter knives to cut the butter into the flour mixture until it forms a coarse meal with pea-sized butter pieces.
4. Incorporate Ice Water
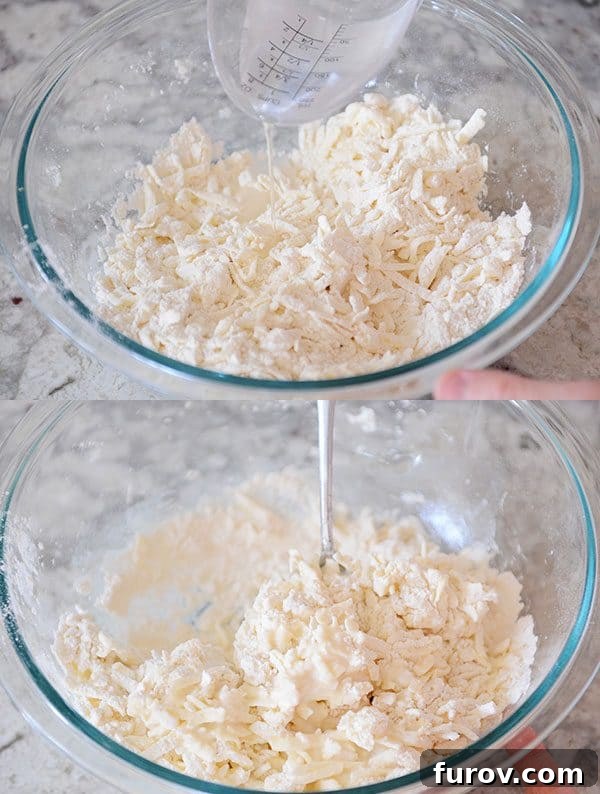
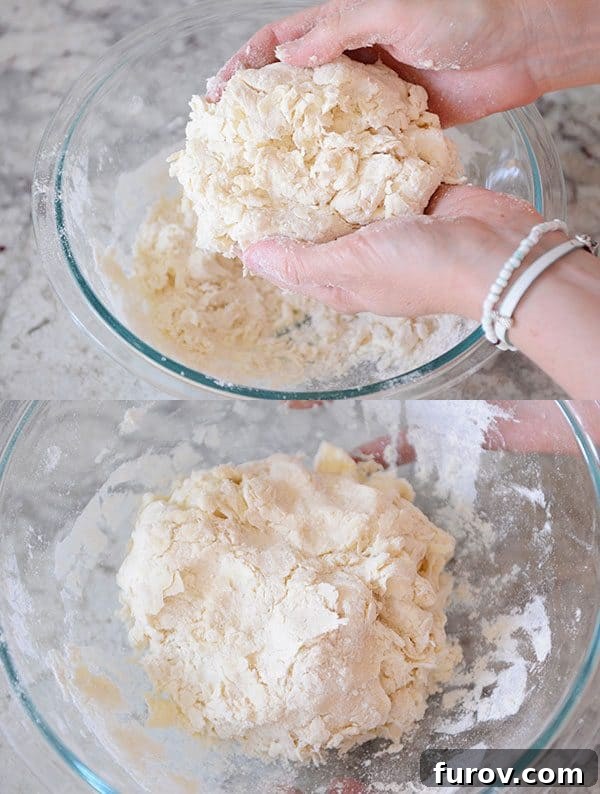
Begin by drizzling in 1/4 cup of ice water. Use a fork to start moistening the ingredients, gently tossing and turning. As the dough begins to come together, you may find it easier to abandon the fork and use your hands. The key is to add just enough water for the dough to barely hold together. When you can press a handful of the mixture and it mostly clumps together, even with some dry, patchy spots, you’ve added enough liquid. **Resist the urge to add more water if the dough still looks a bit shaggy!** It’s far better to have a slightly dry dough than an overly wet one, which can lead to a tough crust.
5. Chill the Dough
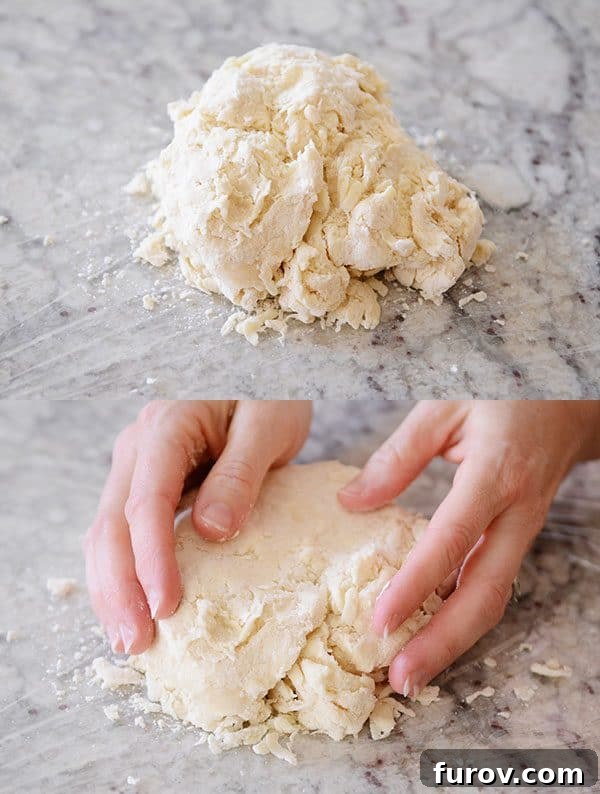
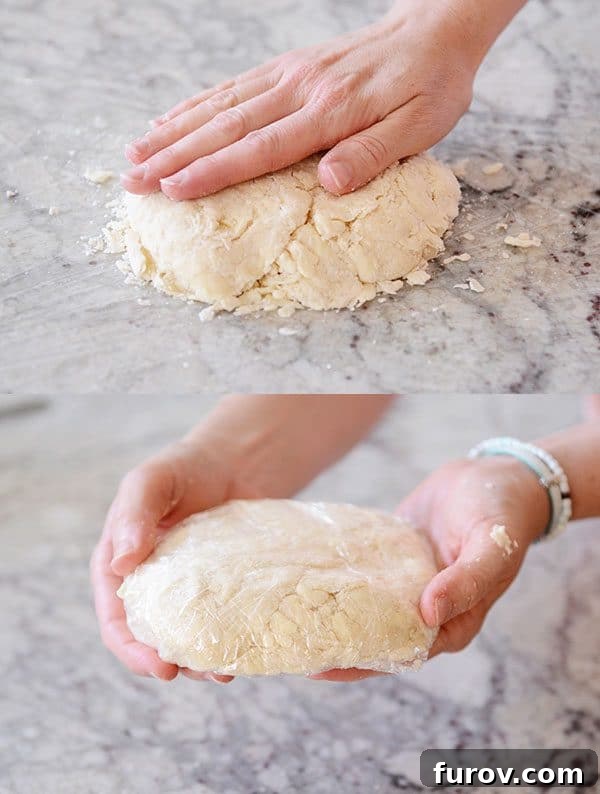
Once the dough has formed a shaggy mass, gather it together and press it lightly into a thick disc shape on a long piece of plastic wrap. Ensure all loose bits are incorporated. Wrap the dough completely and refrigerate it for at least one hour, or up to several days. This chilling period is crucial: it allows the flour to fully hydrate, relaxes the gluten, and, most importantly, re-chills the fats, making the dough much easier to roll out and contributing to its ultimate flakiness. You can also freeze the dough for a couple of months at this stage.
Troubleshooting Tip: Dough Crumbles? If, after chilling, your dough still feels too dry and falls apart when you try to roll it, don’t despair! Very lightly mist the surface of the disc with cold water from a spray bottle. Gently pat any excess dry ingredients back into the disc shape. The dough will absorb this extra moisture as it rests in the fridge, making it more pliable.
6. Roll Out the Dough
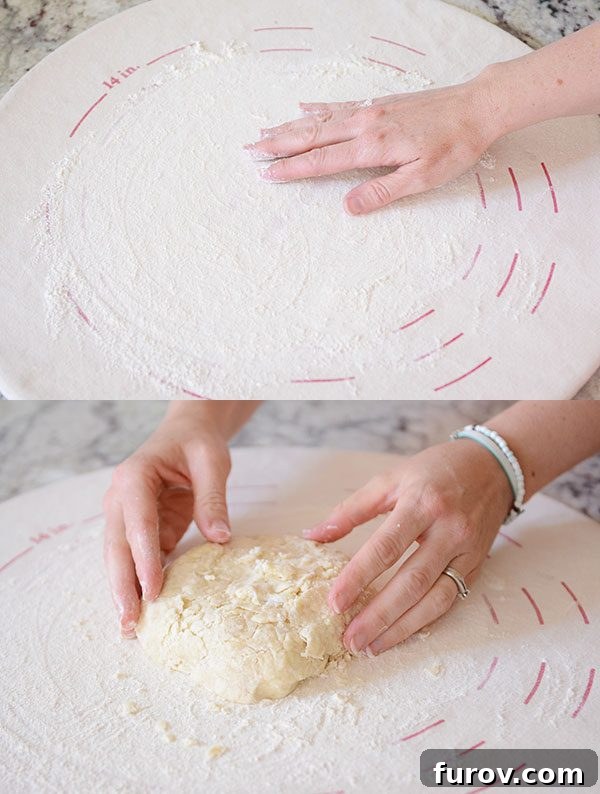
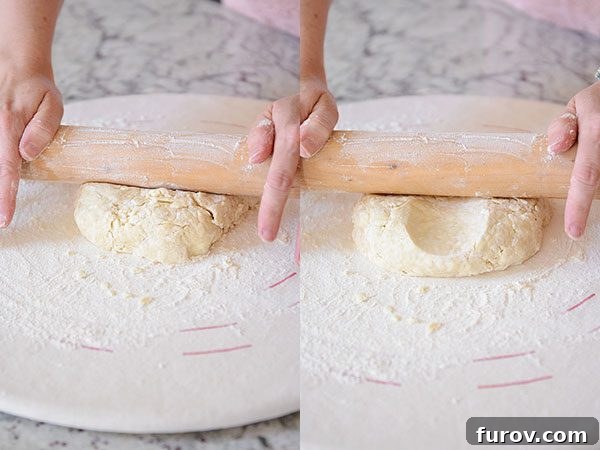
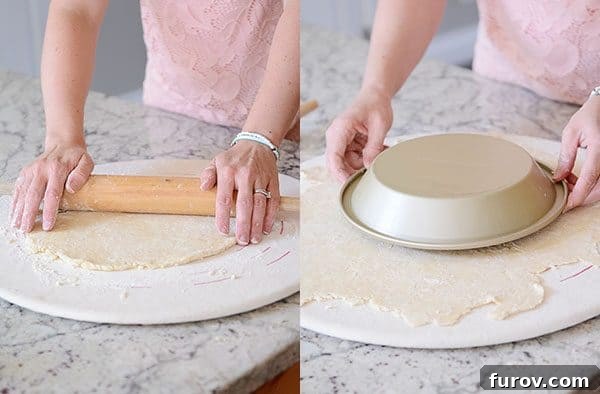
When you’re ready to roll, a canvas pastry board is a fantastic tool for preventing sticking. Lightly flour its surface, or if you don’t have one, lightly flour a clean countertop. Place your chilled dough disc in the center. Using a rolling pin, press down on the center of the dough and roll outward once. Rotate the dough a quarter turn, and repeat the process: roll from the center outwards, turn, and roll. Continue until the dough is a thin, even layer, approximately 2 inches wider than the rim of your pie plate. The goal is to achieve the desired size with as few rolls as possible to keep the dough cold and prevent gluten overdevelopment.
Troubleshooting Tip: Sticking Dough? If the dough starts to stick, lift it gently, sprinkle a little more flour underneath, and rotate. Keep your rolling pin lightly floured as well. Don’t force the dough; gentle persuasion and adequate flour are key.
7. Transfer to Pie Plate
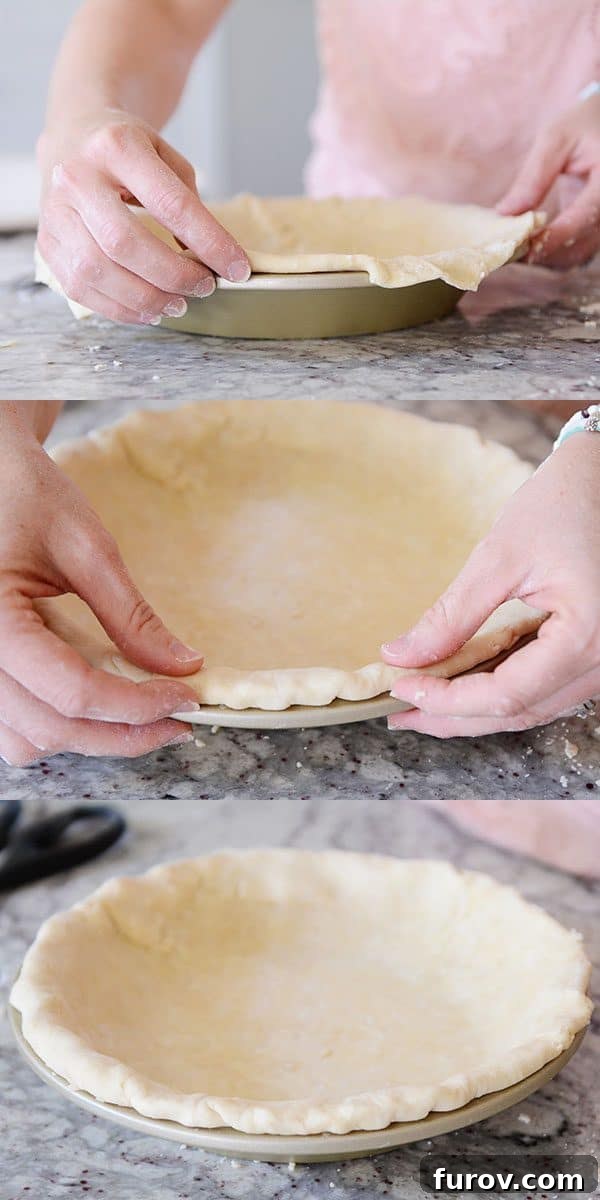
Lightly flour your rolling pin and carefully roll the dough around it, starting from one edge. If the dough feels too sticky, a light dusting of flour on top will help. Unroll the dough over your pie plate, centering it as accurately as possible. Once unrolled, gently lift the edges of the dough to free up any slack, and carefully ease it down into the corners of the pie plate. The crucial technique here is to **lift and fit, not stretch or pull**. Stretching the dough will cause it to shrink back significantly during baking, resulting in a misshapen or shallow crust. Gentle handling ensures your crust maintains its form.
Troubleshooting Tip: Cracks or Tears? If the dough cracks or tears while rolling or transferring, don’t stretch it! Instead, lightly mist the area with a tiny drop of cold water. Take a small piece of excess dough from the overhang and gently press it over the tear to patch it up.
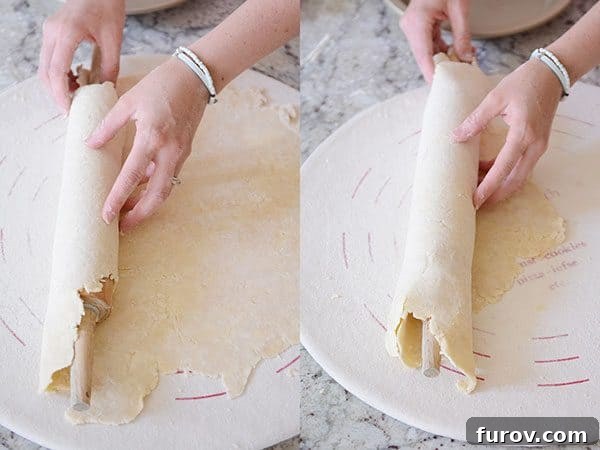
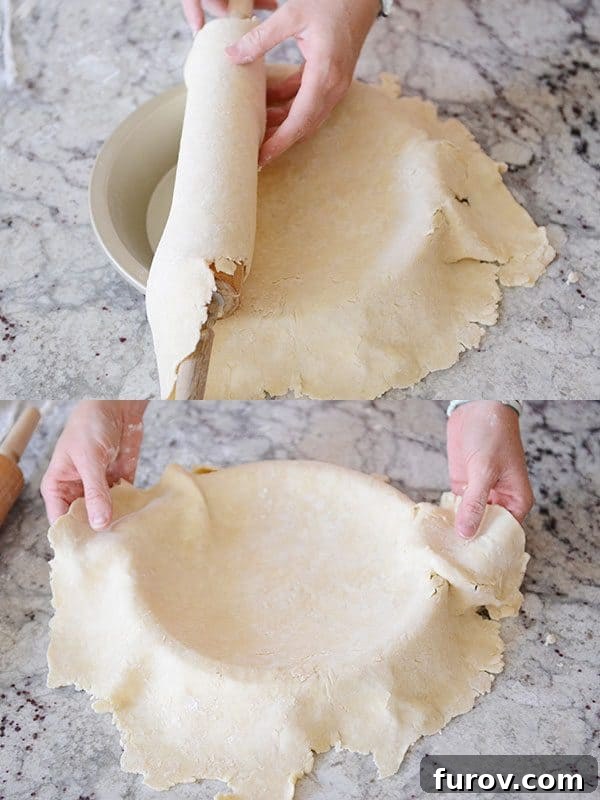
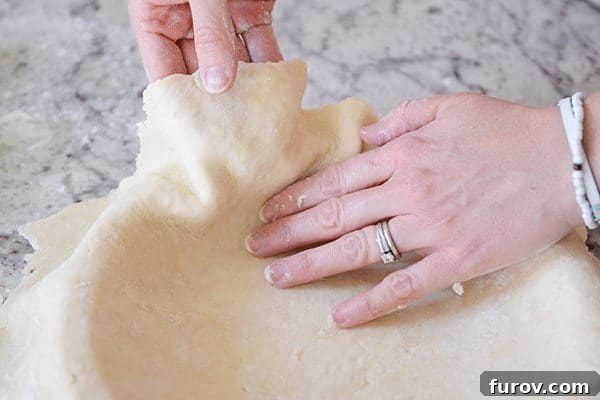
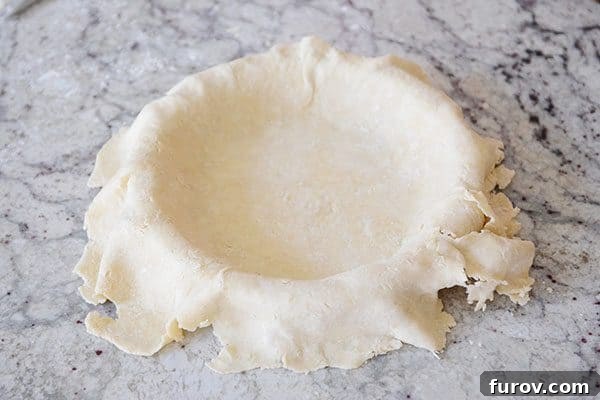
8. Trim and Crimp the Edges
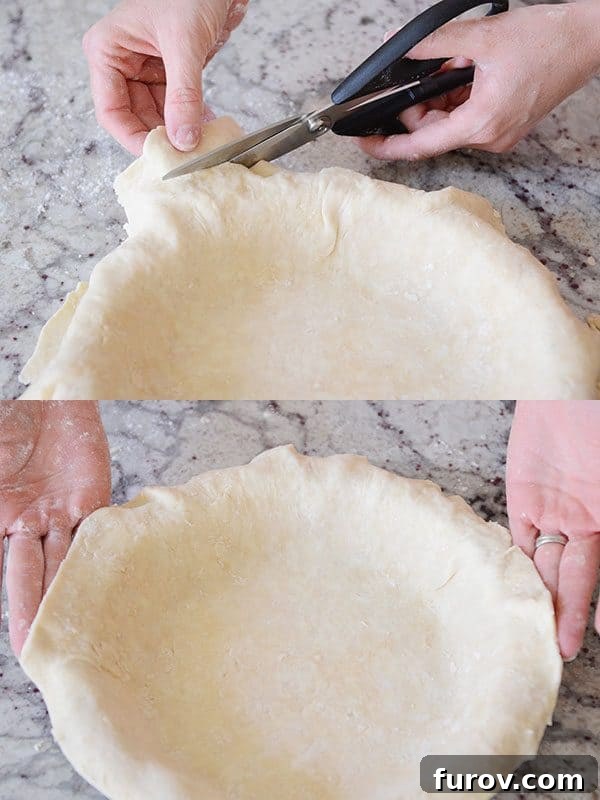
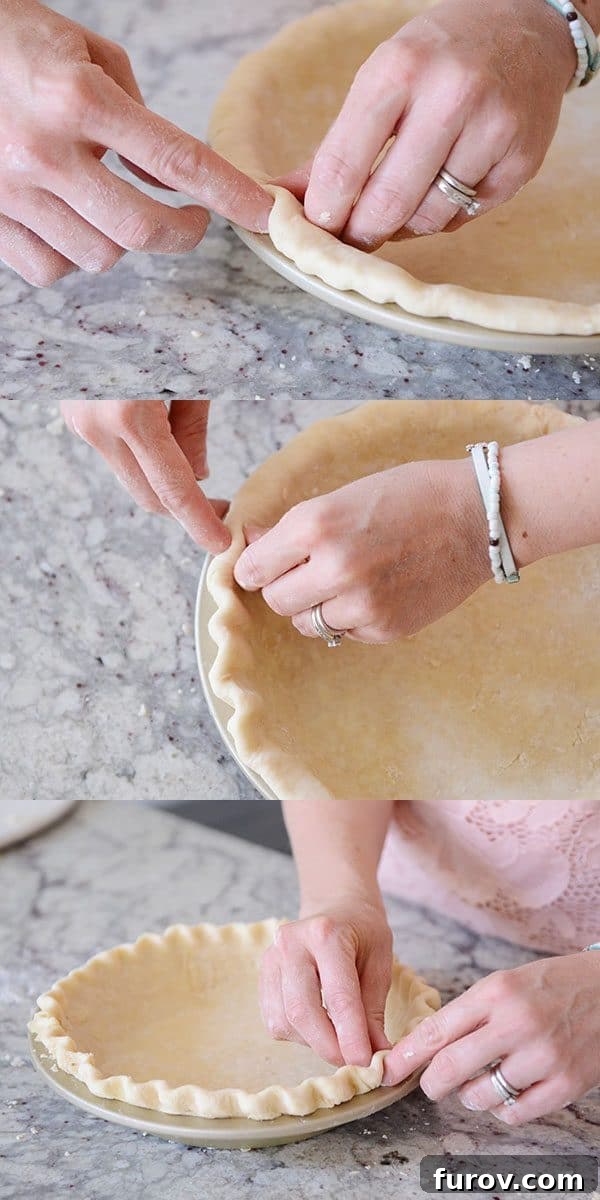
Using kitchen scissors (my preferred tool), trim the pie dough, leaving approximately a 1/4-inch overhang around the rim of the pie plate. This extra dough is essential. Now, take this 1/4-inch overhang and fold it underneath itself, so it rests flush with the edge of the pie plate. This creates a thicker, more stable edge that is perfect for crimping and significantly helps prevent shrinkage during baking. (Note: If you plan to make a double-crust pie, you’ll leave the 1/4-inch overhang as is, without folding it under.)
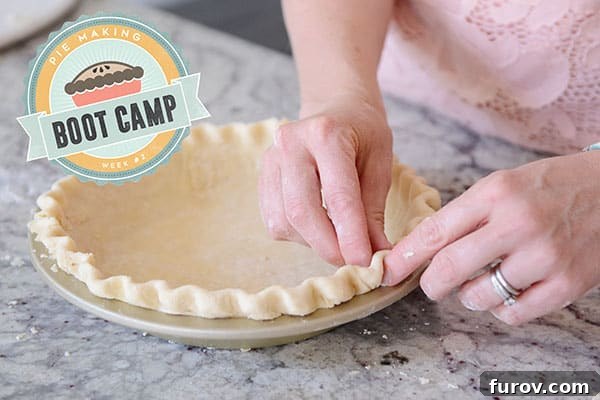
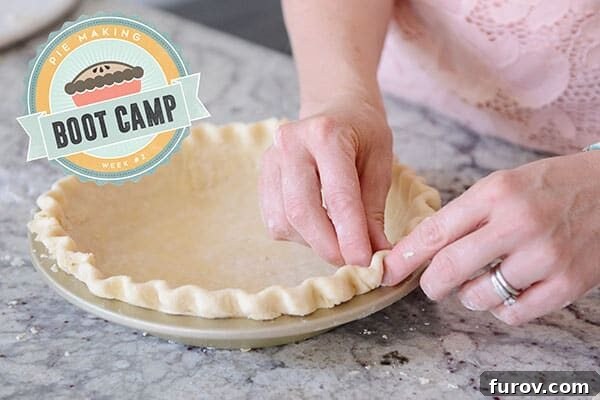
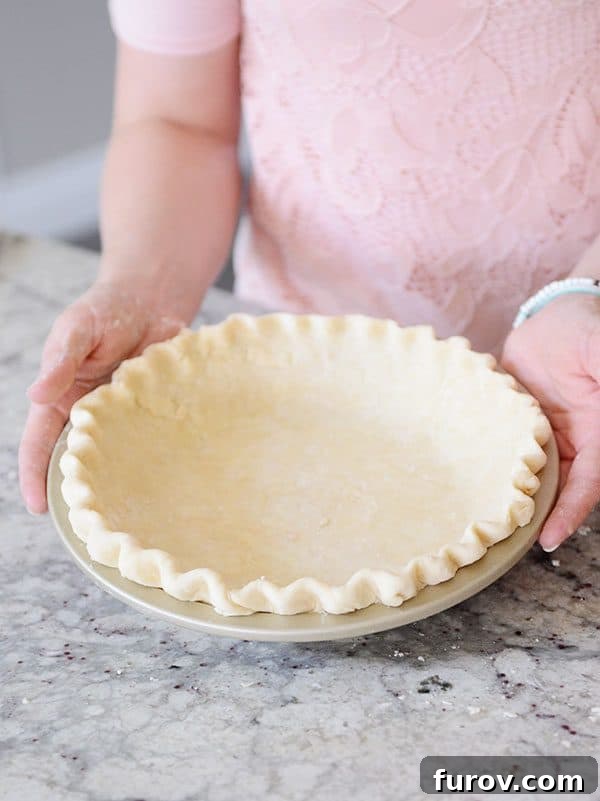
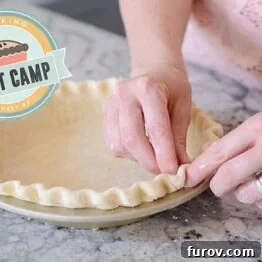
With the edges folded, it’s time to crimp! For a classic pie crust look, use the thumb and forefinger of one hand on the *inside* of the pie plate and the forefinger of your other hand on the *outside* edge. Gently pinch and press the dough together, working your way around the entire rim to create a beautiful, decorative edge. The thicker folded edge will make your crimps more pronounced and elegant.
9. Final Chill: Important for Stability
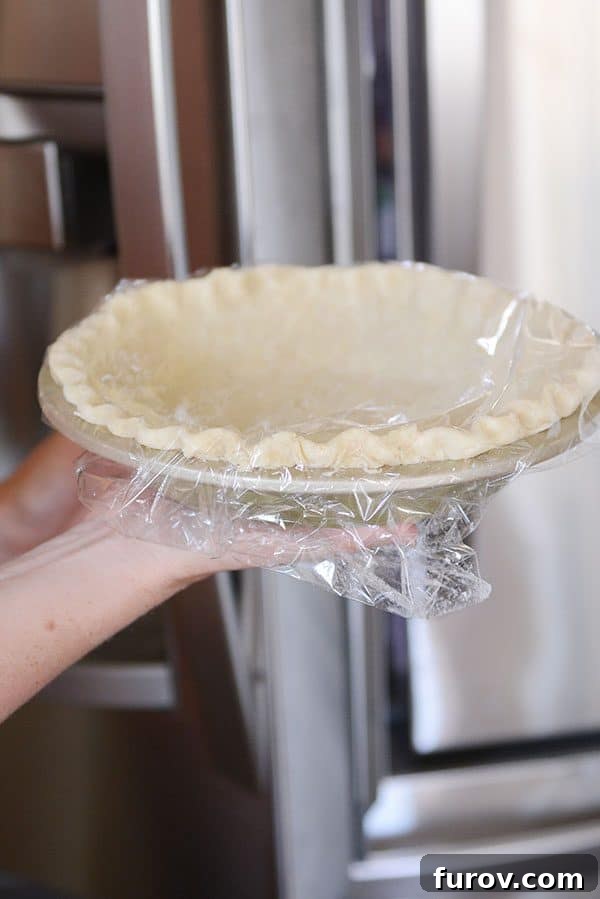
Once your pie crust is perfectly shaped and crimped, lightly cover it with plastic wrap and place it back in the refrigerator for at least an hour. This final chilling period is essential. It helps the dough firm up, further relaxes the gluten, and prevents that dreaded shrinkage during baking. A well-chilled crust is a stable crust, ensuring your pie holds its beautiful shape when it comes out of the oven. We’ll delve deeper into what to do with this gorgeous crust next week, including blind baking and preparing for various fillings.
Common Pie Crust Challenges and Solutions
Making pie crust can have its moments, but understanding common issues helps you conquer them:
- **Shrinking Crust:** Almost always caused by overworking the dough (developing too much gluten) or not chilling it enough. Always use cold ingredients, handle minimally, and ensure ample chilling time before baking. The “lift and fit, don’t stretch” method is also critical.
- **Tough Crust:** This happens when the gluten in the flour is overdeveloped through excessive mixing or handling, or too much water is added. Mix just until combined and handle the dough as little as possible.
- **Crumbly Dough:** If your dough is too dry and won’t come together, you likely need a little more liquid. Add ice water a tablespoon at a time, mixing gently until it just holds together. Remember the spray bottle trick for minor adjustments.
- **Sticky Dough:** Too much moisture or warm fats can make dough sticky. Ensure ingredients are very cold. If it’s too sticky to roll, dust lightly with flour and chill again.
- **Lack of Flakiness:** This usually points to warm fats melting into the flour before baking, preventing steam pockets from forming. Strict adherence to using cold ingredients and keeping the dough cool is paramount.
Conclusion: Your Journey to Pie Mastery
Learning how to make a perfect homemade pie crust is truly one of the most rewarding achievements in baking. It transforms an ordinary dessert into an extraordinary experience. With the techniques and tips shared today, you have all the tools to create stunning, flaky, and delicious pie crusts with confidence. Practice makes perfect, and with each pie you bake, your skills will only grow. Don’t hesitate to leave any questions or share your success stories in the comments below – I’m here to help you every step of the way!
Next week, our Pie Making Boot Camp continues as we tackle the art of blind baking, explore its importance, and unveil an amazing new chocolate ganache cream pie recipe that perfectly utilizes your freshly mastered pie crust. We’ll also dive deeper into specific troubleshooting for baking pie crusts.
Video Tutorial
Perfect Flaky Pie Crust
Yield: 1 (9-inch) pie crust
Prep Time: 1 hr 20 mins
Total Time: 1 hr 20 mins
Pin Recipe
Ingredients
- 1 ½ cups (213 g) all-purpose flour
- 2 tablespoons granulated sugar
- ¼ teaspoon salt
- 2 tablespoons shortening, frozen for 15-20 minutes or well-chilled
- 10 tablespoons (142 g) salted butter, frozen (see note)
- ¼ to ⅓ cup ice water
Instructions
- In a medium bowl, add the flour, sugar, and salt. Whisk together with a fork to combine.
- Add the shortening to the bowl, and cut it into the dry ingredients using a pastry blender, fork, or two butter knives until the shortening is in pea-sized pieces and the mixture is crumbly.
- Using a box grater (or other cheese grater with large holes), grate the frozen butter into the bowl. Lightly toss with a fork or your hands until the butter is evenly coated with the dry ingredients (don’t overmix with your hands, especially if the warmth from your fingers softens or melts the butter).
- Drizzle in 1/4 cup of the ice water. Use a fork to begin combining the dough. Abandon the fork, if needed, and use your hands to gather the pie dough into a mass. It will be dry and patchy – that’s okay. Grab a handful of dough and press. If it clumps together, don’t add more water. If it’s still dry and falling apart, drizzle in another 1-2 tablespoons and mix lightly and quickly until the dough gathers into a shaggy ball.
- Press the pie dough (gathering in any dry pieces that may scatter or fall out) into a thick disc shape onto a piece of plastic wrap. Cover and refrigerate for at least an hour or up to several days (the pie dough can be frozen for several months).
- Roll out and use as needed or directed (in the recipe you are using).
Notes
Butter: I always use salted butter (baking purists look aside), because it is what I have on hand. If using unsalted butter, increase the salt amount to 3/4 teaspoon.
Author: Mel
Recommended Products
Recipe Source: adapted a little from Dorie Greenspan’s Good for Almost Everything recipe (reduced the shortening just a bit, use salted butter and less salt overall, adapted water amount slightly)