
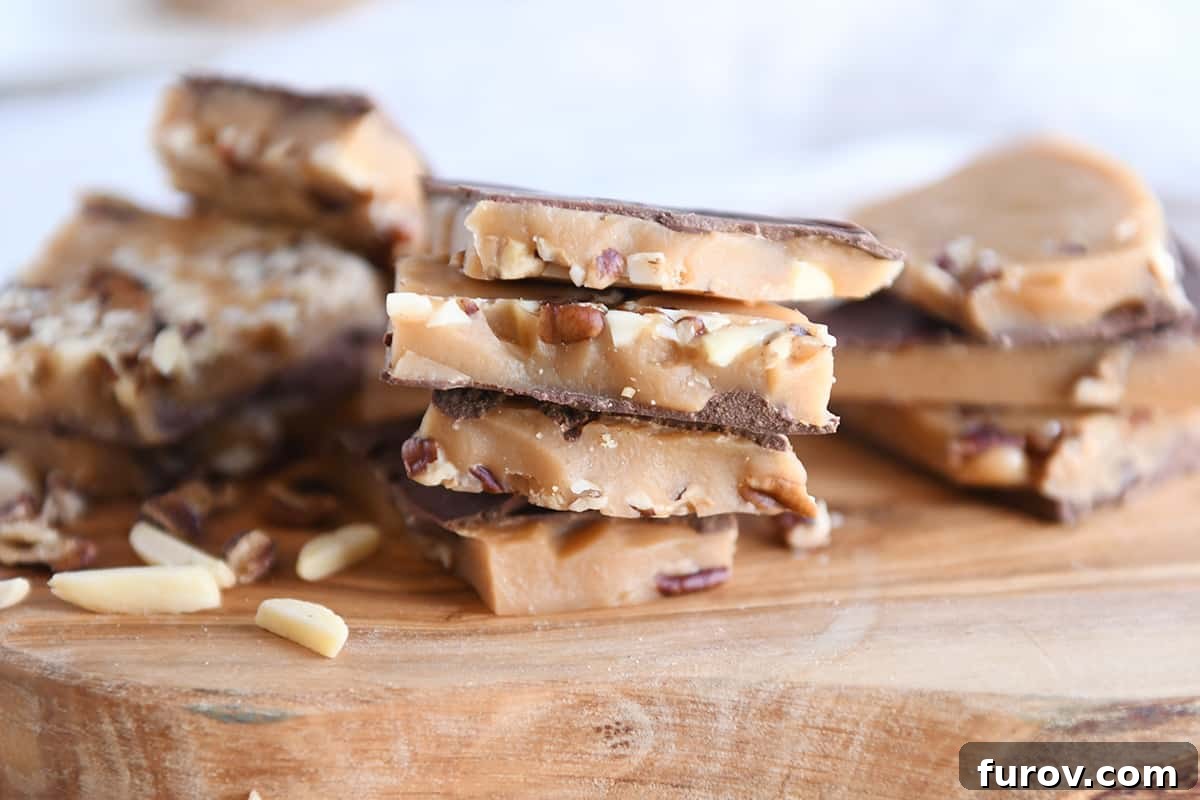
The Ultimate Guide to Foolproof Homemade Toffee: A Holiday Staple
Unlock the secrets to crafting the most irresistible homemade toffee, a cherished holiday staple that promises crunchy, buttery perfection in every bite. While the art of making toffee might seem daunting at first glance, especially with its reputation for being tricky, this comprehensive guide is designed to empower you with the knowledge and techniques for foolproof toffee, ensuring dazzling results every single time. Prepare to transform simple ingredients into a gourmet confection that will impress family and friends alike.
I understand the hesitation; I’ve certainly experienced my fair share of sticky situations and less-than-perfect batches over the years. However, through countless experiments, a good dose of persistence (and perhaps a few muttered words of frustration), I’ve refined the process and discovered the critical nuances that elevate a good toffee to an exceptional one. This article not only provides you with my favorite, battle-tested toffee recipe but also shares three indispensable tips to guarantee flawless execution, making your journey to perfect homemade toffee a sweet success.
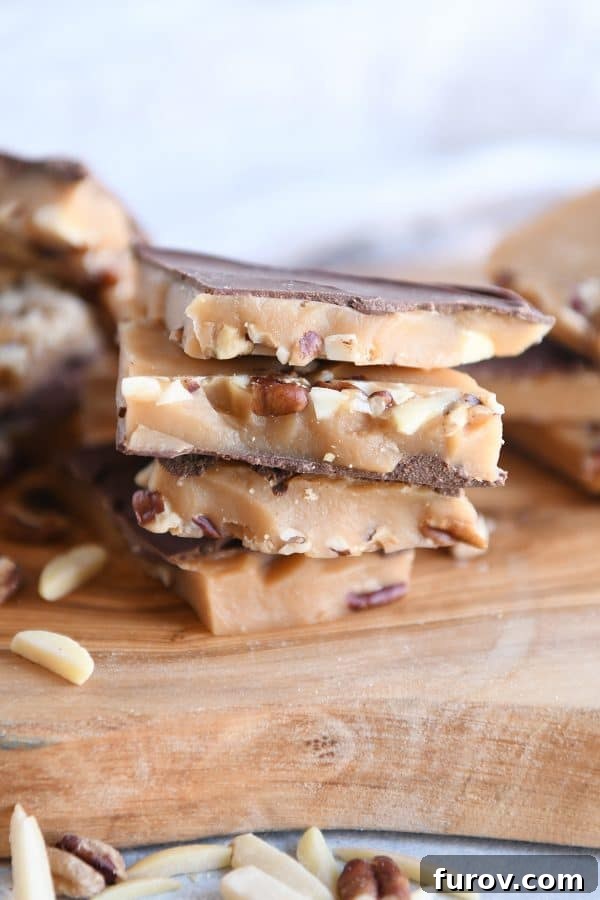
Most homemade toffee recipes share common ingredients, but the magic truly lies in the technique and the meticulous application of a few key principles. It’s about understanding the “do’s and don’ts” that differentiate a sugary mess from a truly decadent treat.
Today, I’m thrilled to share my go-to homemade toffee recipe alongside my top three tips for achieving foolproof results. Get ready to conquer your kitchen and create a holiday memory that tastes as good as it feels!
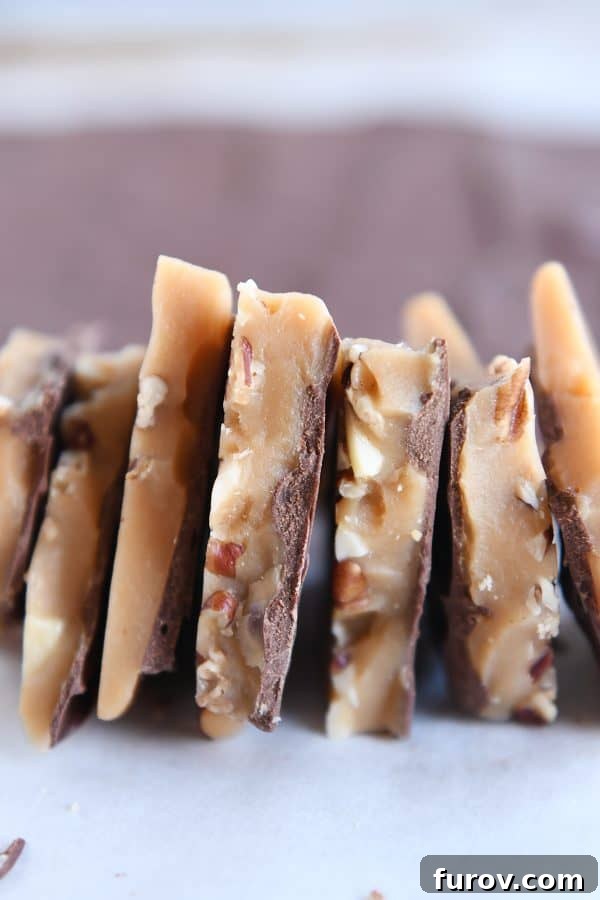
The Essential Ingredients for Perfect Toffee
Despite its rich flavor and luxurious texture, homemade toffee relies on a surprisingly short list of humble ingredients. This means the quality of each component truly shines through, contributing to that irresistible crunchy, caramelly, and nutty goodness we all crave.
Here’s what you’ll need to embark on your toffee-making adventure:
- High-Quality Butter: This is the backbone of your toffee. Opt for a good quality salted butter for the best flavor balance. The richness of butter is what gives toffee its characteristic melt-in-your-mouth texture and prevents it from being too sticky.
- Granulated Sugar: The sweetness and crispness come from this simple ingredient. We’ll delve into why granulated sugar is preferred over brown sugar later, but for that classic brittle snap, white granulated sugar is key.
- A Pinch of Salt: Essential for balancing the sweetness and enhancing the deep caramel notes of the toffee. Don’t skip it! It dramatically improves the overall flavor profile.
- Premium Chocolate: For that classic chocolate topping. Choose your favorite – milk, semi-sweet, or dark chocolate chips or finely chopped bars work wonderfully. The quality of chocolate will directly impact the final taste.
- Finely Chopped Nuts (Optional, but highly recommended): Nuts add a delightful crunch and earthy contrast to the sweet toffee and smooth chocolate. Popular choices include slivered almonds, toasted pecans, walnuts, or even macadamias. Their presence elevates the texture and flavor complexity.
The Unsung Hero: Your Heavy-Bottom Pot
Beyond the edible ingredients, there’s one critical piece of equipment that makes all the difference: a heavy-bottom pot. But what exactly qualifies as “heavy-bottom”?
A heavy-bottom pot is characterized by a base that is significantly thicker and more substantial than its sides. When you pick it up, it should feel noticeably weighty at the bottom. This design is crucial for making toffee because it ensures superior heat distribution, preventing hot spots that can cause the sugar to scorch and burn rapidly. Even heat is key to achieving that perfect deep amber caramel without any unpleasant bitterness. Stainless steel pots are generally recommended over nonstick coated ones for toffee, as they handle high sugar temperatures better and allow for easier monitoring of the toffee’s color development without concerns about coating degradation. Essentially, a heavy-bottom pot provides the stable, consistent heating environment that delicate sugar mixtures demand.
Crafting Homemade Toffee: Step-by-Step Perfection
The journey to creating sublime homemade toffee begins with a simple yet precise process. Patience and attention to detail are your best allies here. Each step, though seemingly straightforward, contributes to the final perfect texture and flavor.
The Initial Melt & The Science Behind It
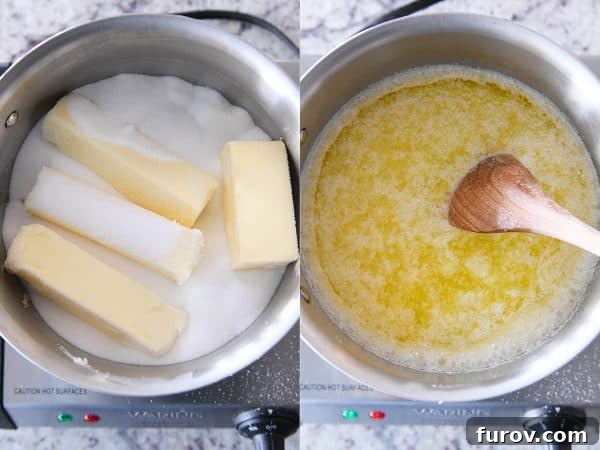
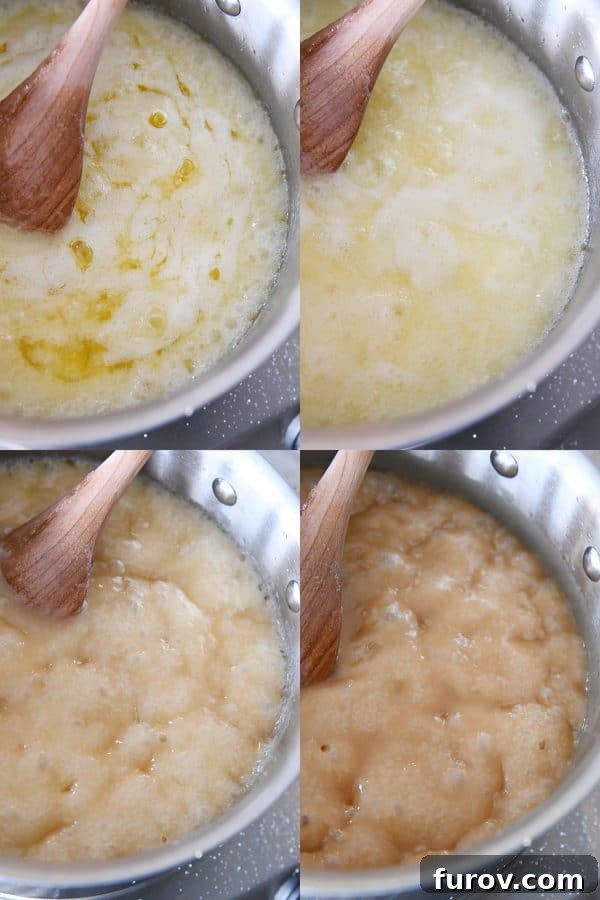
To start, combine the butter, granulated sugar, and salt in your trusty heavy-bottom saucepan. Begin heating this mixture over medium-low heat. As it warms, you might initially feel a sense of alarm. The butter and sugar may appear separated, greasy, and somewhat oily – a seemingly unappealing concoction. Rest assured, this is perfectly normal and a crucial part of the process.
This initial separation is due to the different melting points and solubilities of butter and sugar. As the mixture heats, the butter melts first, and the sugar crystals begin to dissolve within the butterfat and any residual water. It’s a fascinating display of food chemistry where molecules are rearranging and reacting under heat. The key takeaway? Trust the process, and soon, everything will emulsify beautifully into a cohesive, golden syrup. This stage requires patience, moderate heat, and the even distribution that only a heavy-bottom pot can provide.
The Art of Stirring and Temperature Control
Once the butter is fully melted and integrated, and the mixture begins to simmer, the real magic happens. It’s important to understand that unlike many other candy recipes that demand constant agitation, toffee making requires a delicate touch when it comes to stirring. Excessive or vigorous stirring can introduce unwanted sugar crystals from the sides of the pot back into the mixture, leading to crystallization (a grainy, sugary texture) or separation where the butter fat floats on top.
For optimal results, stir the toffee only occasionally – perhaps 3-4 times throughout the entire cooking process. Focus on moderating the heat to prevent scorching, especially as the mixture thickens and darkens. Keeping your stirring spoon in the pot the entire time can also minimize temperature fluctuations and the risk of crystallization. When you do stir, avoid scraping the sides of the pot, as this can reintroduce sugar crystals that have adhered there, acting as “seed” crystals for unwanted graininess.
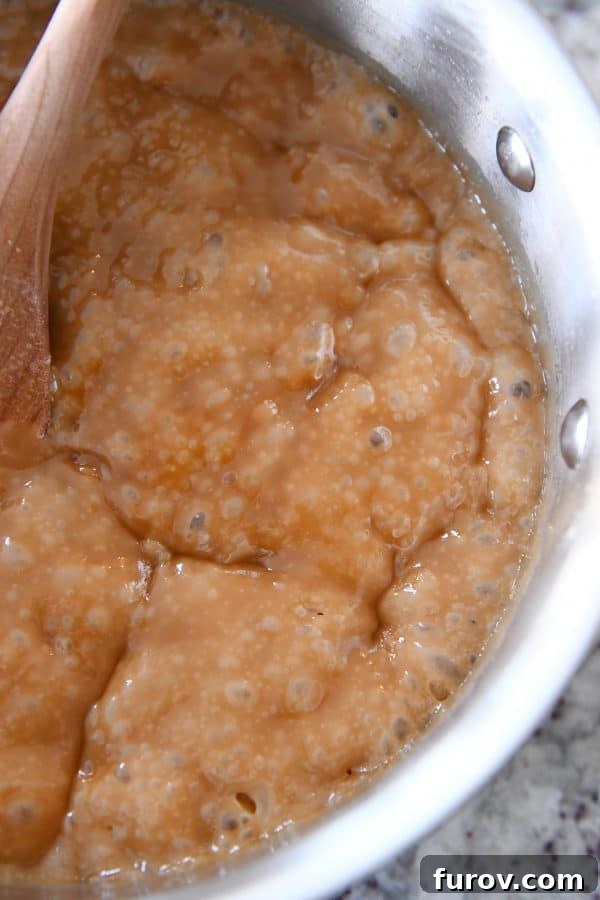
Continue cooking the toffee over medium heat until it transforms into a rich, deep golden brown color. This visual cue is your primary indicator of doneness, signaling that the sugars have caramelized beautifully. For precise candy making, a reliable candy thermometer is invaluable. The ideal temperature range for perfectly brittle toffee is between 285-290 degrees Fahrenheit (140-143 degrees Celsius). Achieving this temperature ensures the sugar has caramelized sufficiently for that signature snap and a delightful, non-chewy texture. Remember, a few degrees too low and it might be too soft; a few degrees too high, and it risks tasting burnt.
Toffee Troubleshooting: What to Do if Your Toffee Separates
Even with the best intentions, occasionally, your toffee might decide to rebel and separate, presenting a greasy, buttery layer on top. Don’t panic! This is often a fixable issue, usually stemming from uneven heat distribution or over-stirring. Understanding why it happens is the first step to preventing it.
If you observe this separation, carefully try stirring in one tablespoon of warm water at a time. Introduce the water slowly and stir gently, but persistently, until the mixture comes back together into a smooth, homogenous caramel. This trick can often re-emulsify the butterfat back into the sugar syrup, saving your batch from being discarded. Once re-emulsified, remember to then resume cooking carefully, maintaining steady heat and minimal stirring, until it reaches the desired temperature and color. The goal is to bring it back to that cohesive, shimmering state before it’s too late.
The Grand Finale: Pouring, Topping, and Setting Your Toffee
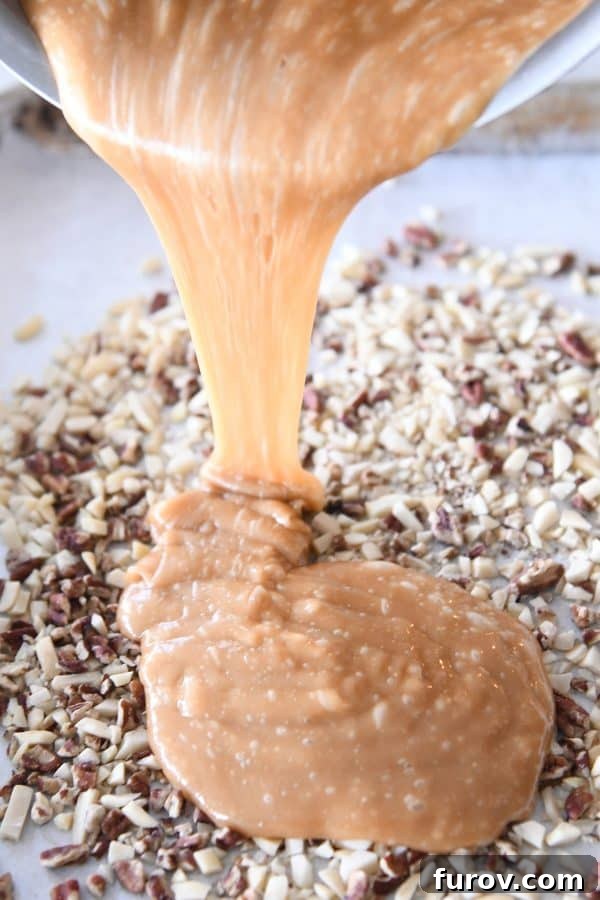
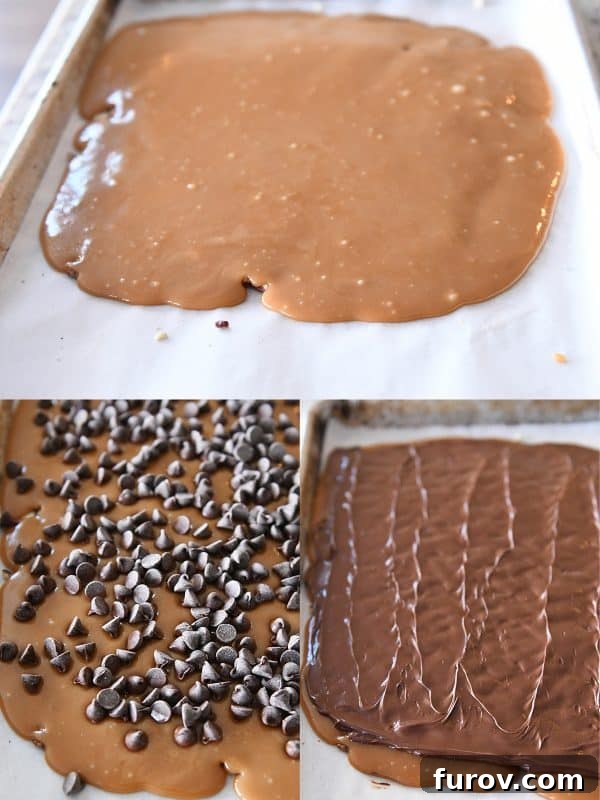
Once your toffee reaches that perfect deep amber hue and precise temperature, swift action is key. The hot toffee will begin to set quickly, so having your baking sheet prepared is essential. Immediately remove the saucepan from the heat and pour the molten toffee onto a parchment-lined baking sheet. While some prefer to use an offset spatula to spread it, I often find simply pouring it in overlapping ribbons allows it to spread naturally and evenly. Avoid scraping the sides of the pot, as any leftover crystallized sugar could compromise the smoothness of your final product and encourage graininess.
Nuts: Bottom or Top? The Eternal Toffee Debate
Now, for a decision that divides toffee enthusiasts: where do the nuts go? On the bottom, or on top with the chocolate?
My personal preference, and the method I wholeheartedly recommend for maximum stability and flavor integration, is to scatter a generous layer of finely chopped nuts directly onto the parchment paper *before* pouring the hot toffee over them. This ensures the nuts are firmly embedded in the base of the toffee, providing a delightful crunch with every bite and preventing them from scattering when the toffee is broken. My go-to combination is often slivered almonds and lightly toasted pecans for their complementary flavors and textures, adding a layer of sophisticated nuttiness.
However, if you’re a purist who prefers the traditional aesthetic of toffee with chocolate and nuts layered on top, you can certainly pour the toffee directly onto the parchment paper and reserve your chopped nuts for the final step after the chocolate has melted. Both methods yield delicious results, so choose what pleases your palate and eyes!
The Chocolate Layer
Regardless of your nut preference, the next step involves chocolate. Immediately after pouring the hot toffee, liberally sprinkle your chosen chocolate chips (or finely chopped chocolate) over the hot surface. The residual heat from the toffee will quickly begin to melt the chocolate. Allow it a few minutes to soften, then gently spread it into an even, glossy layer using an offset spatula or the back of a spoon. If you opted for nuts on top, now is the time to sprinkle them over the soft, melted chocolate before it has a chance to set and harden.
Finally, let the toffee cool completely. You can expedite this by chilling it in the refrigerator for about 30 minutes to an hour, or simply allow it to set at room temperature until it is firm and no longer warm to the touch. Once perfectly set, break the brittle slab into glorious, irregular shards – each a testament to your candy-making prowess. Be warned: this irresistible confection has a mysterious way of disappearing rapidly. It’s always a good idea to have a plan for its immediate exit from your kitchen, whether that’s boxing it up for gifts or sharing it generously, unless you want to find yourself wondering where an entire batch went in less than 24 hours!
Mastering Toffee: Three Essential Tips for Foolproof Results
Achieving consistently perfect homemade toffee is less about luck and more about understanding a few fundamental principles. These three golden rules will guide you to success every single time, ensuring your toffee is always brittle, smooth, and utterly delicious.
1. Invest in a Quality Heavy-Bottom Saucepan
This cannot be stressed enough: the type of pot you use is paramount. A truly heavy-bottom saucepan with a thick base is non-negotiable for making toffee. Its robust construction ensures even heat distribution across the entire surface, which is critical for preventing localized scorching and burning of the sugar. Thin, flimsy pots create hot spots, leading to inconsistent caramelization and a higher risk of a burnt, bitter flavor that can ruin an entire batch. Stick to stainless steel rather than nonstick coated pans, as stainless steel provides better heat transfer for candy making and allows you to accurately monitor the toffee’s color progression without any concerns about nonstick surfaces interacting with high sugar temperatures. Consider your heavy-bottom pot a vital, foundational tool in your quest for perfect, brittle toffee – it’s an investment that pays off in delicious results.
2. Resist the Urge to Stir Constantly
While many culinary processes benefit from constant stirring, toffee recipes are a notable exception. Continuous or aggressive stirring is a common culprit behind crystallization, where the toffee develops a grainy, sugary texture instead of a smooth, brittle snap. It can also lead to separation of the butterfat, resulting in an oily, unappealing confection. The best approach is to stir only occasionally, just enough to ensure even cooking and prevent sticking to the bottom of the pan. A good rule of thumb is to stir perhaps three to four times throughout the entire cooking duration, especially once the mixture starts boiling and thickening. A clever trick is to leave your stirring spoon in the pot; removing and reintroducing a cold spoon can cause minor temperature drops, which can also trigger crystallization. By minimizing contact with external factors and letting the mixture cook undisturbed for periods, you allow the sugar to caramelize smoothly and evenly.
3. Maintain Consistent and Moderate Heat
Heat management is a delicate dance when making toffee. Begin by melting the butter, sugar, and salt over medium-low heat. This initial slow melt is crucial – do not rush it by cranking up the heat. High heat at this stage can lead to sugar burning before it even has a chance to properly dissolve, resulting in a dark, bitter flavor right from the start. Once everything is melted and begins to simmer, increase the heat to a steady medium. The goal is a consistent, gentle boil throughout the rest of the cooking process.
Remember that every stove is different – gas ranges behave differently from electric, and even individual burners can vary. Pay close attention to your toffee; if it’s boiling too vigorously or darkening too quickly, reduce the heat. Conversely, if it seems stagnant and not progressing, a slight increase might be necessary. The key is to avoid sudden, drastic changes in temperature, as these fluctuations can contribute to separation or crystallization. Steady, moderate heat is your path to beautifully caramelized, cohesive toffee with the perfect brittle texture.
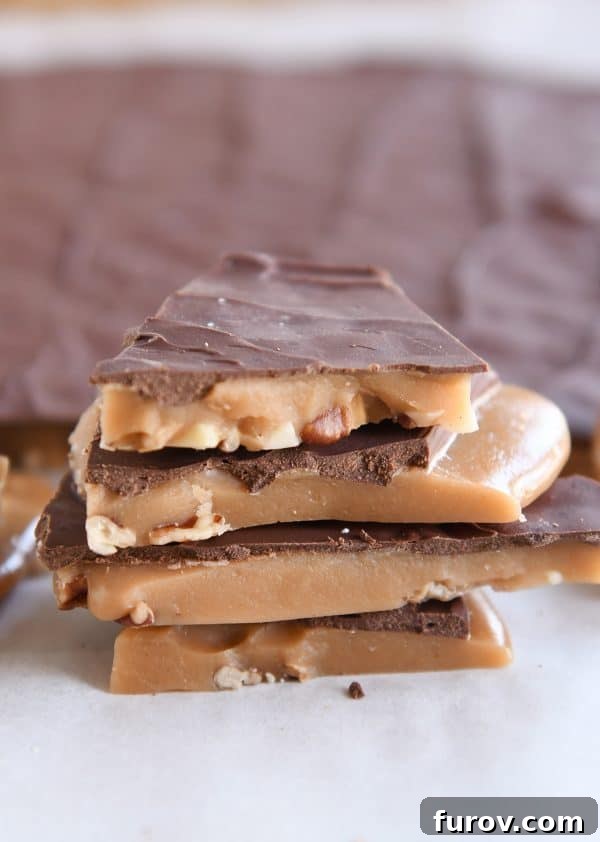
Your Toffee Journey Begins Here
With these expert tips and a clear understanding of the process, you are now equipped to create truly exceptional foolproof homemade toffee. This recipe, a cherished family classic, offers a timeless combination of rich butter, sweet caramel, and crunchy nuts, all enrobed in smooth chocolate, making it an unforgettable treat.
Gone are the days of fear and frustration in the kitchen when it comes to candy making. By focusing on quality ingredients, the right equipment, and the specific techniques outlined, anyone can master the art of homemade toffee. So go ahead, gather your ingredients, set aside some time, and prepare to delight yourself and your loved ones with this incredible holiday treat. Happy toffee making – you’re well on your way to becoming a toffee artisan!
Frequently Asked Questions About Homemade Toffee
Can I double the recipe?
Yes, you absolutely can! If you plan to double this homemade toffee recipe, make sure you use a significantly larger heavy-bottom pot – a 6-quart or 8-quart saucepan would be ideal to accommodate the increased volume and prevent boil-overs. Also, be aware that doubling the recipe will naturally extend the cooking time. It will take longer for the mixture to melt, come to a boil, and reach the correct temperature. Be patient and rely on your candy thermometer for accuracy rather than estimated cooking times, as they will differ.
Why did my toffee separate? How can I fix it?
Toffee separation, where a greasy, buttery layer forms on top of the caramel, is a common issue often caused by inconsistent heat or excessive stirring. Sudden temperature fluctuations (either drops or spikes) can destabilize the emulsion of butter and sugar, causing them to break apart. Similarly, stirring too frequently, too vigorously, or scraping crystallized sugar from the sides of the pot back into the mixture can encourage separation and lead to a grainy texture. If you notice separation, try to carefully stir in 1 tablespoon of warm water at a time. This can sometimes help re-emulsify the mixture. Continue stirring gently until it comes together before proceeding with the cooking, then adjust your heat and stirring technique.
Can I use brown sugar?
For this specific toffee recipe, granulated sugar is highly recommended for the best results. Brown sugar contains molasses, which adds a different flavor profile and, more importantly, has a higher moisture content. This increased moisture makes brown sugar significantly more prone to scorching (burning easily) and can alter the final texture of the toffee, often making it softer or chewy instead of brittle. For that classic, crisp toffee snap and pure butterscotch flavor, stick with granulated sugar.
What’s the best way to store homemade toffee?
Once cooled and broken into pieces, homemade toffee should be stored in an airtight container at room temperature. It will maintain its freshness and crisp texture for several days, typically up to a week. For longer storage, you can keep it in the refrigerator for up to two weeks, or even freeze it for several months. If refrigerating or freezing, ensure it’s tightly sealed to prevent moisture absorption, and bring it back to room temperature before serving for the best texture and flavor.
Can I make different variations of this toffee?
Absolutely! This basic foolproof toffee recipe serves as an excellent canvas for creativity. You can experiment with different types of chocolate, such as white chocolate, dark chocolate with higher cocoa percentages, or even flavored chocolates. For the nut layer, try combinations like pistachios and cashews, or add a sprinkle of toasted coconut flakes. You can also add a sprinkle of flaky sea salt over the melted chocolate for a delightful salty-sweet contrast. Some even like to add a touch of almond extract or other flavorings at the very end, though caution is advised as added liquids can sometimes promote crystallization. Always ensure any additions are done quickly and carefully before the toffee sets.
One Year Ago: Easy Winter Fresh Fruit Salad
Two Years Ago: Easy Parmesan Breadstick Knots
Three Years Ago: Honey-Vanilla Yogurt Fruit Salad
Four Years Ago: Perfect Vanilla {Bean} Caramels {Step-by-Step}
Five Years Ago: Holiday Fruit Soup
Six Years Ago: Smothered Crispy Pork Cutlets with Cauliflower Mash
Seven Years Ago: Homemade Peppermint Patties
Eight Years Ago: White Chocolate Cherry Shortbread Cookies
The Best Homemade Toffee
Rated: 4.89 stars (106 ratings)
Ingredients
- 1 cup (114 g) chopped nuts (slivered almonds, toasted pecans recommended)
- 2 cups (454 g) salted butter
- 2 cups (424 g) granulated sugar
- ¼ teaspoon salt
- 2 cups (340 g) chocolate chips (milk, semi-sweet, or dark)
Instructions
- Line a half sheet pan or a 9×13-inch pan (for thicker toffee) with parchment paper. Sprinkle the chopped nuts in an even layer over the parchment. Set aside. (For nuts on top, skip this step and add them after chocolate melts.)
- In a heavy-bottom 4-quart saucepan, combine the butter, sugar, and salt over medium-low heat. Cook, stirring occasionally, until the butter is fully melted and integrated. If using, clip a candy thermometer to the side of the pot.
- Increase the heat to medium and bring the mixture to a steady, gentle boil. Stir only occasionally (3-4 times throughout the process) and avoid scraping the sides of the pan to prevent crystallization. Moderate the heat as needed to maintain a steady boil without burning.
- Continue cooking for about 20-25 minutes, or until the toffee reaches a deep amber brown color and registers between 285-290 degrees Fahrenheit (140-143 degrees Celsius) on a candy thermometer.
- Immediately remove the pan from the heat and carefully pour the hot toffee evenly over the nuts on the prepared baking sheet. Do not scrape the sides of the pan.
- Sprinkle chocolate chips over the hot toffee. Allow them to soften and melt for 2-3 minutes, then gently spread the melted chocolate into an even layer. If adding nuts to the top, sprinkle them over the soft chocolate before it sets.
- Let the toffee cool completely at room temperature or chill in the refrigerator until firm. Once set, break the toffee into delicious pieces. Store in an airtight container at room temperature.
Notes
Nuts: For best results, use a combination of slivered almonds and toasted pecans, coarsely chopped into small pieces.
Vanilla: Avoid adding vanilla extract directly to the toffee while it’s cooking, as it can sometimes introduce moisture that leads to crystallization or separation. If desired, a touch can be added right before pouring, but it’s generally best omitted for classic brittle toffee.
Nutrition Information
Serving: 1 serving, Calories: 337 kcal, Carbohydrates: 28 g, Protein: 1 g, Fat: 26 g, Saturated Fat: 14 g, Cholesterol: 52 mg, Sodium: 196 mg, Fiber: 1 g, Sugar: 27 g