
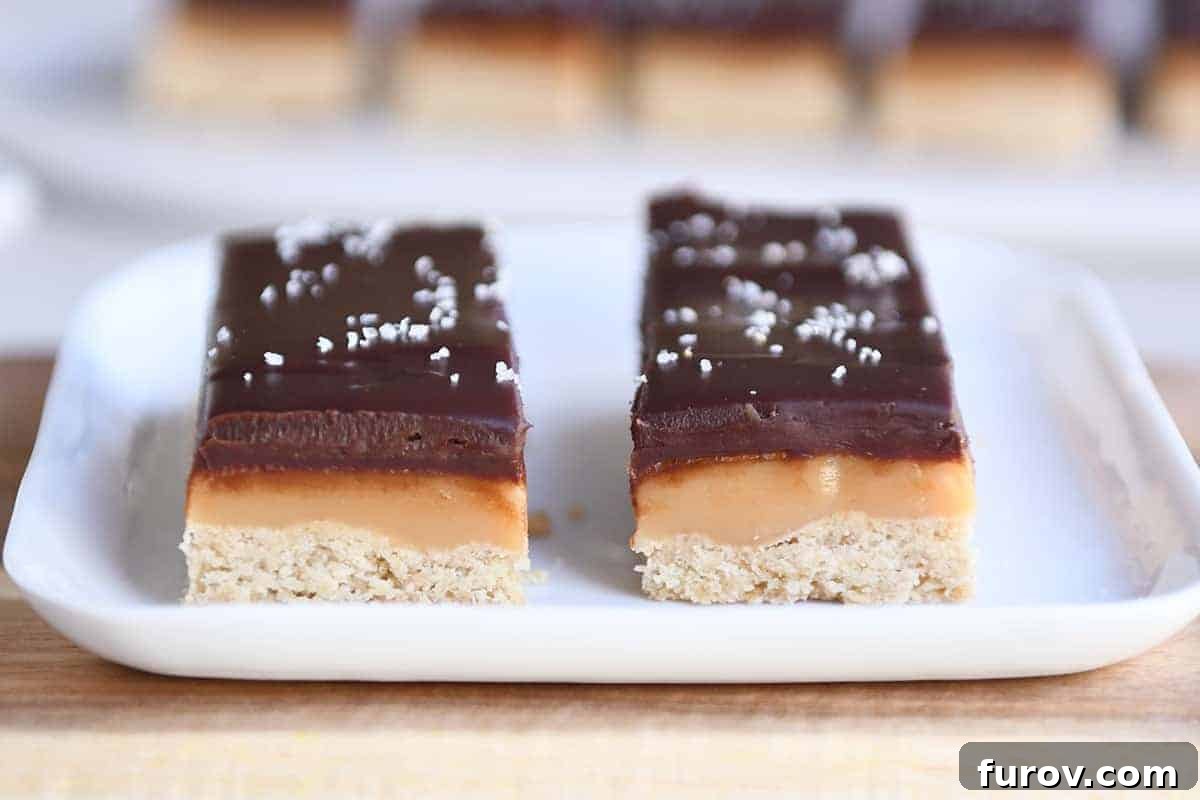
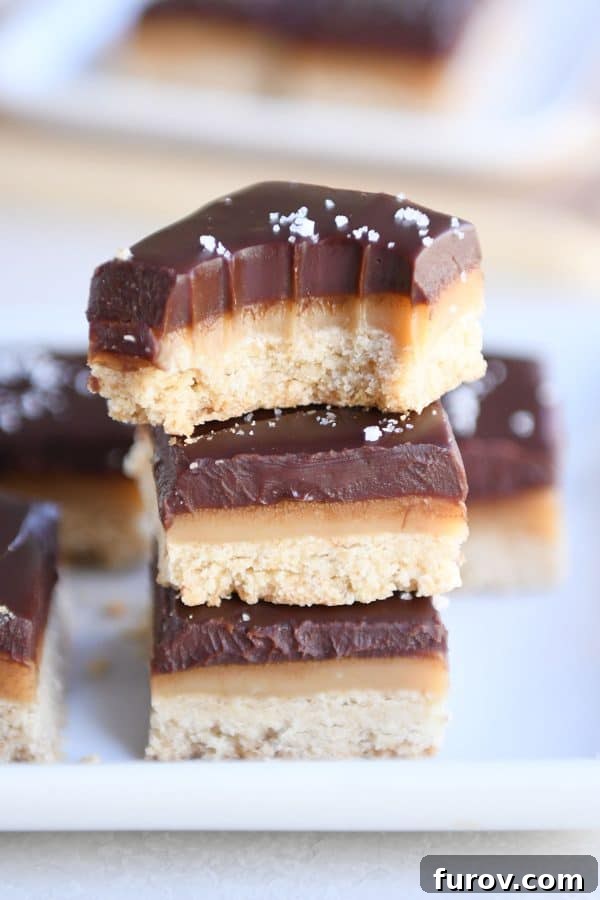
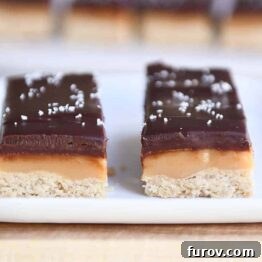
These homemade dulce de leche twix bars are the ultimate combination of shortbread crust, easy homemade caramel, and chocolate topping.
As the holiday season draws to a close, and with most baking lists long completed, you might wonder why I’m just now sharing this incredible recipe. Believe me, I wouldn’t forgive myself if I didn’t introduce you to what I truly believe is one of the best desserts I’ve created all year. Seriously, it’s that good. While there have been many close contenders, if forced to choose just one, these homemade Dulce de Leche Twix Bars would undoubtedly take the crown. Consider this my grand finale – I’ve truly saved the best for last!
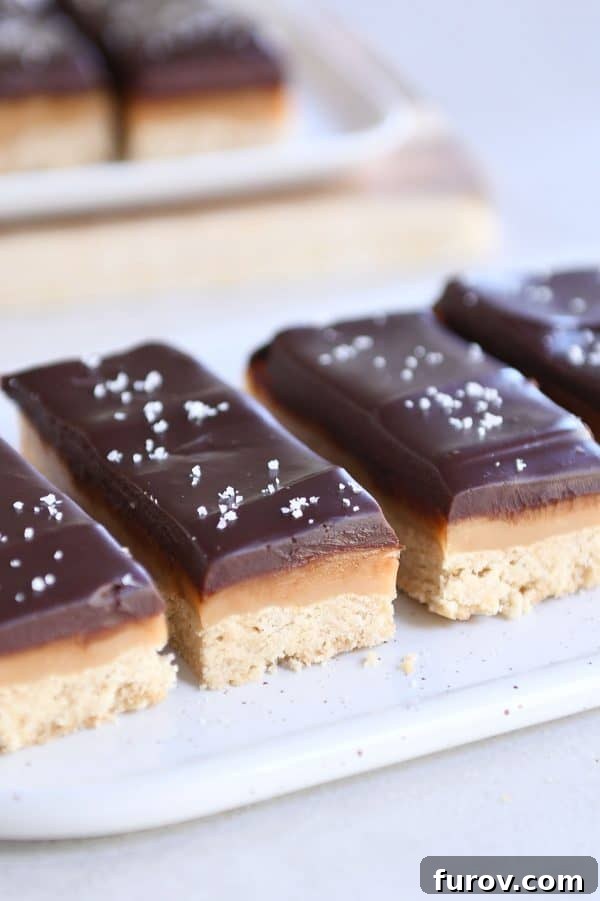
For those who adore the classic candy bar, prepare to be amazed. These bars elevate the iconic flavor profile with a decadent, homemade touch that is simply irresistible. Each bite offers a harmonious blend of buttery shortbread, rich and chewy dulce de leche-inspired caramel, and a smooth, luxurious chocolate ganache. It’s a trio designed to delight, making these bars an absolute showstopper for any gathering or a sublime personal indulgence.
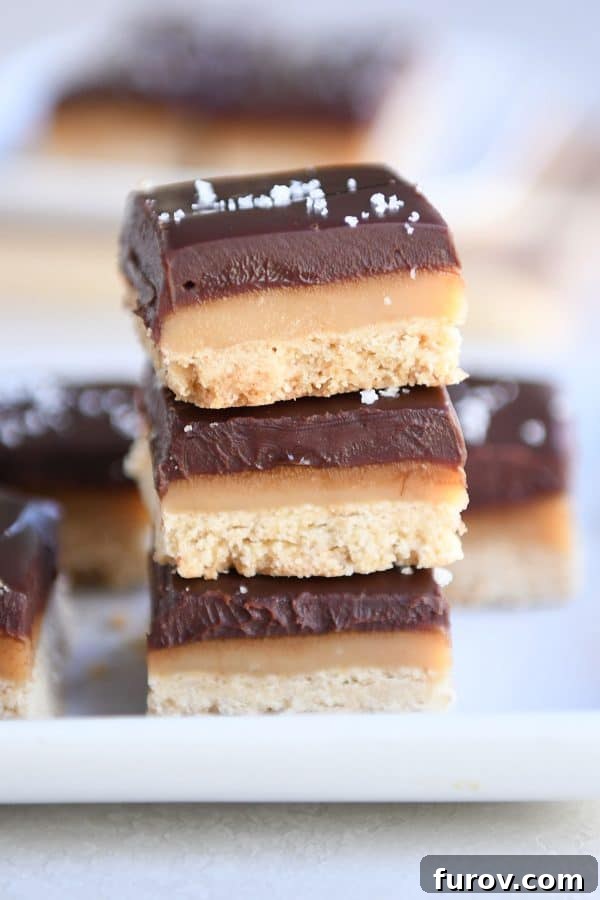
The Irresistible Flavor Trio: Shortbread, Caramel, and Chocolate
I might be a little biased, but the classic combination of shortbread, caramel, and chocolate holds a special place in my heart. It’s a flavor profile I return to again and again. You might even recall my “Twixster shortbread cookies” from a few years ago, which I declared an all-time favorite. My affection for this stellar trio remains unchanged, and these Dulce de Leche Twix Bars are a testament to that enduring love.
These divine bars are essentially an enhanced version of those beloved cookies, reimagined in a convenient bar form, with a few crucial tweaks that make all the difference. The results are nothing short of insane, amazing, and, dare I say, life-changing! I know it sounds hyperbolic, but once you taste them, you’ll understand. I always stand by the truth, especially when it involves buttery shortbread and gooey caramel.
Crafting these homemade Twix bars is a journey through three distinct layers, each contributing its unique texture and flavor to create a cohesive and deeply satisfying dessert. We begin with a simple yet incredibly important foundation: the shortbread crust. This isn’t just any base; it’s the buttery bedrock that provides the perfect contrast to the rich caramel and smooth chocolate that follow.
Crafting the Perfect Shortbread Crust: The Foundation of Flavor
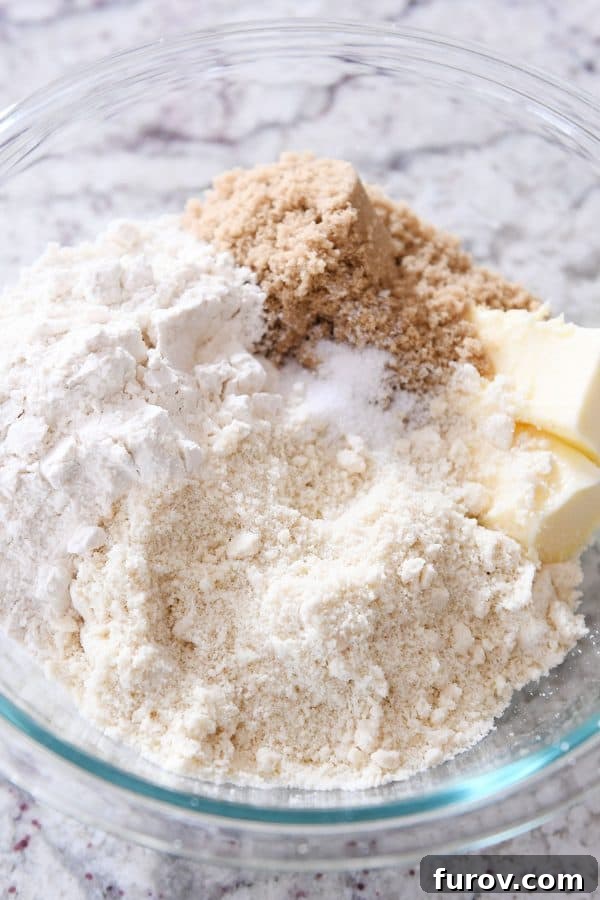
When I say simple, I truly mean it. The shortbread crust requires just a few basic ingredients, but the careful selection and combination of these elements are key to its success:
- Salted Butter: Always my preference for adding depth and balancing sweetness.
- Brown Sugar: Contributes a subtle molasses note and helps achieve that delightful chewiness.
- Almond Flour: This is my secret ingredient. It adds an incredible depth of flavor that all-purpose flour alone can’t achieve, alongside a fantastic crumbly yet tender texture.
- All-Purpose Flour: Provides structure and ensures the crust holds together beautifully.
- Salt: Essential for enhancing all the other flavors.
The almond flour is a game-changer. It imparts a nutty richness and contributes significantly to that ideal crumbly-but-not-too-crumbly consistency. I honestly don’t think I’ll ever make a shortbread crust without incorporating a touch of almond flour. It’s simply delightful!
For those considering a gluten-free option, substituting 100% almond flour for the mixed flour works surprisingly well. While it yields a slightly denser crust, the flavor is still excellent and makes for a perfectly passable gluten-free treat. If you’re experimenting with 100% all-purpose flour, consider replacing a quarter cup of it with cornstarch for added tenderness.
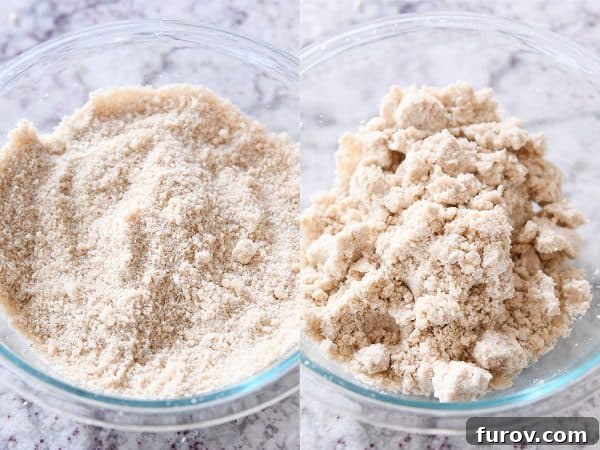
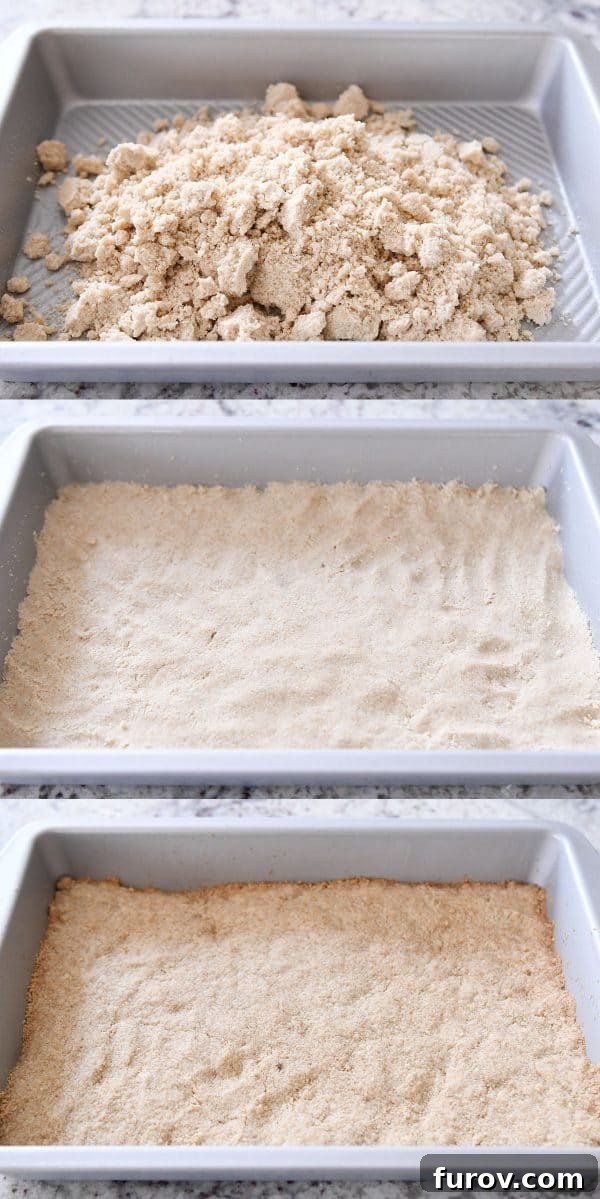
After mixing, your crust mixture will appear very crumbly – don’t panic! This is completely normal, especially if you’re using a handheld mixer. If you gather a handful, it should clump together easily, indicating it’s ready. Press this wonderfully buttery mixture evenly into the bottom of a 9×13-inch metal baking pan. Metal pans are preferred for their straight sides and even heat distribution, leading to consistent baking. If you opt for a glass pan, remember to reduce your oven temperature by 25 degrees Fahrenheit.
Bake the shortbread crust for 13-15 minutes, or until it’s set and the edges are beautifully golden. Avoid overbaking or underbaking – a delicate balance that’s easier to achieve than it sounds. Just keep an eye on those edges!
Decadent Homemade Dulce de Leche (or Caramel) Layer
While the crust cools, it’s time to embark on the delightful task of making the homemade dulce de leche (or caramel, if you prefer). There might be some debate on the exact terminology, but this particular mixture beautifully combines elements of both. Using sweetened condensed milk gives it that distinct dulce de leche flavor, while the cooking process lends it a wonderfully chewy, caramel-like texture—a perfect balance between the normally soft and creamy dulce de leche and a firmer, traditional caramel.
The best part? This recipe simplifies the process significantly. You don’t even need a candy thermometer! The secret lies in consistent stirring and careful heat moderation.
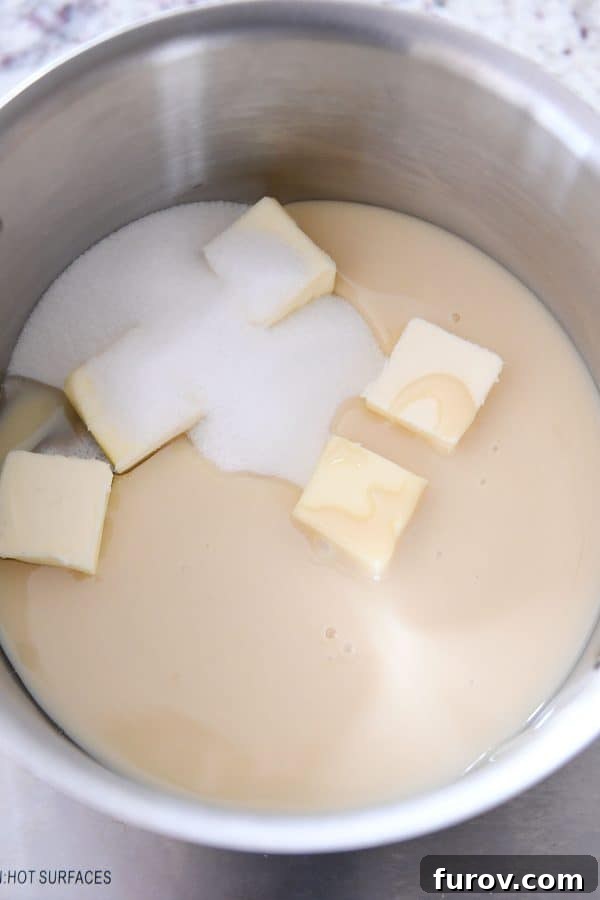
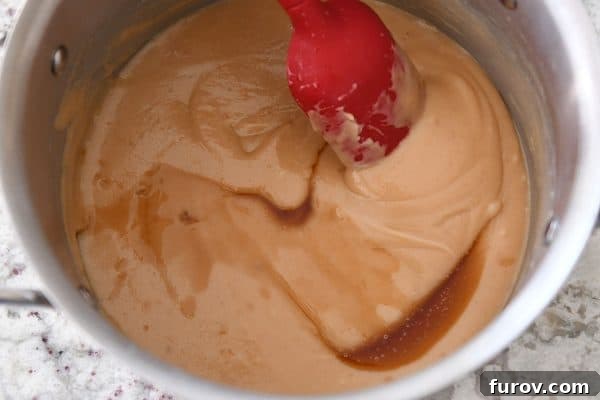
In a medium pot, combine all the caramel ingredients except the vanilla. Over moderate to medium-low heat, stir constantly with a rubber spatula. This continuous stirring is crucial to prevent burning and ensure even cooking. Once the mixture comes to a gentle boil and you see bubbles popping on the surface, set a timer for 10 minutes. During this time, the caramel will transform, deepening in color to a lovely golden brown. If you desire a chewier caramel, extend the cooking time by a few minutes, always keeping a watchful eye on the color to avoid overcooking. Remember, if your heat is higher, the caramel may cook faster, so adjust accordingly.
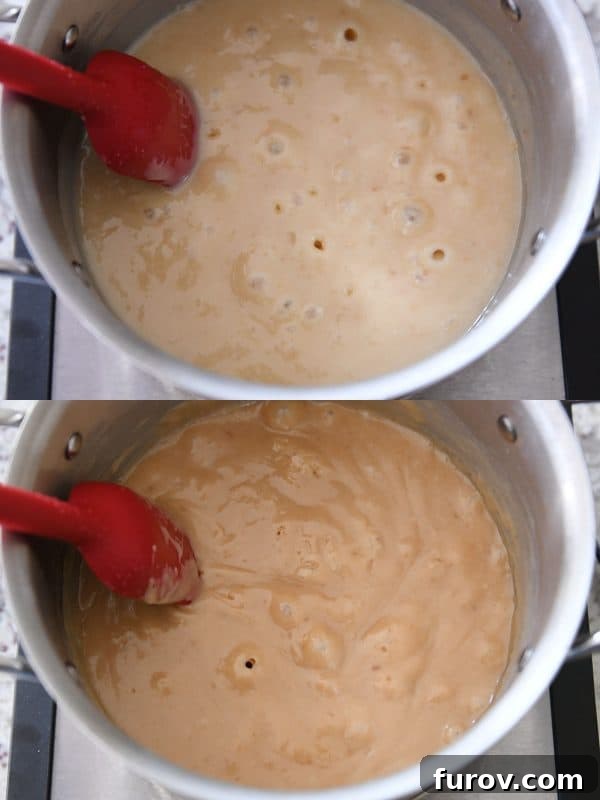
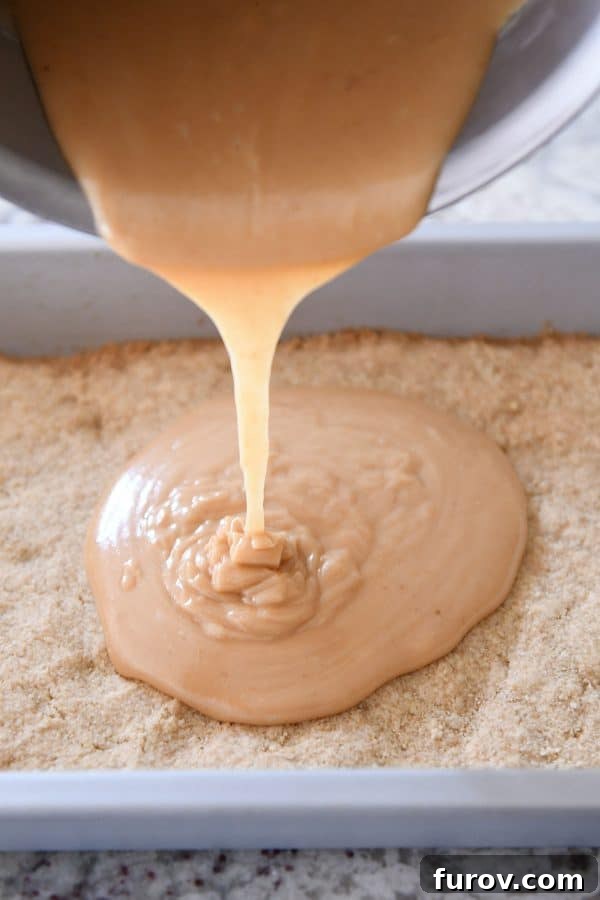
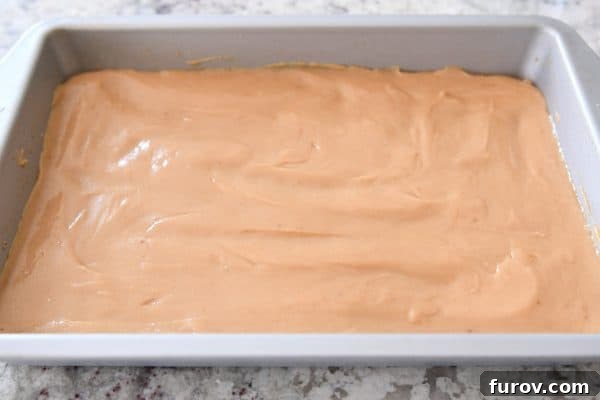
Once the desired color and consistency are achieved, remove the pot from the heat and stir in the vanilla extract. The vanilla adds a fragrant, warm note that perfectly complements the rich caramel. Without delay, pour the warm, luscious caramel evenly over the cooled shortbread crust.
Refrigerate the pan for about 30-45 minutes, or until the caramel has cooled and firmly set. As for any delicious caramel remnants left in the pot, well, that’s entirely up to you – no judgment here!
The Glorious Finish: Two-Ingredient Chocolate Ganache
While the caramel chills, it’s time to prepare one of the most divine creations in the culinary world: chocolate ganache. I adore ganache – the sound of its name, the process of making it, and especially the joy of digging into it with a spoon! For these Dulce de Leche Twix Bars, our ganache is a simple yet incredibly luxurious two-ingredient wonder.
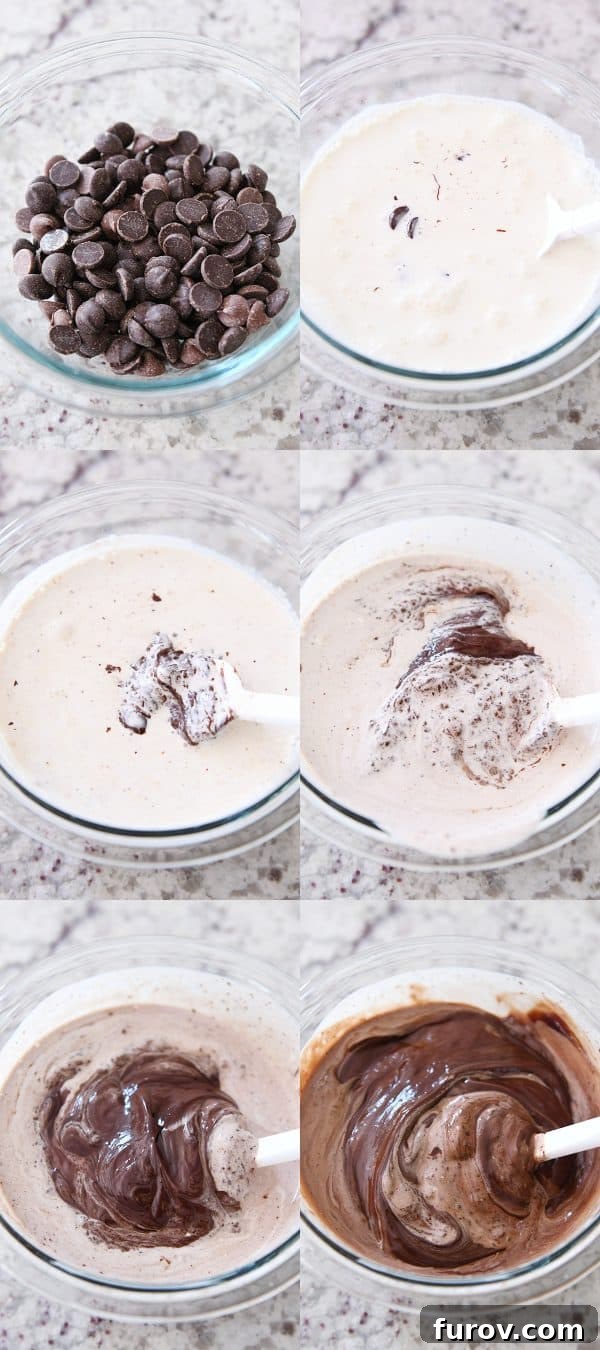
You’ll need 1½ cups of good-quality chocolate chips or chopped chocolate (bittersweet, semi-sweet, or a blend work beautifully – you can even experiment with milk chocolate for a sweeter profile) and 1 cup of heavy cream. Place your chocolate in a medium bowl. Heat the heavy cream in a saucepan until it just begins to simmer, then immediately pour the hot cream over the chocolate. Let it sit undisturbed for 1-2 minutes. This brief resting period allows the heat from the cream to melt the chocolate effectively.
Next, gently stir or whisk the mixture. Initially, it might look a bit grainy or separated, especially if it’s your first time making ganache. Don’t panic! This is perfectly normal. Continue stirring slowly and patiently. As long as the cream was warm enough and the chocolate fully melts, it will come together. Just keep mixing until it transforms into a glossy, silky, and utterly glorious ganache.
This recipe yields a generous layer of chocolate, which, in my opinion, is absolutely perfect. It creates a satisfyingly thick topping that truly completes the bar. However, if you prefer a slightly less substantial chocolate layer, feel free to decrease the quantities a little. We can still be friends, I promise!
Choosing the Best Chocolate for Melting
For optimal flavor and texture in your ganache, I highly recommend using high-quality chocolate. Brands like Guittard or Ghirardelli are excellent choices when using chocolate chips, as they melt smoothly and offer a superior taste. Alternatively, you can use finely chopped chocolate from any brand you love to snack on.
While it’s not necessary to be overly fussy, do bear in mind that some brands of chocolate chips contain added ingredients that can affect their melting properties and overall flavor. Choosing a quality chocolate will make a noticeable difference in the final product.
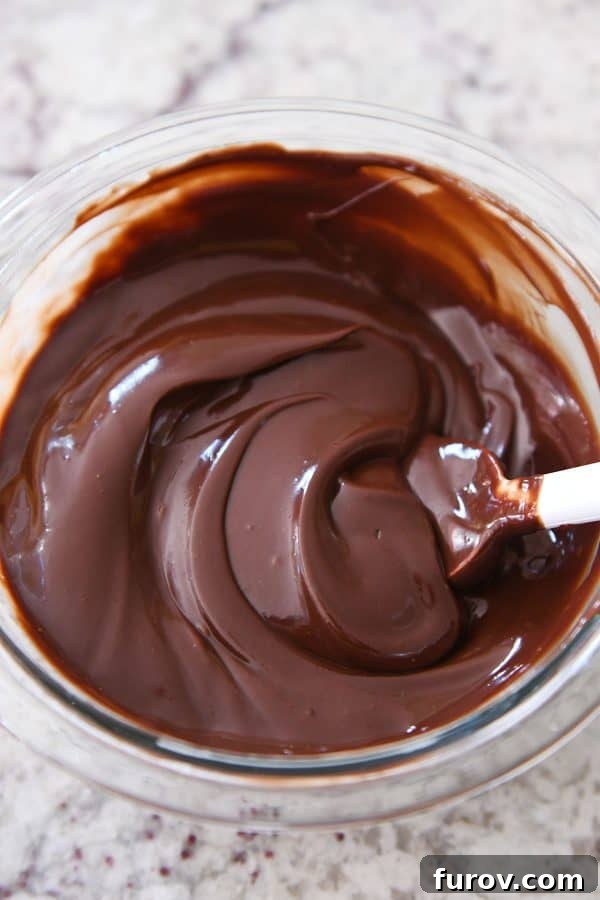
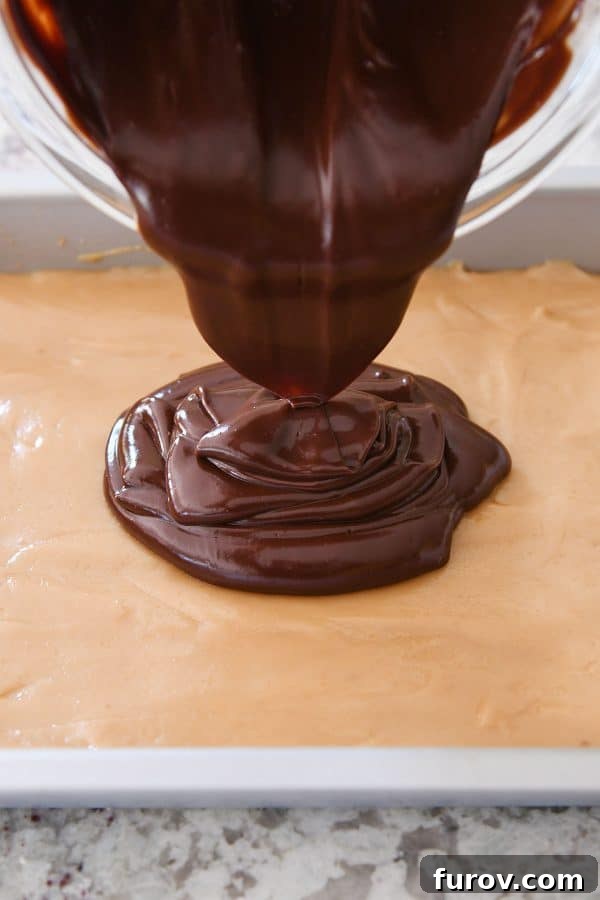
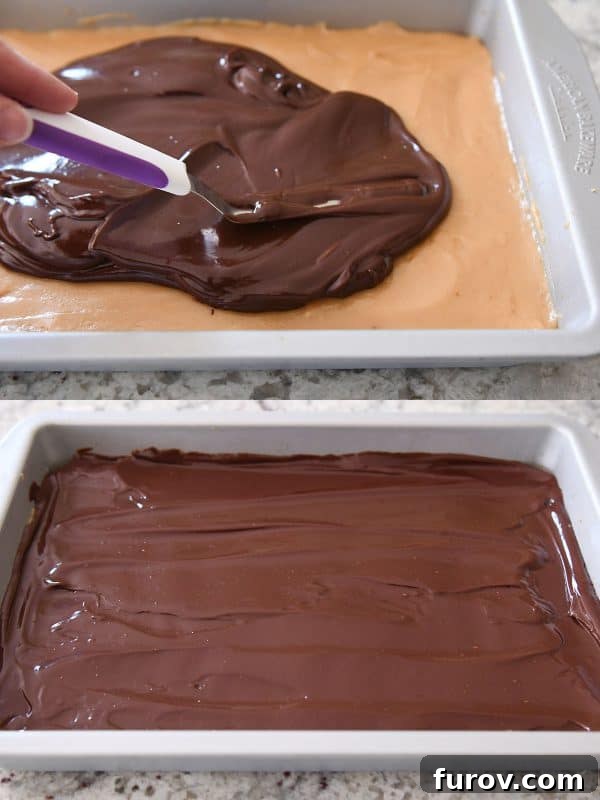
Before you’re tempted to devour the magical ganache straight from the bowl (a perfectly acceptable urge, by the way!), pour it evenly over the set caramel layer. Spread it gently to create a smooth, beautiful finish. If you enjoy a hint of salt with your chocolate, now is the time to sprinkle a small amount of fine sea salt over the wet ganache, or you can wait until it has firmed up slightly. Refrigerate the bars once more, allowing the chocolate layer to set completely, which usually takes about an hour.
Tips for Cutting and Serving Your Homemade Twix Bars
To achieve perfectly neat, clean slices of your homemade Dulce de Leche Twix Bars, follow these simple steps: First, allow the refrigerated bars to sit at room temperature for about 15 minutes. This slight softening of the caramel will make them much easier to cut. Next, run a sharp knife or a bench knife under hot water and wipe it completely dry. Slice the bars, repeating the hot water and wiping step as needed between cuts. This technique helps create beautifully defined edges.
You can cut the bars into traditional thin rectangles, elegant squares, or even more creative shapes like triangles or hexagons – the shape truly doesn’t matter, as these delectable treats are likely to be devoured in minutes! While these bars do need to be stored in the refrigerator if you’re not serving them within an hour or so, I find they are best enjoyed one step above room temperature. Not cold, but not overly warm either. Because the topping is a simple chocolate ganache, it will soften slightly as the bars sit out, which is perfectly fine and contributes to their melt-in-your-mouth texture.
These bars are designed to be picked up and eaten, so don’t worry if a little chocolate lingers on your fingers – it’s part of the indulgent experience! For a more formal presentation, they can also be served plated with a fork, but be warned: a small serving goes a long way. These Dulce de Leche Twix Bars are unapologetically rich and wonderfully decadent.
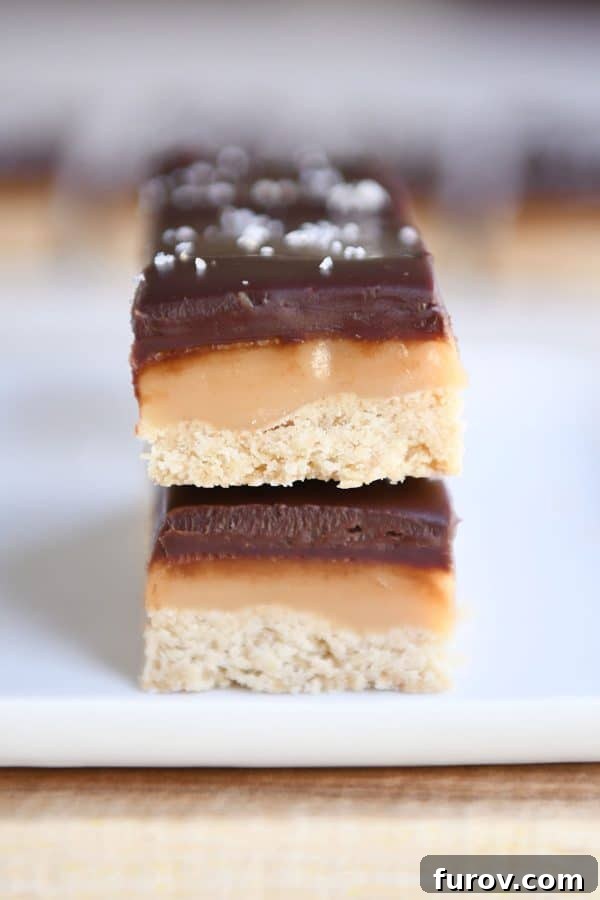
If you’re searching for a true showstopper dessert for a holiday meal, a special occasion, or simply to add an extraordinary treat to your lineup of finger foods and sweets, these homemade Dulce de Leche Twix Bars should be at the very top of your list. They offer an elevated take on a beloved classic, delivering a gourmet experience with every bite.
My brother first introduced me to this recipe months ago (it’s adapted from the incredible Dandelion Chocolate Cookbook). Since then, we’ve both made them numerous times. And while my family is occasionally prone to hyperbolic exclamations, we both sincerely and solemnly agree: these are without a doubt one of the best desserts of all time.
I genuinely cannot wait for you to experience the unparalleled deliciousness of these surprisingly simple, yet utterly exquisite, caramel shortbread bars. My work here is done; I can now rest easy, knowing I’ve shared this ultimate treat with you just in time for any celebration. Enjoy!
One Year Ago: Gingerbread Cookie Butter Oatmeal Cookies
Two Years Ago: Cheesy Hash Brown + Egg Breakfast Casserole {Make-Aheadable}
Three Years Ago: Flaky Buttermilk Biscuit Cinnamon Rolls {No Yeast, No Rising}
Four Years Ago: Soft Eggnog Sugar Cookies with Whipped Eggnog Frosting
Five Years Ago: Amazing Scottish Shortbread
Six Years Ago: Orange Zested Cranberry White Chocolate Bliss Bars {A Slightly Lighter Version}
Seven Years Ago: Rock Salt Roast Chicken {Basically The Best Roast Chicken Ever}
Eight Years Ago: Buffalo Chicken Bites
Homemade Dulce de Leche Twix Bars
Yield: 24 Bars (9X13-inch pan)
Prep Time: 3 hrs 30 mins
Cook Time: 25 mins
Total Time: 3 hrs 55 mins
Rating: 4.61 stars (64 ratings)
Ingredients
Shortbread Crust:
- 10 tablespoons (142 g) room temperature salted butter
- ⅔ cup (141 g) packed light brown sugar
- 1 cup (114 g) almond flour
- 1 ½ cups (213 g) all-purpose flour
- ½ teaspoon salt (coarse, kosher salt recommended)
Dulce de Leche/Caramel Layer:
- 10 tablespoons (142 g) salted butter
- ½ cup (106 g) granulated sugar
- ⅓ cup light corn syrup
- 1 (14-ounce) can sweetened condensed milk
- ¼ teaspoon salt (coarse, kosher salt recommended)
- 1 teaspoon vanilla extract
Chocolate Ganache:
- 1 ½ cups (255 g) good-quality chocolate chips or chopped chocolate (bittersweet or semi-sweet recommended)
- 1 cup heavy cream
- Fine sea salt for the top (optional)
Instructions
- Preheat the oven to 350 degrees F (175°C). Lightly grease a 9×13-inch metal baking pan with cooking spray (or line with parchment paper). If using a glass pan, decrease the oven temperature to 325 degrees F (160°C). Set the pan aside.
- For the crust: In a bowl, combine all crust ingredients. Mix with a handheld or electric stand mixer until evenly combined, ensuring no streaks of flour or butter remain, about 1-2 minutes. Press the dough evenly into the bottom of the prepared pan. Bake for 13-15 minutes, or until the edges are lightly golden. Let cool completely while you prepare the caramel.
- For the dulce de leche layer: In a medium pot, combine all caramel ingredients except the vanilla. Heat over medium or medium-low heat, stirring constantly with a rubber spatula. Bring the mixture to a gentle boil, continuously scraping the bottom of the pot. Cook for about 10 minutes until it changes to a light golden brown color. Monitor the heat carefully; if the color changes quickly, reduce cooking time. If the bottom begins to burn, immediately reduce heat. Remove from heat and stir in the vanilla extract. Immediately pour the warm caramel over the cooled shortbread crust and spread evenly.
- Refrigerate the bars until the caramel layer is completely cooled and set, which will take approximately 30-45 minutes.
- For the chocolate ganache: Place the chocolate chips or chopped chocolate in a medium bowl. Heat the heavy cream in a small saucepan until it just begins to simmer. Pour the hot cream over the chocolate and let it sit undisturbed for 1-2 minutes. Stir or whisk until the chocolate chips are fully melted and the mixture becomes smooth and glossy. Spread the ganache over the set caramel layer. If desired, sprinkle with fine sea salt. Refrigerate until the chocolate layer is firm, about 1 hour.
- To cut neatly, allow the bars to sit at room temperature for 15 minutes to slightly soften the caramel. Run a sharp knife or bench knife under hot water, wipe it dry, and then slice the bars into your desired shapes (rectangles or squares work well). Repeat the hot water and wiping step as needed, cleaning the knife between cuts. Store any uneaten bars in the refrigerator if not serving within a couple of hours.
Notes
Flour: For variation, you can experiment with hazelnut flour as a partial substitute for all-purpose flour. For a gluten-free option, using 100% almond flour is passable, though the crust will be denser. If using 100% all-purpose flour, consider replacing ¼ cup of flour with ¼ cup of cornstarch for a more tender texture.
Chocolate: I prefer bittersweet or semi-sweet chocolate chips (Guittard or Ghirardelli) for this recipe. You can experiment with milk chocolate, but I haven’t tried it myself. The recipe as written creates a substantial chocolate layer; if you prefer a thinner layer, you can slightly reduce the chocolate and cream quantities.
Author: Mel
Course: Dessert
Cuisine: American
Method: Bake
Nutrition Information
Serving: 1 Bar, Calories: 344kcal, Carbohydrates: 36g, Protein: 4g, Fat: 21g, Saturated Fat: 12g, Cholesterol: 45mg, Sodium: 187mg, Fiber: 2g, Sugar: 27g
Recommended Products
- Small Offset Spatula
- Mixing Bowl
- Wire Whisk
- 9X13-inch Metal Baking Pan
Recipe Source: adapted from the Dandelion Chocolate Cookbook