
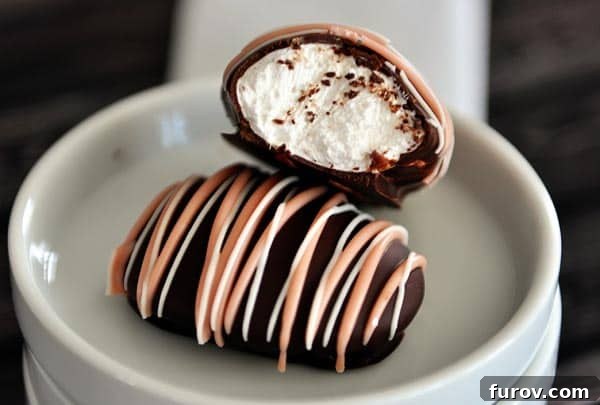
Discover the magic of crafting your own fluffy, chocolate-covered marshmallow Easter eggs with our comprehensive, step-by-step guide. Making homemade marshmallows has never been easier or more delightful!
There’s a special joy in creating something truly unique and delicious from scratch, and these homemade marshmallow Easter eggs fit that bill perfectly. Dipped in rich chocolate, these treats aren’t just cool; they are, quite possibly, one of the most satisfying baking projects you’ll ever undertake. Imagine the delight on faces when they discover these incredibly soft, intensely flavorful marshmallows, encased in a crisp chocolate shell. It’s an experience far superior to any store-bought equivalent.
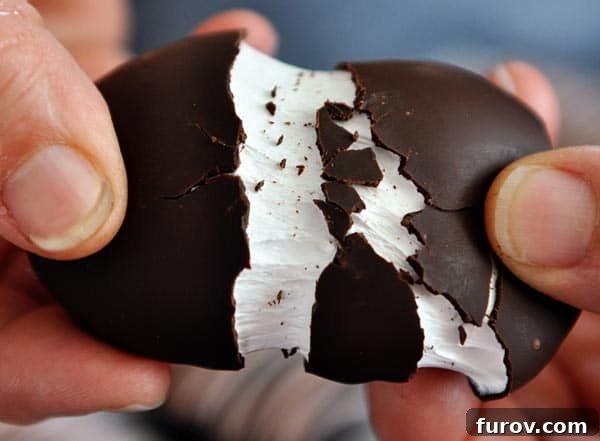
For many, the idea of homemade marshmallows might seem daunting, or perhaps even unnecessary. “Why bother,” you might ask, “when marshmallows are so readily available?” I confess, I once shared that sentiment. I admired those baking enthusiasts who effortlessly whipped up batches of homemade marshmallows, considering them culinary rockstars. But it wasn’t until the vision of delicate, Easter egg-shaped marshmallows, lavishly coated in chocolate, danced in my head that I truly understood the allure. This wasn’t just about making marshmallows; it was about elevating a simple confection into an extraordinary holiday treat.
The inspiration for these irresistible confections comes directly from my Aunt Laurie, a true legend in her Idaho community (shout out to Rexburg!). Her marshmallow eggs are famously delicious, and she dedicates countless hours each year to crafting hundreds of these beloved Easter delights. She is, without a doubt, a chocolate-covered homemade marshmallow Easter egg expert, and in my book, there’s no higher culinary accolade to aspire to!
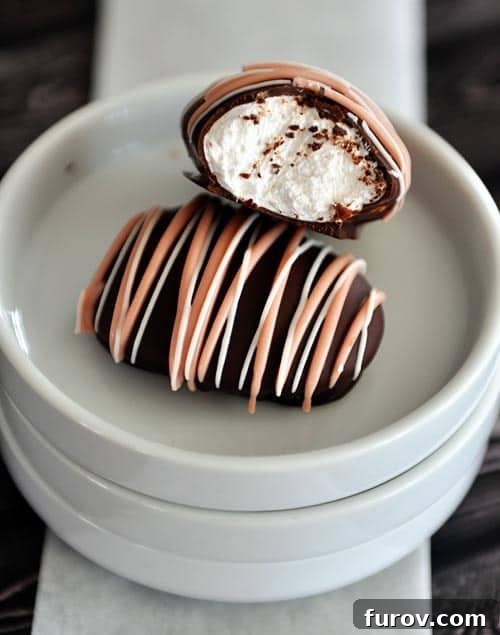
This year, I decided it was time to try my hand at Aunt Laurie’s famed recipe. The process turned out to be one of the most engaging and enjoyable kitchen projects my children and I have tackled in recent memory. Beyond the sheer fun, I’ve been utterly converted to the sublime deliciousness of homemade marshmallows. Their cloud-like texture and pure flavor are simply unparalleled. Prepare to have your expectations for marshmallows completely redefined!
Now, a word of truth: making homemade marshmallows can be a bit sticky and messy. But honestly, that’s part of the charm! It’s a hands-on, sensory experience that can be incredibly fun if you approach it with a relaxed attitude. While the boiling sugar syrup requires adult supervision for safety, there are plenty of tasks for little helpers. Kids can enthusiastically press egg molds into the flour, help scoop out the marshmallow mixture (with a greased spoon, of course!), and, most importantly, provide crucial taste-testing feedback. Seeing their excitement and pride in the finished product is truly rewarding.
As much as my kids adored these marshmallow eggs, I admit, I was reveling in my own rockstar moment in the kitchen. Not only are these treats incredibly cute and festive, but the taste is phenomenal. Forget those mass-produced, rubbery Peeps (no offense if you’re a fan!). These homemade versions are exquisitely light, fluffy, and melt-in-your-mouth tender. And when enveloped in a coating of high-quality Ghirardelli bittersweet chocolate, they transcend mere candy and become a gourmet delight.
To ensure your success and alleviate any apprehension about tackling this recipe, I’ve put together an incredibly detailed photographic tutorial below. A big thank you to my wonderful mom for lending her hands as a model for this post! While the pictures provide invaluable visual guidance, you might find you don’t even need them. The process is surprisingly straightforward and accessible.
If you can master the simple actions of pressing egg shapes into flour, using a stand mixer to whip up fluffy marshmallows, and maintaining a sense of humor when a stray strand of sticky marshmallow inevitably finds its way into your hair, then you are perfectly equipped to make these. Seriously, homemade marshmallow eggs, coated in decadent chocolate, are an absolute must-try this week. They are perfect for Easter baskets, spring celebrations, or simply to enjoy as a truly special indulgence.
Let’s dive into the details of creating these delightful confections. The process might seem multi-stepped, but each stage is manageable and contributes to the final, spectacular result. The key is to prepare your workspace, gather all ingredients, and enjoy the creative journey. The payoff of biting into a freshly made marshmallow egg, with its crisp chocolate exterior yielding to a soft, airy interior, is truly worth every moment spent in the kitchen.
Homemade Marshmallow Easter Eggs
Pin
Rate
SaveSaved!
Ingredients
For the Fluffy Marshmallows:
- ½ cup cold water
- 3 envelopes unflavored gelatin
- 1 ½ cups (318 g) granulated sugar
- 1 cup light corn syrup
- ½ cup water
- ¼ teaspoon salt
- 1 tablespoon pure vanilla extract
For Finishing:
- Plenty of all-purpose flour (for molds)
- 2 cups (340 g) high-quality chopped chocolate or chocolate chips for dipping
- Sprinkles or colored chocolate wafers for drizzling (optional)
Instructions
-
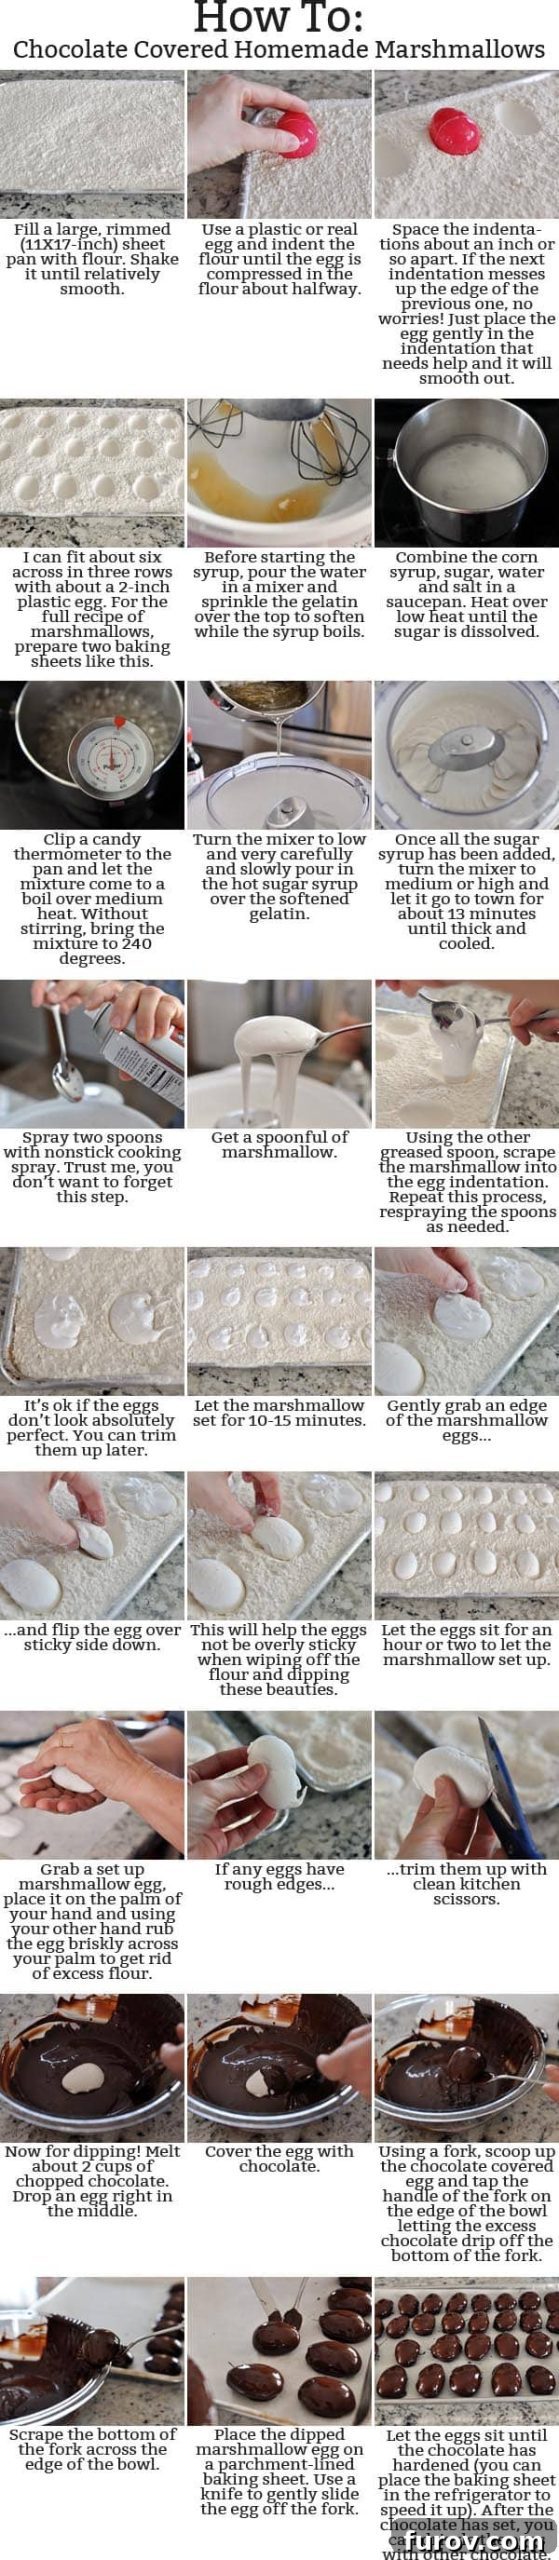
**Prepare Your Egg Molds:** Begin by generously coating two large, rimmed baking sheets (ideally 11×17 inches for ample space) with all-purpose flour. Gently shake the pans to create a relatively even layer across the bottom. Next, take a plastic Easter egg (a real egg or another egg-shaped object works too) and lightly press it into the flour to create distinct egg-shaped indentations. Aim to space these molds about 1-2 inches apart to prevent them from merging. Don’t worry if the edges get a little messy with subsequent presses; simply re-press the egg shape lightly into any indentation that needs tidying. For example, using a 2-inch plastic egg, you can create about 6 indentations across in 3 rows, yielding approximately 18 molds per sheet pan. Carefully set these prepared sheet pans aside in a safe, undisturbed location.
-
**Bloom the Gelatin:** In the bowl of an electric stand mixer fitted with the whisk attachment, pour the cold water. Evenly sprinkle the unflavored gelatin over the water’s surface. Allow the gelatin to “bloom” or soften for several minutes. This crucial step ensures the gelatin fully dissolves and properly sets your marshmallows. While a stand mixer is highly recommended for its power and endurance, a robust electric handheld mixer can be used, provided it can handle continuous mixing for 10-15 minutes without overheating.
-
**Prepare the Sugar Syrup:** While your gelatin is blooming, combine the granulated sugar, light corn syrup, ½ cup of water, and salt in a medium-sized saucepan. Place the saucepan over medium-low heat and stir gently until the sugar has completely dissolved. Once dissolved, attach a candy thermometer to the side of the pan, ensuring the tip does not touch the bottom. Increase the heat to medium. Allow the mixture to come to a steady boil and continue cooking without stirring until the syrup reaches precisely 240 degrees F (115 degrees C) on your candy thermometer. This temperature is vital for the correct marshmallow texture.
-
**Whip the Marshmallow Base:** With the gelatin mixture in your stand mixer, turn the mixer to its lowest speed. Very carefully and slowly, pour the hot sugar syrup into the mixer bowl in a thin, steady stream. Avoid pouring it directly onto the whisk or sides of the bowl to prevent splashing and ensure even incorporation. Once all the hot syrup has been added, increase the mixer speed to medium-high or high. Whip the mixture continuously for 10-13 minutes. You’ll observe a remarkable transformation as the mixture cools, thickens, and becomes wonderfully light and fluffy. Unlike marshmallows intended for cutting into squares, this mixture should be slightly softer and more pliable, making it ideal for molding into your flour indentations. Finally, beat in the pure vanilla extract for flavor.
-
**Fill the Molds:** Lightly grease two spoons with cooking spray to prevent sticking. Working quickly before the marshmallow sets too much, carefully scoop spoonfuls of the warm marshmallow mixture into each of the egg indentations you prepared in the flour. Refer to the provided pictures for visual guidance on this step. Ensure each mold is nicely filled. Once all the egg molds are brimming with marshmallow, allow them to sit undisturbed for 10-15 minutes. This initial setting time helps them firm up enough to handle.
-
**Flip and Continue Setting:** After the marshmallows have slightly set, gently lift the edge of each marshmallow from its mold and carefully flip it over, so the sticky side is now facing down into the flour. It’s crucial not to press down on the marshmallow or push it deeper into the flour; simply allow it to rest gently on the flour’s surface. This step helps the marshmallow develop a light flour coating on all sides, making it easier to handle and preventing excessive stickiness.
-
**Final Setting Time:** Allow the marshmallow eggs to set completely for an additional 1-2 hours at room temperature. For best results, they can even be left overnight, loosely covered with plastic wrap to protect them from dust. This extended setting time ensures they achieve their ideal fluffy yet stable consistency before dipping.
-
**Clean the Marshmallows:** Once fully set, carefully remove each marshmallow egg from the flour. Gently rub each egg briskly between the palms of your hands to remove any excess flour. A very light dusting of flour is perfectly fine and won’t be noticeable once the eggs are coated in chocolate. Don’t worry about wasting flour; any excess flour from the baking sheets can be neatly poured back into its original bag or container for future use.
-
**Melt the Chocolate:** Melt your chosen high-quality chocolate using either a double boiler over low heat or in the microwave. If using the microwave, heat on 50% power in 1-minute increments, stirring thoroughly after each interval, until the chocolate is completely melted and smooth. To help prevent “blooming” (the formation of white streaks on chocolate after it sets), stir in a small amount of finely chopped, reserved chocolate into the hot, melted chocolate. This technique, known as seeding, slightly lowers the chocolate’s temperature, promoting a stable temper and a beautiful, shiny finish.
-
**Dip the Marshmallow Eggs:** Line a baking sheet with parchment paper or wax paper. One by one, gently drop a marshmallow egg into the melted chocolate. Use a fork to fully submerge and coat the egg in chocolate. Lift the chocolate-covered egg onto the fork and lightly tap the handle of the fork against the edge of the bowl. This action allows any excess chocolate to drip off through the tines, ensuring a thin, even coating. Carefully scrape the bottom of the fork against the rim of the bowl and then transfer the egg to the prepared baking sheet. A butter knife can be helpful to gently slide the egg off the fork onto the parchment paper.
-
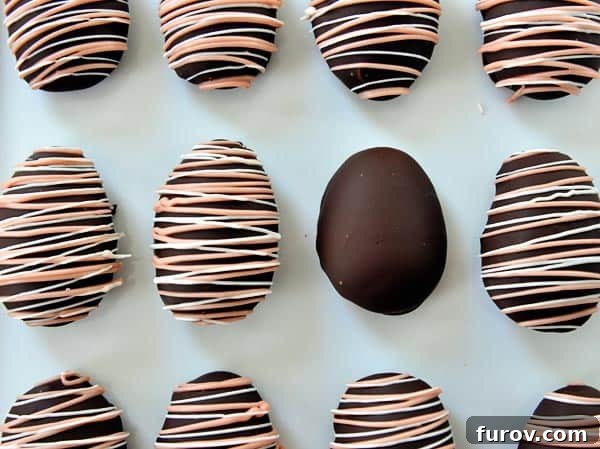
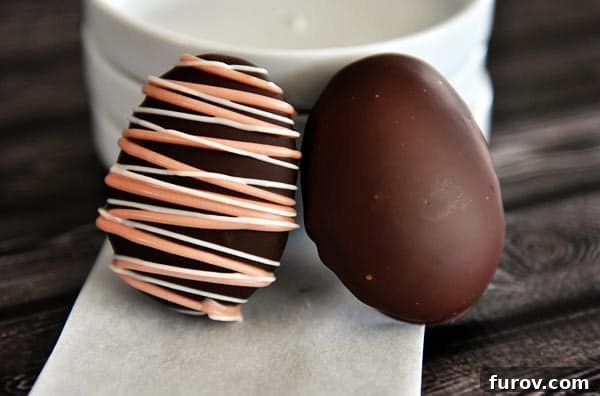
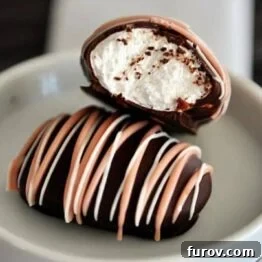
**Decorate and Set:** Repeat the dipping process with the remaining marshmallow eggs. If you plan to use sprinkles, scatter them lightly over the eggs immediately after dipping, while the chocolate is still wet and tacky. Once all eggs are dipped and decorated (if desired), place the baking sheet in the refrigerator to allow the chocolate to set completely, typically about 15-30 minutes. After the chocolate has fully set, you can further decorate them by drizzling colored melting wafers or additional melted chocolate over the eggs for an extra festive touch.
-
**Storage:** Store your beautiful homemade marshmallow Easter eggs in an airtight container in the refrigerator for up to one week. Bring them to room temperature for a few minutes before serving for the best texture and flavor experience.
Chef’s Notes & Expert Tips
The Role of Corn Syrup: I understand that corn syrup is viewed with skepticism by some, and I, like many of you, use it sparingly. However, for specialized treats like these homemade marshmallows, used a couple of times a year, it plays a vital role. Corn syrup helps prevent sugar crystallization, which is crucial for achieving the incredibly smooth, tender texture of these marshmallows. If you’re seeking a substitute, extensive online research or personal experimentation would be necessary, as I have not found a reliable alternative that yields the same perfect results for this specific marshmallow recipe. It’s also important to differentiate between light corn syrup, which is just glucose, and high fructose corn syrup (HFCS); they are distinct products. As with most treats, moderation is key.
Chocolate Perfection: For the best results, always opt for a high-quality chocolate for dipping. My personal favorite brand is Ghirardelli, which melts beautifully and provides a luxurious flavor. For mastering chocolate techniques, here’s a quick video tip on tempering/melting chocolate, and another on dipping things in chocolate like a true professional. These resources can significantly elevate your chocolate-dipping game!
Recommended Products
Recipe Source: This recipe is a delightful adaptation of my Aunt Laurie’s famous chocolate-covered marshmallow eggs, with the foundational marshmallow recipe credited to Ina Garten.