
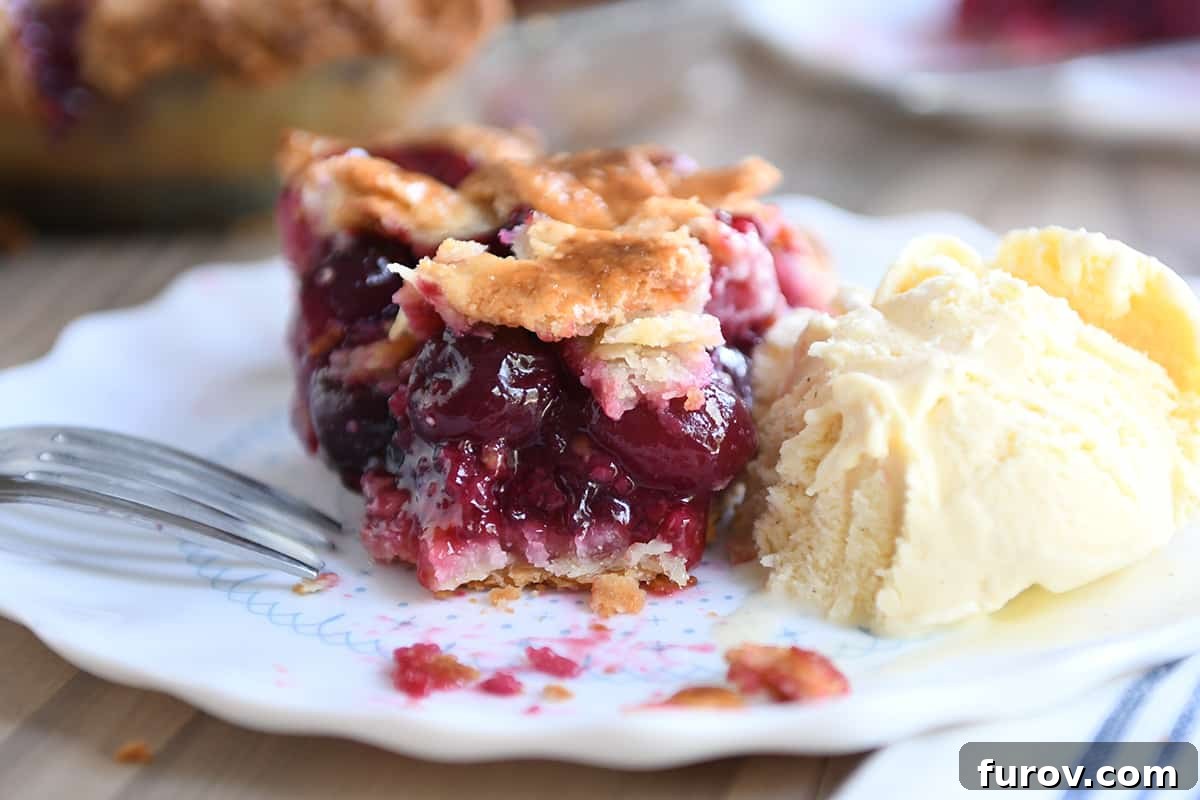
Welcome to the definitive guide for crafting what we confidently declare the best cherry pie you will ever taste. This isn’t about secret techniques or complicated steps; it’s about mastering a timeless classic with simple, fresh ingredients and a touch of patience. Whether you have access to sweet or tart cherries, this recipe includes all the notes you’ll need to achieve pure pie perfection. Prepare to delight your senses with every mouthwatering bite!
Cherry pie holds a truly special place in my heart. It’s the one dessert I simply cannot resist, even when I’ve already indulged in a hearty meal. The exquisite balance of tart sweetness, the plump and juicy cherries bursting with flavor, encased in a divinely buttery, flaky pie crust—it’s an unparalleled culinary experience. While many fruit pies grace our tables, none capture my full attention quite like a perfectly baked cherry pie.
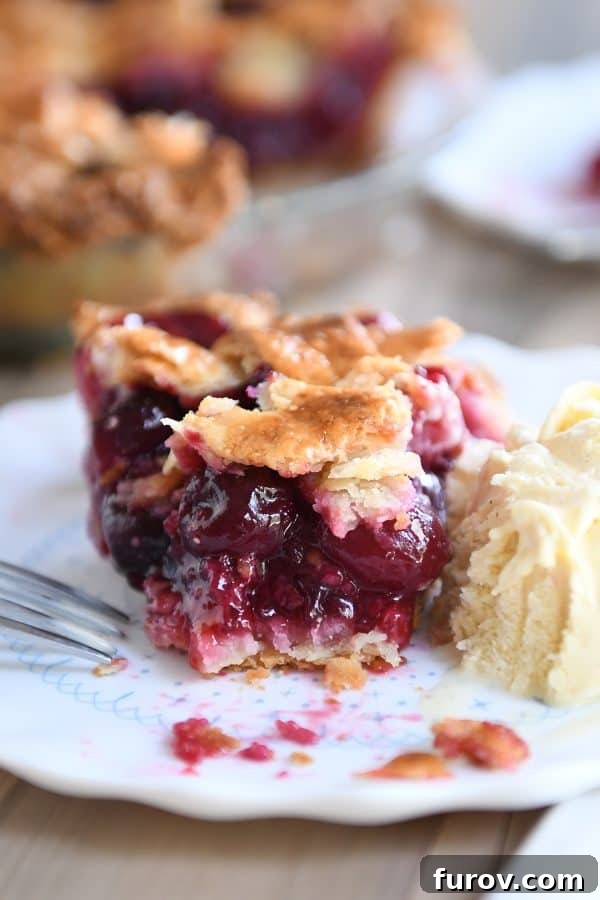
A few years ago, I realized that homemade cherry pie was not making nearly enough appearances in my life. I decided to change that by turning it into a cherished tradition. After all, if it’s a tradition, it simply has to happen, right? So, every 4th of July (or within a week if we’re traveling), a warm, freshly baked homemade cherry pie became mandatory. And, let’s be honest, it frequently graces our Thanksgiving table too.
It took several attempts and a lot of fine-tuning to perfect this cherry pie recipe, but this is the version I’m committed to forever. It’s incredibly straightforward, surprisingly simple, and delivers a flavor that surpasses any other I’ve tasted – and believe me, I’ve had my share of cherry pies over the years. This recipe isn’t just good; it’s a testament to how simple ingredients can create something truly extraordinary.
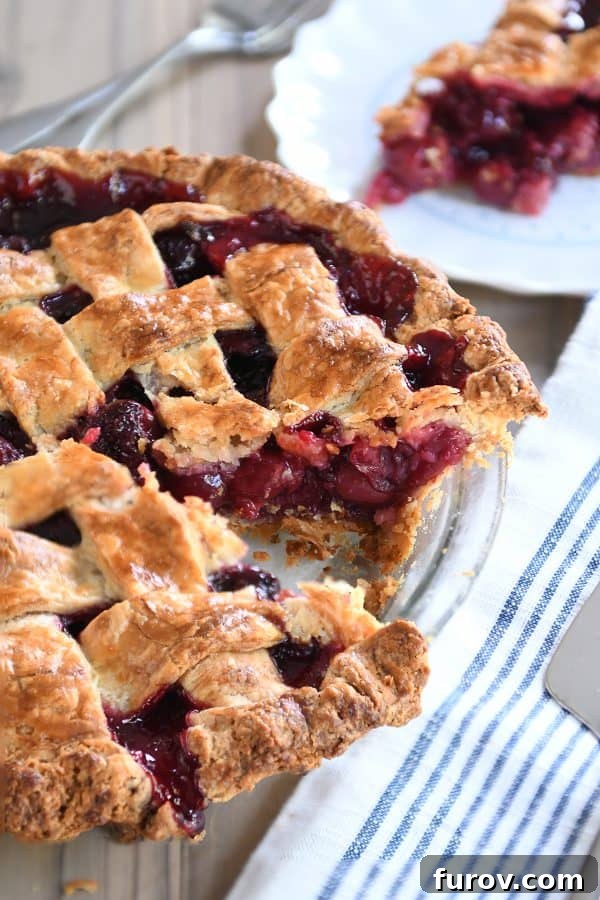
You might be thinking, “But don’t you already have a cherry pie recipe in your archives?” You’d be right! That recipe is nearly a decade old, and while it served its purpose, consider this an evolution. Chalk it up to cherry pie maturity and a decade of dedicated taste testing, but today’s recipe is genuinely 1,000 times better. That’s a promise you can take to the bank!
For many, homemade pie can seem incredibly daunting. I completely understand! It’s not the kind of dish you typically whip up on a busy Tuesday evening. However, with a little planning, quality fresh ingredients, and the golden rule of keeping everything as cold as possible, you’ll be baking impressive pies like a seasoned pro in no time. This journey from pie-phobia to pie-pro is more accessible than you think.
Today, I’m excited to guide you through every step of making this phenomenal homemade cherry pie. This isn’t because the process is overly complicated, but because a visual, detailed walkthrough can be the game-changer. It helps you transform from thinking “no way, homemade pie is a mythical beast” to confidently declaring, “I’ve got this! Oh yes, I absolutely HAVE this!” Our goal is to demystify the art of pie making and equip you with the knowledge and confidence to bake a truly unforgettable dessert.
This post is packed with valuable information, tips, and tricks. Take your time to read through it, absorb the details, and visualize each stage. Take a few deep breaths, and then embark on the rewarding journey of making the best cherry pie of your life. The anticipation alone is half the fun!
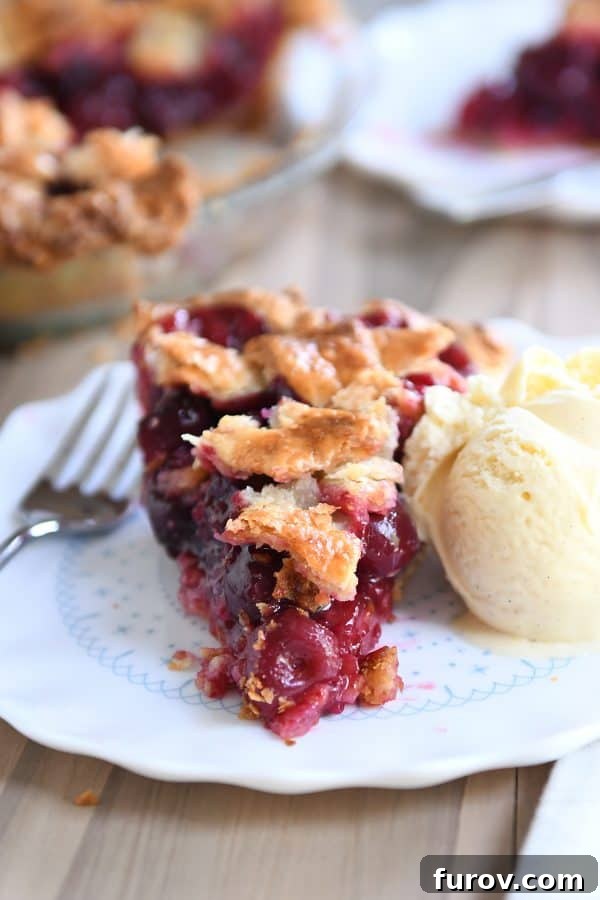
Pie Crust: The Foundation of an Exceptional Cherry Pie
The crust is undeniably the soul of any great pie, and a cherry pie demands a crust that is both tender and wonderfully flaky, providing the perfect counterpoint to the sweet-tart filling. I’ve shared numerous pie crust tutorials, boot camps, and extensive guides on this site, so I won’t delve into the minutiae of pie dough preparation in this specific post. However, it’s crucial to select the right foundation for your cherry pie masterpiece.
For this ultimate cherry pie (and, frankly, for almost all my other pie endeavors), I consistently rely on one of two tried-and-true pie crust recipes:
- My personal favorite sour cream pie crust, which even includes a helpful video tutorial for visual learners. This crust yields an incredibly tender crumb and a beautiful flakiness that’s hard to beat.
- The perfect flaky pie crust, an in-depth tutorial that covers every aspect of achieving that coveted buttery, flaky texture.
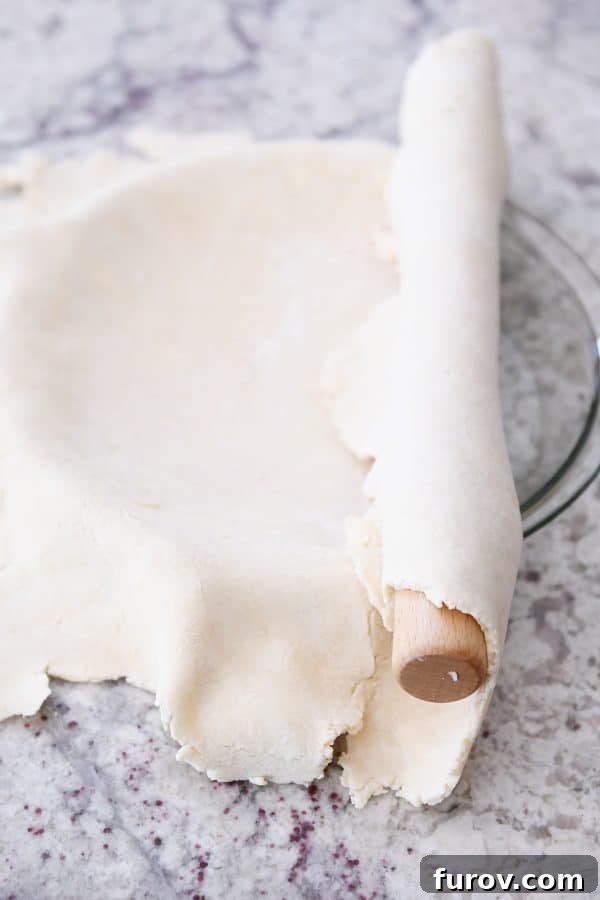
For all the stunning images you see in this post, I utilized the sour cream pie crust. Its exceptional flavor, remarkable tenderness, and delicate flakiness are truly outstanding, making it an ideal companion for the vibrant cherry filling. To begin, roll out your bottom crust to approximately 12 inches in diameter. Carefully transfer it into a 9-inch pie plate, gently pressing it to conform to the shape. Trim the excess dough, leaving about a 1/4-inch overhang beyond the rim of the pie plate. This edge will be crucial for sealing and fluting later.
Sweet Cherries vs. Sour Cherries: Choosing Your Perfect Filling
Ah, homemade cherry pie filling! The heart of this dessert, capable of bringing unparalleled joy. The type of cherries you choose will significantly influence the final flavor profile of your pie. While many of these details are also included in the recipe card below, let’s explore them further here to ensure you make the best choice for your pie.
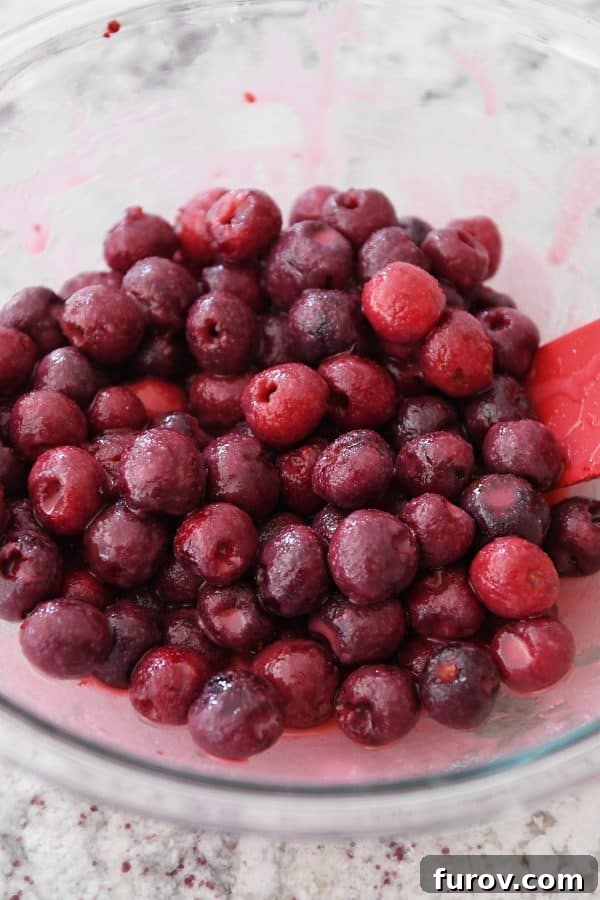
- Sweet, Dark Cherries: My preferred choice for this recipe, and what I’ve primarily tested with, are sweet, dark cherries. The sugar quantity in the recipe is calibrated assuming these cherries are perfectly ripe and inherently sweet. If the dark cherries you’re using lean towards the tart side (which can happen depending on the variety and harvest time), you might consider increasing the sugar just slightly to achieve your desired sweetness level.
- Rainier Cherries: While I haven’t personally tested Rainier cherries in this specific recipe, they are generally a fantastic substitute for dark sweet cherries in terms of both sweetness and flavor. Their beautiful blush color would also make for a visually stunning pie.
- Sour Pie Cherries (Tart Cherries): Fresh sour pie cherries are often a quest to find where I live, and frankly, the canned varieties sometimes deter me due to the risk of mushy texture. However, the good news is that converting this recipe to use sour pie cherries is quite straightforward and yields a wonderfully tangy pie that many adore.
To successfully substitute sour pie cherries: Adjust the lemon juice by decreasing it to just 1 teaspoon (don’t omit it completely, as a hint of citrus enhances the cherry flavor). You’ll then need to increase the granulated sugar to 1 cup, or even slightly more, depending on your personal preference for sweetness and the tartness of your specific cherries. Taste a cherry or two to gauge their tartness before making a final decision on the sugar amount. This adjustment ensures the perfect balance of tart and sweet in your homemade cherry pie filling.
Can I Use Frozen Cherries for Cherry Pie?
The question of using frozen cherries is a common one, especially when fresh cherries are out of season or unavailable. While I haven’t personally tried frozen cherries with this specific recipe yet, I believe they can be used with very good results, provided you follow a couple of crucial steps. The key to success lies in proper thawing and thorough draining.
First, allow your frozen cherries to thaw completely. This process will release a significant amount of liquid. Once thawed, drain them very well to remove as much excess moisture as possible. You might even gently pat them dry with paper towels. Excess water in the filling can lead to a soupy pie, which is exactly what we want to avoid. After baking, the cherries might be a tad bit softer in texture compared to fresh ones, but if you start with good quality frozen cherries, there’s a strong chance your pie will turn out wonderfully. Always choose high-quality fruit, whether fresh or frozen, for the best outcome.
The filling for this cherry pie recipe is delightfully simple to prepare: just combine all the ingredients in a large bowl and let them meld together while you prepare your pie crust. I suspect my increasing affection for cherry pie stems from the numerous u-pick cherry farms scattered around our area. The experience of picking fresh, ripe cherries truly enhances the joy of baking and, ultimately, eating this magnificent dessert.
Pie Filling Thickeners: Navigating the Culinary Debate
Ask any seasoned home baker about pie filling thickeners, and you’ll likely encounter a myriad of strong opinions. From flour and cornstarch to tapioca and Clearjel, every baker seems to have their preferred method – some might even suggest fasting and prayer! While I respect diverse culinary approaches, after extensive testing and baking an immeasurable number of cherry pies, I stand firmly by the specific thickener combination outlined in the recipe below.
I’m not asserting that this particular thickener lineup is universally superior for every single fruit pie ever created. However, for this quintessential cherry pie, it is absolutely perfect. The magic lies in the combination of **tapioca flour (or starch) with a small amount of cornstarch**. This duo works in harmony to create a perfectly set cherry pie filling that is brilliantly clear, never cloudy, and entirely free of any unappetizing glumpy or gelatinous bits. The texture it achieves is simply superior, holding the cherries beautifully without compromising their natural allure.
I understand that tapioca flour might not be a staple in every pantry. However, in our kitchen, it’s a 24/7 essential, primarily for whipping up this incredible Brazilian cheese bread, which makes an appearance at least weekly. Trust me when I say that acquiring tapioca flour for this pie recipe is entirely worth the effort. It’s becoming increasingly available and can often be found in the baking aisle of many grocery stores (Bob’s Red Mill is a widely recognized brand) and is, of course, readily available online. The investment in this ingredient truly pays dividends in the texture of your cherry pie filling.
Does using tapioca flour alongside cornstarch really make a difference compared to using 100% cornstarch? The answer is a resounding YES! It’s precisely this combination that elevated my cherry pie from merely “pretty good” to “absolutely amazing” – a transformation you’ll taste and appreciate with every forkful.
Now…Let’s Get to Assembling This Incredible Cherry Pie!
As I’ve emphasized throughout this post and in the recipe below, maintaining the chill of your pie dough is paramount for success. Warm pie dough is a direct path to a disappointing crust, whereas cold dough ensures flakiness and structure. This fundamental rule is the secret to a professional-quality homemade pie.
Begin by rolling out your top crust into a 12- or 14-inch circle. From this, carefully cut 10-12 thick strips. Then, scoop your luscious cherry pie filling into the prepared, chilled bottom pie plate. Now, it’s time for the truly satisfying part: constructing that beautiful lattice crust!
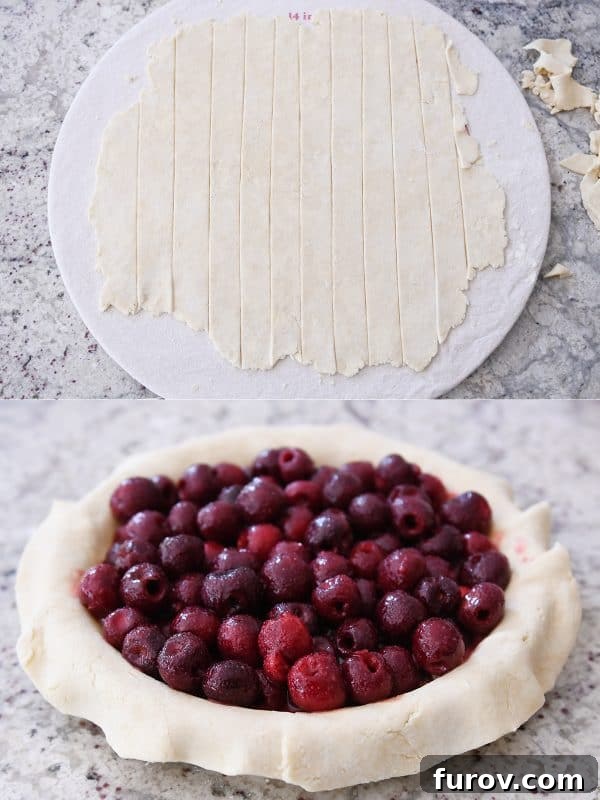
Of course, you could opt for a simpler route: bypass the lattice, simply place a whole top crust, cut a few vents, and pop it into the oven. But where’s the fun, the artistry, the sheer joy in that? I firmly believe that creating a lattice-topped pie is one of life’s most satisfying culinary endeavors. Moreover, a cherry pie just *demands* a lattice top; it’s a classic pairing that enhances both visual appeal and baking performance by allowing steam to escape gracefully.
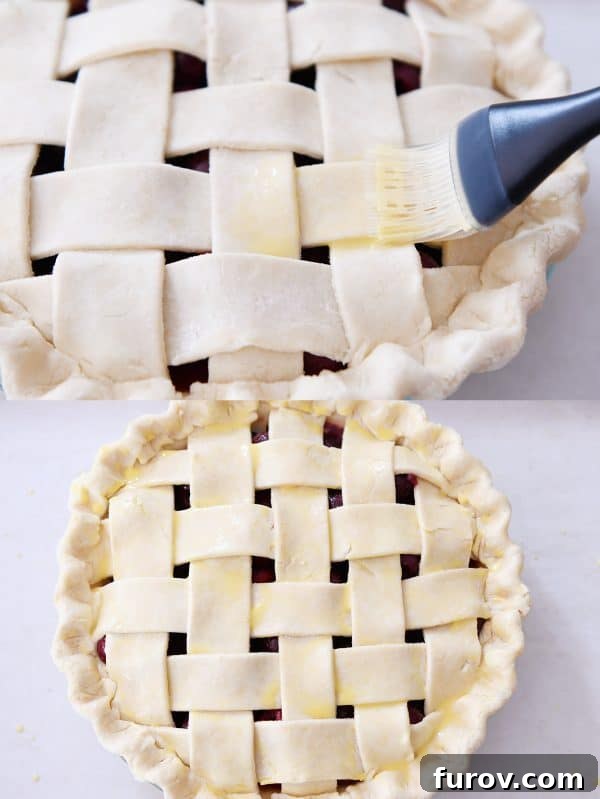
As illustrated in the quick collage below, the process of weaving a lattice is simpler than it appears. It primarily involves lifting alternating pie dough strips to lay down a horizontal strip, then repeating the pattern. Don’t feel pressured for absolute perfection. The strips don’t need to be identically sized, and minor imperfections add character. Pies, especially homemade ones, should have personality! Just go for it, embrace the process, and you’ll be thrilled with the stunning result.
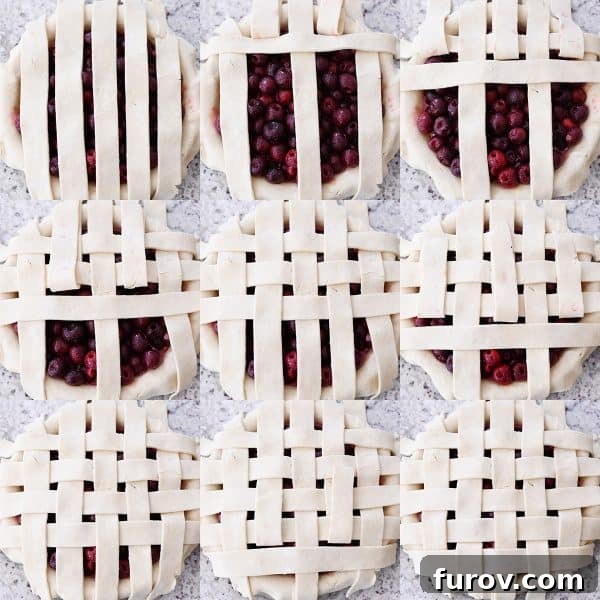
Once your beautiful lattice top has been lovingly and carefully assembled (remember to work swiftly to keep those dough strips cold and prevent them from becoming warm and sticky in your hands!), it’s time to trim the lattice strips so they are even with the edge of the bottom crust. This creates a neat, uniform base for your final crimping.
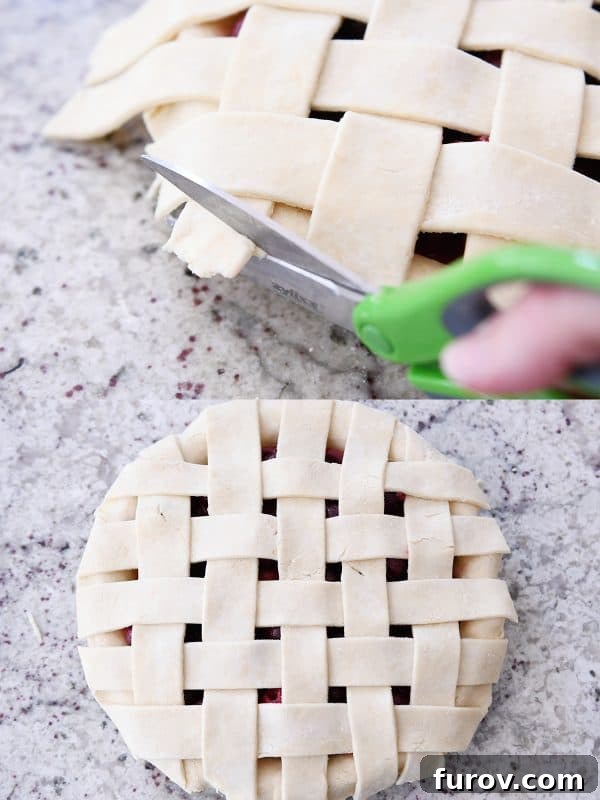
Next, take the bottom crust overhang and gently roll or fold it up and over, creating a slightly thicker lip that rests right on the edge of the pie plate. Press this edge gently towards the inner rim of the pie plate to securely seal all the edges, effectively trapping the ends of the lattice strips within. This creates a sturdy border for your pie.
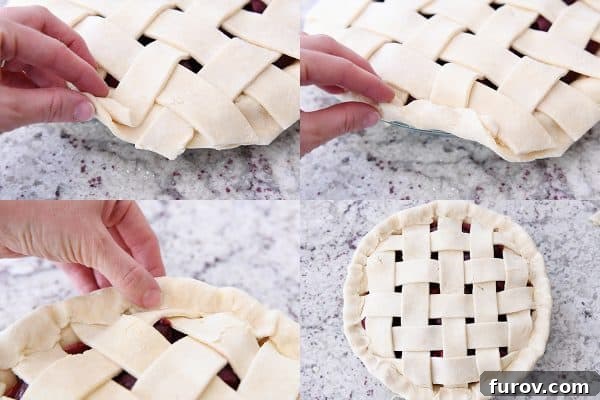
With this reinforced edge, you can now proceed to flute the edges of your pie all the way around. Again, remember that homemade pie is all about charm and character, so perfection isn’t the goal. This step should also be completed relatively quickly to prevent the warmth from your fingers from melting the butter in the delicate pie crust, which could compromise its flakiness.
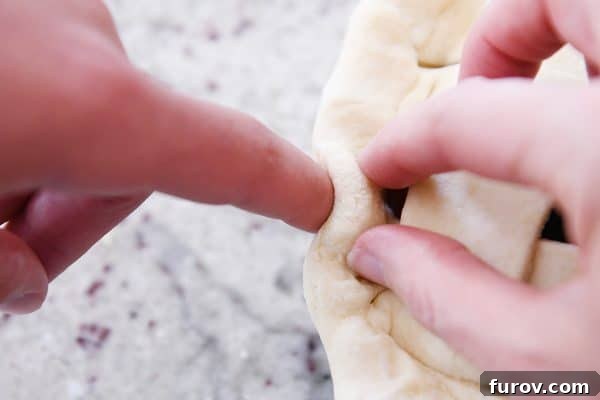
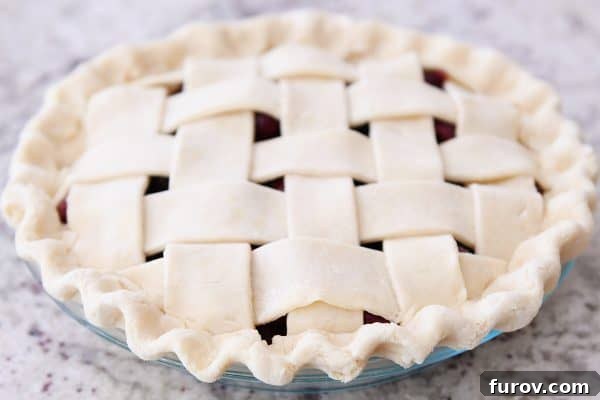
Now comes another critical step: refrigerate that assembled pie for at least 30 minutes. An hour is even better! This chilling period is crucial to ensure the pie crust is thoroughly cold, which prevents shrinkage during baking and promotes that coveted flaky texture. I wouldn’t recommend refrigerating much longer than an hour, as you risk a soggy bottom crust, which is a compromise not worth making.
For an extra touch of visual appeal, I like to brush the top of the pie with a simple egg wash. While this step is entirely optional, it significantly enhances the pie’s ability to achieve that perfectly shiny, golden-brown crust. It’s a small detail that contributes immensely to the overall “pie rock star” feeling and presentation.
Carefully place your chilled pie on a foil- or parchment-lined baking sheet. Trust me on this – it’s likely to bubble over a bit during baking (which is completely normal!), and easy cleanup will be your best friend. Bake the pie at 400 degrees Fahrenheit for about an hour. It’s important to watch it closely, as oven temperatures can vary significantly. If the top or outer crust begins to brown too quickly but the filling (visible through a glass pie plate) or bottom crust still needs more time, simply tent the top of the pie loosely with foil. This will protect the crust from over-browning while allowing the rest of the pie to finish baking thoroughly.
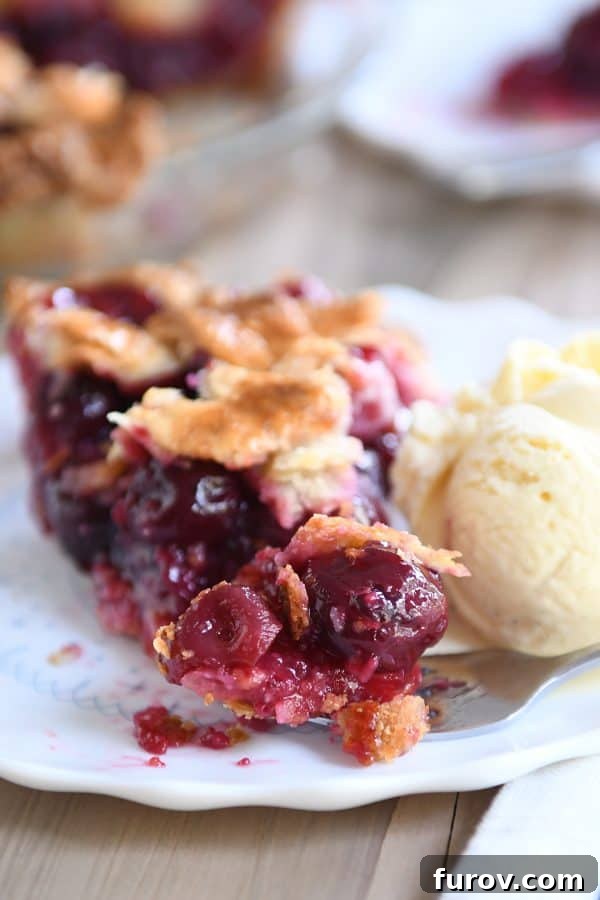
Now for the truly challenging part: the wait. As tempting as it is to immediately dig into a warm, fragrant slice of pie, resist the urge! If you don’t want a soupy, runny mess spilling onto your plate (and quite possibly your pants), you absolutely **must let the pie cool.** It doesn’t have to cool *completely*, but I strongly recommend a minimum cooling period of 2-3 hours. This allows the pie filling ample time to properly set and achieve its perfect, luscious consistency.
Cutting into it too early will undoubtedly lead to disappointment, causing you to shed tears and perhaps even blame the recipe or my thickener advice. Cooling the pie for the correct amount of time is the key to perfect, sliceable pie. And if I’m being completely honest, I actually prefer my cherry pie at room temperature. That’s when its flavors are truly at their peak, making it the absolute best.
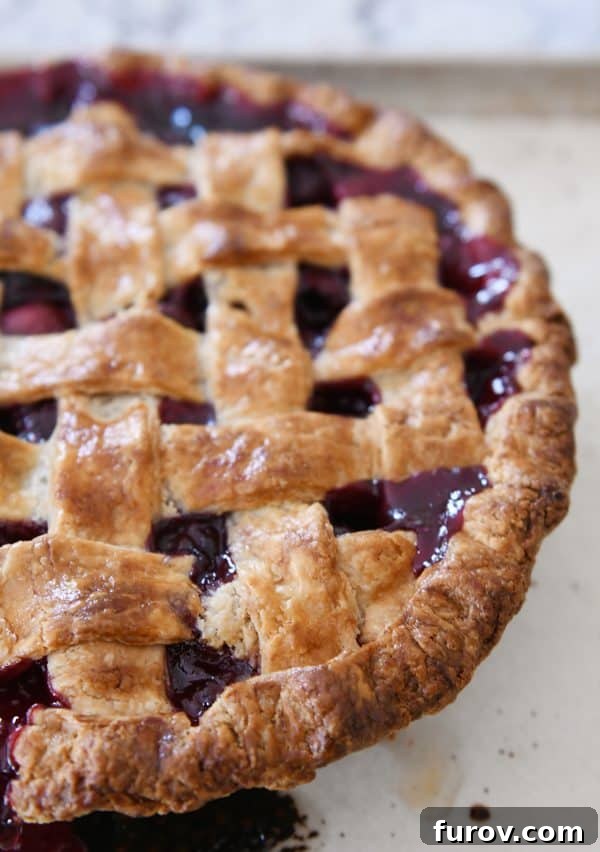
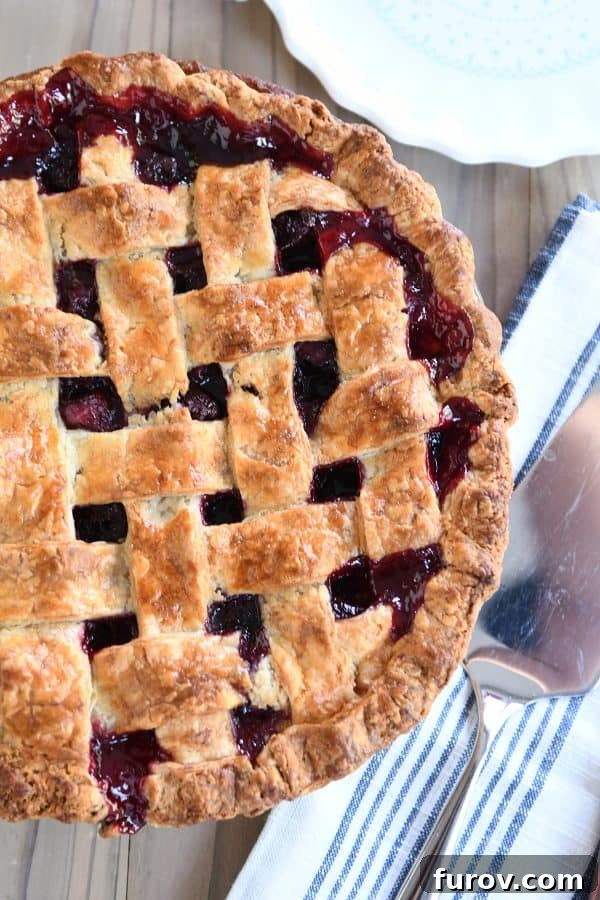
There you have it! This is, without a doubt, my favorite cherry pie recipe in the history of ever. While I wouldn’t necessarily crown myself the best pie maker in the world, and certainly don’t bake pies on a weekly basis, I’ve genuinely come to adore the entire pie-making process – even those moments that might initially feel frustrating.
There’s something uniquely magical and incredibly self-confidence-boosting about pulling a perfectly baked homemade pie out of the oven. It’s the closest I’ve ever come to hearing angels sing right there in my kitchen. And, as embarrassing as it might be to admit, I’ve been known to utter these exact words, staring lovingly at the piping hot pie cradled in my oven mitt-clad hands: “Oh my gosh, I’m amazing.” Homemade pie has a way of doing that to you, making you feel like a culinary wizard, capable of creating pure edible bliss.
Essential Pie Making Tools
Having the right tools can truly elevate your pie-making experience, making the process smoother and more enjoyable. Here’s a quick list of the essential tools and ingredients I use for this cherry pie and for most of my pie-making adventures. These are products I’ve personally found to make all the difference. (Affiliate links are included for your convenience, directing you to products available on Amazon.)
- 9-inch Pyrex pie plate (an inexpensive and incredibly reliable choice)
- Pastry cloth and board (this combination was a game-changer for me, finally allowing me to conquer rolling out homemade pie crust with ease)
- Rolling pin (I’ve truly fallen in love with the simplicity and effectiveness of this particular rolling pin)
- Pizza cutter (perfect for cutting those uniform lattice strips quickly and cleanly)
- Tapioca flour (if you struggle to find it in your local grocery store, this is my favorite online brand for consistent quality)
- Cherry pitter: A necessity for tackling those fresh cherries efficiently! I use this large-capacity one, but a handheld pitter also works perfectly for smaller batches.
Now, armed with confidence, knowledge, and the right tools, go forth and create yourself some truly magnificent cherry pie! Your taste buds (and your family and friends) will thank you.
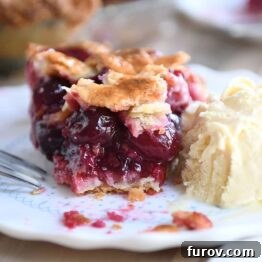
The Ultimate Homemade Cherry Pie
Pin
Rate
SaveSaved!
Ingredients
- Double crust 9-inch pie dough (see note for recipes)
For the cherry pie filing:
- 5 cups (794 to 850) pitted sweet, dark cherries – you’ll start with around 2 pounds whole fruit (see note for sour pie cherries)
- 2 tablespoons fresh lemon juice, from 1-2 medium lemons
- ¼ teaspoon almond extract
- ¾ cup (163 g) granulated sugar
- ½ teaspoon coarse, kosher salt (use 1/4 teaspoon for table salt)
- ⅓ cup (43 g) tapioca starch/flour (see note)
- 1 tablespoon cornstarch
- 1 tablespoon butter
Egg wash:
- 1 egg yolk
- 2 teaspoons water
- 2 teaspoons cream or milk
Instructions
-
Remember to keep all ingredients and pie crust as cold as possible throughout the preparation process to ensure the most delicious, flaky pie! Begin by rolling out your bottom pie crust according to your chosen pie dough recipe instructions. Carefully place it into the bottom of a 9-inch pie plate (a glass pie plate is recommended for even baking). Trim the edges, leaving a 1/4-inch excess from the outer rim of the pie plate. Refrigerate the prepared crust until the filling is ready.
-
For the filling: In a large bowl, combine the pitted cherries, fresh lemon juice, almond extract, granulated sugar, coarse kosher salt, tapioca starch, and cornstarch. Mix all the ingredients gently until they are well combined and the cherries are evenly coated. Set this mixture aside while you prepare the top crust.
-
Roll out your top pie crust to approximately a 10-inch diameter. Using a pizza cutter or sharp knife, cut the dough into 10-12 uniform strips (I prefer slightly thicker strips, about 3/4 to 1 inch wide, for a more substantial lattice).
-
Retrieve the refrigerated bottom crust. Scoop the prepared cherry pie filling evenly into the chilled bottom crust, making sure to scrape out all the delicious sugar and liquid from the bowl. Dot the top of the filling with 1 tablespoon of butter, either pinched into small pieces or cut into tiny cubes, distributing it evenly.
-
Carefully weave the dough strips on top of the filling to create a beautiful lattice crust (refer to the step-by-step pictures provided earlier in this post for detailed guidance). Once the lattice is complete, trim any excess lattice strips so they are even with the bottom crust’s edge. Fold the bottom crust up and over the lattice strips, aligning it evenly with the edge of the pie plate. Press and pinch the edges firmly to seal them together. Finally, artistically flute the edges of the pie crust for a decorative finish.
-
Refrigerate the assembled pie for at least 30 minutes, or up to 1 hour. This crucial step ensures the pie crust is completely chilled before baking, which helps prevent shrinkage and promotes a flakier crust.
-
Preheat your oven to 400 degrees F (200 degrees C). Prepare the egg wash by whisking together the egg yolk, water, and cream or milk until well combined. Gently brush this mixture evenly over the entire top pie crust.
-
Place the pie on a parchment or foil-lined baking pan (this will catch any drips and make cleanup easier). Bake for 50-60 minutes, or until the crust is a beautiful golden brown and the filling is visibly bubbly and thickened. Keep in mind that the filling will continue to thicken significantly as it cools. The exact baking time may vary based on your oven, the type of pie plate, the thickness of your crust, and whether the pie was refrigerated. {It’s better to slightly overbake than underbake; an underbaked pie will result in a soupy filling even after cooling. If the crust begins to brown too much before the filling is ready, loosely tent the top and sides of the pie with foil to prevent burning while allowing the pie to continue baking.}
-
This is the hardest part! Let the pie cool for a minimum of 2-3 hours before attempting to slice and serve. If you cut into it too early while it’s still too warm, the filling will be runny and soupy. Proper cooling allows the thickeners to fully set, ensuring perfect slices. The cooled pie can be covered loosely and kept at room temperature for 2-3 days.
Notes
Cherries: I have not yet tested this specific pie recipe with frozen cherries. If you opt to use them, it is absolutely essential to thaw them completely and drain them very thoroughly to prevent a watery filling. For those using sour pie cherries (tart cherries), adjust the lemon juice to just 1 teaspoon and increase the granulated sugar to 1 cup (or more, to taste, depending on your desired sweetness).
Sugar Adjustment: for any variety of cherry, the precise amount of sugar needed will depend heavily on the inherent sweetness of the fruit itself. Even ‘sweet’ dark cherries can sometimes be quite tart depending on when they were harvested. The 3/4 cup of sugar specified in this recipe for dark, sweet cherries assumes they are perfectly ripe and naturally sweet. If your cherries are slightly underripe or taste a bit more tart, I recommend increasing the sugar by an additional 1/4 cup to achieve optimal balance.
Almond Extract: Typically, I am not a fan of almond flavor in desserts and often omit it from recipes. However, in this cherry pie recipe, that small 1/4 teaspoon of almond extract is truly magical! It adds a wonderfully complementary depth of flavor to the cherries that elevates the entire pie. Please do not leave it out!
Tapioca Flour/Cornstarch Thickener: I prefer a nicely firm, sliceable cherry pie filling. After extensive experimentation, I’ve found that this specific combination of tapioca flour with a small amount of cornstarch yields the absolute best texture – perfectly set without being cloudy, gummy, or globby. Tapioca flour (also known as tapioca starch) is increasingly easy to find in the baking aisle of most well-stocked grocery stores (look for brands like Bob’s Red Mill) or in stores with bulk bins; it’s also readily available for online ordering. As an alternative, you can finely grind minute tapioca or other tapioca pearls.
Make-Ahead & Storage: This pie can be prepared from start to finish and cooled 1-2 days in advance. Ensure it is covered well and stored at room temperature. To reheat, warm individual slices in the microwave or place the entire pie in a 250-degree F (120-degree C) oven for 10-15 minutes until warmed through. I have not attempted to freeze either the unbaked or baked pie.
Recommended Products
Recipe Source: Adapted from Mel’s Kitchen Cafe