
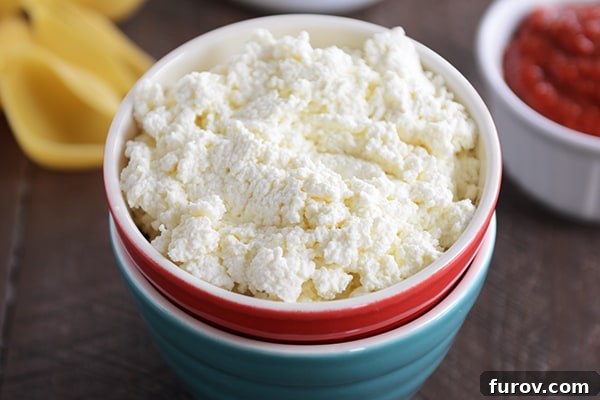
Unlock the secret to incredibly creamy homemade ricotta cheese in under an hour! This step-by-step tutorial reveals just how simple it is, promising results that will redefine your appreciation for fresh dairy.
How to Make Creamy Homemade Ricotta Cheese in Under an Hour
Prepare to embark on a culinary journey that might just change your perspective on cheese forever. While the thought of making cheese from scratch might seem daunting, crafting your own creamy homemade ricotta cheese is remarkably straightforward. However, a fair warning: once you experience the superior taste and velvety texture of freshly made ricotta, returning to the often-gritty, denser store-bought alternatives may become a challenge. But rest assured, this isn’t a bad thing—it’s an upgrade!
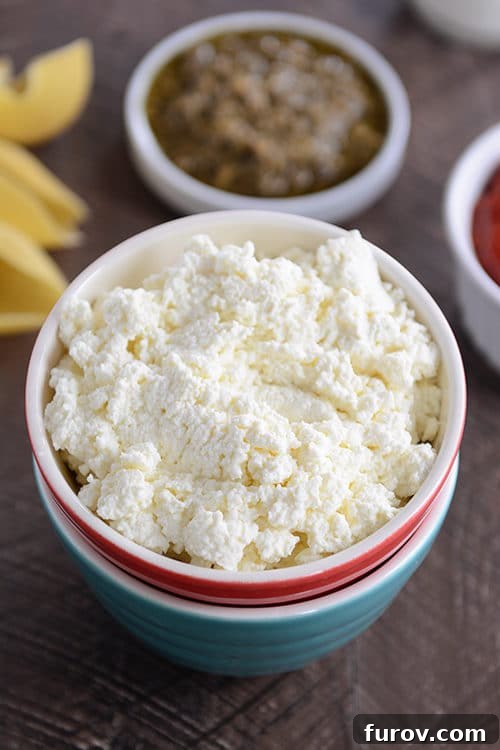
Why You’ll Fall in Love with Homemade Ricotta
I know what you might be thinking: another elaborate kitchen project? Not at all! My enthusiasm for teaching you this skill stems from two core beliefs:
- Firstly, purchasing store-bought ricotta is perfectly fine and convenient. There’s no judgment here! We all have busy lives, and convenience has its place.
- Secondly, making fresh ricotta from scratch is genuinely easy. We’re talking about a process with minimal steps and ingredients, yielding a product so exquisite you’ll wonder why you hadn’t tried it sooner. Forget complex recipes; this is truly an “easy” endeavor, not one that secretly demands obscure ingredients or professional chef skills.
If you’ve ever ventured into making homemade yogurt, you’ll be delighted to hear that making ricotta cheese is significantly faster and simpler. Much of the process involves passive waiting as the magic unfolds right before your eyes. It’s a rewarding culinary experience with minimal effort.
The Unbeatable Taste and Texture of Fresh Ricotta
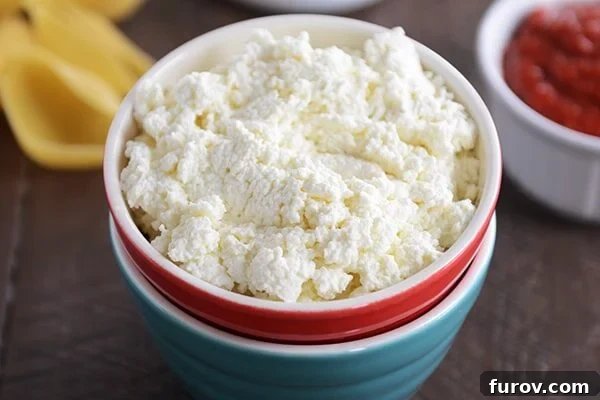
While I don’t always make ricotta for every single recipe, every time I do, I’m reminded of its incomparable quality. The difference in taste and texture between homemade and even the best whole-milk store-bought ricotta is astounding. Homemade ricotta cheese boasts an unparalleled creaminess that is simply divine. It’s smoother, richer, and has a delicate, milky flavor that enhances any dish it graces. And for an extra touch of luxury? If you give your strained and chilled ricotta a quick whirl in a blender, it transforms into an almost ethereal, lusciously soft, and spreadable consistency that is pure bliss.
Consider this an exciting prelude to upcoming culinary adventures. Having a batch of this readily available might just be the best decision you make this week. Trust me on this—your taste buds will thank you!
Essential Equipment for Ricotta Making
You don’t need a lot of specialized gear to make ricotta cheese at home, but a few key tools will make the process smoother and more successful:
- Medium to Large Pot: For heating your milk and cream.
- Sturdy Spoon: For stirring.
- Instant-Read Thermometer: This is a game-changer! It eliminates all guesswork regarding temperature, ensuring your milk reaches the perfect 180°F for optimal curdling. Highly recommended for consistent results.
- Colander: To hold your straining material.
- Straining Material:
- Cheesecloth: A double layer of good quality cheesecloth works perfectly.
- Nut Milk Strainer Bag: This is my preferred method! It’s incredibly efficient, easy to use, and cleans up beautifully for reuse. It holds the curds well and allows the whey to drip freely.
- Coffee Filters: If you’re in a pinch, several large coffee filters can be staggered inside a colander.
- Large Bowl: To collect the valuable whey during straining.
Homemade Ricotta Cheese Recipe
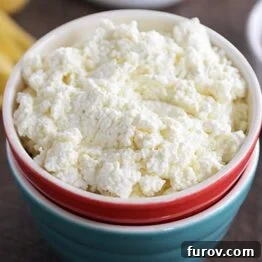
Homemade Ricotta Cheese
Yield: 8 Servings (approximately 2 cups of ricotta)
Prep Time: 40 minutes
Cook Time: 10 minutes
Total Time: 50 minutes
Author: Mel
Course: Side Dish
Cuisine: Italian
Method: Stovetop
Ingredients
- 8 cups milk (2% or above for the creamiest ricotta)
- 1 cup heavy cream
- 1 teaspoon coarse kosher salt
- ⅓ cup distilled white vinegar
Instructions
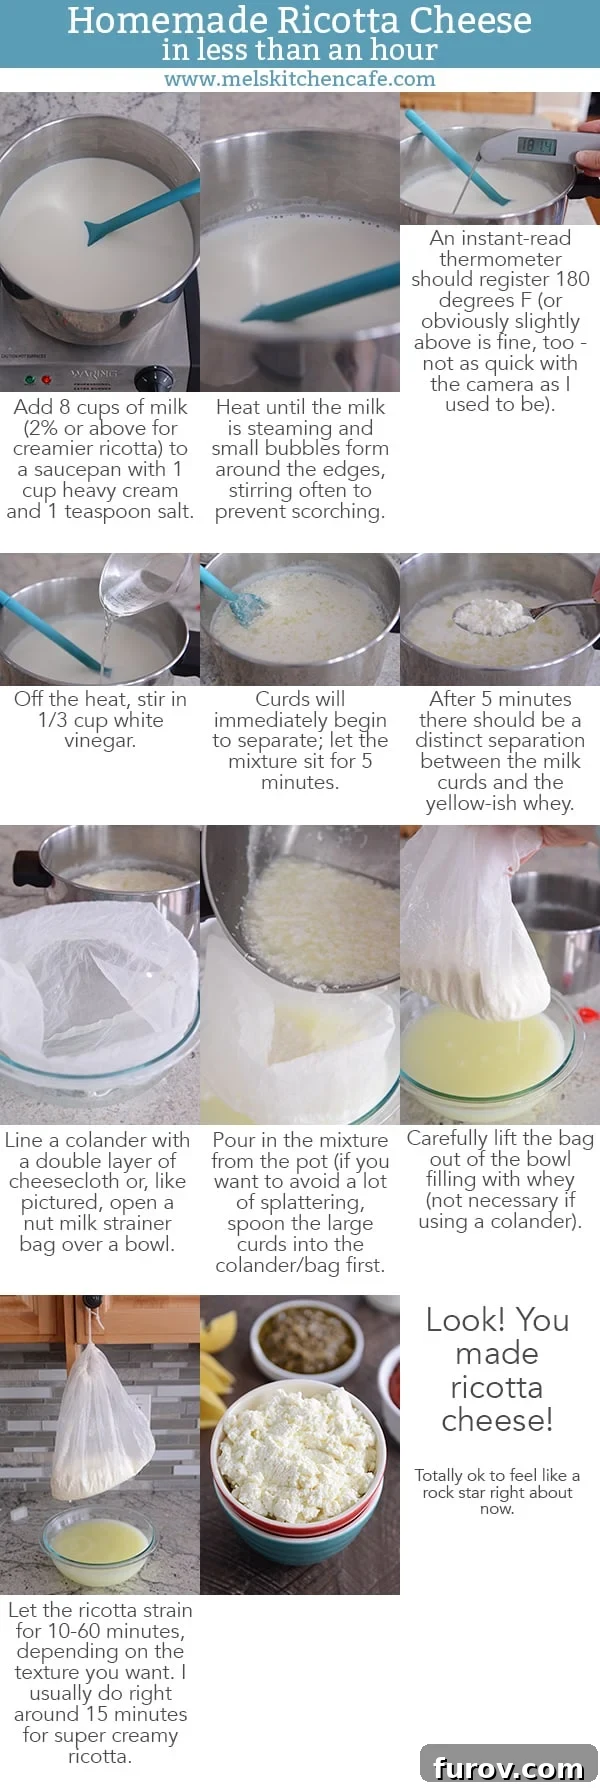
- Combine Ingredients and Heat: In a medium-sized pot, combine the milk, heavy cream, and coarse kosher salt. Place the pot over medium heat. Stir occasionally to prevent the milk from scorching on the bottom. You can increase the heat slightly to speed up the process, but if you do, ensure you stir more attentively and constantly. Continue heating until the milk is steaming gently, just below a simmer, and registers 180°F (82°C) on an instant-read thermometer.
- Curdle the Milk: Once the milk reaches the target temperature, remove the pot from the heat. Stir in the distilled white vinegar. You will notice almost immediately that the milk begins to separate into curds (solids) and whey (liquid). Let this mixture sit undisturbed for 5 to 10 minutes to allow the curds to fully form and separate.
- Prepare for Straining: While the curds are forming, line a colander with a double layer of cheesecloth, or position a nut milk strainer bag over a large bowl. The bowl is crucial for collecting the nutrient-rich whey.
- Strain the Ricotta: Carefully spoon the large curds into your prepared colander or nut milk bag first, which helps prevent splatters. Then, gently pour the remaining mixture (smaller curds and whey) into the colander. If using a nut milk bag, carefully lift it out of the bowl and hang it securely, allowing it to drip into the bowl.
- Achieve Desired Texture: Let the ricotta strain for anywhere from 10 to 60 minutes, depending on the desired texture. For a wonderfully creamy, spreadable ricotta, I typically strain it for about 15 minutes. For a firmer ricotta suitable for baking (like in lasagna), you might extend the straining time to 30-60 minutes.
- Enjoy or Store: Scrape the freshly made ricotta out of the colander or bag. It’s now ready to be used immediately in your favorite dishes, or you can refrigerate it in an airtight container for up to a week.
Notes for Success
Milk Choice: I’ve experimented with various milk types and found that using 2% milk or higher, especially whole milk combined with heavy cream, yields the creamiest and most flavorful ricotta. While I’ve made it with 1% milk, lower-fat milks (like skim or non-dairy alternatives) may not separate as effectively into distinct curds and whey, resulting in a lower yield and less creamy texture. Feel free to adjust the milk and cream ratio to suit your preference, but for optimal results, stick to the recipe.
Don’t Discard the Whey!: The liquid that drains from the curds, known as whey, is a valuable byproduct! It’s packed with nutrients and can be used in numerous ways. I frequently substitute whey for buttermilk in pancakes, or use it instead of water in my homemade bread recipes. It adds a subtle tang and moisture. You can also use it in smoothies, soups, or even to water your plants.
Nutrition Facts
Serving: 1 Serving, Calories: 204kcal, Carbohydrates: 13g, Protein: 9g, Fat: 13g, Saturated Fat: 8g, Cholesterol: 53mg, Sodium: 406mg, Sugar: 12g
(Nutritional information is an estimate based on the ingredients listed and may vary.)
Recommended Products
These are helpful tools to make your ricotta-making experience even better:
- Cookware (a good quality pot)

- Wooden Spoon
- Over-the-Sink Colander
- Instant-Read Thermometer
- Nut Milk Strainer Bag or quality cheesecloth
Tips for the Best Homemade Ricotta Cheese
- Temperature is Key: Don’t rush the heating process. Bringing the milk slowly to 180°F allows for even heating and better curd formation. Using an instant-read thermometer is your best friend here.
- Gentle Stirring: While heating, stir just enough to prevent scorching. Aggressive stirring can prevent proper curd formation.
- Avoid Boiling: Never let the milk come to a rolling boil before adding the acid, as this can lead to tougher curds.
- Acid Alternatives: While white vinegar is fantastic and neutral in flavor, you can also use fresh lemon juice. Note that lemon juice might impart a very subtle lemony tang, which can be lovely in certain applications. Approximately ¼ cup of lemon juice can be substituted for the vinegar.
- Don’t Squeeze the Curds: Resist the urge to squeeze the cheesecloth or nut milk bag to speed up straining. This can make your ricotta dry and crumbly. Let gravity do its work for that beautifully creamy texture.
- Chill for Flavor: For best flavor and texture, especially if you plan to blend it, chill your ricotta for at least an hour before serving.
Creative Ways to Enjoy Your Fresh Ricotta
Once you have a batch of luscious homemade ricotta, the possibilities are endless. Its mild, creamy flavor makes it incredibly versatile for both sweet and savory dishes:
Savory Ideas:
- Pasta Dishes: The classic choice! Layer it in lasagna, mix it into ravioli filling, or dollop it onto any pasta with tomato sauce.
- Spreads & Dips: Mix with herbs, garlic, salt, and pepper for a delicious bruschetta topping or a dip for crackers and vegetables.
- Stuffed Vegetables: Use it as a filling for bell peppers, zucchini, or mushrooms.
- Savory Tarts & Galettes: Spread a layer on pastry dough before adding other fillings.
- Pizza Topping: A dollop of fresh ricotta adds a wonderful creamy element to any pizza.
Sweet Ideas:
- Fruit & Honey: A simple, elegant dessert. Spoon ricotta into a bowl, drizzle with honey, and top with fresh berries or sliced peaches.
- Cannoli: While this recipe is for a fresh ricotta, it can be seasoned and used in cannoli (though traditionally cannoli use a firmer ricotta from whey).
- Pancakes & Waffles: Fold ricotta into your pancake or waffle batter for incredibly fluffy and moist results.
- Cheesecake: While often made with cream cheese, ricotta can lend a lighter, tangier profile to some cheesecakes.
- Ricotta Toast: Spread thickly on toasted bread, then add sweet toppings like jam, fruit, or cinnamon sugar.
Storing Your Homemade Ricotta
Proper storage is essential to keep your fresh homemade ricotta at its best. Once strained, transfer the ricotta to an airtight container. It will keep well in the refrigerator for up to 5-7 days. Always use a clean spoon to scoop it out to avoid introducing bacteria that could shorten its shelf life.
Frequently Asked Questions About Homemade Ricotta
Q: Can I use skim or low-fat milk?
A: While technically possible, using skim or low-fat milk will result in a much smaller yield of curds and a less creamy, sometimes grainy, ricotta. For the best flavor and texture, I highly recommend using 2% or whole milk, and don’t skip the heavy cream!
Q: My milk isn’t curdling. What went wrong?
A: The most common reasons for milk not curdling are:
- Temperature: The milk might not have reached the critical 180°F (82°C) or higher. Use an instant-read thermometer to ensure accuracy.
- Acid Amount: You might need a tiny bit more vinegar (or lemon juice). Add another teaspoon at a time, stir gently, and wait a few minutes.
- Type of Milk: Some ultra-pasteurized milks can be more resistant to curdling, though it’s rare with this method.
Q: Is this “real” Italian ricotta?
A: Traditional Italian ricotta, meaning “re-cooked,” is typically made from the whey left over from making other cheeses (like mozzarella or provolone). The whey is heated again, and the remaining proteins (mostly albumin) coagulate into a fine, delicate curd. This recipe, while yielding a delicious and similar product, uses fresh whole milk and cream, making it more akin to a fresh dairy cheese or a “ricotta-style” cheese. It’s an incredibly easy and accessible way to achieve a fresh, creamy cheese at home!
Q: How can I adjust the saltiness?
A: The recipe calls for 1 teaspoon of coarse kosher salt, which results in a balanced flavor. You can reduce it to ¾ teaspoon for a less salty ricotta, or increase it to 1 ¼ teaspoons if you prefer it more seasoned. You can also add more salt to the finished product, so it’s safer to start with less.
Conclusion
Embarking on the journey of making homemade ricotta cheese is a rewarding experience that elevates your culinary skills and brings incredible freshness to your table. This simple, hour-long process yields a creamy, flavorful cheese far superior to anything you’ll find in a grocery store. Whether you’re a seasoned chef or a kitchen novice, this recipe is accessible, enjoyable, and guarantees a delicious outcome. So, gather your ingredients, set aside an hour, and prepare to be amazed by the magic of fresh ricotta. Enjoy!