
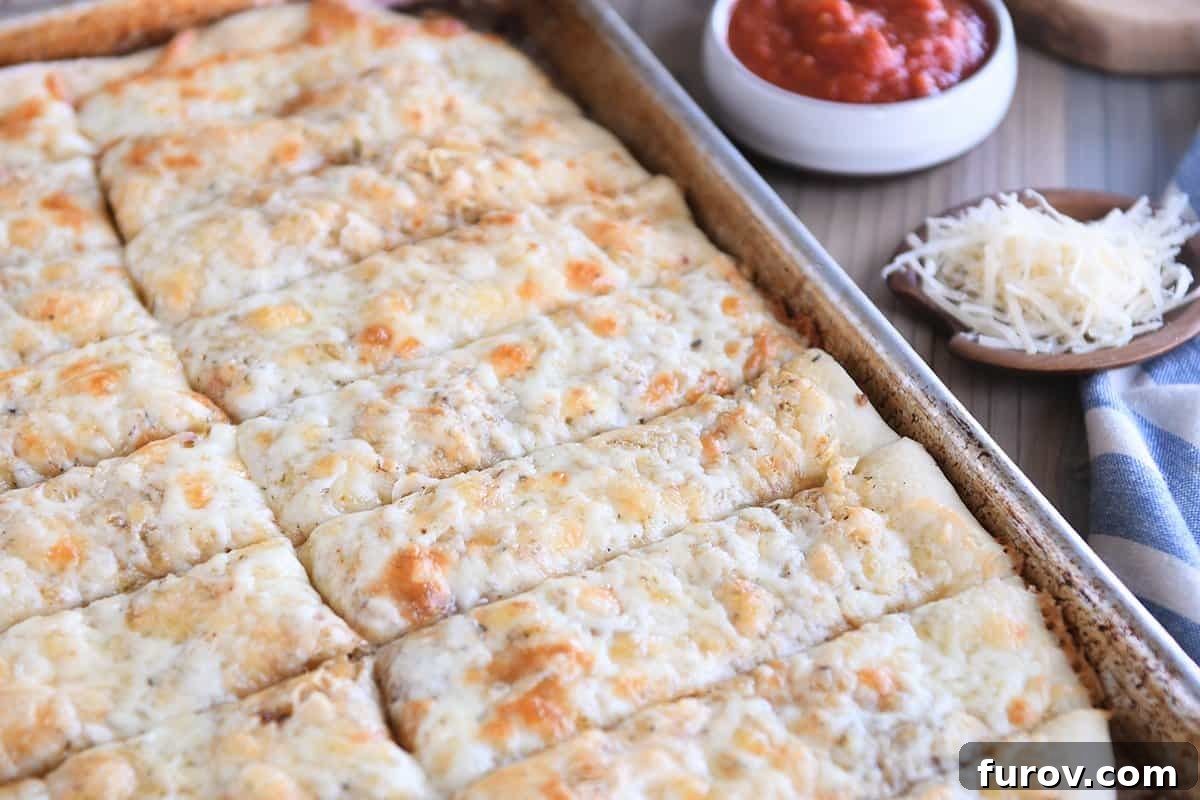
Experience the ultimate comfort food with these incredibly easy and undeniably delicious cheesy breadsticks! Forget complicated recipes or the need for a stand mixer – this simple dough comes together by hand. Topped with a savory garlicky, cheesy blend, these breadsticks are a true culinary delight, promising to become a go-to favorite for any occasion. Prepare yourself for an irresistible treat that will vanish moments after it emerges from the oven.
The timeless combination of warm, fluffy carbs and melted, savory cheese is a universal love language, and these glorious homemade breadsticks speak volumes. From family dinners to impromptu gatherings, or simply as a satisfying snack, these garlicky, cheesy breadsticks are crafted to perfection and guaranteed to disappear quickly. They’re dangerously simple to whip up, requiring minimal effort for maximum flavor, making them an ideal choice for both seasoned bakers and kitchen novices. And when paired with a generous bowl of your favorite marinara sauce? Pure bliss, making them utterly irresistible.
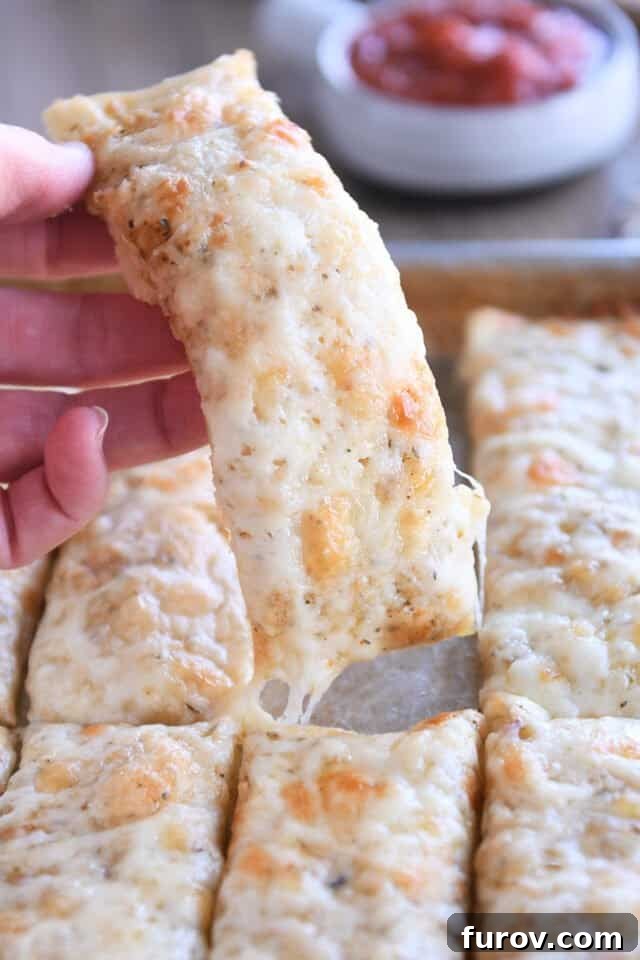
Effortless Homemade Breadsticks: The Secret to a Perfect Dough
The foundation of these outstanding cheesy breadsticks lies in a remarkably simple dough. You won’t need any fancy equipment; a large bowl and your own two hands are all it takes. This dough recipe is a streamlined adaptation of a highly popular, beloved breadstick formula, ensuring a reliable and delicious result every time. Its straightforward nature makes it incredibly approachable, proving that homemade doesn’t have to mean complicated. The magic truly begins the moment you combine a few basic ingredients to form this pliable, forgiving dough.
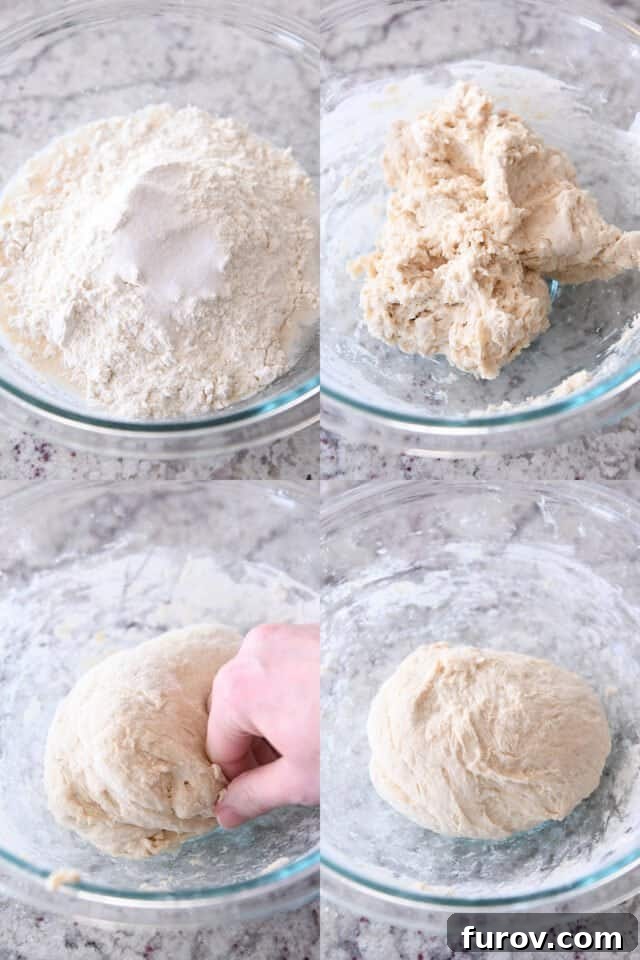
Once your ingredients are stirred together and a shaggy ball of dough begins to form, it’s time to get hands-on. Ditch your spoon or spatula and perform a quick, satisfying knead right there in the bowl. Just 15-20 gentle turns with your hands are enough to bring the dough together, developing its gluten structure without overworking it. Don’t strive for absolute perfection; a few bumps and a rustic texture are perfectly acceptable. The goal isn’t a flawless exterior at this stage, but rather a delicious, amazing breadstick at the finish line, and the most challenging part (which isn’t really that challenging!) is already behind you.
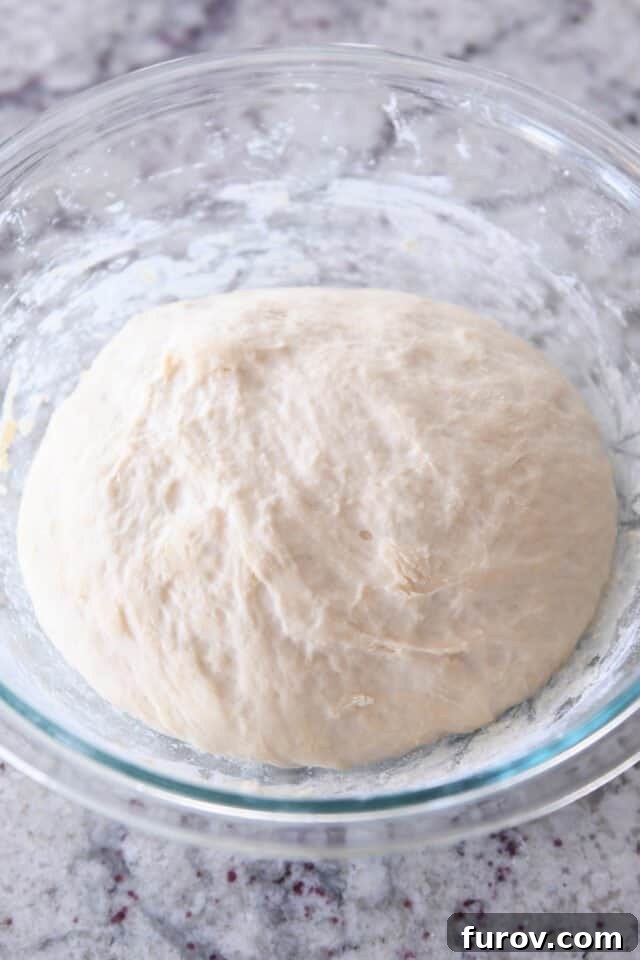
After a brief kneading, allow your dough to rest and rise for a mere 15-20 minutes. During this short period, you’ll observe it transform, becoming noticeably puffy and softer. While it might not double in size like some traditional bread doughs, a visible puffiness indicates that the yeast is active and working its magic. This quick rise contributes to the breadsticks’ tender, chewy texture without requiring hours of waiting, making this recipe ideal for when cravings strike and you need a fast, flavorful fix. The simplicity of this step ensures you’re on your way to homemade deliciousness in no time.
Crafting Your Cheesy Masterpiece: Step-by-Step Breadstick Assembly
Transforming that delightful lump of puffy dough into a sheet of magical, cheesy breadsticks is an artfully easy process. Each step is designed for simplicity, ensuring a rewarding baking experience that culminates in golden, savory perfection. From preparing your pan to the final sprinkle of cheese, you’re just a few simple actions away from indulging in warm, homemade goodness. This hands-on process is not only straightforward but also incredibly satisfying, bringing the aroma of freshly baked bread and melted cheese into your kitchen.
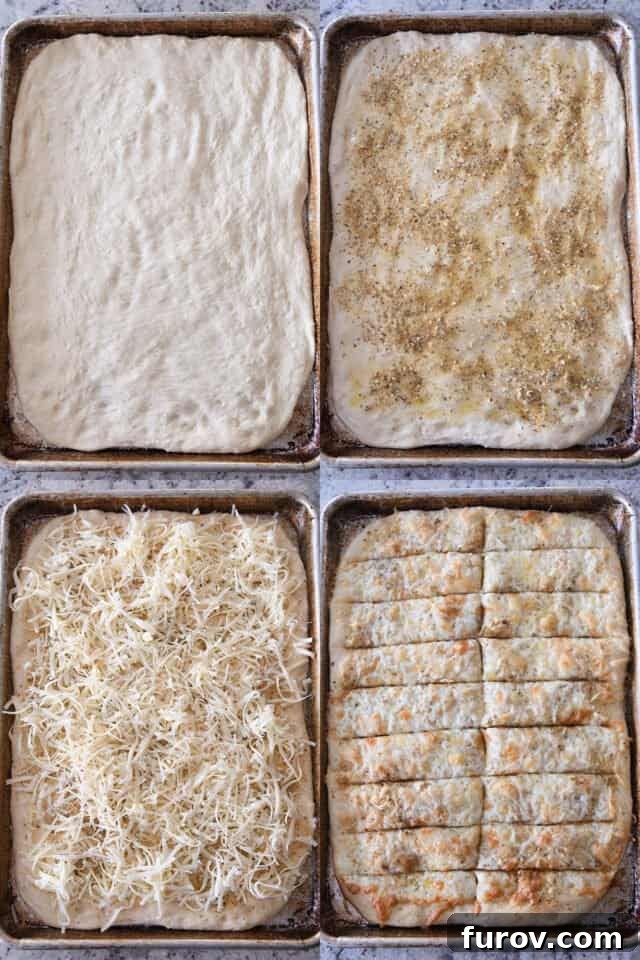
- **Prepare Your Pan:** Lightly grease a half sheet pan (for us home cooks, that’s typically an 11×17-inch rimmed baking sheet) using nonstick cooking spray or a brush of melted butter. This crucial step prevents sticking and helps achieve that desirable golden-brown bottom.
- **Shape the Dough:** Gently press the risen dough into a mostly even rectangular shape across the bottom of the prepared pan. Aim for an even thickness to ensure uniform baking. If the dough resists, let it rest for a few minutes to relax the gluten, then continue pressing.
- **The Flavor Base:** Liberally brush the dough with a generous amount of melted butter or olive oil. Seriously, do not skimp on this step – it’s key to a rich, moist breadstick. This layer acts as a perfect canvas for the seasonings and helps fuse them with the dough.
- **Season with Savor:** Evenly sprinkle your chosen garlic and herb seasonings over the buttery dough. This aromatic blend is what gives these breadsticks their signature savory depth and irresistible fragrance.
- **Pile on the Cheese:** Now for the best part! Add a lavish amount of shredded cheese. We recommend a blend of mozzarella for its amazing melt and stretch, and Parmesan for its sharp, salty kick. Don’t be shy; more cheese equals more deliciousness!
- **Bake to Golden Perfection:** Transfer your cheese-topped dough to a preheated oven and bake until it achieves a beautiful golden hue, and the cheese is wonderfully melted, bubbly, and slightly caramelized at the edges.
- **Slice and Serve:** Once baked, carefully remove the sheet from the oven and slice the large cheesy slab into cute, inviting breadsticks. Whether you prefer thick or thin, uniform or rustic, each piece will be a savory delight.
- **Embrace the Indulgence:** At this point, abandon any pretense of moderation. These breadsticks are designed for enjoyment, so forget the idea of eating just one. They’re meant to be savored, shared (if you can bear to), and enjoyed wholeheartedly!
The Optimal Bake: Decoding Baking Stones and Baking Sheets
Achieving that perfectly crispy bottom and evenly baked interior for your breadsticks was a key focus during extensive recipe testing. We experimented with various methods to ensure a consistently superior result. The coveted “blog worthy” taste test, a rigorous evaluation process that asks, “Would I serve this to my closest friends or my fiercest critics?” was confidently passed by breadsticks baked on a preheated baking stone. A baking stone, like the one from King Arthur Baking, effectively mimics a brick oven, retaining and radiating heat to create an ideal baking environment for crusty, chewy bread.
Pro Tip for Home Bakers: If a dedicated baking stone isn’t part of your kitchen arsenal, do not despair! A simple and effective alternative is to preheat an inverted (upside-down) baking sheet in your oven. This clever trick provides a similar heat-retaining surface, distributing heat evenly to the breadsticks and helping you achieve that wonderfully golden and slightly crisp bottom crust. Just make sure it’s a sturdy metal sheet that can withstand high temperatures.
Even without a baking stone or an extra baking sheet to invert, you can still produce truly excellent results. Simply preheat your oven to 425 degrees F and place the baking sheet containing your breadsticks on the lowest rack. The direct heat from the bottom element will help crisp up the crust beautifully, ensuring your breadsticks are cooked through and through with a delightful texture. The secret is to let whatever baking surface you use get thoroughly hot before the breadsticks go in.
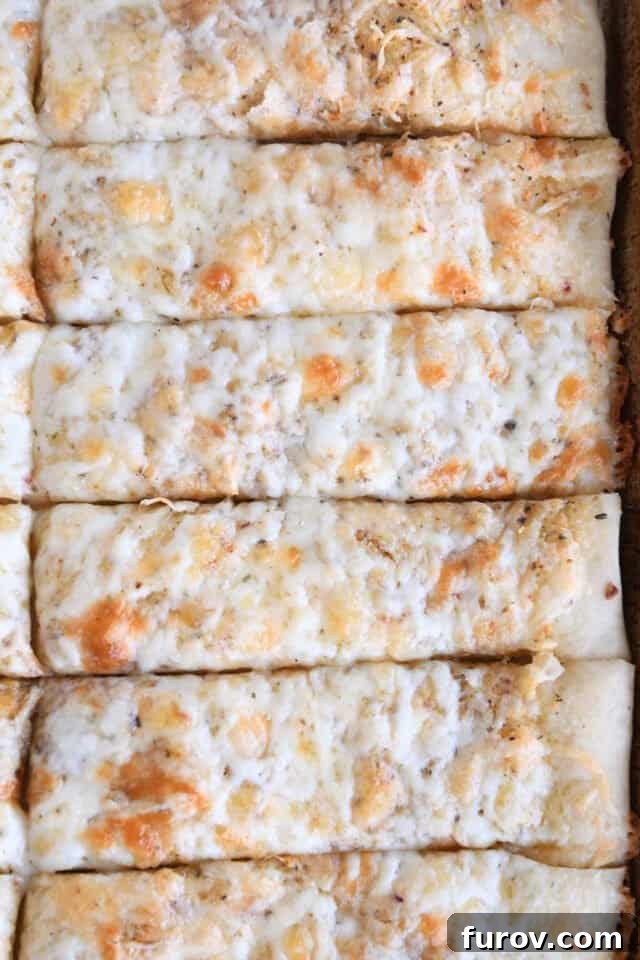
The moment these breadsticks emerge from the oven, they are truly a sight to behold and a treat for the senses. The harmonious blend of rich, buttery flavors, robust garlic, and fragrant herbs creates an aromatic profile that’s simply irresistible. This savory symphony is perfectly complemented by the melted, bubbly cheese, forming a golden crust that gives way to a soft, chewy interior. Each bite offers a heavenly combination of textures and tastes, making these breadsticks incredibly addictive and deeply satisfying. They represent the pinnacle of comfort food, easy to make yet utterly gourmet in experience.
These versatile easy cheesy breadsticks can elevate a wide variety of meals or stand proudly on their own. Serving them with a steaming bowl of marinara sauce for dipping is a classic choice, and one we heartily endorse – yes, please! But their utility extends far beyond. They are perfect as a substantial lunch item (truly, they can be the main event!), a crowd-pleasing appetizer for parties, or a delightful side dish to pasta, salads, or soups. My own children regularly clamor for any leftovers, eagerly packing them into their school lunches, a testament to their enduring appeal even hours after baking. They’re a guaranteed hit with all ages, proving their status as a household favorite. There are indeed countless reasons to adore and repeatedly make these phenomenal breadsticks.
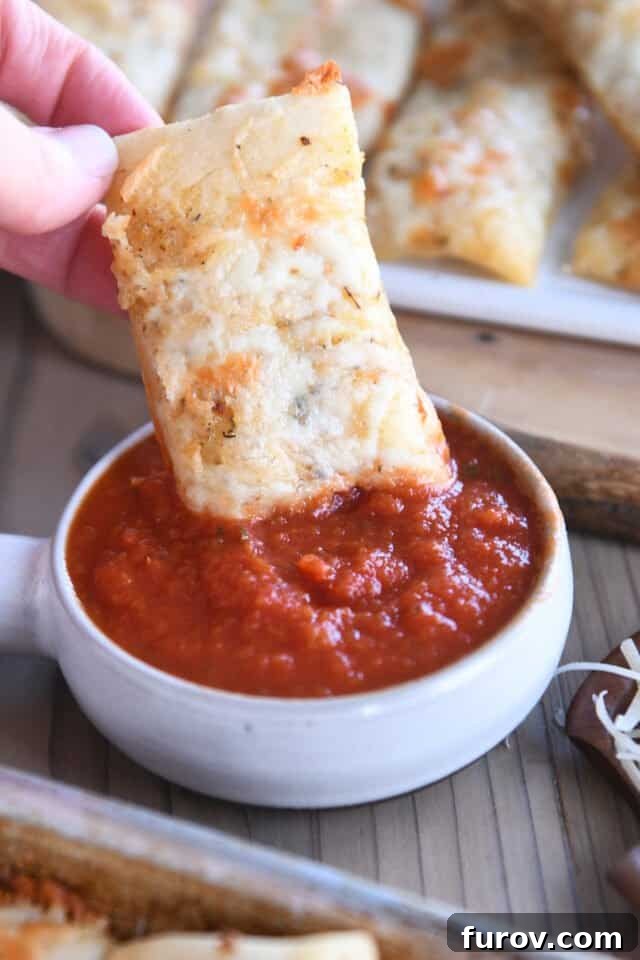
Developing this cheesy breadstick recipe for the site has been a long-held aspiration, a culinary quest spanning many months. It took numerous variations and relentless refining, particularly in perfecting the dough’s ideal thickness, to arrive at this flawless rendition. However, every minute of testing and every ingredient adjustment was unequivocally worth the wait. The journey was filled with delicious “research” and constant refinement, ensuring that the final recipe was nothing short of perfection. The best part? Not a single soul, and I repeat, not a single soul, uttered a complaint about the abundance of cheesy breadsticks lingering after multiple recipe tests. This includes myself, who may have been responsible for at least one entire recipe testing session going completely unnoticed by the children because, upon their return from school, there were simply no breadsticks to be found. A mystery, perhaps, but a delicious one! What can I say? These babies are simply ultra-yummy, a testament to the effort put into making them just right for you.
One Year Ago: Easy Yogurt Flatbread
Two Years Ago: Lemon Bar White Chocolate Brownies
Three Years Ago: Easy Choco-Banana Bars
Four Years Ago: Extra Fudgy Brownies {One Bowl!}
Five Years Ago: The Best White Sandwich Bread
Six Years Ago: Mexican Chopped Salad with Cilantro Lime Vinaigrette
Seven Years Ago: Shepherd’s Pie
Eight Years Ago: Incredible Chocolate Pudding {Dairy, Egg and Gluten Free}
Nine Years Ago: How to Cook Perfect Brown Rice
Ten Years Ago: Smoked Salmon Chowder
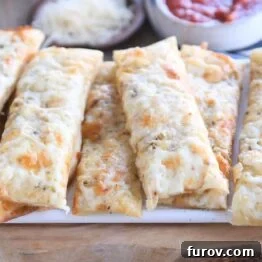
Easy Cheesy Breadsticks
18 breadsticks
1 hr 20 mins
15 mins
1 hr 35 mins
Pin
Rate
Save
Ingredients
- 1 cup warm water
- 2 teaspoons instant or active dry yeast
- 1 teaspoon sugar
- 1 teaspoon salt
- 2 to 2 ¼ cups all-purpose or bread flour
- 2 tablespoons melted butter or olive oil
- 1 tablespoon garlic herb seasoning (see note)
- 1 ½ to 2 cups shredded mozzarella cheese
- ½ cup shredded Parmesan cheese
Instructions
- Preheat the oven to 425 degrees F (220°C). Place a baking stone on a rack in the lower third of the oven. If you don’t have a baking stone, use an inverted half sheet pan. If neither option is available, bake the breadsticks directly on the lowest rack in the oven. Allow the baking stone/baking sheet to heat at 425 degrees F for at least 15-20 minutes before baking the breadsticks.
- In a large bowl, combine the warm water, yeast, and sugar. Stir gently and let it sit for 3-4 minutes until it becomes foamy, indicating the yeast is active.
- Add the salt and flour to the foamy yeast mixture. Stir until the ingredients come together and form a shaggy ball of dough. The dough should feel soft and slightly sticky, but not overly wet or soupy.
- Knead the dough by hand, directly in the bowl, for about 15-20 times. If the dough is too sticky, lightly grease your hands or add an additional tablespoon of flour at a time, being careful not to over-flour. The dough should remain soft and pliable.
- Shape the kneaded dough into a neat ball, cover the bowl, and let it rise for 15-20 minutes. The dough should become noticeably puffy during this time.
- Lightly grease a half sheet pan with nonstick cooking spray or brush it with melted butter to prevent sticking.
- Transfer the risen dough from the bowl to the prepared sheet pan. Gently stretch and press the dough evenly into a large rectangle, covering the bottom of the pan. If the dough springs back or is difficult to spread, let it rest for 10-15 minutes to allow the gluten to relax, then continue pressing.
- Brush the entire surface of the pressed dough with the two tablespoons of melted butter or olive oil. Generously sprinkle the garlic herb seasonings over the buttery dough.
- Evenly distribute the shredded mozzarella cheese over the seasoned dough, followed by the shredded Parmesan cheese.
- You can bake the breadsticks immediately for a slightly denser texture, or for slightly puffier breadsticks, let the dough rest on the sheet pan for an additional 10-15 minutes before baking.
- Carefully place the sheet pan with the breadsticks directly onto the preheated pizza stone or inverted baking sheet in the oven. Bake for 15-17 minutes, or until the breadsticks are beautifully golden brown and the cheese is melted and bubbly.
- Once baked, remove from the oven. Using a pizza cutter or sharp knife, cut the large breadstick slab in half lengthwise (the long way), then slice into individual strips to yield approximately 18 breadsticks in total. Serve warm and enjoy!
Notes
Proofing the Yeast: While some recipes allow direct mixing of all dough ingredients, we’ve found that giving the yeast a brief proofing period (letting it get foamy in warm water for a few minutes) before adding the salt and flour significantly helps, especially with this recipe’s shorter rising time. This kick-starts the yeast, ensuring your breadstick dough rises beautifully and achieves that desirable puffy texture. It’s a small step that yields big results!
Mel Gunnell
Bread, Appetizer, Side Dish
American, Italian
Bake
Calories: 115kcal
Carbohydrates: 13g
Protein: 5g
Fat: 5g
Saturated Fat: 2g
Cholesterol: 9mg
Sodium: 234mg
Fiber: 1g
Sugar: 1g