
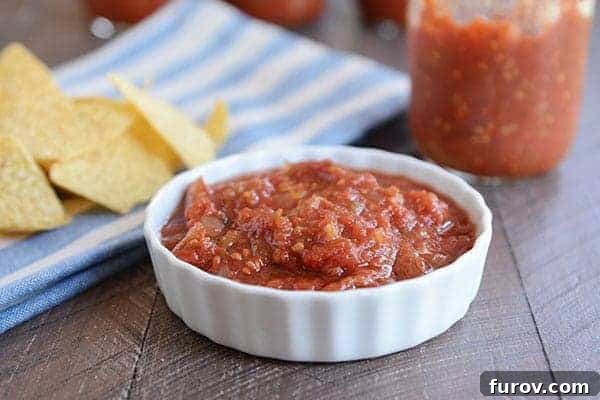
With over 2,000 glowing 5-star reviews, this isn’t just a salsa recipe—it’s the best homemade salsa you’ll ever create. Whether you crave the vibrant taste of fresh salsa or wish to preserve the flavors of summer all year long, this recipe delivers. Our comprehensive, step-by-step canning guide ensures your homemade salsa is not only delicious but also perfectly safe for shelf-stable storage, allowing you to stock your pantry with jars upon jars of this incredible condiment.
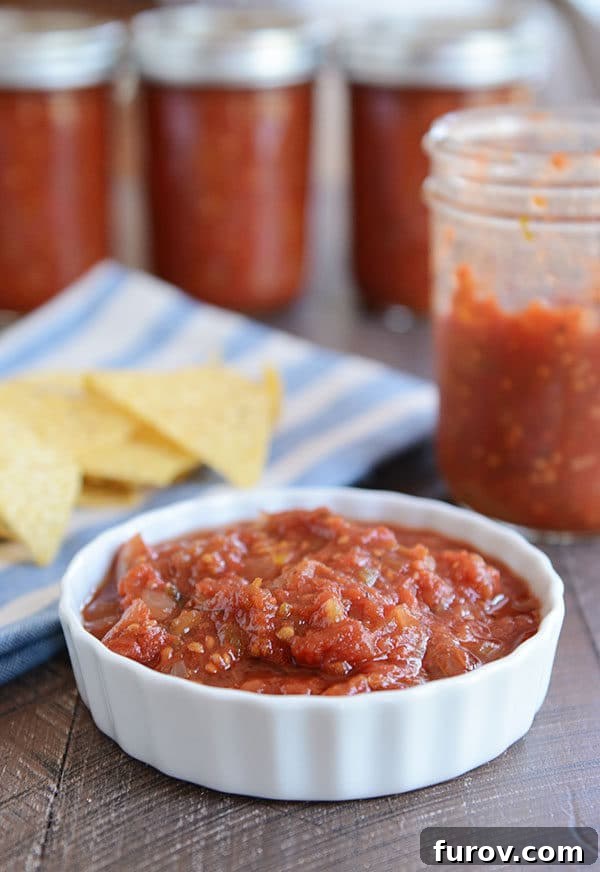
The Ultimate Homemade Salsa Recipe: Fresh or Canned for Year-Round Enjoyment
There’s nothing quite like the taste of garden-fresh tomatoes transformed into a rich, zesty salsa. This recipe goes beyond just flavor; it provides a reliable, tested method for making delicious homemade tomato salsa that can be enjoyed immediately or safely preserved through home canning. Forget store-bought options; once you experience the vibrant taste and satisfying texture of this salsa, you’ll be hooked. It’s perfect for dipping with tortilla chips, topping tacos, enhancing grilled meats, or simply adding a burst of flavor to any meal.
Making your own salsa allows for complete control over the ingredients, ensuring you use only the freshest produce and avoid unwanted additives. Plus, with our detailed canning instructions, you can capture the peak flavor of your tomato harvest, turning it into a shelf-stable delight that lasts throughout the colder months.
Essential Ingredients for Your Perfect Homemade Tomato Salsa
When it comes to home canning, precision is key, especially concerning pH levels for safety. This recipe has been rigorously tested to ensure safe acidity. Therefore, it’s crucial to adhere strictly to the ingredient quantities listed below. Where variations are permissible without compromising safety, we’ve provided clear guidance.
- 10 cups peeled, chopped, and drained tomatoes: Any variety of ripe tomatoes will work beautifully. The most critical step here is to drain the tomatoes thoroughly after chopping them. This prevents a watery salsa. Measure your tomatoes *after* they have been peeled and drained for accuracy. Roma or paste tomatoes are often preferred for canning due to their meatier texture and lower water content, resulting in a thicker salsa, but any garden tomato can be used if properly drained.
- 3 cups chopped onion: Both white or yellow onions are suitable for this recipe. Onions add a foundational savory and slightly sweet flavor to the salsa.
- 1 ¾ cups chopped green bell pepper: Feel free to use any color of bell pepper you prefer, though green bell peppers offer a classic salsa flavor profile. It’s imperative not to increase the amount of bell peppers beyond 1 ¾ cups, as doing so could potentially alter the pH levels, impacting canning safety.
- 1 to 1 ¼ cups finely diced jalapeños: For those who love a bit of heat, leave the seeds and membranes intact. For a milder salsa, remove them. The quantity of jalapeños can be decreased according to your spice preference, but it should not be increased above 1 ¼ cups to maintain the tested safety parameters of the recipe.
- 7 cloves garlic, finely minced: Garlic is essential for that unmistakable depth of flavor. You can reduce the amount if you find 7 cloves too strong, but we recommend this amount for optimal taste.
- 2 ½ teaspoons ground cumin: Cumin adds a warm, earthy undertone that complements the other flavors beautifully, contributing to the authentic salsa experience.
- 2 ½ teaspoons coarsely ground black pepper: Freshly ground black pepper provides a sharper, more aromatic spice than pre-ground varieties, enhancing the overall flavor.
- 2 ½ tablespoons canning or pickling salt: This type of salt is recommended as it’s free of iodine and anti-caking agents, which can sometimes cloud canning liquids or alter flavors. If canning or pickling salt is unavailable, you can use coarse kosher salt. If experimenting with table salt, ensure it has no added iodine or other additives.
- ⅓ cup chopped fresh cilantro: Cilantro brightens the salsa with its fresh, herbaceous notes. Do not increase this amount for canning purposes. It can be omitted or reduced if you are not a fan of cilantro.
- ⅓ cup sugar: Sugar is entirely optional in this recipe. The amount needed will depend heavily on the natural sweetness of your tomatoes and your personal taste preference. A little sugar can help balance the acidity of the vinegar.
- 1 ¼ cups apple cider vinegar: The amount of acidity (vinegar) in this recipe is crucial for canning safety and MUST NOT be altered. You may, however, substitute a portion of the apple cider vinegar with bottled lemon or lime juice (not fresh). Be aware that this substitution will affect the final flavor. Many have found great success substituting half of the vinegar with bottled lime juice for an incredible flavor boost. DO NOT USE FRESH LEMON OR LIME JUICE, as its acidity is inconsistent and unreliable for safe canning.
- 16 ounces tomato sauce: This ingredient is mandatory for proper pH balance and safe canning. It is NOT optional, contrary to what some other recipes or reviewers might suggest. Its inclusion ensures the salsa remains within the safe acidity range for water bath or steam canning.
- 12 ounces tomato paste: Tomato paste primarily serves to thicken the salsa, giving it a richer consistency. This ingredient is OPTIONAL. You can add a reduced amount or omit it completely based on your desired thickness.
Mastering the Art of Tomato Preparation for Superior Salsa
The success of your homemade salsa, especially for canning, largely depends on how you prepare your tomatoes. Two crucial steps are peeling and draining. Peeling removes the tough skins, which can become chewy and undesirable in salsa, while also reducing the risk of bacterial contamination. Draining is vital to prevent a watery salsa, ensuring a thick, rich consistency that holds its own.
The Easiest Way to Peel Tomatoes
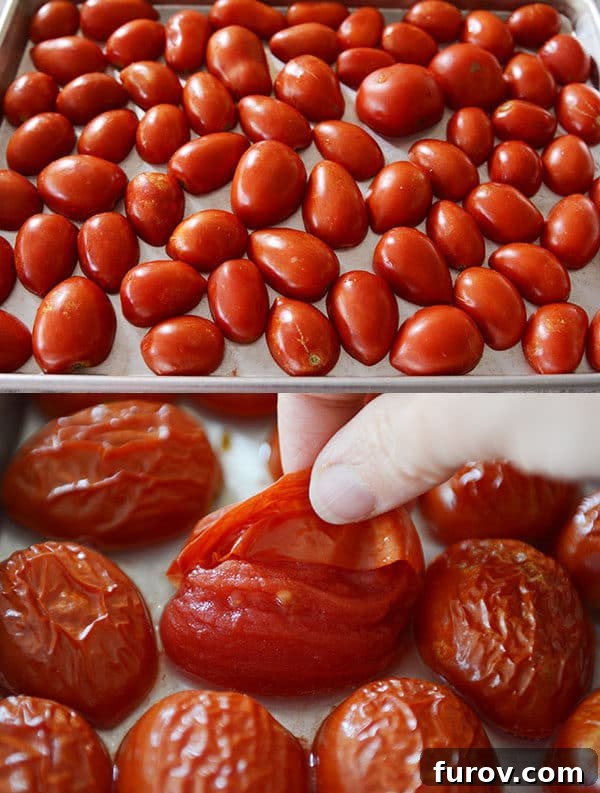
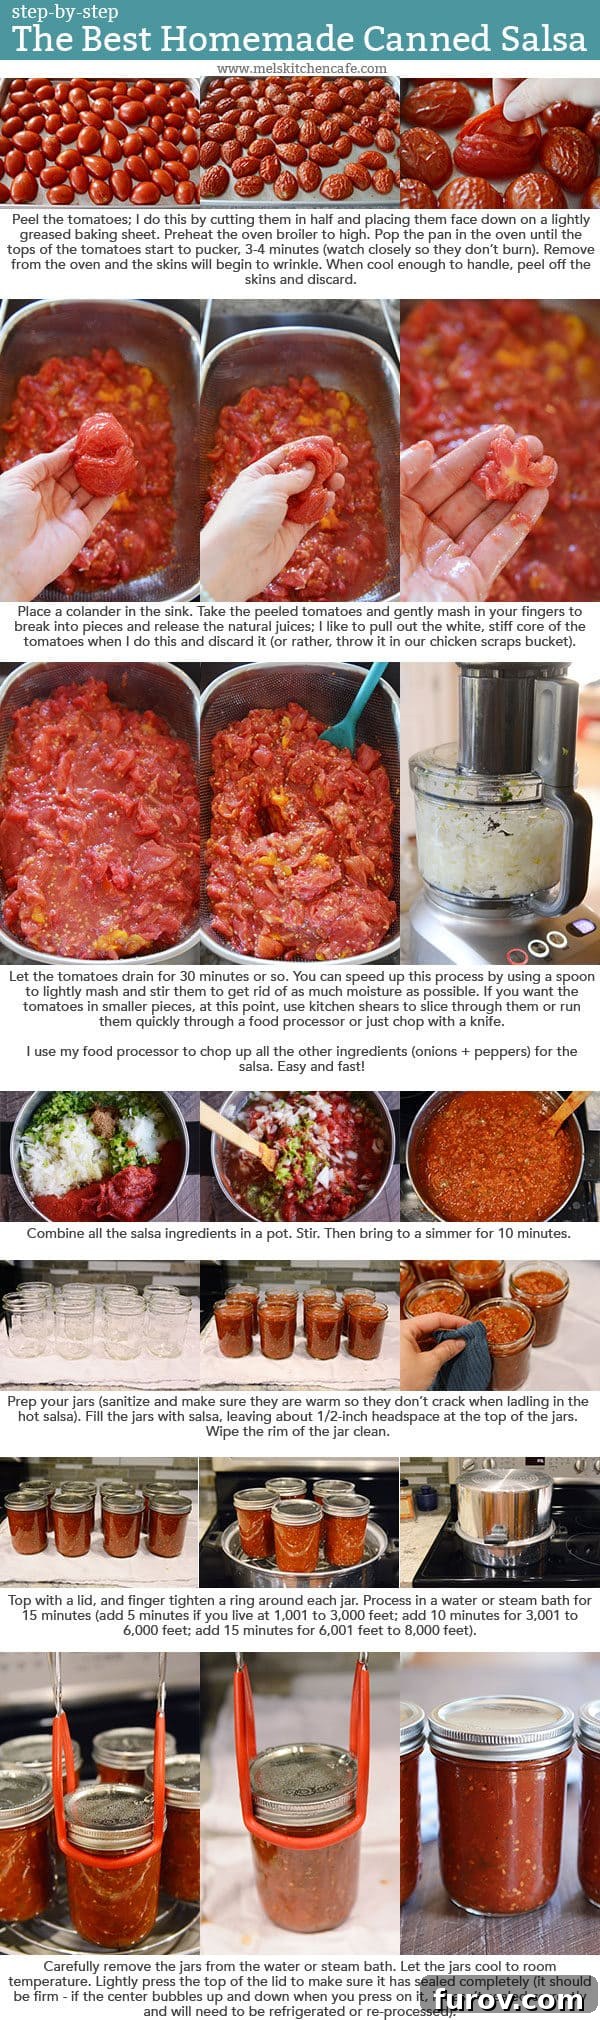
Forget the traditional, messy method of boiling and ice bathing tomatoes. Our preferred technique uses your oven broiler and is significantly faster and cleaner:
- Preheat your oven to broil and position an oven rack 8 to 10 inches away from the broiler element.
- Cut your tomatoes in half and arrange them cut-side down on a large baking sheet. Really cram them in there in a single layer.
- Place the baking sheet in the oven and broil for 3-4 minutes. Keep a very close eye on them! The tomatoes are ready when their skins begin to swell, look taut, and show slight bubbling.
- Once removed from the oven and as they cool, the tomato skins will wrinkle beautifully and peel off with remarkable ease. This method is incredibly efficient and makes cleanup a breeze compared to the hot water plunge.
The oven broiling method to remove tomato skins is remarkably simpler and far less messy than the traditional water bath technique, streamlining your salsa preparation process.
Crafting Your Signature Salsa Flavor Profile
As written, this homemade salsa recipe offers a balanced flavor that is not overly spicy, making it enjoyable for a wide range of palates. However, you have several options to customize the heat level to your liking. For an extra kick, simply leave the seeds and membranes in the jalapeños when dicing them. If you dare to venture into hotter territory, consider substituting some or all of the jalapeños with peppers known for more intensity, such as serrano or even habanero peppers. Always be mindful of canning safety when altering ingredients, ensuring any additions don’t compromise the tested pH.
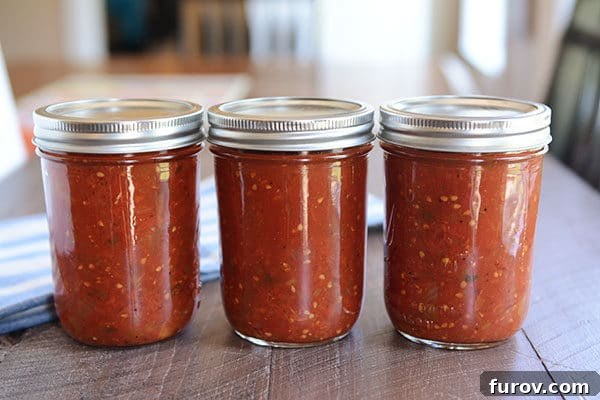
IMPORTANT: The flavors of this salsa, particularly after canning, significantly improve and meld together with time. If you find it has a somewhat strong vinegar taste immediately after processing, allow the jars to rest on your shelf for at least a week, or even longer, before enjoying. This “resting period” allows the flavors to harmonize, resulting in a perfectly balanced and incredibly delicious salsa.
For a truly exceptional batch, consider my personal favorite adaptation: using half apple cider vinegar and half bottled lime juice. This combination introduces a brighter, more complex citrus note that elevates the salsa to another level. I now make it this way consistently!
Scroll down below the recipe card for a step-by-step visual tutorial on how to make this delicious salsa. ⬇️⬇️⬇️
“Made this this morning. It is by far the best homemade salsa I have ever had. Perfect!”
—Diane
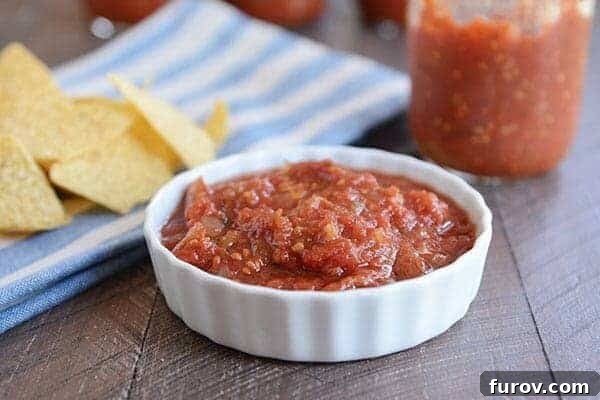
The Best Homemade Salsa Recipe
Yield: 8-9 pints
Prep Time: 1 hour 15 minutes
Cook Time: 25 minutes
Total Time: 1 hour 40 minutes
Rating: 4.66 stars (based on 2465 ratings)
Print Recipe
Pin Recipe
Ingredients
- 10 cups peeled, chopped, and drained tomatoes (see notes for preparation)
- 3 cups chopped onion
- 1 ¾ cups chopped green bell pepper
- 5 medium jalapeños, finely chopped (about 1 to 1 ¼ cups) – remove membranes and seeds for less heat, leave in for extra spice
- 7 cloves garlic, finely minced
- 2 ½ teaspoons ground cumin
- 2 ½ teaspoons coarsely ground black pepper
- 2 ½ tablespoons canning or pickling salt (see notes for alternatives)
- ⅓ cup chopped fresh cilantro
- ⅓ cup sugar, optional (adjust based on tomato sweetness and preference)
- 1 ¼ cups apple cider vinegar (see notes for critical acidity information)
- 16 ounces tomato sauce (MANDATORY for canning safety/proper pH)
- 12 ounces tomato paste, optional (for thicker salsa)
Instructions
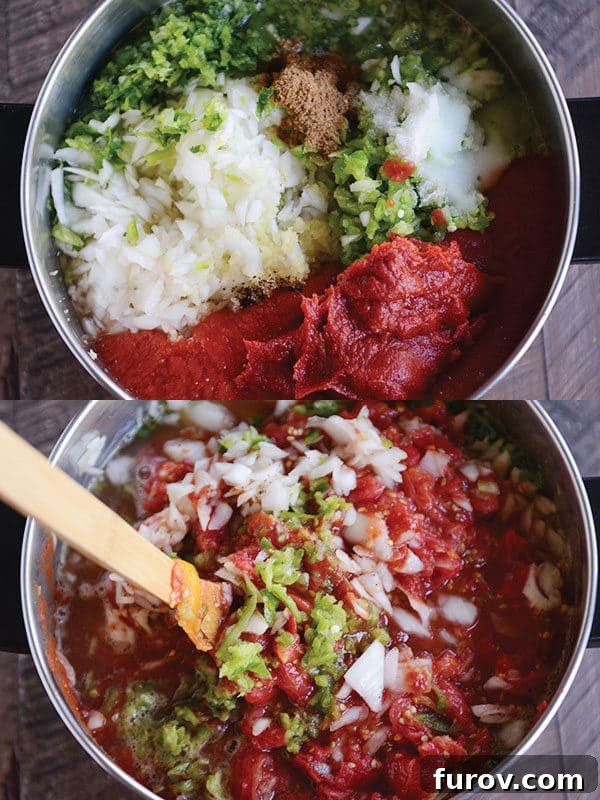
- Combine all the prepared ingredients in a large, heavy-bottomed pot. Bring the mixture to a rolling boil over medium-high heat.
- Once boiling, reduce the heat to a simmer and continue to cook for 10 minutes, stirring frequently to prevent sticking and ensure even cooking.
- While the salsa simmers, prepare your pint-size canning jars. Ensure they are sterilized and hot. Carefully fill each hot jar with the hot salsa, leaving ½-inch headspace from the top rim.
- Wipe the rims of the jars thoroughly with a clean, damp cloth to remove any food residue. Place a clean, new lid on each jar, followed by a screw band, tightened to fingertip-tight.
- Process the filled jars in a water bath canner or a steam canner for 15 minutes. Adjust processing time based on your altitude: add 5 minutes for 1,001 to 3,000 feet; add 10 minutes for 3,001 to 6,000 feet; add 15 minutes for 6,001 to 8,000 feet.
- Once the processing time is complete, carefully remove the hot jars from the canner using a jar lifter. Place them on a wire rack or a clean towel, ensuring they are not touching, and allow them to cool completely at room temperature for 12-24 hours.
- After cooling, check the seals. The center of each lid should be concave and not flex when pressed. If a lid yields when pressed, the jar has not sealed properly. Unsealed jars must be refrigerated and consumed within a few weeks, or the salsa can be re-processed with a new lid (after reheating the salsa) within 24 hours.
Notes
- Tomatoes: Always peel your tomatoes first, then chop, and most importantly, let them drain thoroughly *before* measuring. The exact weight of tomatoes needed will vary significantly by variety and how much moisture they release. A general guideline is around 20 pounds of Roma/paste tomatoes or 22-25 pounds of non-paste tomatoes for one batch. Over-draining is better than a runny salsa!
- Salt: Canning or pickling salt is preferred due to its purity. If using other salts, verify they are free of iodine and anti-caking agents, which can affect clarity and flavor.
- Peeling the Tomatoes: Our recommended oven broiling method is far superior to the messy water bath. Cut tomatoes in half, place cut-side down on a baking sheet, and broil for 3-4 minutes until skins pucker. They’ll peel right off once cooled.
- Chopping: For maximum efficiency, use a food processor to finely chop the onions, bell peppers, jalapeños, and garlic. Pulse until you reach your desired consistency.
- pH and Acidity: This recipe has been precisely developed and tested for safe canning pH levels. DO NOT alter the amount of vinegar. While you can substitute some vinegar with *bottled* lemon or lime juice (which changes the flavor), *never* use fresh lemon or lime juice, as its acidity is inconsistent and unsafe for canning. Dried spices can be adjusted without affecting pH.
- Canning Method & Jars: This recipe is suitable for water bath or steam canning. It is NOT recommended for pressure canning. Furthermore, do not use quart-size jars for this recipe; stick to pint-size jars for proper heat penetration and safety.
- Quantity: This recipe is easily adaptable. You can double or triple the batch (ensure you have a large enough pot!) or halve it for a smaller yield.
Author: Mel
Course: Appetizer
Cuisine: American, Mexican
Recommended Products for Canning Success
- Over-the-Sink Colander: Perfect for efficiently draining your chopped tomatoes.
- Steam Canner: An approved and efficient way to can at home, recommended by the National Center for Home Food Preservation.
- Breville Food Processor: An invaluable tool for quick and consistent chopping of vegetables, saving you significant prep time.
- Essential Canning Supplies: A basic toolset including jar lifters, funnels, and other essentials for safe and easy jar handling.
Recipe Source: Adapted slightly (with quantities increased appropriately for canning safety) from this recipe found on the invaluable GardenWeb site.
Canning Safety: A Comprehensive Guide for Home Preservation
While the joy of preserving your own food is immense, especially when creating a delicious homemade salsa, it’s absolutely paramount to prioritize food safety. Home canning, when done incorrectly, can pose serious health risks, including botulism. This is why using a thoroughly tested and approved recipe is non-negotiable. Our recipe has been scientifically tested in a proper lab to ensure the pH levels are safe for home canning over time, providing you with peace of mind.
- Always Use a Tested Recipe: Never improvise with canning recipes. The balance of acidity (pH), ingredients, and processing times are specifically formulated to inhibit harmful bacteria. This salsa recipe has undergone rigorous testing for home canning safety.
- Tomato Preparation Matters: While the specific variety of tomatoes you use isn’t as critical for this recipe, the preparation method is. Always peel and thoroughly drain your chopped tomatoes. Failing to drain them adequately will result in a thin, watery salsa, and can impact the overall acidity.
- Peeling Tomatoes is Essential: Peeling tomatoes isn’t just for texture; it’s also a crucial step for reducing potential bacterial load. Our easy oven broiling method makes this task simple and effective.
- Choose the Right Canning Method: This salsa recipe is specifically designed for processing in either a water bath canner or a steam canner. This recipe has NOT been tested and is NOT recommended for pressure canning. Adhering to the correct canning method is vital for destroying spoilage microorganisms and ensuring a safe, shelf-stable product.
- Sterilize Jars and Tools: Always start with clean, sterilized canning jars and ensure all your canning tools (lids, rings, jar lifters, funnel) are also clean and ready.
- Proper Headspace: Leaving the correct amount of headspace (the empty space between the food and the jar lid) is crucial for creating a proper vacuum seal and preventing spoilage.
- Check Seals: After processing and cooling, always check that your jars have sealed correctly. A properly sealed lid will be concave and won’t flex when pressed in the center.
Enjoying Your Garden-Fresh Salsa
Once your jars of homemade salsa are perfectly sealed and have rested, you’re ready to savor the fruits of your labor! This versatile salsa is fantastic in countless ways. Serve it simply with a bowl of warm, crispy tortilla chips for an irresistible snack or appetizer. Elevate your next taco night by adding a generous dollop to your favorite tacos, burritos, or quesadillas. It also makes a vibrant topping for scrambled eggs or omelets at breakfast, a flavorful addition to grilled chicken or fish, or even a base for a quick chili. The possibilities are endless, and the satisfaction of knowing you made it yourself is unmatched.