
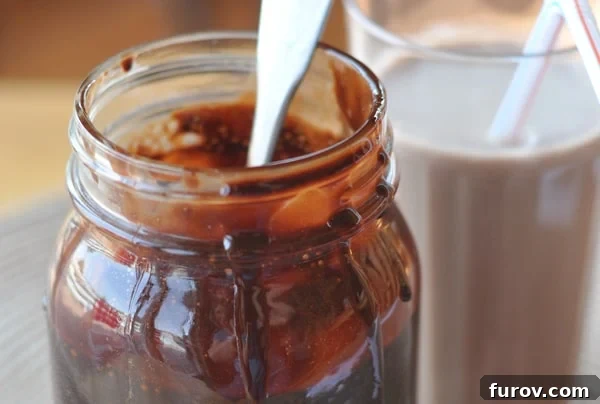
Indulge in Homemade Bliss: The Ultimate Recipe for Decadent Chocolate Syrup and Perfect Chocolate Milk
There’s an undeniable magic to a perfectly mixed glass of chocolate milk. It’s a nostalgic treat, a comforting indulgence, and for many, a sip of pure joy. But what if we told you that the secret to the most exquisite chocolate milk lies not in a store-bought mix, but in a simple, homemade chocolate syrup? Imagine a rich, deep, and velvety syrup, crafted with just a handful of pronounceable ingredients and ready in mere minutes. This isn’t just a recipe; it’s an invitation to elevate your everyday chocolate milk into an extraordinary experience that delights both young and old.
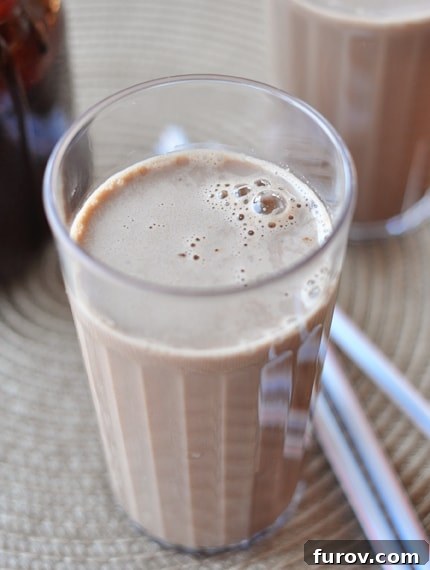
At our house, the announcement of “chocolate milk!” is met with unbridled enthusiasm – a flurry of cartwheels, enthusiastic high-fives, and general celebratory chaos from my four boys. It’s more than just a drink; it’s a special occasion, a reward, and a moment of shared delight. For years, we relied on various commercial chocolate mixes, from popular brands to gourmet options. While they served their purpose, none quite captured the authentic, profound chocolate flavor we craved.
That all changed the moment we first whipped up this incredible homemade chocolate syrup. With its deep, robust, and utterly perfect flavor profile, it quickly surpassed all store-bought alternatives. It’s not just better; it’s a revelation. And the best part? It uses incredibly simple ingredients you likely already have in your pantry, making it an accessible luxury for any day of the week. This recipe simplifies the process, ensuring a smooth, delicious syrup every time that will make your chocolate milk truly unforgettable.
Why Choose Homemade Chocolate Syrup? The Benefits Are Sweet!
You might wonder why bother making chocolate syrup when there are so many options readily available on grocery store shelves. The answer lies in the unparalleled taste, the control over ingredients, and the sheer satisfaction of creating something truly special from scratch. Here’s why this homemade version will become your new favorite:
- Superior Flavor & Richness: Store-bought syrups often contain artificial flavors and excessive sweeteners that can leave an odd aftertaste. Our homemade syrup, however, boasts a deep, authentic chocolate flavor that is both rich and perfectly balanced. The thoughtful combination of light brown and granulated sugars with unsweetened cocoa powder creates a complexity and depth that commercial products simply can’t replicate. It’s a difference you can truly taste.
- Wholesome, Natural Ingredients: Take comfort in knowing exactly what’s going into your syrup. This recipe uses only five and a half simple, natural ingredients that are easy to pronounce and understand. You’ll find no high-fructose corn syrup, no artificial colors, and no unwanted preservatives here. This makes it a healthier, more transparent choice for your family, especially if you’re mindful about what you consume.
- Customizable Sweetness and Intensity: One of the greatest advantages of making your own syrup is the ability to tailor it to your exact preferences. Do you prefer your chocolate milk darker and less sweet? Or perhaps a little sweeter and milder for the children? With homemade syrup, you have complete control. You can easily adjust the sugar levels slightly or add a touch more cocoa to fine-tune the flavor profile to your liking.
- Economical & Budget-Friendly: Making your own syrup can often be significantly more cost-effective in the long run than repeatedly buying premium store-bought versions. Pantry staples like sugar and cocoa powder are relatively inexpensive and yield a generous batch of syrup, offering great value for money without compromising on quality or taste.
- Effortlessly Easy & Quick: Despite its gourmet taste and impressive depth of flavor, this homemade chocolate syrup comes together in under 15 minutes, with minimal fuss and straightforward steps. It’s a quick win for busy parents looking to provide a special treat, and a rewarding project for any home cook, regardless of their experience level in the kitchen.
Beyond Chocolate Milk: Creative Uses for Your Homemade Syrup
While this syrup makes undeniably the best chocolate milk you’ll ever taste, its versatility extends far beyond that classic beverage. Once you have a batch on hand, you’ll find endless ways to incorporate its rich, decadent flavor into your culinary creations, transforming everyday dishes into something truly special:
- The Ultimate Ice Cream Topping: Drizzle generously over scoops of vanilla, chocolate, strawberry, or even mint chip ice cream for an instant upgrade. Add a sprinkle of chopped nuts, a dollop of whipped cream, and a cherry for an ultimate sundae experience that rivals any parlor.
- Elevate Coffee and Espresso Drinks: Stir a tablespoon or two into your morning coffee, latte, or cappuccino for a gourmet mocha that puts many coffee shop versions to shame. It’s a fantastic way to customize your caffeine fix, allowing you to control the richness and sweetness precisely.
- Versatile Dessert Enhancement: Use this luscious syrup to garnish a wide array of desserts. It’s phenomenal drizzled over cheesecakes, brownies, or fresh fruit. It also makes a fantastic addition to pancakes, waffles, or crepes, turning breakfast or brunch into a truly indulgent affair. You can even swirl it into plain yogurt or oatmeal for a touch of chocolatey goodness.
- Delicious Milkshakes and Smoothies: Blend the syrup with milk and your favorite ice cream for a classic, thick, and creamy chocolate milkshake. For a healthier twist, add it to a fruit smoothie with bananas and a spoonful of nut butter for a rich, decadent treat that’s surprisingly nutritious.
- Sophisticated Cocktails and Mocktails: For the adults, this homemade chocolate syrup can be a fantastic ingredient in various chocolate-themed cocktails, adding depth and sweetness. For a delightful mocktail, combine it with sparkling water and a splash of cream.
The Simple Science of Deliciousness: A Look at the Ingredients
The magic of this homemade chocolate syrup lies not only in its ease of preparation but also in its carefully selected, simple ingredients. Each component plays a crucial role in creating that perfect balance of sweetness, depth, and smooth texture that defines truly exceptional chocolate syrup:
- Light Brown Sugar & Granulated Sugar: The combination of these two sugars is a key secret to the syrup’s complex flavor. Granulated sugar provides direct and immediate sweetness, while light brown sugar introduces subtle molasses notes and a bit more moisture. This blend contributes to a richer, more nuanced, and less one-dimensional flavor profile than using just one type of sugar, adding depth that is often missing in commercial syrups.
- Unsweetened Cocoa Powder: This is the heart of the syrup, the source of its deep, authentic chocolate flavor. Using unsweetened cocoa powder is crucial as it allows you to control the overall sweetness of the syrup precisely. Investing in a good quality cocoa powder makes a significant difference, so choose one with a robust chocolate aroma for the best possible results.
- Pinch of Salt: Often overlooked in sweet recipes, salt is a powerful flavor enhancer. In this chocolate syrup, it plays a vital role in balancing the sweetness of the sugars. It brings out the chocolate’s natural bitterness and deepens its flavor, preventing the syrup from tasting cloyingly sweet and creating a more harmonious taste experience.
- Cold Water: Serving as the essential liquid base, cold water is used to dissolve the sugars and cocoa powder, allowing them to meld together seamlessly into a smooth, pourable syrup. Starting with cold water is particularly beneficial as it helps prevent the cocoa powder from clumping, ensuring a silky-smooth consistency from the start.
- Vanilla Extract: Added at the very end of the cooking process, vanilla extract is a crucial aromatic that complements chocolate beautifully. It adds a layer of warmth, complexity, and roundness to the flavor, enhancing the overall chocolate experience without making the syrup taste distinctly like vanilla. Be sure to use pure vanilla extract for the best flavor.
Homemade Chocolate Syrup for Chocolate Milk

Yield: 2 1/2 cups
Prep Time: 5 mins
Cook Time: 10 mins
Total Time: 15 mins
Average: 4.69 stars (58 ratings)
Pin Recipe
Rate This Recipe
Ingredients
- ¾ cup (159 g) light brown sugar
- ¾ cup (159 g) granulated sugar
- 1 cup (85 g) unsweetened cocoa powder
- Pinch of salt
- 1 cup cold water
- 1 tablespoon vanilla extract
Instructions
- 1. In a medium saucepan, thoroughly whisk together the brown sugar, granulated sugar, cocoa powder, and salt until all dry ingredients are well combined and uniform. This initial step helps prevent lumps. Gradually add the cold water, whisking continuously until the mixture is completely smooth and lump-free.
- 2. Place the saucepan over medium heat. Bring the mixture to a gentle boil, ensuring to whisk frequently to prevent any sticking or scorching at the bottom of the pan. Once boiling, reduce the heat to medium-low and allow it to simmer for exactly five minutes, stirring occasionally. During this simmering time, the syrup will thicken slightly to a desirable, pourable consistency.
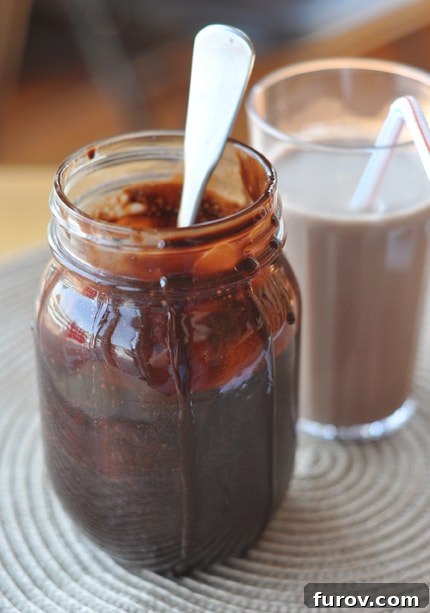
- 3. Remove the pan from the heat immediately. Stir in the vanilla extract until it is fully incorporated, ensuring its delicate flavor is preserved. Carefully pour the hot chocolate syrup into a clean mason jar or any other airtight, heat-safe lidded container. Let the syrup cool completely to room temperature before covering it securely and transferring it to the refrigerator for proper storage.
- 4. To enjoy a refreshing glass of rich homemade chocolate milk, simply stir a spoonful or two of the cooled syrup into your preferred type of milk. Adjust the amount of syrup to your personal taste, depending on how intensely chocolatey you desire your beverage to be. For best results, use a spoon or a small whisk to ensure the syrup is fully incorporated.
Notes
Shelf Life: While I can’t provide a definitive, scientifically-backed shelf life without being a certified food scientist (and believe me, I’m not!), based on personal experience and common culinary practices, this homemade chocolate syrup typically keeps wonderfully in the refrigerator for at least two weeks, and often even up to a month. Always use your best judgment. Look for any signs of spoilage such as unusual odors, mold, or changes in texture before consuming. To maximize freshness, ensure your storage container is thoroughly clean and completely airtight.
Author: Mel
Course: Drink | Cuisine: American | Method: Stovetop
Tips and Tricks for the Perfect Chocolate Milk Experience
Creating the perfect glass of chocolate milk with your homemade syrup is an art form, albeit a very simple and enjoyable one! Here are a few expert tips to ensure every sip is as delightful and satisfying as possible:
- Choose Your Milk Wisely: The beauty of this syrup is its versatility. Any type of milk works beautifully – whether it’s dairy (whole, 2%, skim milk) or your favorite non-dairy alternative (almond, oat, soy, or coconut milk). For the creamiest, most decadent result, whole milk is often preferred, while oat milk frequently mimics that richness wonderfully for a plant-based option.
- Warm or Cold? It’s Your Choice! For a classic, refreshing chocolate milk, thoroughly chilled milk is absolutely key. However, if you’re craving a comforting hot chocolate on a chilly day, simply warm your milk gently on the stovetop or in the microwave before stirring in the syrup. Both options are incredibly delicious!
- Find Your Perfect Ratio: Start with approximately 1-2 tablespoons of homemade chocolate syrup per 8 ounces (1 cup) of milk. This is a good starting point. Taste and adjust the amount according to your preference. Some individuals prefer a lighter, more subtle chocolate flavor, while others adore a super-rich, dark chocolate experience. Don’t be afraid to experiment to find your ideal balance!
- Stir Thoroughly for Smoothness: It’s essential to ensure the syrup is fully incorporated into the milk to avoid any concentrated pockets of flavor. A small whisk or even a milk frother can be incredibly helpful in achieving a perfectly smooth, consistent blend, especially if the syrup is cold and has thickened slightly from refrigeration.
- Elevate Your Serving: Take your chocolate milk to the next level with simple garnishes. Serve it with a generous dollop of freshly whipped cream, a delicate sprinkle of chocolate shavings, or even a few fluffy mini marshmallows for an extra treat that adds both visual appeal and textural delight.
Frequently Asked Questions About Homemade Chocolate Syrup
- Can I make this syrup with dark cocoa powder for a richer flavor?
- Absolutely! Using dark cocoa powder (like Dutch-processed cocoa) will result in an even richer, more intense chocolate flavor and a darker syrup. If you opt for dark cocoa, you might find you need to adjust the sugar slightly to your preference, as dark cocoa can be more bitter.
- How can I make the syrup thicker or thinner to suit my needs?
- To achieve a thicker syrup, simply simmer the mixture for an extra minute or two, watching it carefully to prevent it from becoming too thick or burning. To make it thinner, you can whisk in a small amount of hot water (add a tablespoon at a time) after the syrup has cooled, until your desired consistency is reached.
- Is this homemade chocolate syrup recipe vegan-friendly?
- Yes, this chocolate syrup recipe is inherently vegan! All the ingredients used—brown sugar, granulated sugar, cocoa powder, salt, water, and vanilla extract—are plant-based. To create a delicious vegan chocolate milk, simply pair this syrup with your favorite non-dairy milk alternative.
- Can I use this syrup as a substitute for hot fudge?
- While this chocolate syrup is wonderfully rich and delicious, it is designed to be a thinner, pourable syrup primarily for drinks and lighter toppings. Hot fudge, on the other hand, is typically much thicker, richer, and often made with butter, cream, or other fats to achieve its distinct dense texture. For a true hot fudge experience, you would generally need to follow a dedicated hot fudge recipe.
- What should I do if my syrup turns out lumpy?
- Lumps usually occur if the cocoa powder isn’t fully whisked with the dry sugars before adding water, or if the mixture isn’t whisked continuously during the initial heating phase. If you do end up with lumps, don’t despair! You can easily strain the cooled syrup through a fine-mesh sieve to remove them, or try to re-whisk vigorously when gently reheating the syrup to smooth it out.