
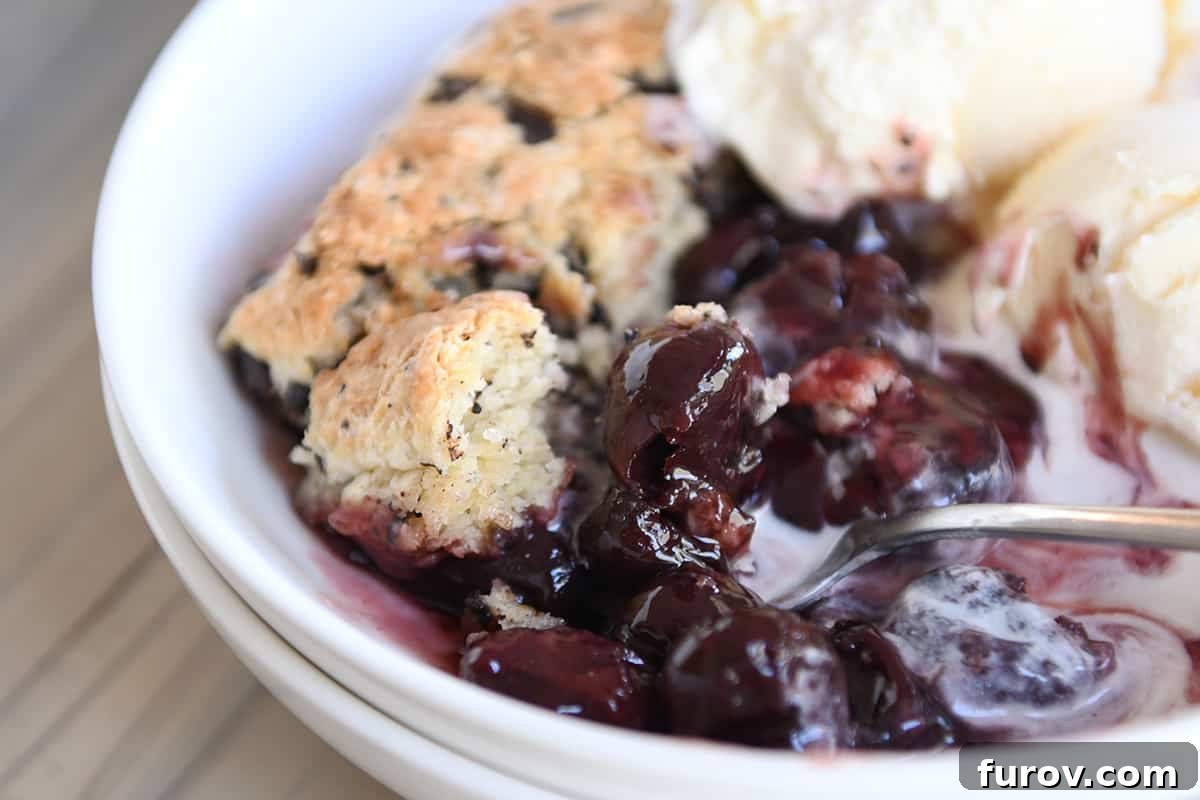
This cherry chocolate cobbler is an unbelievably delicious dessert, combining the luscious sweetness of cherries with the rich indulgence of chocolate. Topped with light and flaky chocolate chunk biscuits, it’s a perfect treat for any occasion, especially delightful during the summer months.
While I cherish a classic fudgy brownie or an intensely chocolate-focused dessert, there’s an undeniable magic in savoring a freshly baked cherry pie, particularly when cherries are in peak season. It’s truly a quintessential summer experience.
My go-to has always been this exceptional cherry pie, a recipe that consistently delivers pure delight. However, in recent years, this incredible cherry chocolate cobbler has carved out a significant place in my heart, demanding its own spotlight.
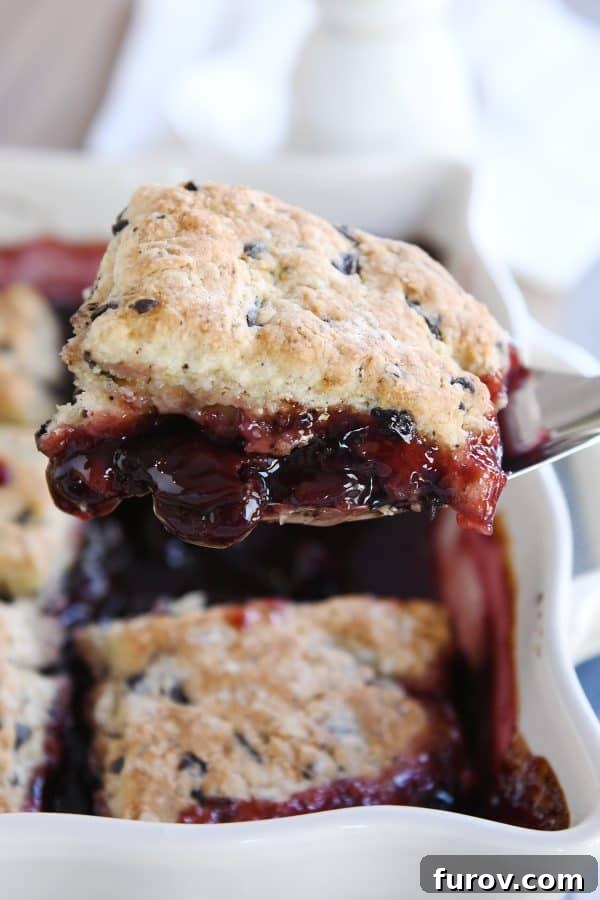
And yes, “just because” is an absolutely valid reason to whip up this decadent chocolate cherry cobbler. Its fantastic flavor profile and comforting warmth have quickly made it one of my all-time favorite desserts. Imagine juicy, sweet cherries baked to perfection beneath a golden-brown, chocolate-studded biscuit topping. It’s a symphony of textures and tastes that will leave you craving more with every bite.
This dessert isn’t just delicious; it’s a celebration of summer’s bounty and a testament to how simple ingredients can create something truly extraordinary. Whether you’re hosting a backyard barbecue, enjoying a quiet evening at home, or simply looking for an impressive yet easy-to-make dessert, this cherry chocolate cobbler recipe is your answer. It offers all the comforting familiarity of a traditional cobbler, elevated by the unexpected and delightful addition of chocolate.
Embracing the Divine Chocolate Cherry Combination
To be completely honest, the chocolate-cherry combination wasn’t always my favorite. My earliest encounter with this flavor pairing was rather…unforgettable. As a child, I once snuck into my grandma’s box of fancy chocolates, expecting a delightful caramel, only to bite into a gooey, sickly sweet cherry cordial. The unexpected burst of syrupy cherry juice and scattered chocolate shards was, in my young mind, quite traumatic. This incident instilled a deep-seated aversion to most chocolate-cherry confections.
However, with the wisdom that comes with age (and a touch more culinary maturity, I hope!), I’ve slowly discovered a select few chocolate cherry combinations that truly shine. These aren’t the mass-produced, artificial-tasting candies of my youth, but rather thoughtfully crafted desserts where the flavors complement each other in perfect harmony. And I am thrilled to report that this homemade cherry chocolate cobbler is unequivocally one of those delightful exceptions.
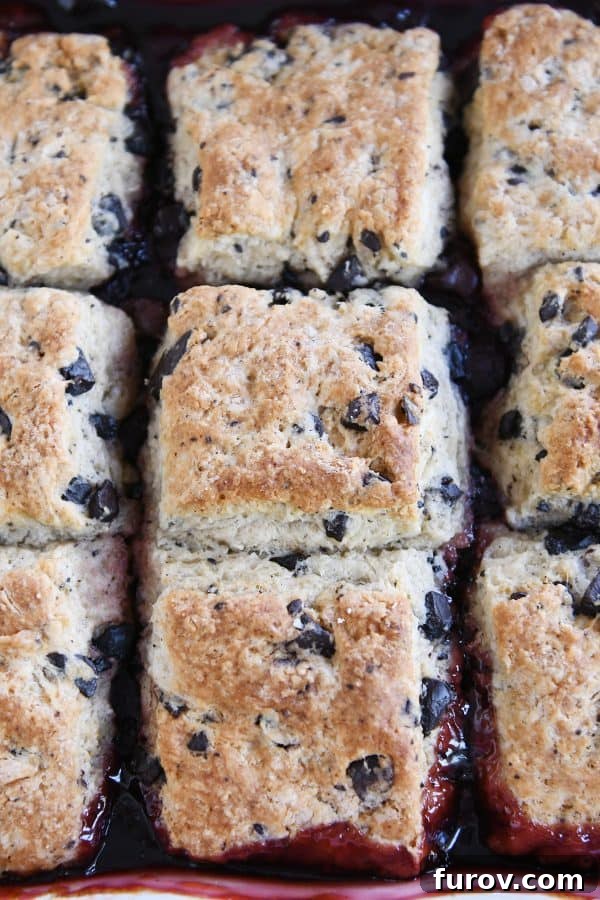
What makes this particular cobbler so special? The chocolate element is a subtle yet significant indulgence, woven into the tender biscuit topping in the form of rich chocolate chunks. It’s not an overpowering chocolate flavor, but rather a perfect hint that complements the bright, fruity cherries without competing for attention. The buttery biscuits provide a wonderful textural contrast to the juicy filling, and those melted pockets of chocolate create a truly memorable experience. It just works, and it’s utterly delicious.
Choosing Your Cherries: Fresh vs. Frozen for the Perfect Filling
One of the beauties of this cobbler recipe is its versatility when it comes to the star ingredient: cherries. You can achieve fantastic results using either fresh or frozen cherries, making this dessert accessible year-round. While fresh, ripe cherries during their season offer an unparalleled burst of flavor, high-quality frozen cherries are an excellent, convenient alternative.
If you opt for fresh cherries, be prepared for a bit of pitting. A cherry pitter makes quick work of this task, but a pastry tip or even a chopstick can also be used in a pinch. If you’re using frozen cherries, there’s no need to thaw them beforehand; they can go straight into the bowl, which is a fantastic time-saver. However, using frozen cherries requires a slight adjustment to the cornstarch quantity to ensure your filling thickens properly, as they release more liquid during baking. (Don’t worry, the recipe notes below cover this detail).
Regardless of whether you choose fresh or frozen, the pitted cherries are gently tossed with a handful of simple ingredients to create that irresistible, glistening filling:
- Granulated sugar: Sweetens the tart cherries and helps create that wonderful syrupy consistency. You can adjust the amount slightly based on the sweetness of your cherries and your personal preference.
- Cornstarch: This is the crucial thickening agent that transforms the cherry juices into a lush, spoonable sauce. Without it, your cobbler would be too watery.
- Fresh lemon juice: A splash of lemon juice brightens the cherry flavor and provides a lovely counterpoint to the sweetness. It’s a secret weapon for intensifying fruit desserts.
- Vanilla extract: Adds a warm, aromatic depth that complements both the cherries and the chocolate.
- Almond extract: (Optional, but highly recommended!) A touch of almond extract pairs exquisitely with cherries, enhancing their natural flavor profile and adding a sophisticated twist. If you’ve never tried it, now’s the time!
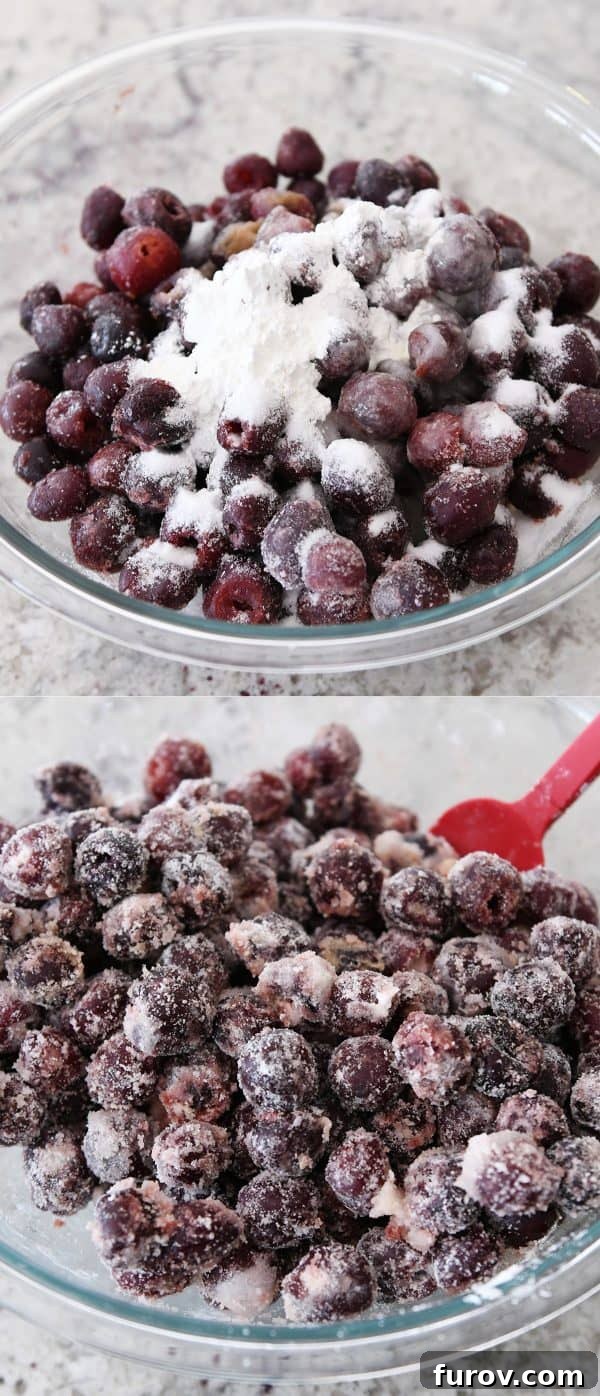
This simple combination ensures that your cherry filling will be perfectly balanced in flavor and texture, ready to nestle beneath its delicious biscuit crown.
Crafting the Flaky Chocolate Biscuit Topping
The star of this cobbler, arguably as much as the cherries, is the tender, flaky, and subtly sweet chocolate chunk biscuit topping. Creating perfect biscuits might sound intimidating, but this method simplifies the process significantly while guaranteeing outstanding results.
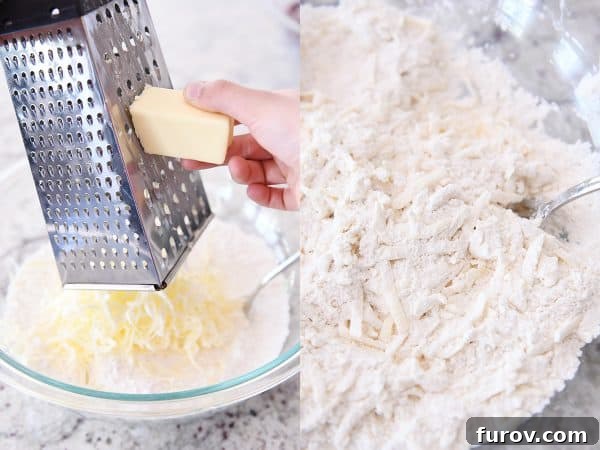
To begin, I combine all the dry ingredients – flour, sugar, baking powder, baking soda, and salt – in a spacious bowl. The real trick to exceptionally flaky biscuits lies in using very cold butter. My preferred method is to grate the cold (or even frozen) butter directly into the dry mixture using the large holes of a box grater. This creates tiny, uniform pieces of butter that are easily coated by the flour, leading to wonderful layers and pockets of steam as the biscuits bake, resulting in that coveted flakiness.
While grating is my go-to for its ease and minimal cleanup, you certainly have other options. You can use a pastry blender to cut the cold butter into pea-sized pieces, employ two knives to achieve a similar result, or even pulse the butter and dry ingredients briefly in a food processor. The key, regardless of method, is to keep the butter as cold as possible and avoid overworking it, which can lead to tough biscuits.
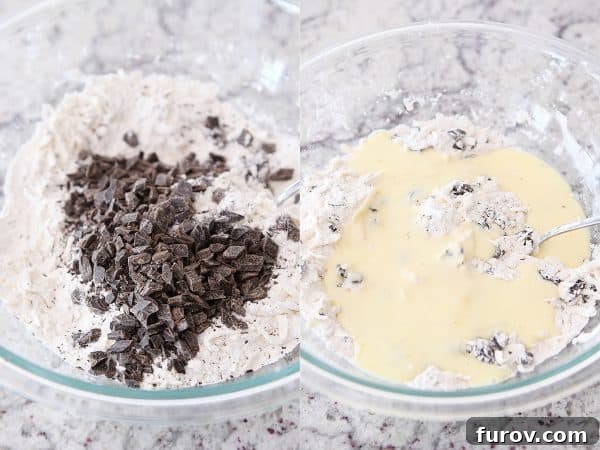
Once the butter is incorporated, it’s time to add the chocolate. Toss in generous amounts of semisweet chocolate chunks for distinct pockets of melted goodness, or use chocolate chips (regular or mini) for a more even distribution. The choice is yours, and all variations are equally delightful. This chocolate adds that perfect hint of richness that elevates the cobbler beyond a traditional fruit dessert.
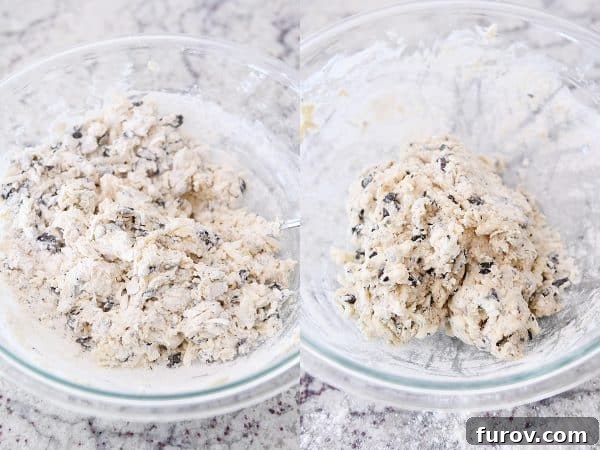
Finally, combine the wet ingredients – an egg and buttermilk. Buttermilk is crucial here; its acidity reacts with the baking soda to create a light, tender crumb. Stir this mixture into the dry ingredients. The most important tip for tender, flaky biscuits is to mix the dough just until it barely comes together. It will look a little rough, shaggy, and perhaps even slightly dry in places, but resist the urge to overmix! Overworking the dough develops the gluten too much, resulting in tough biscuits. A light touch is all that’s needed.
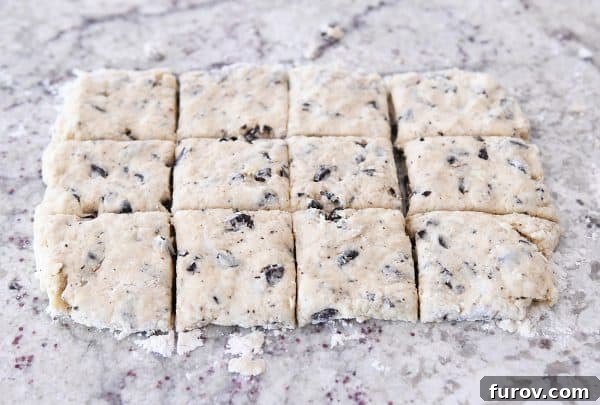
That slightly shaggy appearance is exactly what you’re aiming for. It indicates that the dough is just hydrated enough and will yield beautifully tender biscuits. Once combined, gently press or roll the dough out onto a lightly floured counter to about ½-inch thick. Then, cut the dough into 12 squares. These rustic squares add to the charm of the cobbler and are much easier than cutting perfect circles.
With your perfectly prepared biscuits ready, the final assembly is just moments away from baking perfection.
Assembling and Baking Your Irresistible Cobbler
With your delectable cherry filling and flaky chocolate biscuit topping prepared, it’s time to bring this glorious cobbler together. The assembly is straightforward, promising a rewarding baking experience and an even more satisfying dessert.
First, spread the cherry filling evenly across the bottom of a lightly greased 9×13-inch baking pan. Ensure the cherries are distributed in a single layer to allow for even cooking. Next, gently arrange the biscuit squares over the cherry filling. I find that placing them in neat rows (three rows of four biscuits each, for example) creates an aesthetically pleasing presentation, but a more casual, scattered arrangement works just as well. If desired, sprinkle the tops of the biscuits with a little coarse sugar, like turbinado, for an extra sparkle and delightful crunch.
Now, for a crucial tip, especially if you’re using frozen cherries: I highly recommend giving the cherry filling a head start in the oven. Bake the cherries by themselves for about 10 minutes before adding the biscuit topping. This initial bake helps to release some of the excess moisture from the frozen fruit and allows the cornstarch to begin its thickening process. This simple step is key to preventing a watery filling and ensures your cobbler reaches that perfectly luscious, bubbling consistency. Once the initial bake is complete (if using frozen cherries), carefully place the biscuit topping on top and return the pan to the oven.
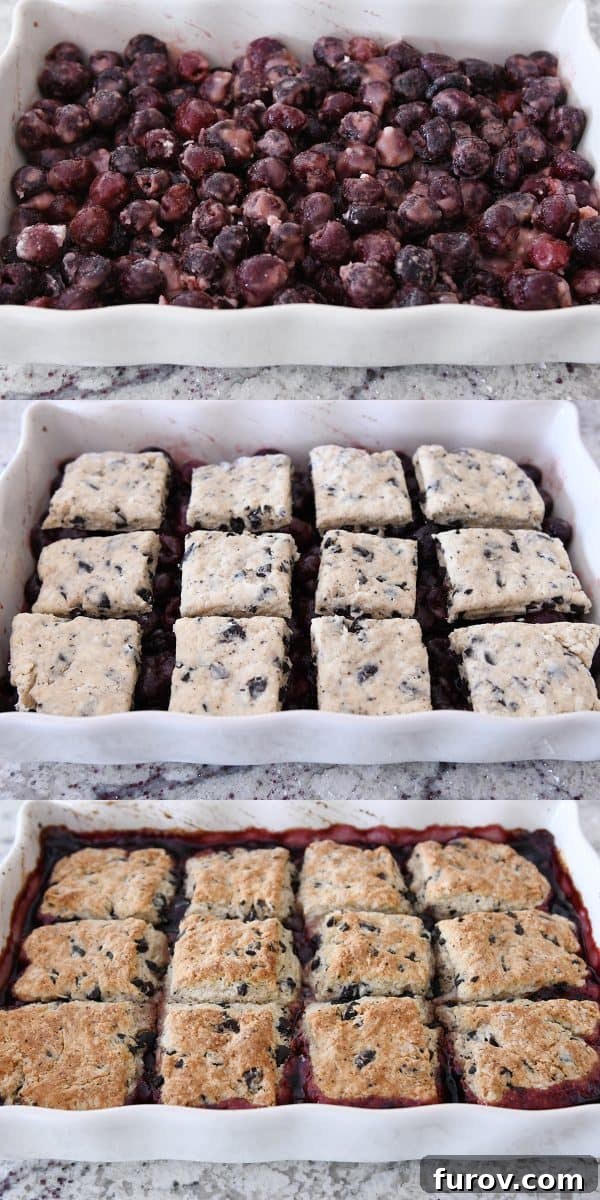
Bake the cobbler until the biscuits are beautifully golden brown and the cherry filling is visibly bubbling invitingly around the edges of the pan. This typically takes about 45-50 minutes. To check for doneness, you can gently lift one of the biscuits with a small spatula; if the underside still appears raw or doughy, continue baking for a few more minutes. Be mindful not to overbake, as this can lead to dry biscuits. The goal is a tender, golden topping with a perfectly cooked, thick, and juicy fruit filling.
This unique cherry chocolate cobbler offers a fantastic solution for satisfying your cherry dessert cravings without the fuss of preparing a homemade pie crust. I can genuinely promise you, it’s every bit as flavorful and satisfying as a classic cherry pie, if not more so!
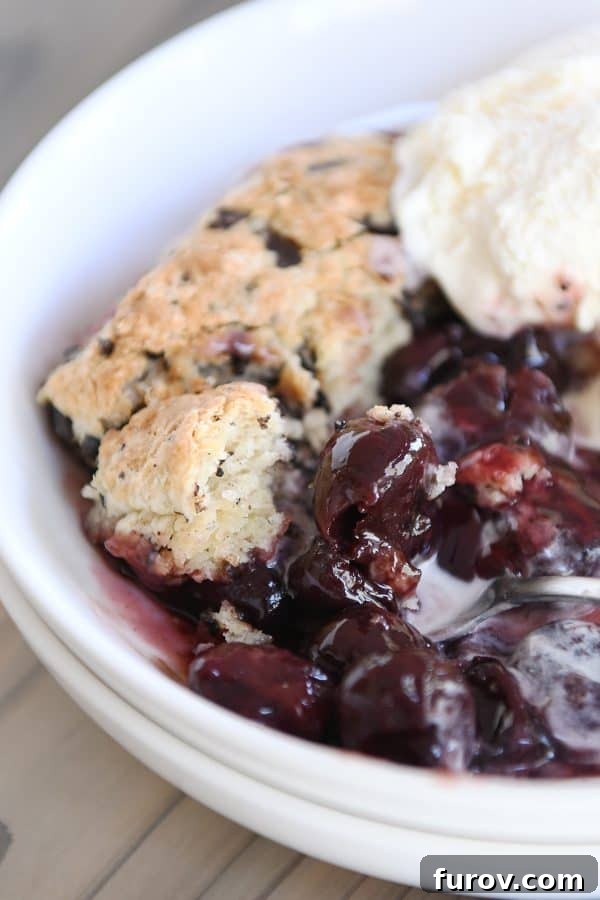
Those chocolate chunk biscuits are truly delightful, providing an exquisite contrast to the sweet-tart cherry filling. The small pockets of melted chocolate within the flaky biscuit add a hint of something extra special, transforming each bite into a memorable experience. The combination of warm, tender fruit and rich, slightly crisp chocolate biscuits is simply irresistible.
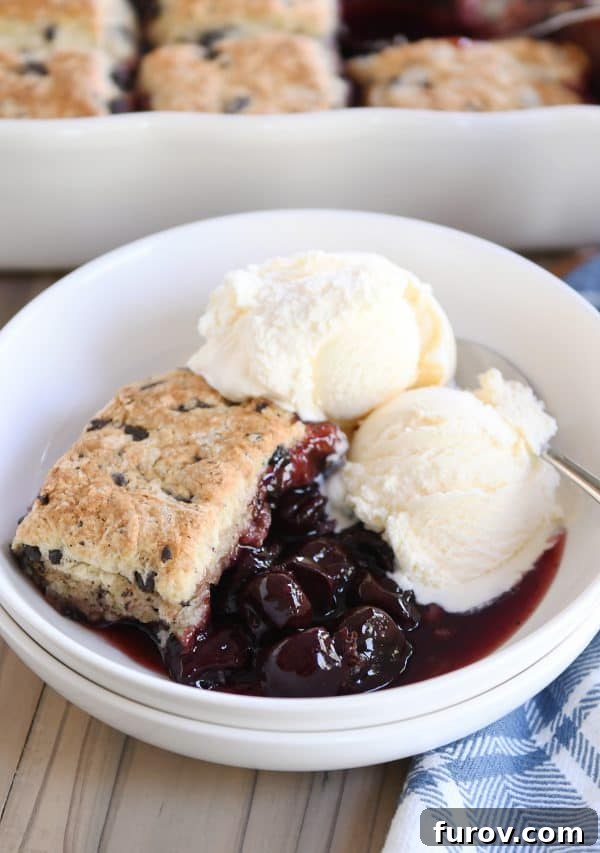
While I might not need to say it, I absolutely will: this cherry chocolate cobbler reaches its peak deliciousness when served warm, straight from the oven, with a generous scoop of creamy vanilla ice cream. The melting ice cream mingling with the warm cherry filling and chocolate biscuits is pure bliss. Alternatively, a dollop of fresh whipped cream would also be a fantastic accompaniment. YUM!
One Year Ago: Mexican Street Corn Salad
Two Years Ago: Cherry Pie Cookie Bars
Three Years Ago: Tender Grilled Salmon
Four Years Ago: Homemade Pepperoni Pizza Rolls
Five Years Ago: Strawberry Shortcake Bars
Six Years Ago: Classic Chocolate Mint Brownies
Seven Years Ago: 30-Second Chocolate Turtle Cookie Sundaes
Eight Years Ago: The Lava Flow Drink
Cherry Chocolate Cobbler
Pin
Rate
SaveSaved!
Ingredients
Cherry Filling:
- 2 ½ to 3 pounds (8-10 cups) pitted sweet cherries (fresh or frozen – see note below)
- 1 cup (212 g) granulated sugar
- 2 tablespoons cornstarch (see note below)
- 2 tablespoons fresh lemon juice
- 1 teaspoon pure vanilla extract
- ½ teaspoon almond extract, optional
Biscuit Topping:
- 2 cups (284 g) all-purpose flour
- ⅓ cup (71 g) granulated sugar
- 1 tablespoon baking powder
- ¼ teaspoon baking soda
- ½ teaspoon salt
- ½ cup (113 g) salted butter, cold or frozen
- ¾ to 1 cup (113 to 170 g) semisweet chocolate chunks or chocolate chips (regular or mini)
- ½ cup buttermilk
- 1 large egg
- Coarse sugar, like turbinado for sprinkling (optional)
Instructions
-
Preheat the oven to 375 degrees F (190°C). Lightly grease a 9×13-inch (23×33 cm) baking dish.
-
In a large bowl, combine the pitted cherries, granulated sugar, cornstarch, fresh lemon juice, vanilla extract, and almond extract (if using). Toss gently but thoroughly to ensure all cherries are well coated. Spread this cherry filling evenly into the prepared baking pan.
-
For the biscuit topping: In a medium bowl, whisk together the all-purpose flour, granulated sugar, baking powder, baking soda, and salt. Grate the cold or frozen butter directly into these dry ingredients using the large holes of a box grater. Toss the mixture lightly with your fingers to ensure the butter pieces are evenly coated with flour. Stir in the semisweet chocolate chunks or chocolate chips until well distributed.
-
In a small bowl or liquid measuring cup, whisk together the buttermilk and large egg until combined. Add this wet mixture to the dry ingredients. Mix with a rubber spatula, just until the dough starts to come together. If needed, switch to using your hands to gently press the dough together. Be careful not to overmix; the dough should look shaggy and slightly rough, not smooth.
-
Turn the biscuit dough out onto a lightly floured counter. Gently pat or lightly roll the dough into a rectangle approximately 10×6 inches (25×15 cm) and about ½-inch (1.25 cm) thick. Use a knife or bench scraper to cut the dough into 12 even squares.
-
Carefully arrange the biscuit squares evenly over the cherry filling in the baking dish. If desired, sprinkle the tops of the biscuits with coarse sugar for added texture and sparkle.
-
Bake for 45-50 minutes, or until the biscuit topping is golden brown and the cherry filling is actively bubbling around the edges of the pan. To check for doneness, gently lift one of the biscuits; if it appears raw on the bottom, continue baking for a few more minutes. Avoid overbaking, as this can result in dry biscuits.
-
Remove the cobbler from the oven and allow it to cool for approximately 30 minutes. The filling will continue to thicken as it cools. Serve warm, ideally with a scoop of vanilla ice cream for the ultimate indulgence.
Notes
Recommended Products
Recipe Source: Adapted from a recipe published in Food Network Magazine, September 2018 (with modifications including the addition of baking soda, specific instructions for frozen cherries, and added weight measurements for precision).