
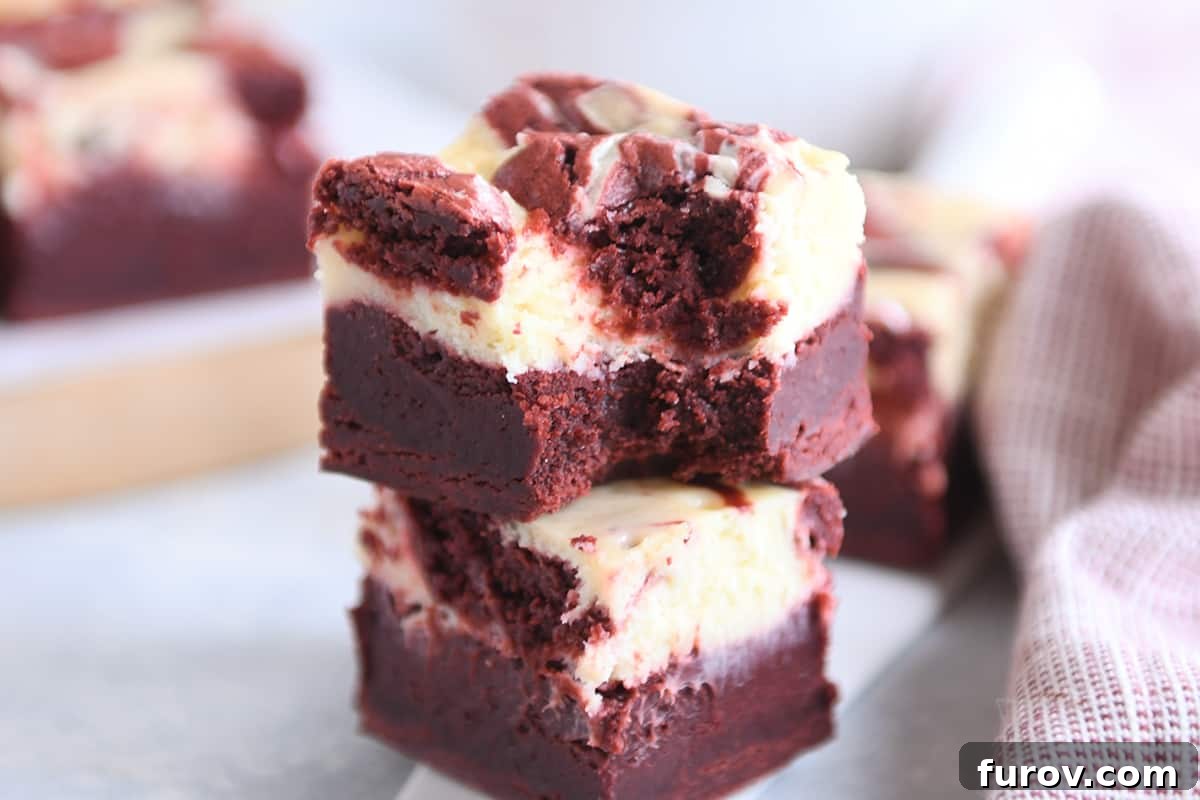
Welcome to the ultimate indulgence! These **Red Velvet Cheesecake Brownies** aren’t just a dessert; they’re a decadent experience that promises to be the star of any occasion. Forget those hit-or-miss red velvet encounters; this recipe delivers on every front, combining the best of rich, fudgy brownies with the creamy tang of classic cheesecake, all infused with that iconic red velvet charm. Prepare to be amazed by the depth of flavor, the luxurious texture, and the stunning marbled appearance that makes these brownies truly unforgettable.
There’s something uniquely captivating about red velvet. It’s more than just a color; it’s a promise of a subtle cocoa flavor intertwined with a hint of tang, often enhanced by buttermilk or cream cheese. When paired with the intense chocolatey goodness of a classic brownie and the smooth, velvety texture of cheesecake, the result is nothing short of divine. This recipe takes these beloved elements and elevates them, creating a dessert that is both visually striking and exquisitely delicious.
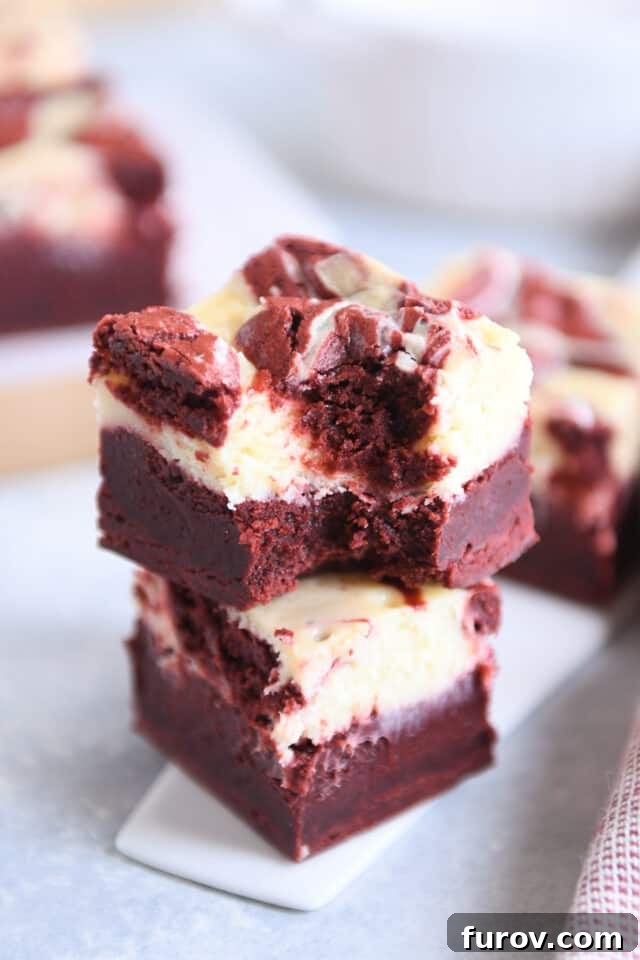
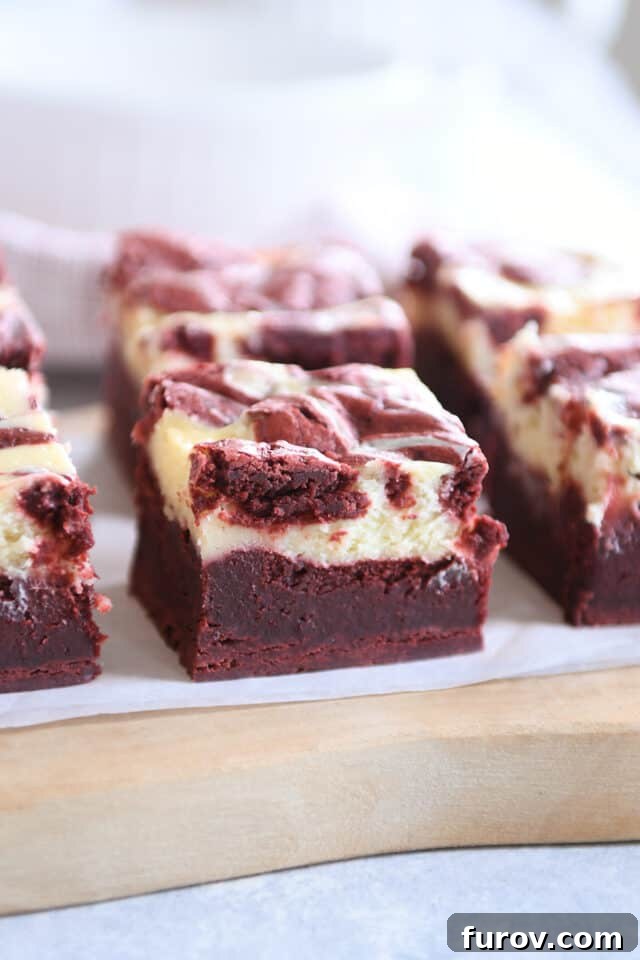
Each bite offers a symphony of textures and flavors. The brownie base is wonderfully fudgy, with a deep chocolate essence, while the cheesecake layer adds a luscious creaminess that perfectly balances the sweetness. The beautiful red swirl woven throughout creates an artistic masterpiece that’s almost too pretty to eat – almost!
The Secret to a Perfect Red Velvet Brownie Base
The foundation of these incredible **red velvet cheesecake brownies** lies in their fudgy brownie batter. This isn’t just any brownie batter; it’s carefully crafted to achieve that dense, rich, and melt-in-your-mouth texture we all crave. The process is straightforward, ensuring even novice bakers can achieve spectacular results. Here’s a closer look at what makes this brownie base so special:
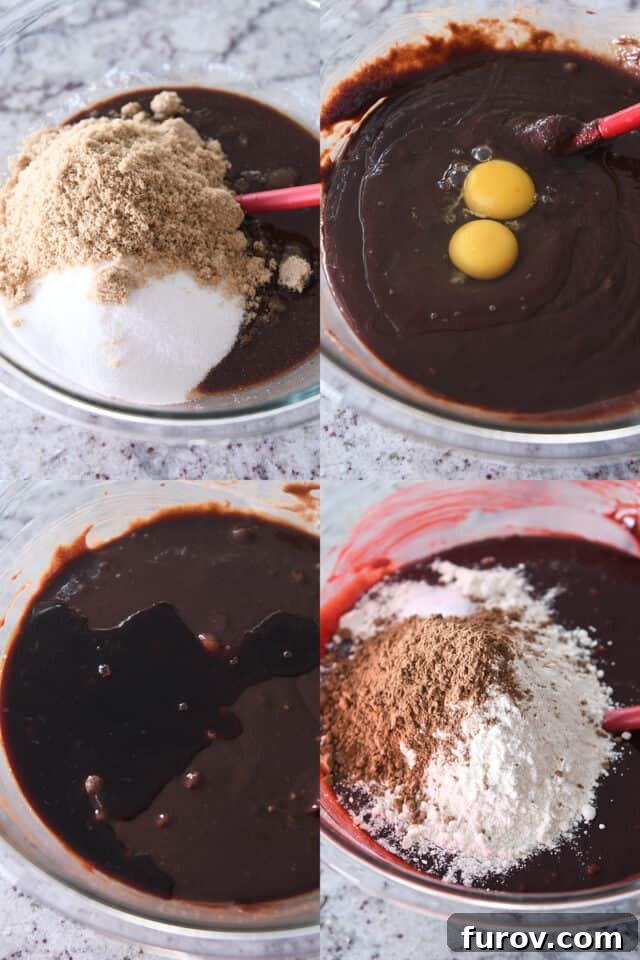
- Butter and Chocolate: The combination of real butter and high-quality semisweet chocolate is non-negotiable for superior flavor and fudginess. Melting them together creates a luxurious base that’s packed with rich chocolate notes.
- Granulated and Brown Sugars: Using both types of sugar contributes to both flavor and texture. Granulated sugar provides sweetness and helps create that shiny, crackled top, while brown sugar adds moisture, a subtle caramel note, and contributes to the brownies’ chewy, dense texture.
- Eggs & Vanilla: Eggs are crucial for structure and binding, while a generous splash of vanilla extract enhances the overall flavor profile, complementing the chocolate and red velvet.
- Red Food Coloring: This is where the “red velvet” magic truly happens, transforming the dark chocolate batter into a vibrant, eye-catching red hue.
- A Touch of Cocoa, Flour, and Salt: A small amount of unsweetened cocoa powder intensifies the chocolate flavor without making it overly bitter. All-purpose flour provides the necessary structure, and a pinch of salt balances the sweetness, making every flavor pop.
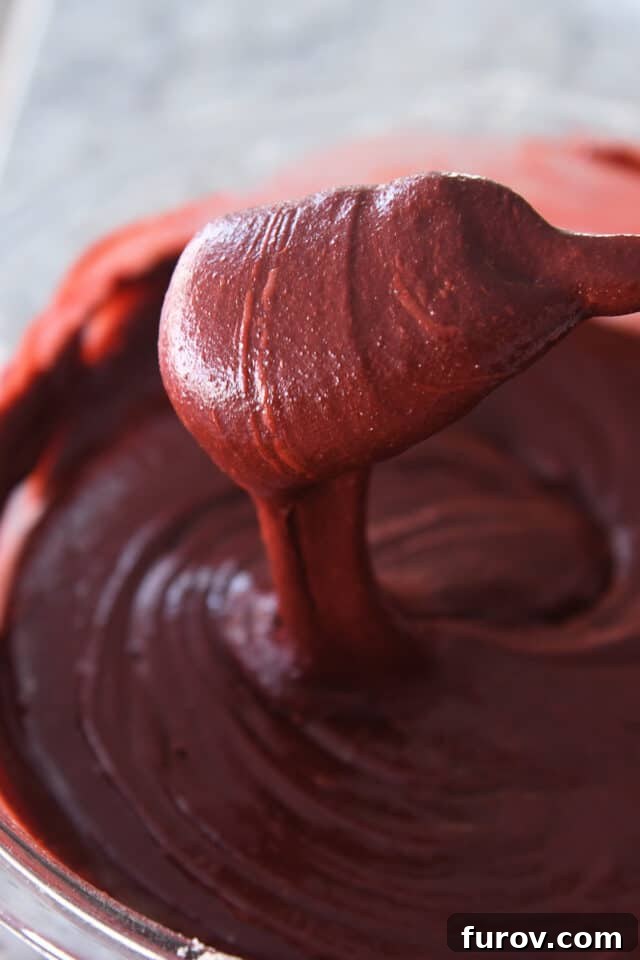
Once the red food coloring is mixed in, watch the transformation unfold as the rich, dark brownie batter instantly takes on a brilliant red shade. This captivating color only deepens as the brownies bake, resulting in a visually stunning dessert that beckons you to take a bite. The thoughtful balance of these ingredients ensures a brownie layer that is moist, deeply flavored, and perfectly complements the creamy cheesecake swirl.
The Art of Red Food Coloring for Red Velvet Brownies
When it comes to **Red Velvet Cheesecake Brownies**, the vibrant red color is more than just a visual treat; it’s an integral part of the experience. There’s no mistaking these brownies for their classic counterparts once that gorgeous red hue shines through. They are red velvet through and through, from their appearance to the subtle flavor profile that defines this iconic dessert.
A few essential notes about achieving that perfect red:
- **Liquid vs. Gel Food Coloring:** For this specific recipe, liquid food coloring is recommended. It blends seamlessly into the batter, ensuring an even and consistent color. While gel food coloring is more potent, its consistency might require a slight adjustment to the recipe. If you opt for gel, it’s generally safe to start with half the amount specified for liquid, and then add more gradually until you achieve the desired vibrant red. Experimentation is key!
- **Natural Alternatives:** While some recipes explore natural coloring agents like beet powder, this particular recipe focuses on classic red food coloring for maximum impact and consistent results. The good news is, the red food coloring primarily serves an aesthetic purpose. If you prefer to avoid artificial colors, you can certainly skip it altogether. The brownies will still be incredibly delicious with their fudgy texture and creamy cheesecake swirl – they just won’t have that signature red velvet appearance. They’ll be more akin to classic cheesecake brownies, which are equally delightful.
Ultimately, the red food coloring doesn’t significantly alter the taste of these brownies. Instead, it’s there to elevate the visual appeal, making them a true showstopper. The striking contrast between the deep red brownie and the creamy, pale cheesecake swirl is what makes these **red velvet brownies** so captivating and perfect for celebrations or simply brightening up an ordinary day.
Mastering the Perfect Swirl in Your Cheesecake Brownies
The visual appeal of these **Red Velvet Cheesecake Brownies** is undoubtedly enhanced by the elegant marbled swirl. Achieving this perfect pattern is simpler than you might think, and it adds an artistic touch that makes these brownies truly stand out. Here’s how to master that irresistible swirl:
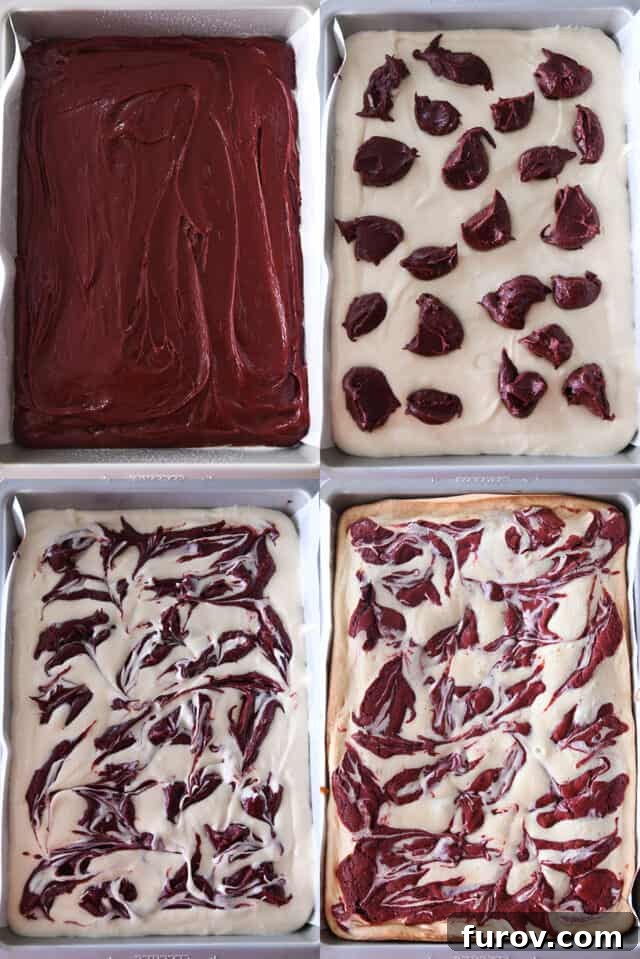
For this recipe, the majority of the rich red velvet brownie batter forms the foundational layer, spread evenly across the bottom of your prepared baking pan. However, a crucial step is reserving approximately one cup of this vibrant batter. This reserved portion is dedicated to creating the signature dollop-and-swirl effect that defines these cheesecake brownies.
Once the creamy cheesecake layer is spread over the brownie base, the reserved brownie batter is spooned onto the cheesecake in small dollops. The magic happens next: using a thin implement – a wooden skewer, a butter knife, or even a clean knitting needle (yes, seriously!) – gently swirl the two batters together. The key is to drag your tool through the layers in a flowing, figure-eight motion, being careful not to overmix. A quick swirl is best; if the brownie batter sits too long, it might stiffen, making it harder to create distinct patterns.
My personal tool of choice for this swirling action is a clean knitting needle. It might sound unconventional, but after numerous attempts (and admitted failures) to master knitting, I found a new, glorious purpose for these slender tools in the kitchen – perfect for creating those intricate patterns in ebelskivers and, of course, these irresistible brownies. Trust me, once you see the beautiful marbled effect, you won’t look back!
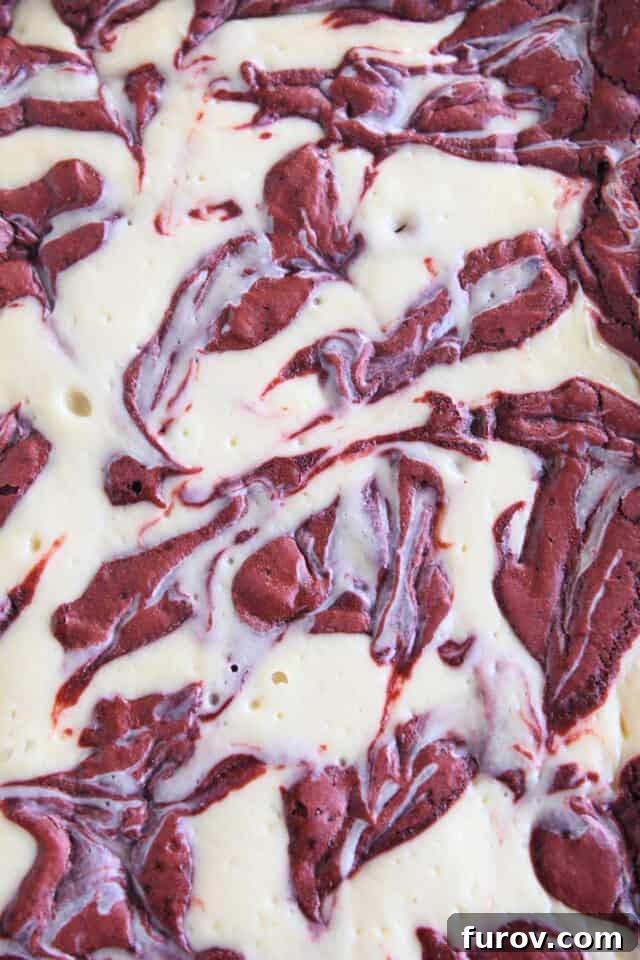
The contrast between the deep red brownie and the creamy, off-white cheesecake creates a stunning visual tapestry. Each swirl is unique, making every brownie a small work of art. This technique not only adds aesthetic beauty but also ensures that every bite contains a delightful fusion of both incredible layers.
Just look at that magnificent swirl – it’s a testament to the irresistible charm of homemade **cheesecake brownies**!
The Unbeatable Trio: Red Velvet, Brownies, and Cheesecake
The fusion of **red velvet, fudgy brownies, and creamy cheesecake** in a single dessert is truly a match made in heaven. These **Red Velvet Cheesecake Brownies** are astonishingly delicious, delivering a complex yet harmonious flavor profile that will leave everyone craving more.
What sets these brownies apart is the meticulously balanced ratio of brownie to cheesecake. It’s not just a brownie with a hint of cheesecake, nor is it an overly rich cheesecake on a flimsy base. Instead, each layer holds its own, contributing equally to the overall symphony of taste and texture. The dense, chewy, and deeply chocolatey red velvet brownie forms a robust foundation, while the smooth, tangy, and rich cheesecake layer adds a luxurious creaminess that cuts through the brownie’s intensity. The iconic red velvet flavor, with its subtle cocoa and slight tang, enhances the appeal of these brownies, adding a layer of sophistication that distinguishes them from a standard chocolate brownie.
For the ultimate enjoyment, I highly encourage you to try these brownies chilled. While warm, gooey brownies are a delight in many cases, cheesecake-swirled brownies truly shine after a few hours in the refrigerator. Chilling allows the cheesecake to firm up, creating a more defined texture and intensifying its creamy, cool sensation, which contrasts beautifully with the dense brownie. The flavors also meld and deepen when cold, providing a more complex and satisfying experience. Serving them warm, however, can result in a somewhat “shivery” texture for the cheesecake layer – not ideal for this particular masterpiece.
Though their vibrant appearance might suggest they are reserved solely for festive occasions, these lovely brownies are incredibly versatile. They are perfect for holiday gatherings, potlucks, birthday celebrations, or simply as a special treat to brighten your week. There’s no wrong time or reason to indulge in a batch of these extraordinary **cheesecake brownies**. They’re easy to make, impressive to serve, and absolutely irresistible.
One Year Ago: Triple Chocolate Scones
Two Years Ago: Easy Sugar Cookie Bars
Three Years Ago: The Best Swig Sugar Cookies {Copycat Recipe}
Four Years Ago: Amazing Instant Pot Indian Butter Chicken and Potato Curry
Five Years Ago: The Best Vanilla Buttercream Frosting {For Cookies + Cakes}
Six Years Ago: Winter Minestrone Soup with Garlic Bruschetta
Seven Years Ago: Classic Strawberry Shortcake {With a Decadent Chocolate Version}
Eight Years Ago: No-Bake Berry Yogurt Cheesecakes
Nine Years Ago: Nutella and Strawberry Stuffed French Toast
Ten Years Ago: Healthy Banana Oat Snack Bars
Red Velvet Cheesecake Brownies
Pin
Ingredients
Brownie Batter:
- 1 cup (227 g) butter (I use salted)
- 2 cups (340 g) semisweet chocolate, chopped (or good quality chocolate chips – see note)
- 1 ½ cups (318 g) granulated sugar
- 1 cup (212 g) lightly packed brown sugar
- 6 large (300 g) eggs
- 2 tablespoons red liquid food coloring
- 1 tablespoon vanilla extract
- 1 ¾ cups (249 g) all-purpose flour
- ¼ cup (21 g) natural, unsweetened cocoa powder
- ¾ teaspoon salt
Cheesecake Batter:
- 16 ounces (454 g) cream cheese, softened
- 1 cup (212 g) granulated sugar
- ¼ cup (36 g) all-purpose flour
- 2 large (100 g) eggs
- 1 teaspoon vanilla extract
Instructions
-
Preheat your oven to 325 degrees F (160 degrees C). Line a 9×13-inch baking pan with parchment paper or foil, ensuring some overhang on the sides for easy removal. Lightly grease the lining with cooking spray. A metal baking pan is recommended for more even baking.
-
In a microwave-safe bowl, combine the butter and chopped semisweet chocolate. Heat in 1-minute intervals at 50-60% power, stirring thoroughly after each interval, until the mixture is fully melted and smooth. Be careful not to overheat the chocolate, as this can cause it to seize.
-
Add the granulated sugar and lightly packed brown sugar to the melted chocolate mixture. Whisk vigorously until both sugars are fully incorporated and the mixture is smooth. Next, add the large eggs one at a time, whisking well after each addition until thoroughly combined.
-
Stir in the vanilla extract and the red liquid food coloring. Continue to whisk until the color is evenly distributed throughout the batter and you have a beautiful, vibrant red.
-
Gently fold in the all-purpose flour, natural unsweetened cocoa powder, and salt. If your cocoa powder is particularly lumpy, it’s best to sift it into the batter to ensure a smooth consistency. Stir until just combined, being careful not to overmix, and no dry streaks of flour remain. Overmixing can lead to tougher brownies.
-
Scoop out precisely 1 cup of the red velvet brownie batter and set it aside; this will be used for the swirl. Spread the remaining brownie batter evenly into the prepared 9×13-inch baking pan, creating a smooth base.
-
Now, prepare the cheesecake batter. In a separate medium bowl, cream together the softened cream cheese and granulated sugar until the mixture is light, fluffy, and well combined. Add the ¼ cup of all-purpose flour and mix until fully incorporated.
-
Beat in the two large eggs and the teaspoon of vanilla extract until everything is well combined and smooth. Remember to scrape down the sides of the bowl as needed to ensure all ingredients are thoroughly mixed.
-
Carefully spread the prepared cheesecake batter evenly over the red velvet brownie base in the baking pan, creating a distinct second layer.
-
Take the reserved 1 cup of brownie batter and dollop it by tablespoonfuls over the smooth cream cheese layer. Using a wooden skewer, a butter knife, or another thin tool (like a clean knitting needle!), gently swirl the brownie and cheesecake layers together. Move quickly, as the brownie batter can stiffen, making it harder to create beautiful swirls. Aim for distinct marble patterns rather than fully mixing the layers.
-
Bake the brownies in the preheated oven for approximately 40-45 minutes. They are ready when the edges appear set and slightly golden, and the top has a glossy sheen. The center should still be slightly jiggly – this is perfectly normal for fudgy brownies with a cheesecake swirl. For accuracy, an instant-read thermometer inserted into the center should register 165 degrees F (74 degrees C). Baking times may vary depending on your oven and pan type, so adjust as needed.
-
Allow the brownies to cool completely in the pan on a wire rack. This step is crucial for the cheesecake layer to set properly. Once cooled, transfer the pan to the refrigerator and chill for a minimum of 2-4 hours, or preferably overnight, until they are thoroughly cold. Serve these decadent brownies chilled or at room temperature for the best flavor and texture.
Notes
Food Coloring Alternatives: This recipe specifies liquid red food coloring. If you plan to substitute with gel food coloring, which is typically more concentrated, you’ll need to adjust the amount. I haven’t personally tested this recipe with gel, but as a general rule, you can usually use about half the amount of gel coloring compared to liquid and add more gradually until your desired vibrant red hue is achieved. For a natural alternative, you could experiment with beet powder, though results for color intensity and flavor may vary. Alternatively, you can omit the food coloring entirely for a delicious, swirled cheesecake brownie without the red velvet aesthetic.
Recommended Products
Recipe Source: This delightful recipe is a thoughtful adaptation from an original featured in the Bake magazine, specifically the November/December 2021 edition, with some personal tweaks to perfect the flavor and texture.