
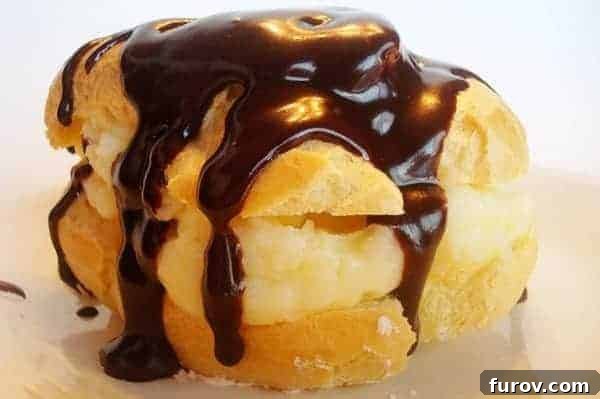
Indulge in Homemade Heart-Shaped Cream Puffs with Rich Bavarian Cream and Decadent Chocolate Glaze
There’s an unparalleled joy in creating something truly special from scratch, and these heart-shaped cream puffs, generously filled with luscious Bavarian cream and crowned with a decadent chocolate glaze, are no exception. Often perceived as a daunting culinary feat, the art of making cream puffs, or “choux pastry,” is surprisingly accessible and incredibly rewarding. This recipe transforms what might seem like a complex dessert into a delightful baking adventure that will impress your loved ones and satisfy even the most discerning sweet tooth.
For many years, the idea of baking cream puffs felt intimidating. The elegant appearance and delicate structure suggested a level of expertise I wasn’t sure I possessed. However, at the gentle urging of my husband – a lifelong aficionado of this classic French pastry – I decided to conquer my fears and dive into the world of choux. What I discovered was not the monumental task I had envisioned, but rather a wonderfully engaging process that, while requiring a bit of attention, was far less arduous than anticipated. (Though, I must confess, some of the challenge came from navigating a curious one-year-old determined to use my legs as a teething toy!)
While perhaps a notch above the simplicity of whipping up a batch of thick and chewy chocolate chip bars, crafting these cream puffs isn’t dramatically more intense than carefully portioning cookie dough onto baking sheets. The magic truly lies in the transformation of humble ingredients into airy, golden shells that are perfect for holding a rich, creamy filling.
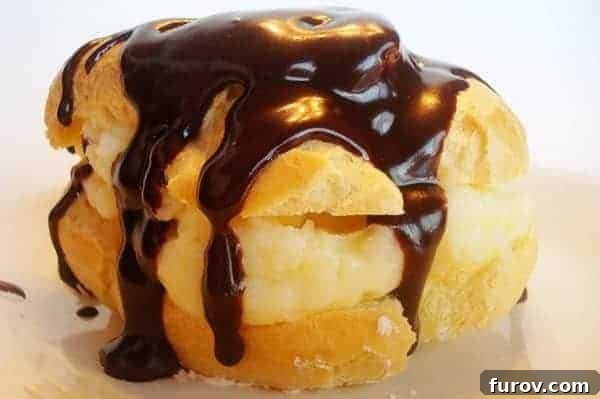
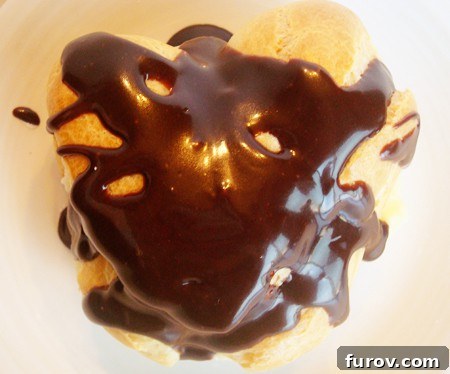
With a certain romantic holiday on the horizon, I opted to shape these particular pastries into delicate hearts. Even if the distinct heart shape softened slightly once plumped with a thick, homemade Bavarian cream and generously coated in a simple yet utterly luxurious chocolate glaze, the extraordinary taste remained undeniably captivating. The combination of the crisp pastry, the silken cream, and the bittersweet chocolate creates a symphony of textures and flavors that is truly unforgettable.
Do not let the seemingly lengthy recipe or the reputation of the cream puff deter you. I assure you, every minute spent in the kitchen and every glorious calorie consumed is entirely worth it. These pastries come together more quickly than their impressive appearance suggests, offering a delightful reward for your culinary efforts. To guide you every step of the way, I’ve included a comprehensive pictorial guide below the recipe card, illustrating the key stages of the process.
Sweet Delights for Special Occasions
Looking for more dessert inspiration, especially for Valentine’s Day or other heartfelt celebrations? Here are a few other sweet treats that are sure to win hearts:
- White Velvet Sugar Cookies
- Red Velvet Cake Balls
- Strawberry Cream Puff Cake
- Cherry Cheesecake Cookies
- Berries and Cream
- Heart Shaped Chocolate Toffee Sugar Cookies
- Kicked Up Rice Krispy Treats
As for our upcoming special dinner, we’ll be enjoying a tried-and-true recipe. For dessert, I plan to make these incredible brownies, which I’ll cut into charming heart shapes using a cookie cutter. To elevate them further, they’ll be topped with scoops of vanilla ice cream, a generous drizzle of warm homemade hot fudge sauce, a cloud of whipped cream, and a bright, sweet cherry – a truly indulgent finale!
Heart Shaped Cream Puffs
10 heart shaped cream puffs
20 mins
30 mins
50 mins
Pin Recipe
Rate This
Ingredients
Pastry:
- 1 cup water
- 8 tablespoons (113 g) butter
- ¼ teaspoon salt
- 1 ¼ cups (178 g) all-purpose flour
- 4 large eggs
Bavarian Cream:
- 2 cups whole milk
- ½ teaspoon pure vanilla extract
- ¼ cup cornstarch
- ½ cup (106 g) granulated sugar
- ¼ teaspoon salt
- 2 large eggs
- 2 tablespoons (28 g) butter
- 1 ½ cups heavy cream
- ¼ cup (29 g) powdered sugar
- ½ teaspoon vanilla
Chocolate Glaze:
- 1 tablespoon (14 g) butter
- 1 ounce (28 g) (1 square) unsweetened baking chocolate
- 1 tablespoon hot water
- ½ cup (57 g) powdered sugar
Instructions
-
For the Bavarian Cream: Begin by placing the milk in a heavy-bottomed saucepan. Gradually bring the milk to a gentle boil over medium heat, ensuring it doesn’t scorch. While the milk heats, whisk together the cornstarch, granulated sugar, and salt in a separate bowl. Incorporate the large eggs into this mixture, whisking until perfectly smooth and lump-free. Once the milk is hot, slowly pour about one-third of it into the egg mixture while whisking vigorously. This crucial step, known as tempering, prevents the eggs from scrambling. Continue whisking rapidly to ensure even heating and a smooth consistency. Pour this tempered egg mixture back into the remaining hot milk in the saucepan.
-
Return the saucepan to medium heat and cook, stirring continuously with a whisk or rubber spatula, until the mixture comes to a full boil and visibly thickens. Once thickened, allow it to boil for a few more seconds to cook out any raw starch taste. Remove from heat, stir in the pure vanilla extract, then add the butter, stirring until it is completely melted and integrated into the creamy custard.
-
Transfer the finished custard to a clean bowl. To prevent a skin from forming, cover the surface directly with a piece of plastic wrap, pressing it down so it touches the entire surface of the custard. Allow it to cool completely to room temperature. Once cooled, in a separate bowl, whip the heavy cream, powdered sugar, and the second measure of vanilla extract until stiff peaks form. Gently fold the whipped cream into the cooled pastry cream until fully combined. Cover the Bavarian cream again with plastic wrap, pressing directly onto the surface, and refrigerate for at least 2 hours, or until firm. It can be stored in the refrigerator for up to 4 days.
-
Important Note: If your pastry cream becomes lumpy while cooking, typically due to excessively high heat or insufficient stirring, don’t despair. Immediately pass the hot mixture through a fine-mesh strainer before it has a chance to cool, and it should become smooth again.
-
For the Cream Puff Pastry (Choux Pastry): Preheat your oven to a robust 425 degrees Fahrenheit (220 degrees Celsius). This high initial heat is essential for a good puff.
-
In a medium saucepan, combine the water, butter, and salt. Bring this mixture to a vigorous rolling boil over medium heat. As soon as it reaches a rolling boil, remove the pan from the heat and immediately add all of the all-purpose flour at once. Stir vigorously and quickly with a wooden spoon or heat-resistant spatula until the mixture comes together to form a cohesive ball of dough. Return the pan to the burner and continue to cook over medium heat, stirring constantly, for about one minute. This process dries out the dough and is crucial for creating the perfect choux. At this stage, the dough should pull away from the sides of the pan and look like a smooth, firm ball. (This is what you’d see in Photo #1: a neat ball of choux paste in the saucepan, ready for the next step).
-
Remove the pan from the heat and let the choux pastry cool down for approximately five to ten minutes. While it will still feel warm to the touch, you should be able to comfortably hold your finger in it for a few seconds. This cooling period is important to prevent the eggs from cooking prematurely when added.
-
Transfer the slightly cooled dough to a stand mixer fitted with the paddle attachment (or use a hand mixer). Begin beating in the eggs, one at a time, ensuring each egg is fully incorporated before adding the next. After the first egg is added, the mixture may appear to separate or look crumbly and somewhat curdled. Do not be alarmed; this is completely normal for choux pastry. (This transformation is captured in Photo #2: the choux paste appearing broken and crumbly after the first egg is incorporated).
-
Continue adding the eggs gradually, beating well after each addition. As you incorporate more eggs, the dough will start to come back together and form a cohesive, albeit sticky, mass. By the time the third egg is mixed in, you’ll notice the dough becoming smoother and more elastic. (Observe this consistency in Photo #3: the dough reforming into a smoother, thicker paste after the third egg).
-
Keep beating in the remaining eggs one at a time until the mixture transforms into a light, glossy, and fluffy dough. Continue beating for at least two minutes after adding the final egg to ensure it’s fully emulsified and airy. The final dough should have a consistency that allows it to hold its shape when piped but is still soft and pliable, often described as having a “ribbon stage” where it slowly falls off the paddle in a V-shape. (The ideal light and fluffy texture of the choux pastry is shown in Photo #4).
-
At this stage, the dough will be extremely sticky, clinging to the beaters and the sides of the bowl. This stickiness is a characteristic of well-made choux pastry, so don’t be concerned. Simply scrape the dough back into the bowl as needed.
-
Now, you can form the choux paste into your desired shapes. For simple, rustic cream puffs, use a spoon to drop rounded mounds of dough onto your prepared baking sheet. For more precise or decorative shapes, like our heart-shaped puffs, a pastry bag is recommended.
-
To create the heart shapes, I fitted a pastry bag with my largest coupler (no tip needed, as the coupler itself creates a good opening) and carefully spooned the dough into the bag. A word of caution: avoid overfilling the pastry bag, as it can lead to a messy situation and make piping more difficult. A large Ziploc bag with a corner snipped off can also serve as an excellent impromptu piping bag for creating specific shapes. (Photo #5 illustrates the pastry bag filled with choux dough, ready for piping – perhaps a bit overfilled, learn from my experience!). You can also see a close-up of the large coupler used for piping the dough.
-
Pipe the dough onto a baking sheet lined with parchment paper or a silicone baking mat. For heart shapes, I piped simple “V” shapes, connecting them at the bottom. You might notice some small ridges or unevenness on the piped V-shapes. (This initial piping stage, showing the V-shapes with slight ridges, is captured in Photo #6).
-
To achieve beautifully smooth heart shapes, simply moisten your fingertips with a little water and gently smooth down any ridges, bumps, or peaks on the piped dough. This quick fix ensures a more refined and even puff. (The transformation to smooth, refined heart shapes is visible in Photo #7, after smoothing with wet fingers).
-
Finally, bake the cream puffs. Start by baking them for 15 minutes at 425 degrees Fahrenheit (220 degrees Celsius). After 15 minutes, reduce the oven temperature to 375 degrees Fahrenheit (190 degrees Celsius) and continue baking for an additional 15 minutes. Once baking is complete, turn off the oven, open the door slightly (leaving a crack), and allow the pastries to cool inside for approximately 30 minutes. This slow cooling process is vital; if they cool too rapidly, they may deflate. Remove them from the oven and let them cool completely on a wire rack before attempting to fill them. During baking, the choux pastry should puff up beautifully and achieve a lovely golden-brown color, becoming crisp on the outside and hollow within. (The perfectly puffed and browned cream puffs directly out of the oven are displayed in Photo #8).
-
For the Chocolate Glaze: In a microwave-safe bowl, melt the butter and unsweetened baking chocolate together. Heat at 50% power in short intervals, stirring frequently, until completely melted and smooth. Once melted, stir in the hot water and powdered sugar until well combined. Beat with a spoon or fork until the glaze is smooth, glossy, and has a pourable consistency. If the glaze appears too thick, you can thin it out with an additional tiny amount of hot water or a splash of heavy cream until it reaches your desired drizzling consistency.
-
To Assemble the Cream Puffs: Carefully slice each cooled cream puff horizontally, almost in half, to create a top and bottom. Fill the bottom half generously with a heaping dollop of the prepared Bavarian cream. Gently replace the top of the pastry and then generously drizzle the entire cream puff with the decadent chocolate glaze. For the best texture and to prevent the pastry from becoming soggy, it is recommended to assemble these delightful treats no more than two hours before serving. Enjoy the exquisite taste of your homemade masterpiece!
Mel
Dessert
American, French
Bake, Stovetop
Nutrition Information
Serving: 1 Cream Puff,
Calories: 464kcal,
Carbohydrates: 38g,
Protein: 8g,
Fat: 32g,
Saturated Fat: 19g,
Cholesterol: 198mg,
Sodium: 306mg,
Fiber: 1g,
Sugar: 22g
Recommended Products
Step-by-Step Visual Guide to Perfect Cream Puffs
To help you confidently navigate the process, here’s a more detailed look at the visual progression of making these delightful cream puffs. While the actual images aren’t present here, these descriptions will guide you through what to expect at each critical juncture:
Understanding Choux Pastry: A Pictorial Walkthrough
Photo #1: Choux Paste in the Pot
Photo #2: Crumbly Choux Paste After First Egg
Photo #3: Choux Paste After Third Egg
Photo #4: Light and Fluffy Choux Pastry
Photo #5: Overfilled Piping Bag
Photo #6: Unsmoothed Heart Shapes
Photo #7: Smoothed Heart Shapes
Photo #8: Perfectly Baked Cream Puffs
Recipe Source: The foundational Cream Puff Dough and Chocolate Glaze recipes were inspired by King Arthur Flour’s Baker’s Companion, known for its reliable and comprehensive baking guidance. The delightful Bavarian Cream filling was expertly adapted from the esteemed resource, The Professional Pastry Chef.