
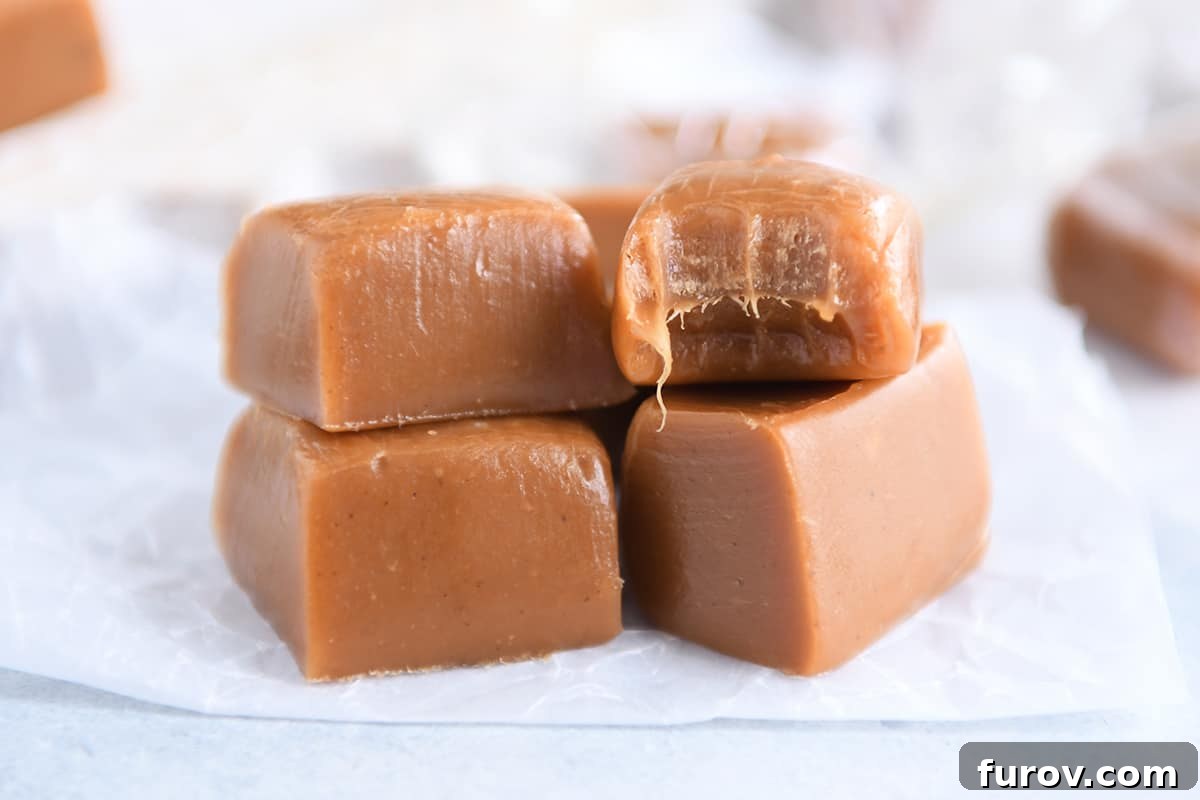
These gingerbread caramels are absolutely amazing! All the flavors of gingerbread wrapped up in a creamy, chewy, soft, homemade caramel.
As the holiday season draws near, there’s a unique warmth and magic that only gingerbread can bring. Imagine that classic, comforting spice blend infused into a luscious, buttery, and melt-in-your-mouth caramel. These aren’t just any caramels; these are **Gingerbread Caramels** – a festive sensation that screams “holidays” and promises cozy evenings in your favorite flannel pajamas. Be warned, though: leaving yourself alone with an entire batch of these homemade delights might lead to delicious trouble!
The exquisite combination of warm gingerbread spices and rich, creamy caramel creates a truly divine treat. It’s an elevated twist on a classic candy that will impress friends and family alike, making it perfect for gifting or simply indulging in a moment of pure bliss. And the best part? Making them at home is far easier than you might think. Below, you’ll find a step-by-step tutorial to guide you through crafting these irresistible gingerbread caramels.
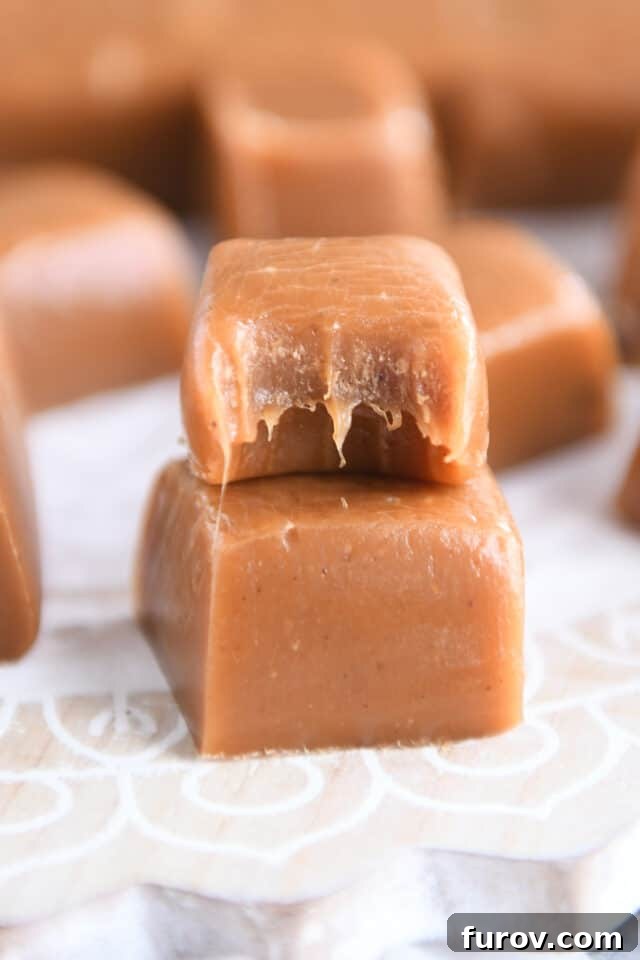
Mastering Homemade Gingerbread Caramels: A Step-by-Step Guide
The thought of making candy or caramel from scratch can often seem daunting, a culinary challenge reserved for expert confectioners. However, I can assure you with absolute confidence that this gingerbread caramel recipe is incredibly achievable for home cooks of all skill levels! There’s an immense satisfaction that comes from creating something so delicious from simple ingredients, and these caramels are no exception.
While I’ve shared extensive details in this comprehensive guide to homemade caramels on how to achieve rock-star status in caramel making, I’m happy to walk you through all the essential steps right here. This ensures you have all the specific information you need to successfully make these festive gingerbread treats.
At the heart of these gingerbread caramels lies my consistently reliable, go-to caramel recipe. It’s the only one I use, cherished for its fool-proof method that prevents scorching and delivers an unparalleled depth of flavor. The journey begins with a foundational syrup: sugar, corn syrup, and water are combined and carefully boiled until they transform into a beautiful, light amber hue. This initial stage sets the stage for the rich caramel flavor to develop.
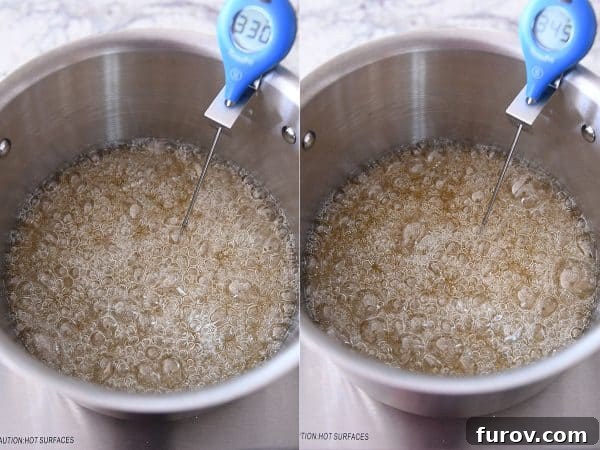
One of the most crucial steps in crafting perfect homemade caramels is preventing sugar crystals from clinging to the sides of your pan. If these stray crystals fall back into the boiling caramel mixture, they can trigger a chain reaction, causing the entire batch to crystallize and ruin the smooth, chewy texture you desire. Fortunately, this common pitfall is easily avoided. Simply brush down the sides of the pan occasionally with a pastry brush dipped in water. A few gentle swipes are all it takes; there’s no need to constantly monitor it or worry excessively.
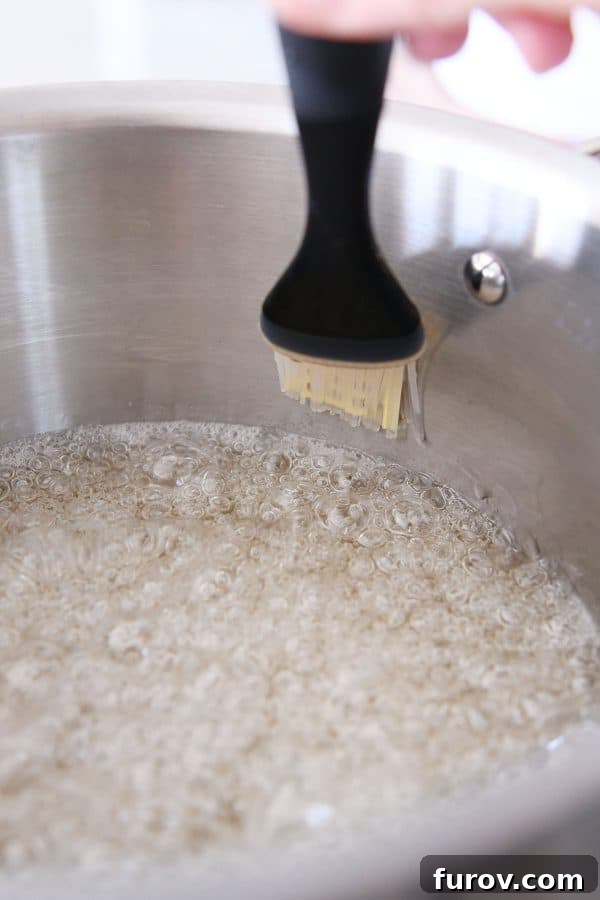
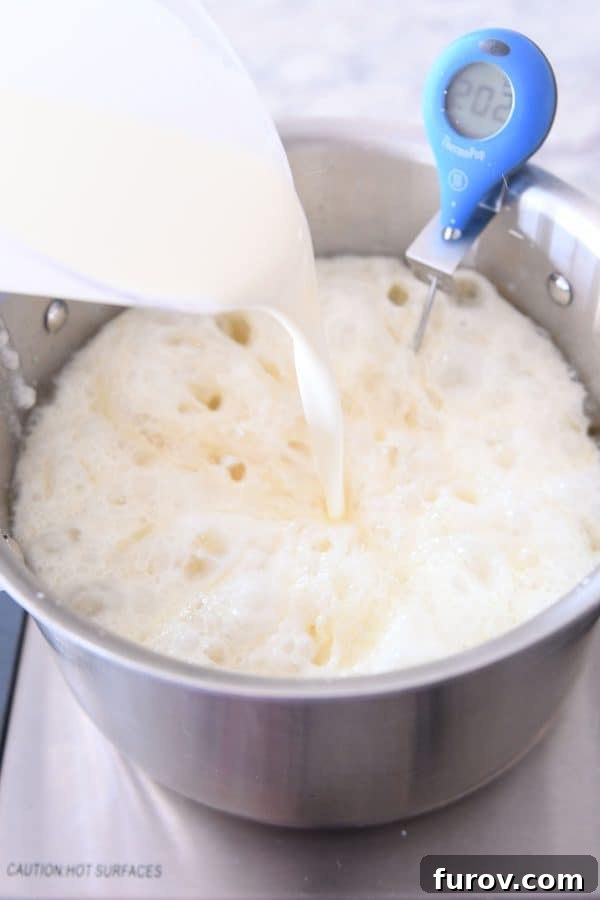
Once your sugar mixture achieves a temperature of 325 degrees F and a beautiful amber color, it’s time to carefully incorporate the warm cream, butter, and salt. Expect a lively reaction! The mixture will bubble vigorously and produce a good amount of steam, and you’ll notice a temporary drop in temperature. This is entirely normal and part of the transformation into rich, creamy caramel. Don’t be alarmed by the bubbling; it’s a sign that the ingredients are coming together beautifully.
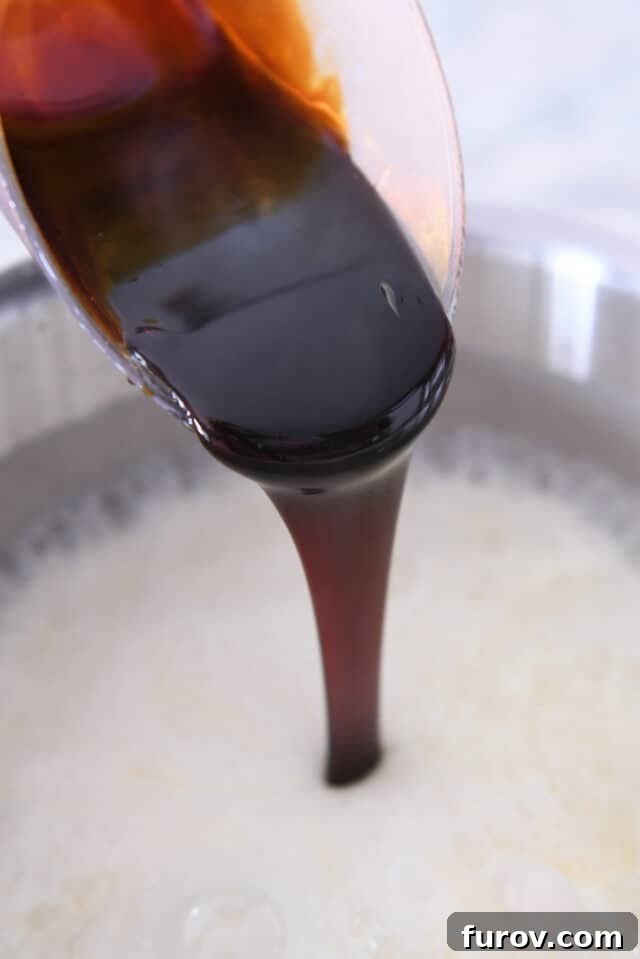
Now, for the unmistakable signature of gingerbread caramels: the addition of molasses. We’re talking about regular, unsulphured molasses here – definitely not the more intense blackstrap variety. Molasses is key to achieving that authentic gingerbread character, lending a beautiful, deep flavor and a richer, darker color to the finished caramel. It truly elevates these caramels from ordinary to extraordinarily festive.
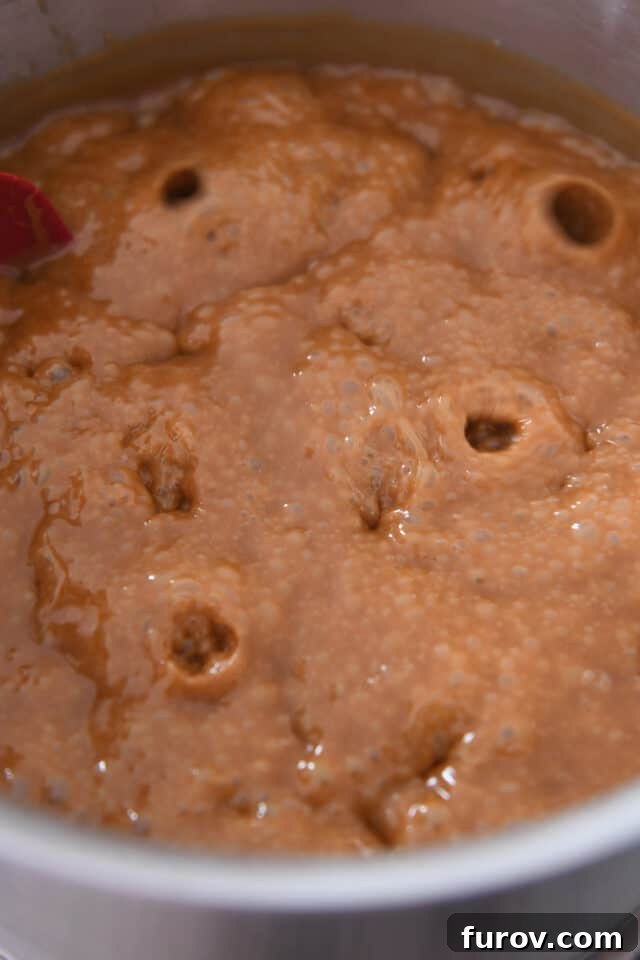
With all ingredients now combined, bring the caramel mixture to a gentle boil, stirring constantly to ensure even cooking and prevent sticking. In the initial stages, you’ll observe frothy, thin bubbles dancing across the surface.
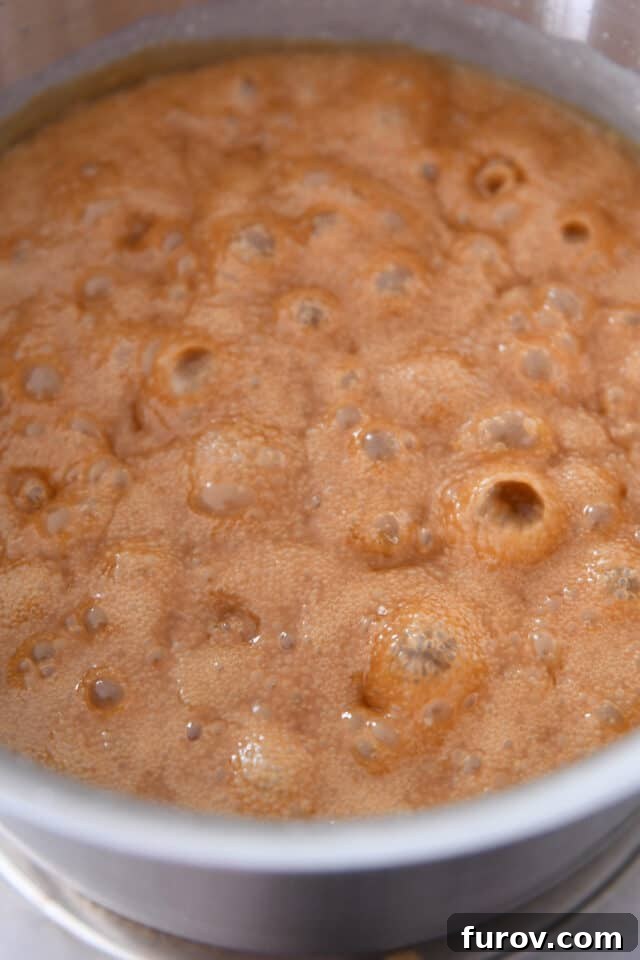
As the caramel continues to cook and reduce, you’ll notice a delightful transformation. The color will gradually deepen, evolving into a richer, more inviting amber. Concurrently, the bubbles will become larger and more pronounced, indicating the caramel is thickening and concentrating.
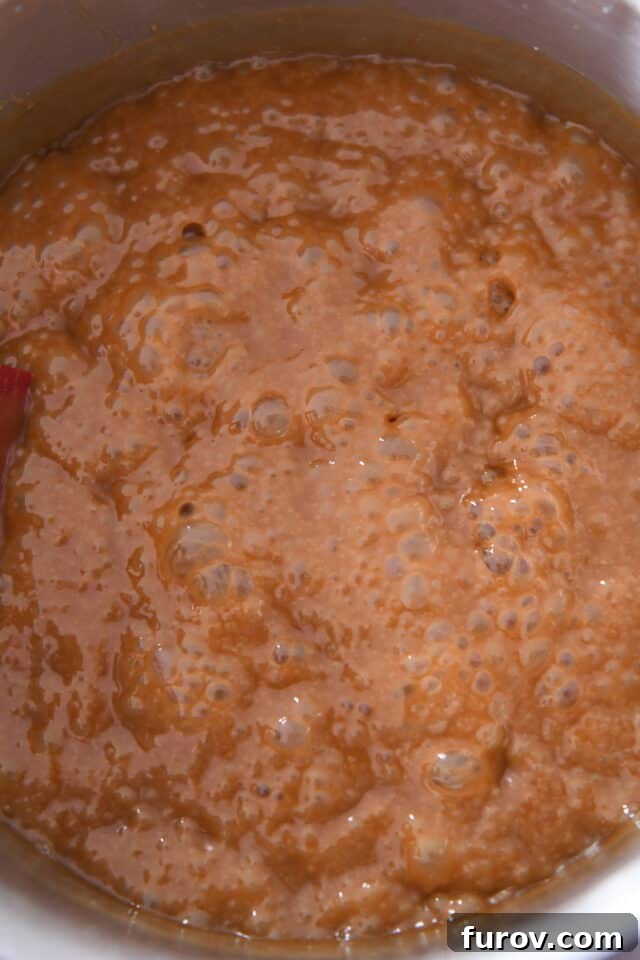
Towards the final stages of cooking, the caramel will achieve a wonderfully thick and luxurious consistency. Large, satisfying bubbles will slowly pop at the surface, and your spatula will leave distinct, swirly trails as you stir. These visual cues are excellent indicators of the caramel approaching its perfect stage.
Achieving Perfection: The Ideal Temperature for Homemade Caramels
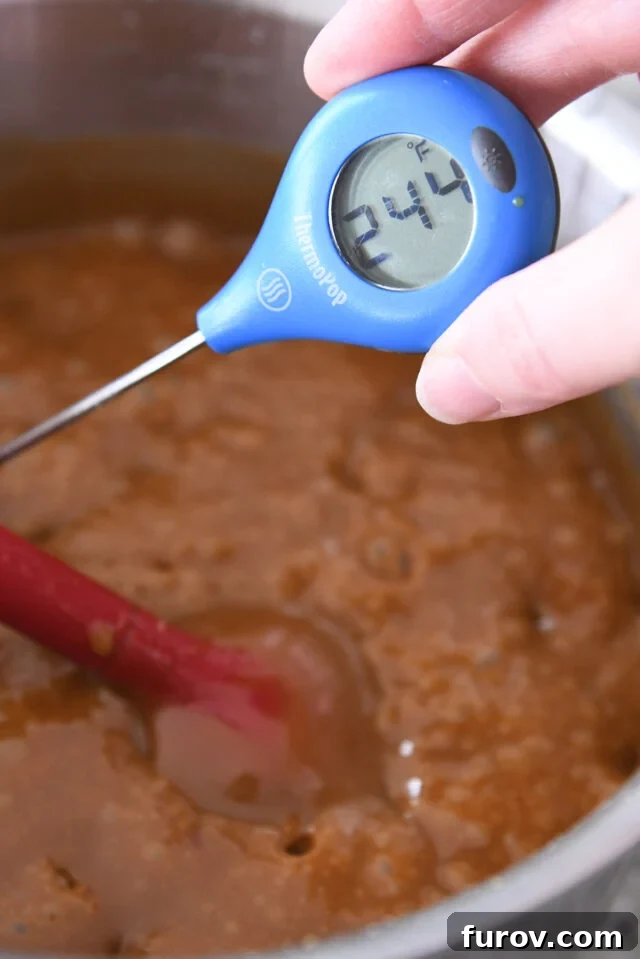
For caramels that boast that irresistible soft-chew texture, precision in temperature is paramount. Aim to cook your gingerbread caramel mixture to a target range of **244-246 degrees F (118-120 degrees C)**. This range typically corresponds to the “soft ball” stage in candy making, ensuring your caramels are chewy without being hard or sticky.
However, it’s essential to understand that the precise temperature for perfection can actually vary based on a couple of critical factors:
- Your Thermometer’s Accuracy: Not all thermometers are created equal, and even good ones can lose calibration over time. An inaccurate reading is the most common culprit for caramel failures.
- Your Elevation: Altitude significantly affects the boiling point of water and, consequently, candy cooking temperatures. For example, I reside at approximately 2,400 feet elevation, which requires slight adjustments compared to sea level cooking.
To ensure consistent success, I highly recommend dedicating a few minutes to calibrating your candy thermometer. This simple step can truly make all the difference in how your homemade caramels turn out, guaranteeing that perfect chewy texture every time. You can easily calibrate your thermometer by placing it in vigorously boiling water. At sea level, it should read 212°F (100°C). If it reads higher or lower, you’ll know to adjust your target caramel temperature accordingly. For every 500 feet above sea level, the boiling point of water decreases by roughly 1°F, which means your target caramel temperature will also be slightly lower.
Taking the time to calibrate your thermometer is a small investment that will yield huge rewards in the quality and consistency of your homemade caramels! It transforms caramel making from a guessing game into a precise, enjoyable process.
Over the years, I’ve transitioned away from traditional glass candy thermometers. I now exclusively use an instant-read thermometer, paired with a pan clip that securely attaches it to the side of the pot. This allows for continuous monitoring, or I simply dip it in when I sense the caramel is nearing its target temperature. My personal favorite is the ThermoPop thermometer from Thermoworks; it’s both accurate and budget-friendly.
The Aromatic Blend: Essential Gingerbread Spices
Beyond the rich molasses, the distinctive flavor of these caramels truly comes alive with a carefully balanced blend of ground spices. These aromatic additions are what transform a simple caramel into an unforgettable gingerbread experience. The spices include:
- Ground Ginger: The star of the show, providing that signature warm, slightly spicy kick.
- Ground Cinnamon: Sweet and woody, cinnamon perfectly complements the ginger, adding depth and a familiar holiday aroma.
- Ground Allspice: A versatile spice that hints at cloves, nutmeg, and cinnamon, all rolled into one, enhancing the overall complexity.
- Ground Cloves: Pungent and sweet, cloves deliver a strong, warm undertone that is quintessential to gingerbread flavor.
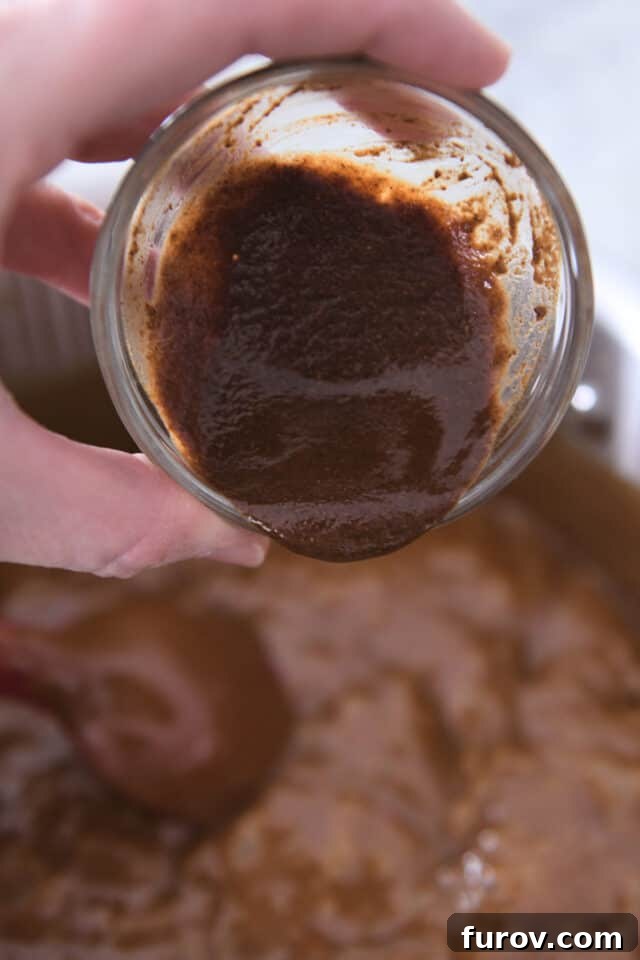
After many batches of experimentation, I discovered a brilliant trick to prevent these finely ground spices from clumping when stirred into the hot caramel mixture. Spices tend to seize up in liquid, creating pockets of concentrated flavor rather than a smooth, even distribution. This simple method ensures a perfectly blended, smooth caramel every time!
The secret? Combine all the ground spices with the vanilla extract in a small bowl before adding them to the caramel. This creates a smooth, paste-like mixture that incorporates beautifully and effortlessly into the warm caramel, distributing the gingerbread flavor evenly without any lumps.
No clumping means a very happy caramel maker – and even happier caramel eaters!
Neatly Slicing Your Homemade Caramels
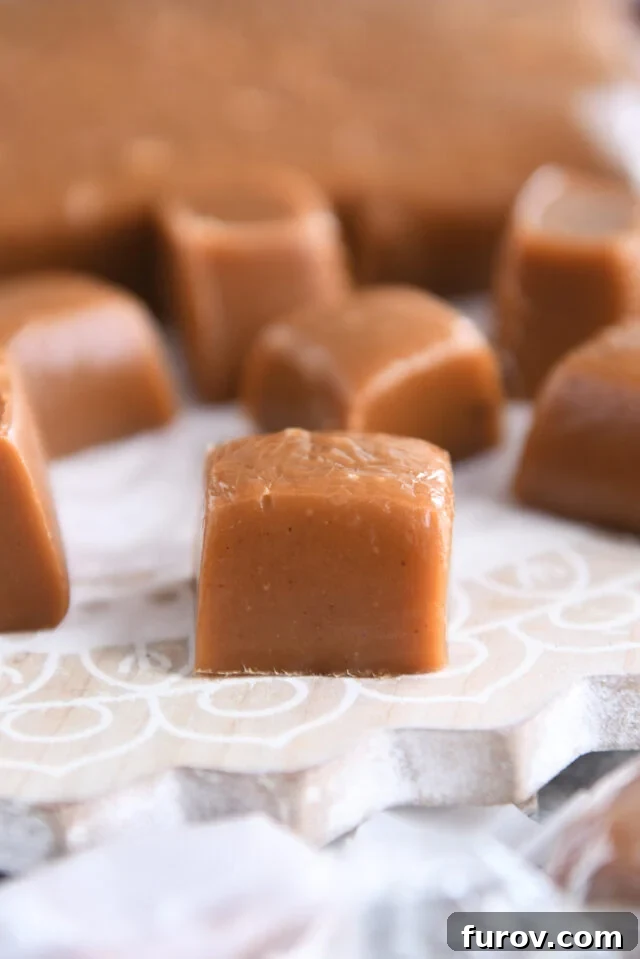
Once your delectable gingerbread caramels have completely cooled and set in the pan, the satisfying task of cutting and wrapping them awaits! The key to perfectly uniform and cleanly cut caramels lies in using the right tool: a bench knife. This simple kitchen utensil is a game-changer for candy making.
I find it easiest to gently peel the entire slab of cooled caramel out of the baking pan and transfer it onto a clean cutting board. The firm, straight edge of a bench knife makes quick and precise work of slicing the caramel into neat, uniform squares. This ensures each piece is perfectly bite-sized and presentable, whether for a dessert platter or a thoughtful gift.
The Best Way to Wrap Homemade Caramels
Gone are the days of painstakingly cutting sheets of wax paper into tiny squares for wrapping homemade caramels. Modern solutions have made this step significantly easier and more effective. For the best results, I highly recommend investing in precut cellophane wrappers.
These specialized wrappers are an absolute game-changer! Unlike parchment or wax paper alternatives, cellophane provides a superior twist and hold, keeping your caramels neatly sealed and fresh. The tight twist ensures the caramels remain protected from air, preserving their soft texture and delicious flavor for longer. Plus, their clear nature beautifully showcases the caramel’s inviting color.
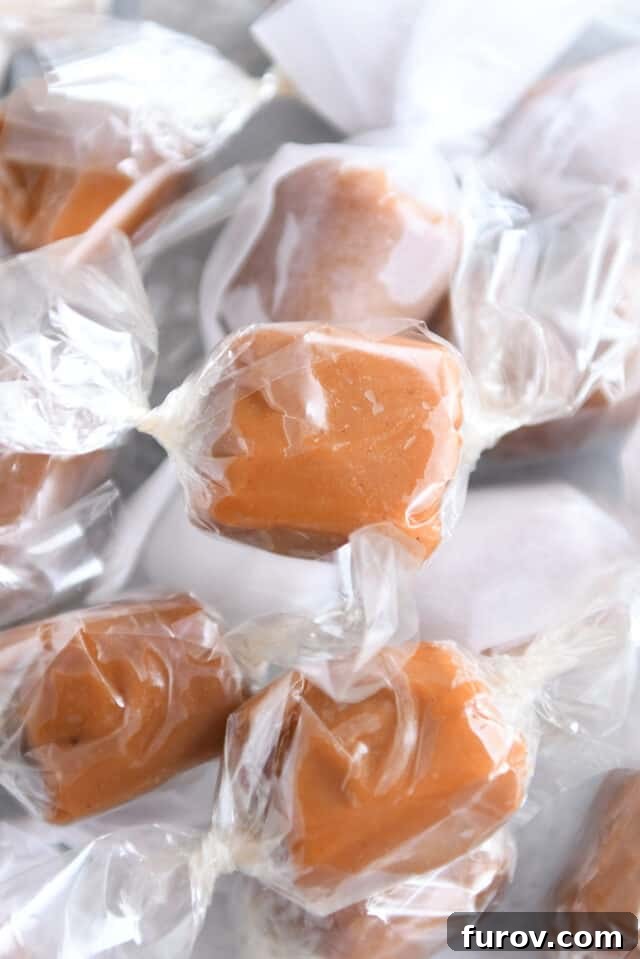
Experience the Magic of Amazing Gingerbread Caramels
Introducing a new caramel flavor into my personal repertoire is not a decision I take lightly. It involves a serious evaluation process to determine if a new flavor truly “makes the cut.” Over the years, I’ve tried and, frankly, rejected many experimental caramel flavors (razilberry, I’m looking squarely at you, with your cough syrup-like taste – no thanks!).
However, I can wholeheartedly and honestly declare that these **Gingerbread Caramels** have not just made the cut; they have skyrocketed straight to the very top of my all-time favorite caramels list. They are, simply put, beyond good. They are absolutely sublime.
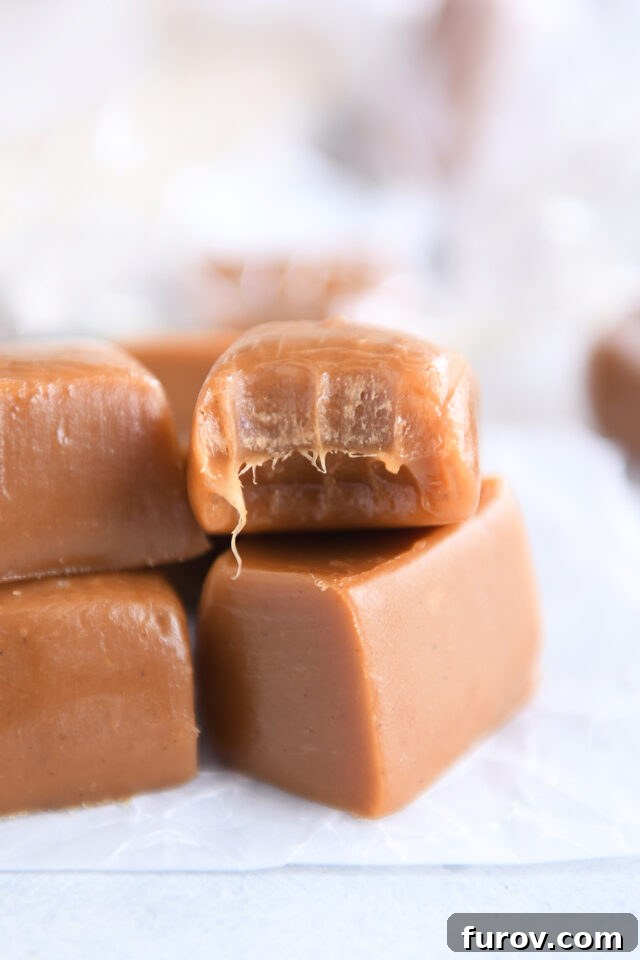
The carefully balanced gingerbread flavors are wonderfully warm, inviting, and deliciously cozy without ever being overwhelming. Each bite delivers that perfect blend of sweet caramel and festive spice that is utterly irresistible. They embody the true spirit of the season, making them the ultimate holiday caramel flavor. I adore them immensely and sincerely hope that you will, too! These caramels are more than just a sweet treat; they’re a delightful celebration of holiday flavors, wrapped in a perfectly chewy package.
One Year Ago: Overnight Cheesy Bacon Croissant Breakfast Casserole
Two Years Ago: Cranberry Coffee Cake with Warm Vanilla Sauce
Three Years Ago: Make-Ahead Overnight Tater Tot Breakfast Casserole
Four Years Ago: Easy Peanut Butter Chocolate Graham Cracker Toffee
Five Years Ago: Chocolate Peppermint Crinkle Blossom Cookies
Six Years Ago: Overnight Creme Brûlée French Toast Bake
Seven Years Ago: Soft Eggnog Sugar Cookies with Whipped Eggnog Frosting
Eight Years Ago: Amazing Scottish Shortbread
Nine Years Ago: Orange Zested Cranberry White Chocolate Bliss Bars
Ten Years Ago: Chocolate Shortbread Fingers
Gingerbread Caramels
Pin
Ingredients
- 2 cups heavy cream
- 2 teaspoons vanilla extract
- ½ teaspoon ground ginger
- ½ teaspoon ground cinnamon
- ⅛ teaspoon ground allspice
- ⅛ teaspoon ground cloves
- 2 ½ cups (530 g) granulated sugar
- ½ cup light corn syrup
- ½ cup water
- ½ cup molasses (not blackstrap)
- 6 tablespoons (85 g) butter, cut into 1/2-inch pieces (I use salted butter)
- ½ teaspoon coarse, kosher salt (use 1/4 teaspoon for table salt)
Instructions
-
Butter the bottom and sides (get into the corners, too!) of an 8- or 9-inch square baking pan. (Alternately, you can line with parchment paper and butter the parchment – this may make it easier to pull the slab of caramels out of the pan after they have cooled for cutting and wrapping.) Set aside.
-
Heat the cream in a saucepan or in the microwave until steaming. Keep warm.
-
In a small bowl, stir together the vanilla, ginger, cinnamon, allspice, and cloves. Set aside.
-
For the caramels, in a large, heavy-bottomed pot (at least 5- or 6-quarts), stir together the sugar, corn syrup, and water, taking care not to splash the mixture up the sides of the pot. Clip a candy thermometer onto the side of the pan, if using.
-
Bring the mixture to a boil over medium-high heat WITHOUT STIRRING or moving the pan. As it begins to boil, fill a cup with water and use a pastry brush to wash down the sides of the pan so there are no granules of sugar sticking to the sides of the pan (you probably won’t need to repeat this after the sides have been well-cleaned). This prevents the caramel mixture from crystallizing in later steps.
-
Cook until the boiling sugar turns a light amber color and registers 325 degrees F on the thermometer, about 15-20 minutes.
-
Slowly and carefully pour the warm cream into the caramel. It will bubble and produce a lot of steam! Add the molasses, butter, and salt. The mixture will bubble high during this step but will go down after a few minutes.
-
Begin stirring the caramel with a heatproof rubber spatula, making sure to scrape across the bottom of the pan (but avoid scraping the sides of the pan too much). Continue to cook, stirring constantly and slowly, until the mixture reaches 244-246 degrees F, about 10-20 minutes. Immediately remove from the heat.
-
Off the heat, scrape the vanilla/spices mixture into the caramel and stir gently until well-combined.
-
Pour the caramel mixture into the prepared pan. Let the caramels cool completely at room temperature for several hours or overnight.
-
Cut the caramel into squares using a sharp knife or bench scraper. Wrap the caramels individually and store them in an airtight container at cool room temperature for up to two weeks.
Notes
Gingerbread Flavor: For a more pronounced gingerbread flavor, the ground spices (ginger, cinnamon, allspice, cloves) can be doubled to suit your preference.
Recommended Products
Recipe Source: Adapted from Mel’s Kitchen Cafe