
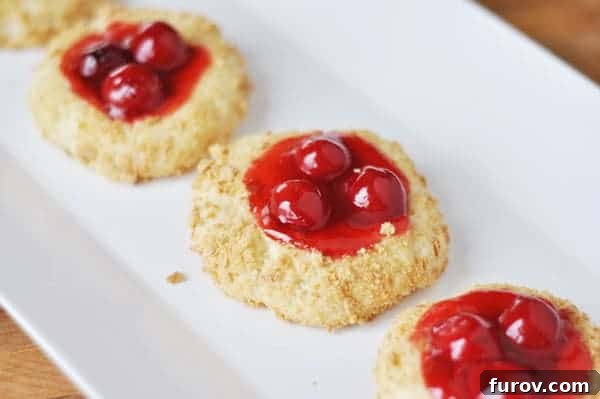
Irresistible Cherry Cheesecake Cookies: Your New Favorite Dessert!
Experience the delightful combination of creamy cheesecake and fruity cherries, all wrapped up in a convenient cookie form. Pure yum!
Prepare to embark on a culinary journey that will redefine your dessert expectations. These Cherry Cheesecake Cookies are, without exaggeration, absolutely phenomenal. They ingeniously capture the rich, decadent essence of a classic cherry cheesecake and transform it into an easy-to-handle, utterly delicious cookie. Imagine sinking your teeth into a tender, sweet cookie that offers the comforting flavors and textures you adore from a cheesecake, but in a fraction of the time and effort.
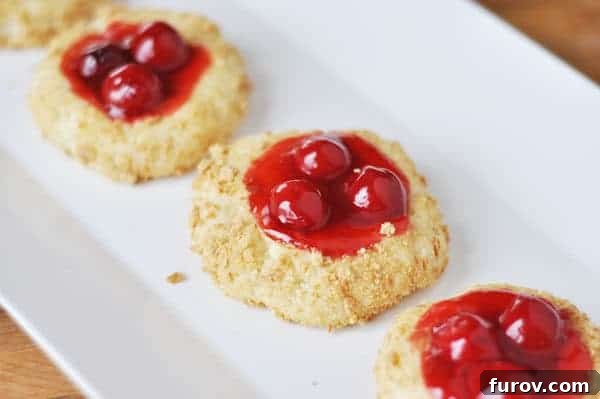
The Magic Behind These Mini Cheesecake Delights
What makes these cookies so special? It’s the harmonious blend of textures and tastes. Each cookie features a sweet, tender cream cheese dough as its base, offering that signature tangy-sweet flavor of cheesecake. This delightful dough is then lovingly encased in a crisp, golden layer of crushed graham crackers, mimicking the beloved crust of a traditional cheesecake. At the very heart of each cookie lies a vibrant, tart cherry filling, providing a burst of fruity contrast that perfectly balances the rich, creamy cookie. This spectacular combination creates an unforgettable treat that will have everyone asking for the recipe.
Why These Cookies Are a Must-Try
These aren’t just any cookies; they’re a revelation. They have consistently been a monumental hit every single time they’ve been made, earning praises and requests for more. If you’ve always wanted to bake a cheesecake but found yourself daunted by the time commitment, the water baths, or the delicate baking process, these cookies are your ultimate answer! They deliver all the beloved flavors of a cherry cheesecake in a portable, shareable, and much simpler format. They’re ideal for parties, potlucks, family gatherings, or simply as an indulgent treat to brighten any day.
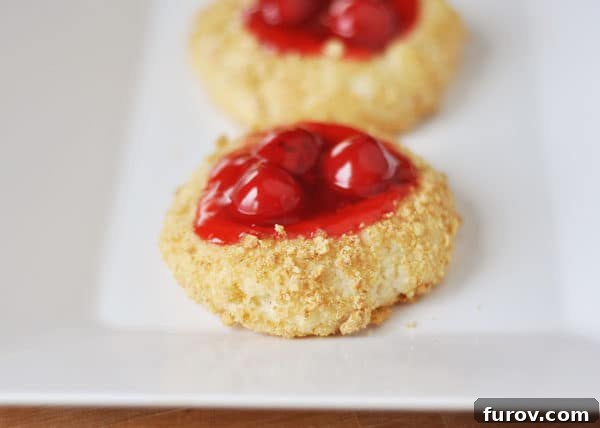
Classic Cherry Cheesecake Cookies Recipe
This recipe is designed to yield approximately 24 delightful cookies, perfect for sharing or savoring yourself!
Yield: 24 Cookies
Prep Time: 1 hour (includes crucial dough chilling time)
Cook Time: 12-14 minutes
Total Time: Approximately 1 hour 15 minutes
Ingredients
- 3 ½ cups (497 g) all-purpose flour
- 2 teaspoons baking powder
- 1 teaspoon salt
- 2 packages (8-ounces each, 454 g total) cream cheese, softened
- 1 ¼ cups (283 g) unsalted butter (2 ½ sticks), softened
- 1 ½ cups (318 g) granulated sugar
- 2 large eggs
- 2 teaspoons vanilla extract
- 1 cup (100 g) graham cracker crumbs
- 2 cans (20-ounces each) cherry pie filling
Instructions
- Prepare Dry Ingredients: In a medium-sized bowl, combine the all-purpose flour, baking powder, and salt. Whisk these dry ingredients together thoroughly to ensure they are well distributed. Set this bowl aside for later use.
- Cream Wet Ingredients: In a separate large mixing bowl, preferably with an electric mixer, beat together the softened cream cheese, softened butter, and granulated sugar. Mix on medium speed until the mixture becomes wonderfully smooth, light, and creamy. This typically takes about 2 minutes. Scrape down the sides of the bowl as needed to ensure everything is fully incorporated.
- Add Eggs and Vanilla: Introduce the eggs to the creamed mixture, adding them one at a time. Beat well after each egg addition until fully combined. Stir in the vanilla extract until it’s evenly distributed throughout the batter, imparting a lovely aroma.
- Combine Wet and Dry: Reduce the speed of your electric mixer to its lowest setting. Gradually add the reserved flour mixture to the wet ingredients. Mix just until the flour is incorporated and no dry streaks remain. Be very careful not to overmix the dough, as this can result in tough cookies.
- Chill the Dough: Once the dough is mixed, cover the bowl tightly with plastic wrap. Transfer the dough to the refrigerator and chill for a minimum of 30 minutes, or until the dough is firm enough to easily handle and roll. This step is crucial for preventing the cookies from spreading too much during baking.
- Preheat Oven & Prep Pans: While the dough is chilling, preheat your oven to 350°F (175°C). Line two large baking sheets with parchment paper or silicone baking mats. Prepare a shallow dish or plate with the graham cracker crumbs for coating the cookie dough balls.
- Roll and Coat Dough: Remove the chilled dough from the refrigerator. Roll the dough into uniform balls, approximately 1 ½ inches in diameter. Gently roll each dough ball in the graham cracker crumbs, ensuring it is thoroughly and evenly coated on all sides.
- Shape and Fill: Place the coated dough balls onto the prepared baking sheets, leaving about 2 inches of space between each cookie to allow for proper spreading. Using a tablespoon measure or your thumb, create a deep indentation in the center of each dough ball. Carefully spoon approximately 3 cherries from the cherry pie filling into the dimple of each cookie.
- Bake Cookies: Transfer the baking sheets to the preheated oven. Bake for 12 to 14 minutes, or until the edges of the cookies are lightly golden brown and the centers appear just set. Avoid overbaking to maintain a tender texture.
- Cool Completely: Once baked, remove the cookies from the oven. Allow them to cool on the baking sheets for about 5 minutes. This allows them to firm up slightly before you move them. After 5 minutes, carefully transfer the cookies to a wire rack to cool completely.
Recipe Source: Adapted from Cook’s Country
Expert Tips for Baking the Best Cherry Cheesecake Cookies
- Room Temperature Ingredients: Always ensure your cream cheese and butter are at proper room temperature. This is vital for achieving a smooth, well-emulsified dough that incorporates air effectively, leading to a tender cookie.
- Accurate Flour Measurement: For best results, measure your flour by weight (using a kitchen scale) or by using the spoon-and-level method. Scooping flour directly with a measuring cup can pack it too densely, leading to dry, crumbly cookies.
- The Importance of Chilling: Do not skip the chilling step! Cold dough is easier to work with, prevents the cookies from spreading too much in the oven, and contributes to a richer flavor and better texture.
- Prevent Sticking: Parchment paper or silicone baking mats are highly recommended. They ensure your cookies don’t stick to the pan and make cleanup a breeze.
- Customize Your Filling: While cherry pie filling is a classic choice, don’t hesitate to get creative! Blueberry, strawberry, or even apple pie filling can make equally delicious variations. Just ensure the filling isn’t overly watery to avoid soggy cookies.
- Deep Enough Indentations: When making the dimples, press firmly enough to create a good “well” for the cherries. This helps contain the filling and prevents it from spilling out during baking.
- Gentle Handling: Cream cheese dough can be a bit delicate. Handle the cookie balls gently when rolling and coating them to maintain their shape.
Storage and Serving Suggestions
These delectable cherry cheesecake cookies are undeniably best enjoyed fresh, when their aroma fills your kitchen and they’re just slightly warm. However, they also store exceptionally well, making them perfect for preparing ahead or keeping for a delightful treat throughout the week.
Store your cooled cookies in an airtight container at room temperature for up to 3 days. If you prefer them chilled or want to extend their freshness, they can be kept in the refrigerator for up to a week. For longer preservation, these cookies freeze beautifully. Place them in a single layer on a baking sheet to flash freeze, then transfer them to a freezer-safe bag or container for up to 2-3 months. Thaw at room temperature or gently warm for a fresh-baked feel.
Serve these cookies simply as they are, perhaps with a delicate dusting of powdered sugar for an elegant finish. For an even more indulgent experience, consider serving them slightly warmed with a scoop of premium vanilla bean ice cream or a generous dollop of freshly whipped cream. They also make a fantastic addition to any dessert platter or as a charming gift for friends and family.
The Unmatched Joy of Homemade Desserts
There’s an undeniable charm and satisfaction that comes with baking homemade cookies. Beyond the incredible taste, it’s the warmth that fills your home, the anticipation as they bake, and the sheer joy of creating something delicious from scratch. These cherry cheesecake cookies embody that spirit perfectly. They’re more than just a dessert; they’re a gesture of care, a way to celebrate, and a source of simple, sweet pleasure. Crafting these cookies allows you to control every ingredient, ensuring a high-quality, wholesome treat without any hidden additives. Plus, the process itself is wonderfully therapeutic, a chance to unwind and create something truly special. Sharing them with loved ones creates memories and spreads happiness, making every batch a labor of love.
Frequently Asked Questions About Cherry Cheesecake Cookies
Can I use fresh cherries instead of canned pie filling?
While canned cherry pie filling offers convenience and consistency, you can certainly use fresh cherries! If opting for fresh, you’ll need to pit them and gently cook them down with a small amount of sugar, cornstarch (to thicken), and a splash of lemon juice until they reach a jam-like consistency. This step is crucial to prevent the cherries from releasing too much moisture during baking, which could make your cookies soggy. Allow your homemade filling to cool completely before adding it to the cookie dough.
Is it possible to prepare the cookie dough in advance?
Absolutely! The cookie dough is quite versatile and can be made ahead of time. You can prepare the dough up to 2-3 days in advance. Simply wrap it tightly in plastic film and store it in the refrigerator. When you’re ready to bake, you might need to let the dough sit at room temperature for 10-15 minutes to soften slightly, making it easier to roll and shape.
What if I don’t have graham cracker crumbs on hand?
No graham crackers? No problem! While they provide the classic “cheesecake crust” flavor, you can substitute them with other crushed biscuits. Finely crushed digestive biscuits, vanilla wafers, shortbread cookies, or even gingersnaps (for a unique twist) can work wonderfully as an outer coating.
How can I make these cookies look even more appealing for a special occasion?
For an extra touch of elegance, consider dusting the cooled cookies with powdered sugar just before serving. Another fantastic idea is to drizzle a simple cream cheese glaze over them. To make the glaze, whisk together powdered sugar, a small amount of milk (or lemon juice), and a softened tablespoon of cream cheese until smooth. This adds both visual appeal and an extra layer of creamy flavor.
Can I use different types of pie filling?
Yes, you can experiment with various fruit pie fillings! Blueberry, strawberry, peach, or even apple pie filling can be used to create exciting new variations of these cheesecake cookies. Just make sure the filling isn’t too runny; if it seems overly liquid, you might want to drain some of the excess syrup before spooning it into the cookie indentations.