
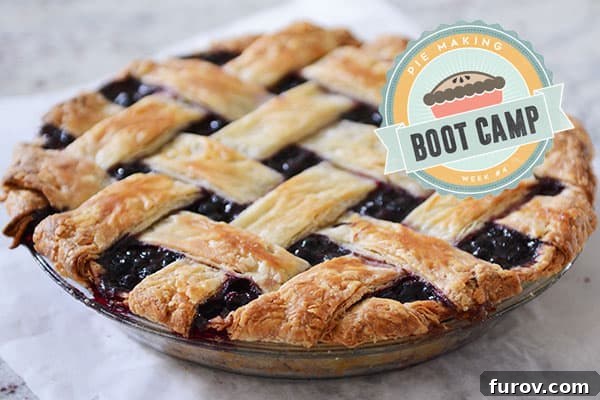
Embark on your journey to bake the most beautiful double crust pie of your life with our easy lattice crust tutorial and helpful printable resources!
Mastering the Double Crust Pie: Your Ultimate Guide to Flaky Perfection
Welcome to Week #4 of Pie Boot Camp – and surprisingly, our grand finale! While it’s hard to say goodbye, we’re wrapping up this incredible series with a topic that will truly elevate your pie-making skills: the glorious double crust pie. Get ready to transform simple ingredients into a stunning, show-stopping dessert that will impress everyone.
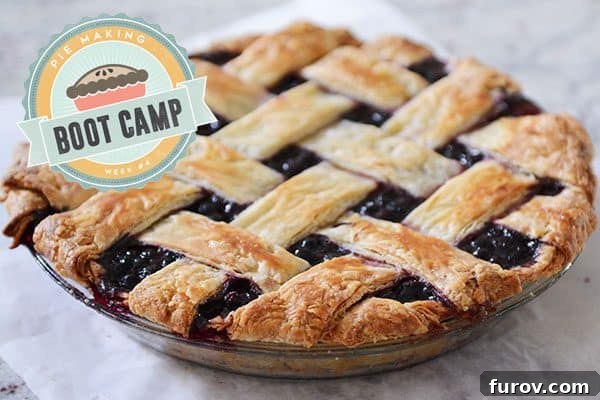
This journey through Pie Boot Camp has been nothing short of amazing, and I’ve loved every moment of sharing these essential techniques with you. If you’ve been following along, you’re already well on your way to becoming a true pie aficionado. If you’re just joining us, don’t worry – you can catch up on all the foundational knowledge with our comprehensive Pie Boot Camp series.
Recap: Your Pie Making Journey So Far
To ensure you’re fully equipped for today’s challenge, let’s quickly revisit the crucial topics we’ve covered that lay the groundwork for a flawless double crust pie:
-
Week 1: All About Pie Making Equipment Essentials – Discovering the right tools that make all the difference in your pie-making success.
-
Week 2: How to Make the Perfect Pie Crust – Our foolproof recipe, along with expert tips on rolling out dough, achieving perfect crimps, and a video tutorial to guide you.
-
Week 3: All About Blind Baking + How to Do It and Why – Understanding the science and technique behind pre-baking your crust, complete with a bonus Chocolate Ganache Cream Pie Recipe!
Your Free Pie Boot Camp Cheat Sheet!
As a special thank you for completing all four weeks of our Pie Boot Camp, I’ve prepared an invaluable resource just for you! This free, printable cheat sheet is designed to be your quick-reference guide, consolidating all the essential tips and techniques we’ve discussed into a single, easy-to-read overview. Keep it handy in your kitchen for those moments when you need a quick reminder.
Here’s a vibrant color version, perfect for keeping on your computer or mobile device:
Download the Color PDF Version with Links Here!
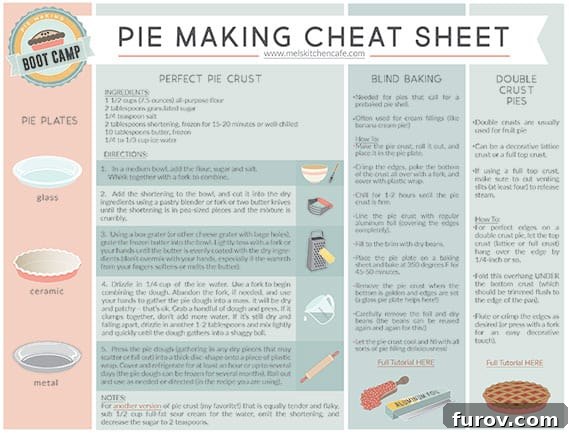
And for those who prefer a physical copy for printing and marking up, here’s a classic black and white version:
Download the Black and White Printable Version!
Demystifying the Double Crust Pie: A Step-by-Step Tutorial
Today, we’re diving deep into the art of the double crust pie. This isn’t just about covering your filling; it’s about creating a beautiful, functional, and delicious top crust that perfectly complements your pie. Conquering the double crust is a hallmark of an accomplished pie maker, and I promise you, it’s much simpler than you might think. With a few key techniques, you’ll be making stunning pies in no time!
1. Prepare Your Pie Dough (Double the Recipe!)
First things first: you need your pie dough. For a standard 9-inch double crust pie, you’ll need approximately twice the amount of dough typically used for a single crust. If your go-to recipe yields enough for one crust, make sure to double it!
Need a refresher on creating the perfect, flaky pie dough? Head over to our Week 2 tutorial on How to Make Pie Crust for a foolproof recipe and detailed instructions on handling your dough.
Once your dough is ready, divide it. I typically use slightly more than half for the bottom crust, as it needs to hold all that delicious filling, and the slightly smaller portion for the top.
2. Laying the Foundation: The Bottom Crust
Gently roll out the larger portion of your pie dough on a lightly floured surface. Remember the golden rule from Week 2: never stretch or pull your pie dough when placing it into the pie plate. Stretching can cause the crust to shrink significantly during baking, leading to an unsightly and often cracked pie. Instead, carefully ease the dough into the plate, ensuring it settles into every curve.
Once in place, trim the edges of the bottom crust so they are flush with the rim of your pie plate. This precise trimming creates a clean foundation for sealing your pie later. For this task, I find my favorite kitchen scissors to be incredibly handy, offering more control than a knife.
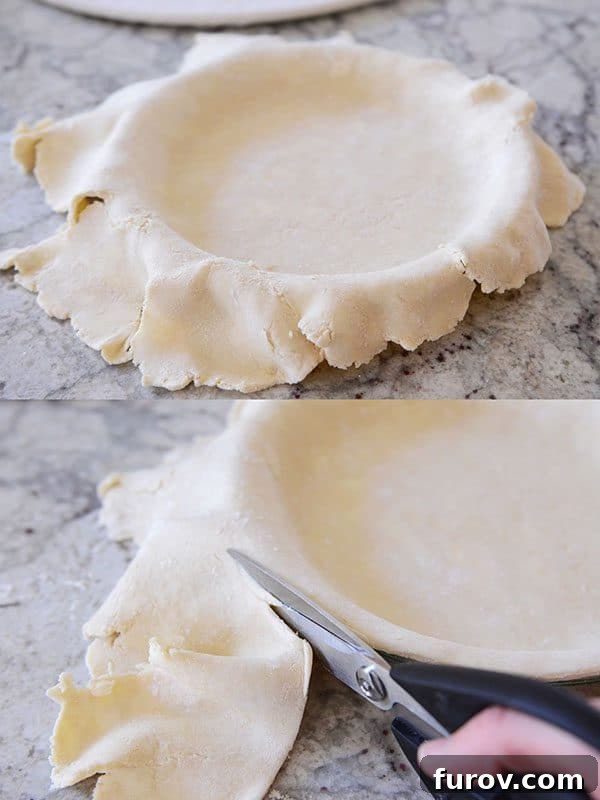
After trimming, I often refrigerate the bottom pie shell for about an hour. This helps the butter firm up, ensuring a crispier, flakier crust that holds its shape beautifully during baking. However, always defer to your specific recipe’s instructions, as chilling times can vary.
3. Fill Your Pie with Deliciousness
Now for the best part – adding your filling! For a double crust pie, hearty fruit fillings like apples, berries, or peaches are perfect as they can bubble and meld under the top crust. Here, I’m using my all-time favorite Blue Ribbon Apple Pie recipe, which is truly phenomenal!
Fill the pie shell generously, mounding the filling slightly in the center. This helps create that classic domed pie shape as it bakes.
4. Applying the Full Top Crust Method
Roll out the second half of your pie dough. Once rolled to your desired thickness, carefully drape it over the top of your filled pie. My top crust in the photo appears a bit stiff because I had refrigerated it for 15-20 minutes beforehand. This step isn’t usually necessary unless your kitchen is particularly warm, or your recipe calls for it to prevent the dough from becoming too soft and difficult to handle.
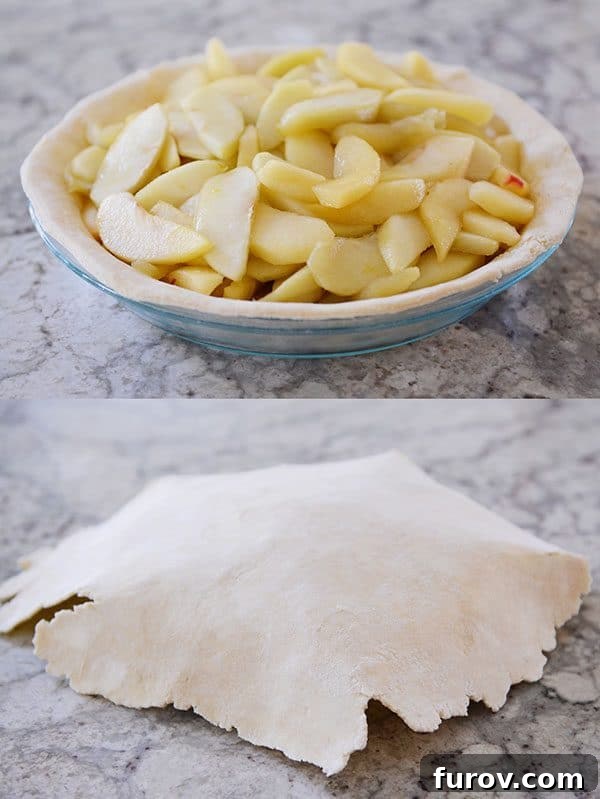
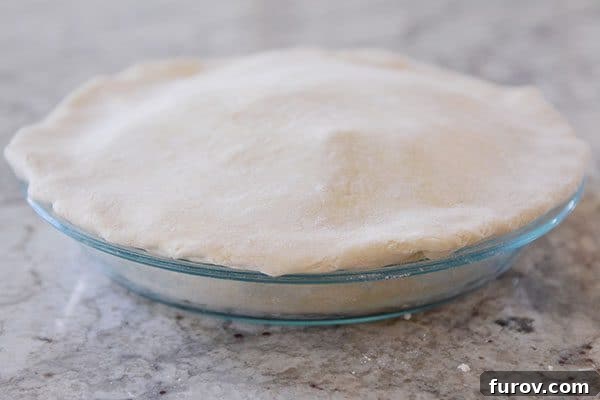
Next, using your kitchen scissors again, trim the top crust, leaving an overhang of about 1/4 to 1/2 inch beyond the edge of the pie plate. This overhang is crucial for creating a robust seal.
Now, carefully fold that top crust overhang underneath the bottom crust’s edge. This technique effectively creates a sturdy, double-layered rim that locks in all the delectable filling, preventing messy leaks and ensuring the juices stay where they belong – inside your pie!
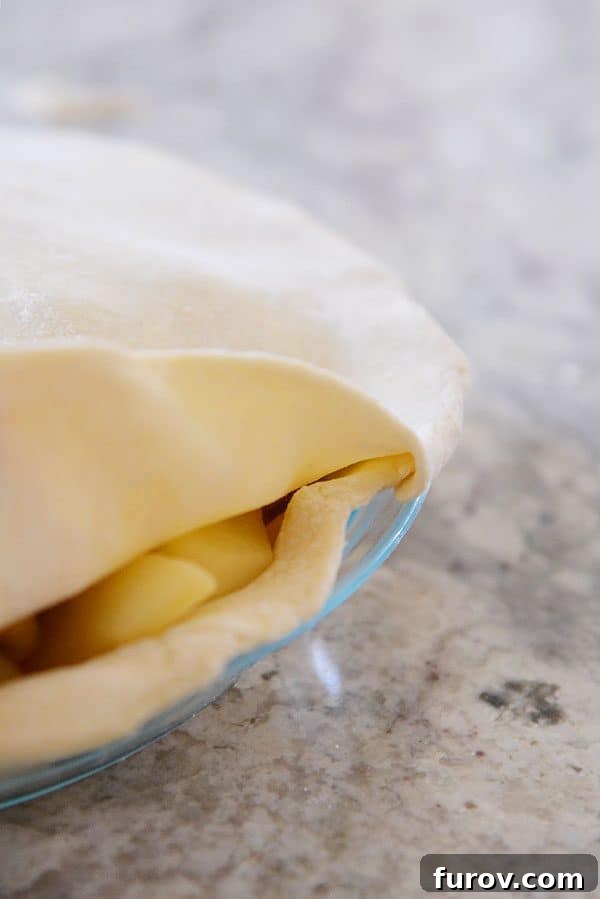
While some methods suggest folding the bottom crust over the top, I’ve consistently found that tucking the top crust underneath the bottom provides a superior seal and a cleaner finish. It’s a small detail that makes a significant difference in the final product!
5. Fluting for that Signature Finish
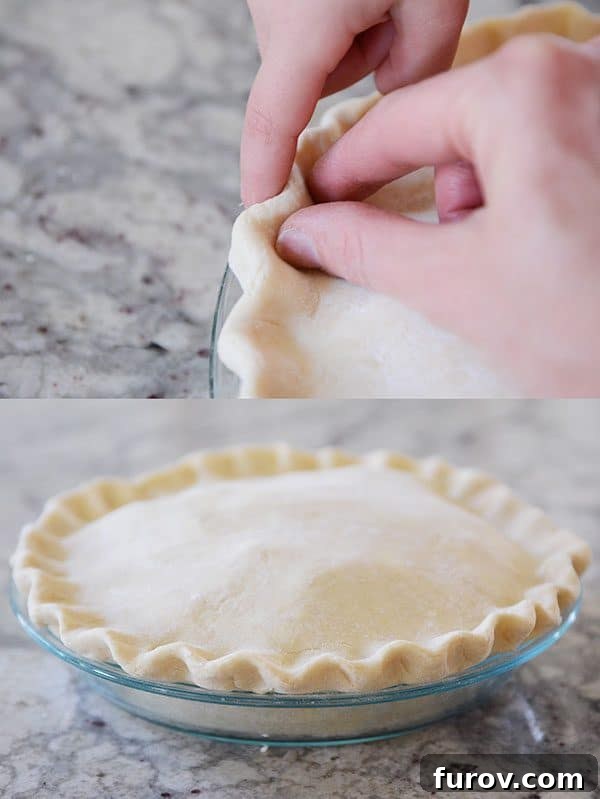
Just like with a single crust pie, now is the time to create those beautiful, decorative edges. Fluting not only adds visual appeal but also helps reinforce the seal you just created. For an easy approach, simply press the edges firmly with the tines of a fork all the way around the pie.
For that classic, elegantly fluted edge, you’ll want to crimp the edges using your fingers. If you need a refresher on this technique, our Week 2 tutorial provides detailed instructions and tips for achieving that perfect, pretty crimp. Don’t be afraid to get your hands dirty – a little practice goes a long way!
6. Venting and Final Touches for a Full Top Crust
If you’re using a full top crust (as opposed to a lattice crust, which we’ll cover next), it’s absolutely essential to create vents for steam to escape during baking. Without proper venting, steam builds up inside the pie, potentially causing the crust to puff up excessively, crack, or even explode! Using a sharp paring knife – my favorite inexpensive paring knife is perfect for this – cut four gashes, each about 3 inches long, into the top of the pie. You can arrange them symmetrically or in a decorative pattern.
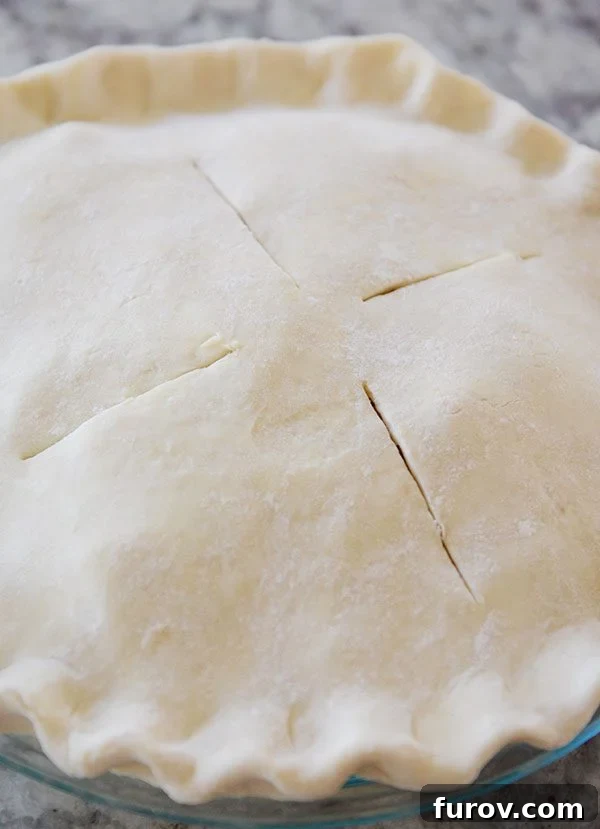
For an extra touch of beauty, you can brush the top of the pie with an egg wash (a whisked egg white or a whole egg with a splash of water) or a simple water wash. This helps the crust achieve a gorgeous, glossy, golden-brown finish as it bakes. While it’s often called for in recipes, I admit there are times when I’m a little too eager to get the pie in the oven and skip this step. And that’s perfectly okay!
Optionally, sprinkle the top of the pie with coarse sugar (or regular granulated sugar) before baking. This adds a beautiful sparkle and a delightful textural crunch to the crust. Again, this is entirely up to your preference.
7. Baking Your Masterpiece (and Controlling Messes!)
Always place your assembled pie on a foil-lined baking sheet before transferring it to the oven. This is a non-negotiable step, especially for fruit pies, as bubbling juices can often escape the vents or edges. The baking sheet will dutifully catch any drips, saving your oven from a sticky, burnt mess and making cleanup a breeze. Bake according to your recipe’s specific instructions.
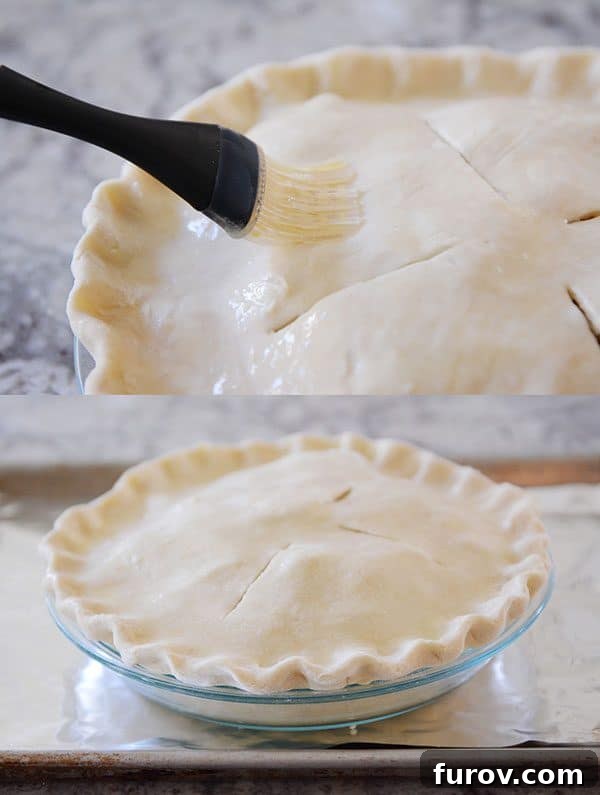
8. Embracing Imperfection: The Beautifully Baked Pie
And there it is – a glorious, freshly baked pie! The aroma alone is enough to make mouths water. You might notice that the fluted edges didn’t hold their exact shape perfectly, or perhaps a bit of fruit filling bubbled over. And guess what? That is absolutely, wonderfully okay!
If there’s one piece of advice I can’t emphasize enough in pie making, it’s this: let go of the quest for perfection! Homemade pies have character. Their slight imperfections tell a story of love, effort, and deliciousness. I promise you, a pie that looks a little rustic but tastes incredibly flaky, tender, and SO yummy will always be cherished more than a “perfect” but flavorless one. The true beauty of a homemade pie lies in its heart and taste.
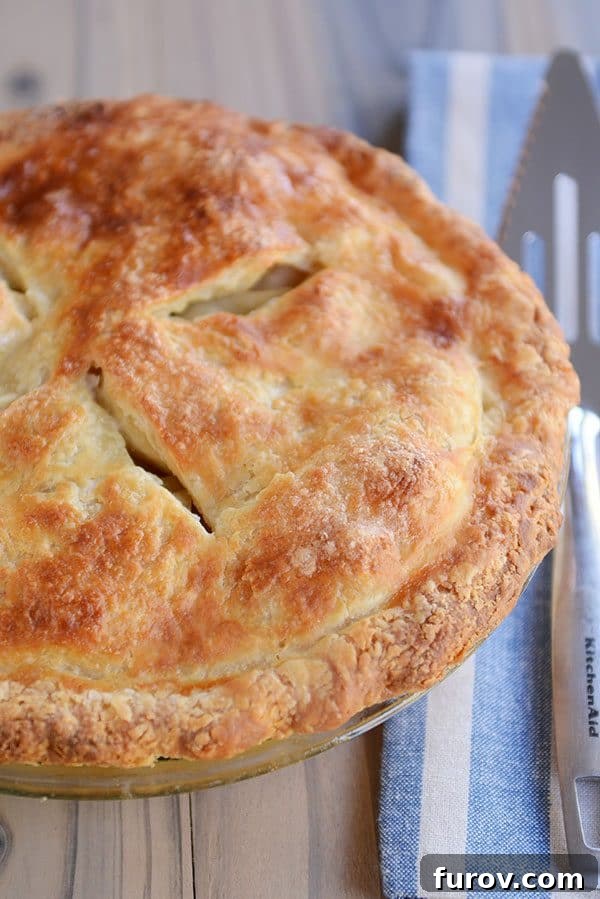
Crafting a Beautiful Lattice Crust: A Decorative Alternative
While a full top crust is classic and satisfying, a lattice crust offers an elegant, eye-catching alternative that allows the vibrant colors of your fruit filling to peek through. There are countless creative ways to decorate pie tops, but for those of us with limited time (or artistic flair!), the lattice remains a timeless and achievable masterpiece. It’s a method that consistently delivers stunning results without requiring elaborate techniques.
1. Preparing Your Lattice Strips
To create a lattice crust, roll out the second portion of your pie dough (the slightly smaller half) into a circle or rectangle. Using a pizza wheel, a sharp knife, or even a charming zigzag cutter, cut the dough into even strips. I highly recommend making your strips fairly wide, about an inch or so. Thinner strips tend to become wavy, distorted, and fragile during baking, making them harder to handle and less visually appealing.
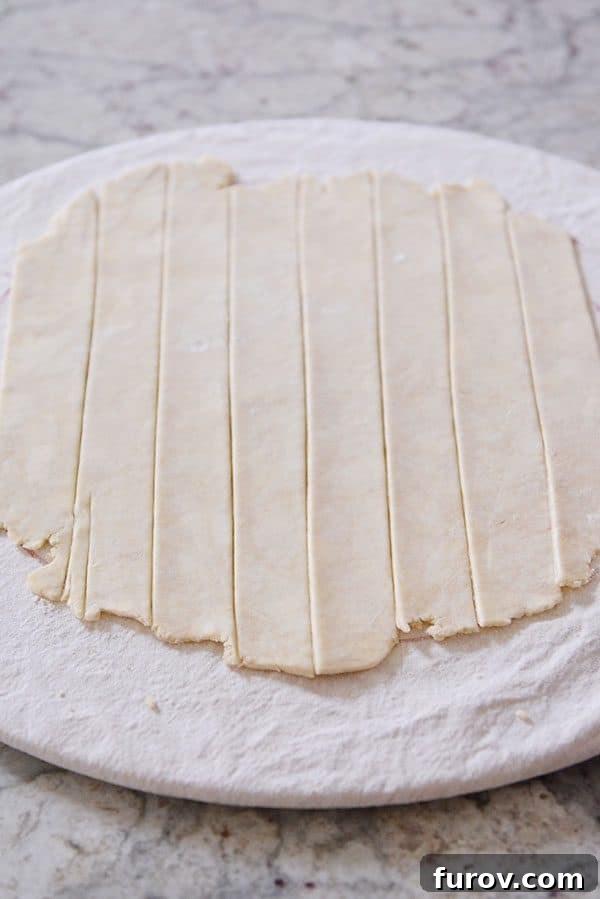
With your strips ready, fill your bottom crust with your desired fruit filling. Here, I’m showcasing a vibrant huckleberry pie – a true delight that tastes as incredible as it looks!
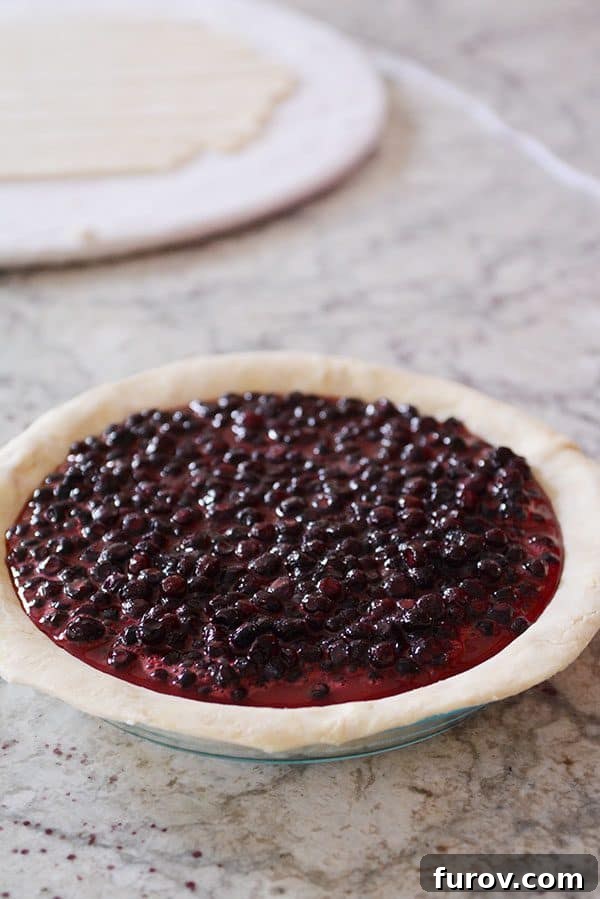
2. The Lattice Crust “Hack” (No Weaving!)
Now, for a confession: if you’re truly short on time or feeling intimidated by weaving, there’s a clever hack! You can simply lay a few strips parallel across the filled pie, then lay perpendicular strips directly on top without any weaving. It might sound a little unconventional to pie purists, but it works surprisingly well in a pinch, and most people will be too focused on enjoying a slice of homemade pie to notice the difference!
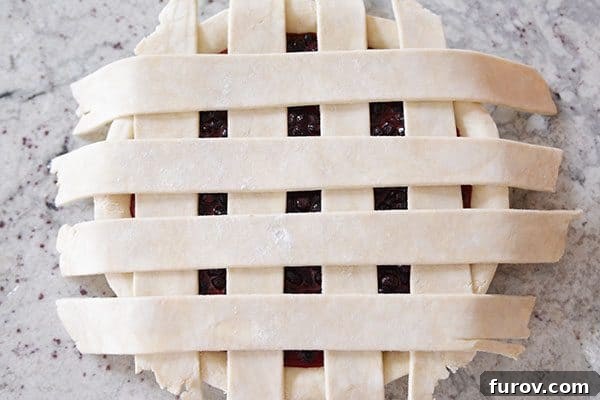
3. The Classic Woven Lattice Crust Tutorial
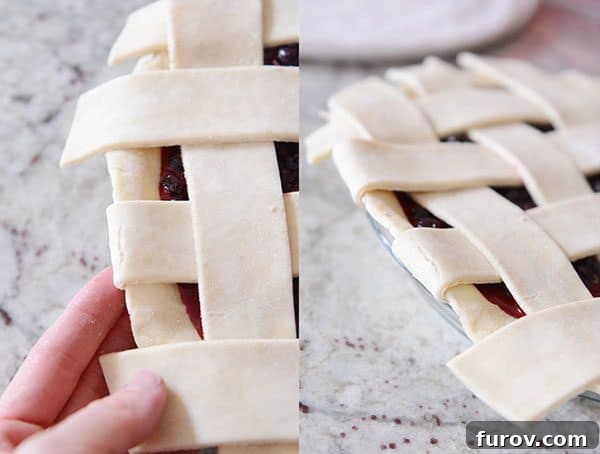
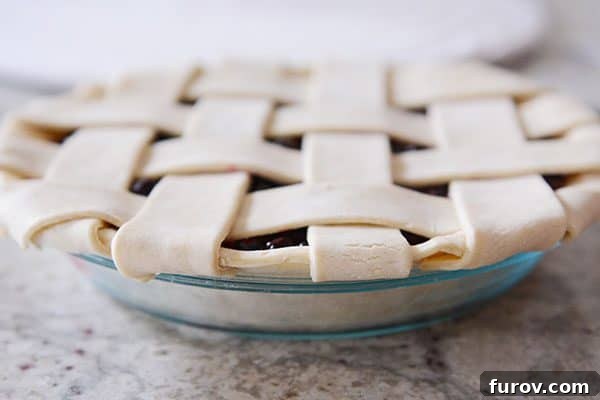
However, if you’re ready to embrace the full lattice experience, I assure you it’s not nearly as complicated as it looks. It’s a simple, rhythmic weaving procedure that takes mere minutes to master. Below, you’ll find a quick picture tutorial outlining the steps. The key is to lift alternating sets of strips, place a new perpendicular strip, and then lay the lifted strips back down. Repeat this process, and watch your beautiful lattice come to life!
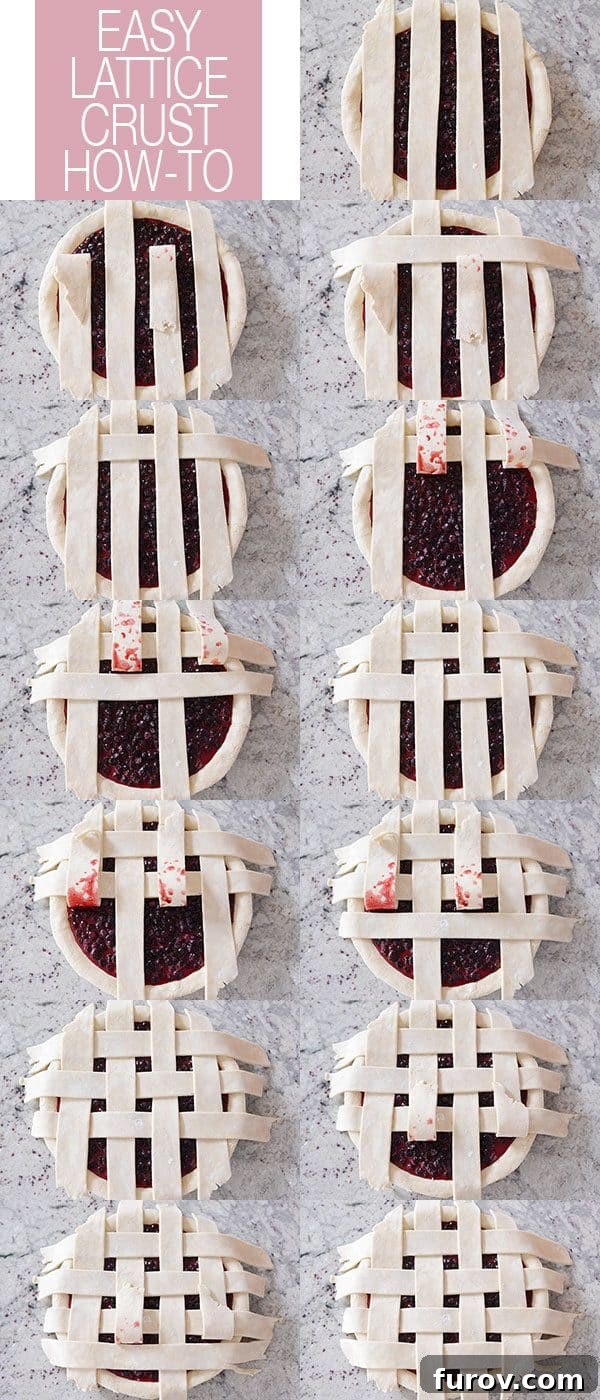
4. Trimming and Sealing Your Lattice Edges
Once your weaving is complete – and it truly takes no time at all – you’ll be left with some lattice crust overhang. Don’t fret, there are several ways to trim, tuck, and crimp these edges, and there’s no single “right” or “wrong” method. I’ve found that my preferred technique is to trim the shaggy lattice strips to an overhang of about 1/4 to 1/2 inch, letting them extend slightly over the pie plate’s edge.
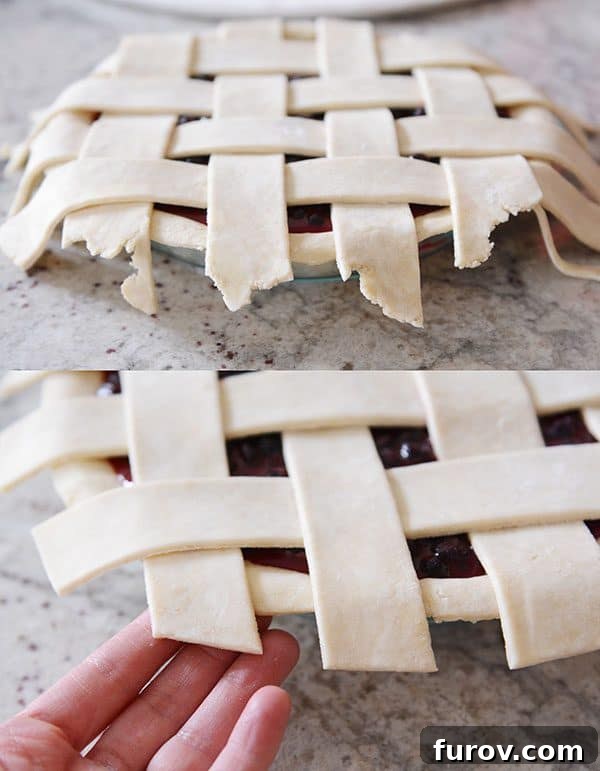
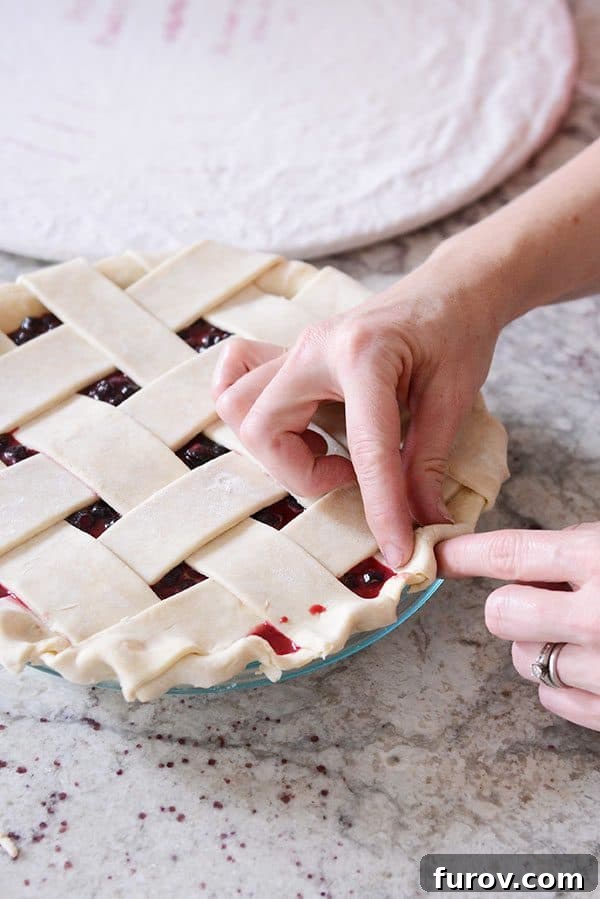
Similar to the full top crust method, I then gently tuck these trimmed lattice strips underneath the bottom crust. Work your way around the entire pie, ensuring all rogue pieces of lattice are safely and neatly tucked away. This creates a beautifully finished edge that will hold strong during baking.
5. Fluting the Lattice Edge
Now, it’s time to flute those edges one last time! The edges of a lattice pie, where the strips intersect with the bottom crust, will naturally be thicker. Don’t let this intimidate you. Simply crimp them as you would a single crust pie, applying gentle but firm pressure. Have faith that the beautiful end result will make any minor challenges worthwhile – it absolutely will!
6. Baking Your Lattice Masterpiece
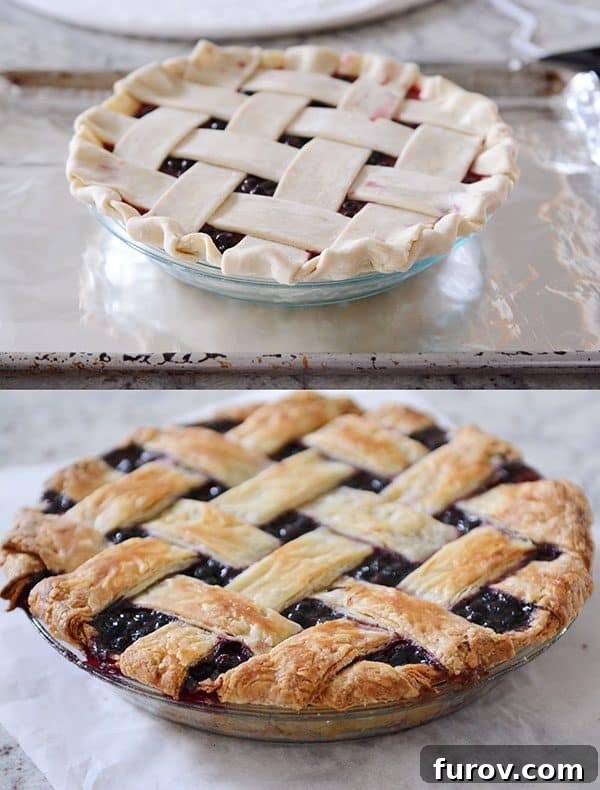
Just like with a full top crust, always place your lattice pie on a foil-lined baking sheet. This step is even more critical for lattice crust pies, especially if your pie is generously filled with juicy fruit. The openings in the lattice design mean there’s a higher likelihood of delicious, bubbling filling spilling over as it cooks. That baking sheet is your best friend here, catching all potential messes and keeping your oven clean. Bake according to your recipe’s instructions, keeping an eye on the crust for ideal golden-brown perfection.
Celebrate Your Homemade Pie!
Remember that it’s completely normal for your pie to emerge from the oven with a bit of fruit filling bubbling over or tiny imperfections on the crust. These are not flaws; they are badges of honor, proving your pie is truly homemade and bursting with flavor. Every bubble and every golden-brown patch tells a story of deliciousness waiting to be savored.
And there you have it – a comprehensive guide to crafting magnificent double crust pies, from the classic full top to an elegant lattice! You now possess the knowledge and confidence to create truly spectacular homemade pies.
Do you have questions, comments, or your own favorite double crust pie tips? Please share them below! I love hearing from you and will answer every single one.
Thank you for being such an enthusiastic and engaged participant throughout our Pie Boot Camp adventure! Your comments, insights, and passion for baking have made this series truly special. You are all incredible pie makers in the making!