
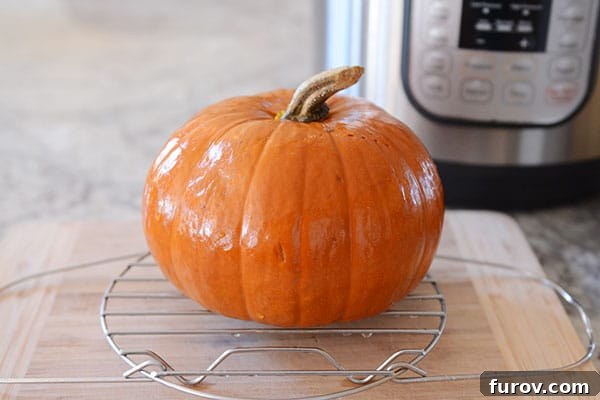
Effortless Homemade Pumpkin Puree: Your Guide to Pressure Cooker Perfection
Unlock the secret to incredibly easy and fast homemade pumpkin puree using your pressure cooker! This comprehensive guide provides simple, step-by-step instructions for a flawless result every time.
Say goodbye to store-bought cans and hello to the fresh, vibrant flavor of homemade pumpkin puree. If you’ve ever felt intimidated by the idea of making your own, prepare to have your mind changed. Utilizing a pressure cooker transforms a traditionally time-consuming process into an astonishingly simple and quick kitchen endeavor. My pressure cooker has become an indispensable tool, consistently delivering perfect results, and this method for pumpkin puree is no exception. It’s so efficient, it might just revolutionize your fall baking and cooking.
This technique is, without a doubt, the easiest way to introduce fresh, homemade pumpkin puree into your culinary life. It’s so effective, it even convinced me to embrace pumpkin in ways I hadn’t before. The convenience and quality are unparalleled, making it a must-try for anyone who enjoys cooking with pumpkin, whether for savory dishes or sweet treats.
Selecting Your Perfect Pumpkin for Puree
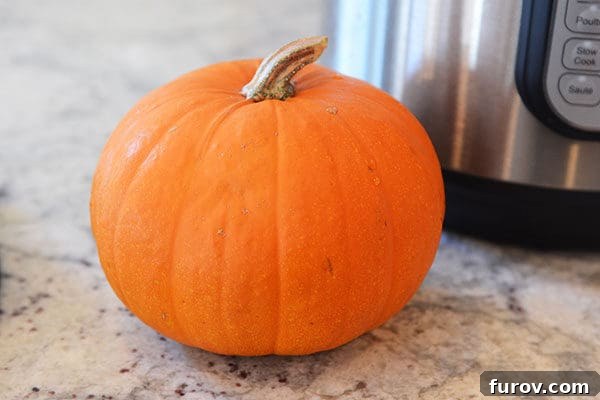
To begin your journey to delicious homemade pumpkin puree, you’ll need to choose the right pumpkin. Opt for a sugar pumpkin, also known as a pie pumpkin, or any small, firm pumpkin variety that comfortably fits inside your pressure cooker. These types of pumpkins have denser, sweeter flesh and less stringiness compared to larger carving pumpkins, making them ideal for pureeing.
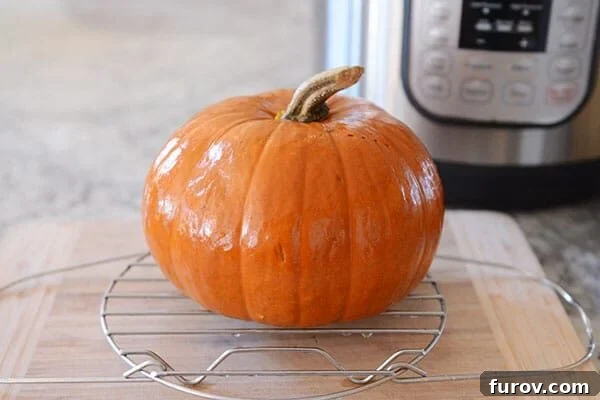
For this tutorial, we’re using a common electric pressure cooker like the Instant Pot – a versatile 6-quart model. However, an 8-quart model would allow for an even larger pumpkin, maximizing your yield. My typical pie pumpkin, similar to the one pictured, usually weighs around 3 to 4 pounds. This size is perfect for producing a good amount of puree without overcrowding the pressure cooker. If your pumpkin is too large, don’t worry, we’ll cover an easy adjustment later in the FAQ section.
Pressure Cooking Your Pumpkin: The Easiest Method
Preparation for Pressure Cooking
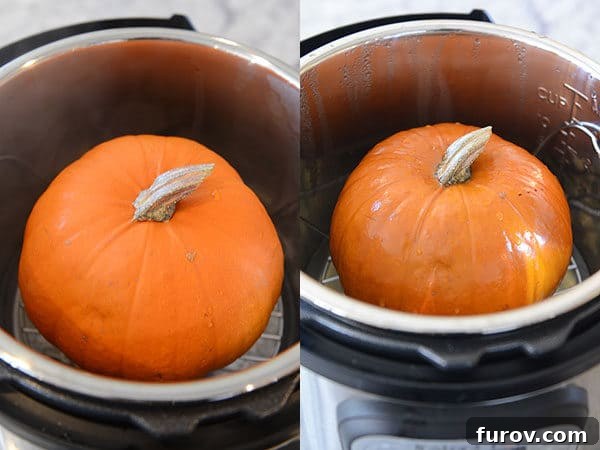
Start by placing a steamer rack or basket at the bottom of your pressure cooker. This elevates the pumpkin, allowing it to steam rather than boil. Add one cup of water to the inner pot – this is crucial for generating the steam needed for cooking. Gently place your pumpkin on the rack or in the basket. Before sealing, ensure the lid can close properly without any interference from the pumpkin’s stem. I highly recommend popping the stem off prior to cooking for a better seal and easier handling later. There’s no need to pierce the pumpkin before pressure cooking; the pressure and steam will do all the work.
Cooking Times and Natural Release
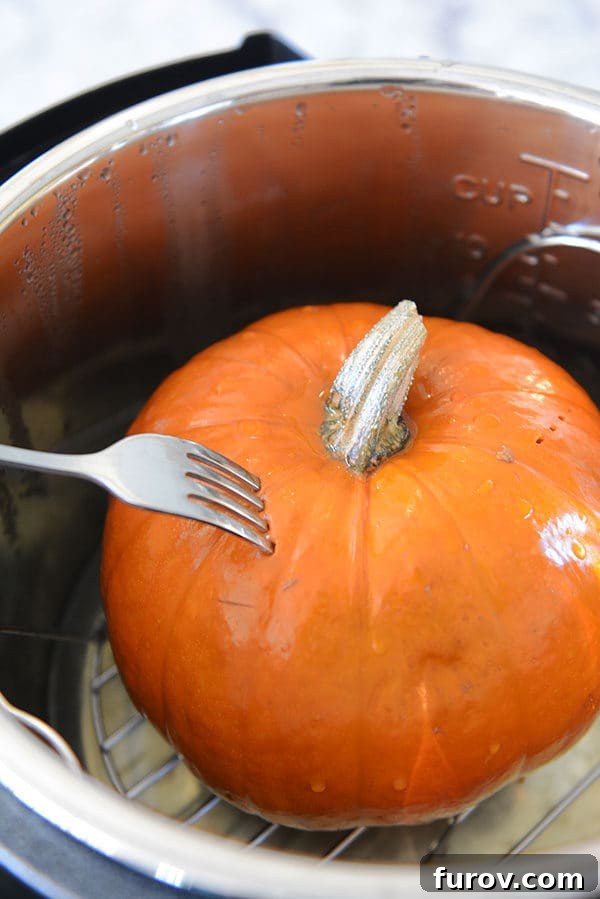
Seal your pressure cooker and set it to high pressure for 13 minutes if you’re using an electric model. If you have a stovetop pressure cooker, 11-12 minutes should suffice, but always refer to your specific model’s guidelines. Once the cooking cycle is complete, allow the pressure to release naturally for at least 10 minutes. This natural release method helps the pumpkin continue to cook gently and results in a more tender texture. After 10 minutes, you can carefully perform a quick release of any remaining steam. The pumpkin should be incredibly soft and tender when tested with a fork, much like soft butter.
Processing the Cooked Pumpkin into Puree
Cooling and Handling
Carefully lift the cooked pumpkin out of the pressure cooker using the handles of the rack and transfer it to a cutting board or plate. Allow it to cool for about 10-15 minutes. This crucial cooling period prevents burns and makes the pumpkin much easier and safer to handle as you move on to the next steps. You’ll notice how soft and fragrant it is already!
Slicing and Deseeding
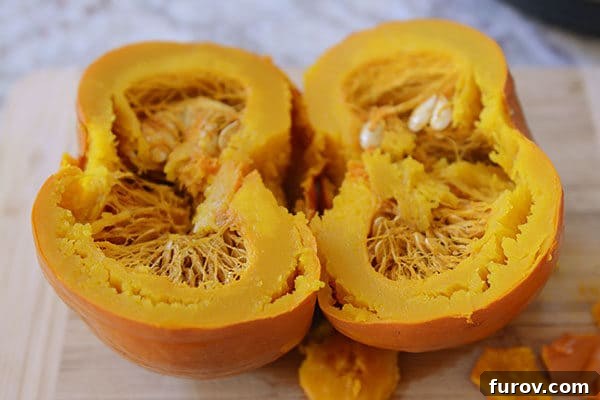
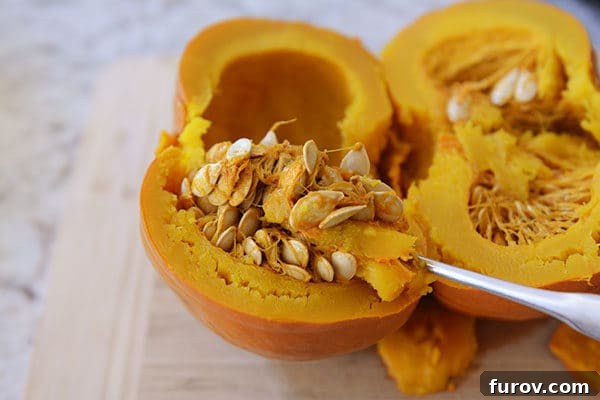
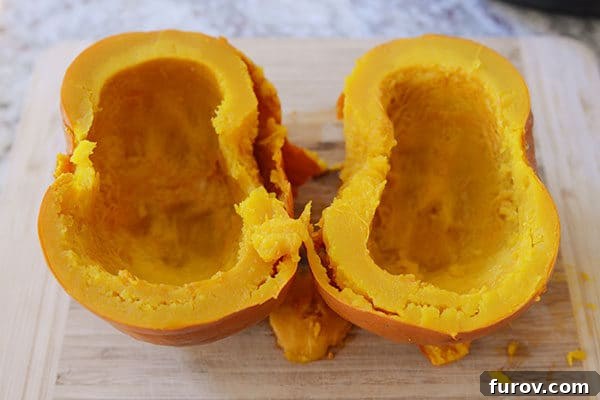
If you haven’t already removed the stem, do so now. Then, carefully slice the pumpkin in half. You’ll find that the inside is incredibly soft. With a large spoon, scoop out all the seeds and fibrous strands (often referred to as “goop”). This step is remarkably easy after pressure cooking; the seeds and fibers will almost effortlessly separate from the cooked flesh. And don’t even think about discarding those precious pumpkin seeds! They are perfect for roasting into a delicious, crunchy snack. Simply clean them, toss with a little oil and salt, and roast until golden brown.
Peeling the Skin
You’ll quickly notice how the skin is already beginning to peel away from the flesh – a testament to the pressure cooker’s efficiency! Continue peeling off the skin. Most of it will come right off with your hands, but for any more stubborn bits, a small paring knife can help you effortlessly remove them. The goal is to separate all the tender, cooked pumpkin flesh from its outer layer.
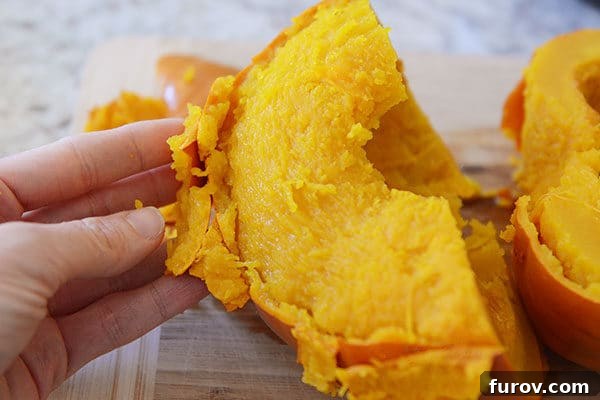
Blending to Perfection
Once peeled, break the soft pumpkin flesh into large chunks and transfer them to your blender or food processor. Process until completely smooth and creamy. For best results, I often use the smoothie setting on my high-speed blender. While most varieties of pressure-cooked pumpkin will blend beautifully without assistance, if you find yours is a bit thick, add a tablespoon of water at a time to help it along. Be very careful not to add too much water, as you want a rich, thick puree, not a watery one. A single tablespoon is usually more than enough, if needed at all.
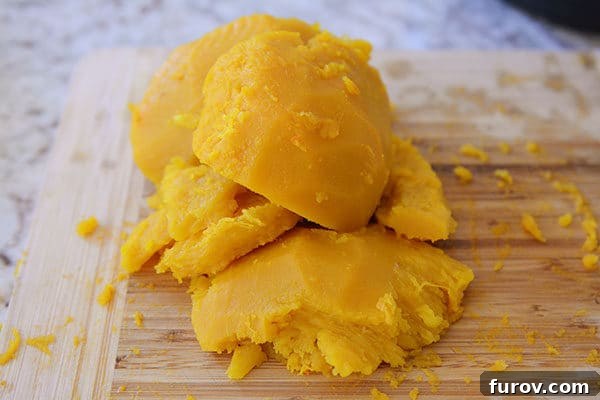
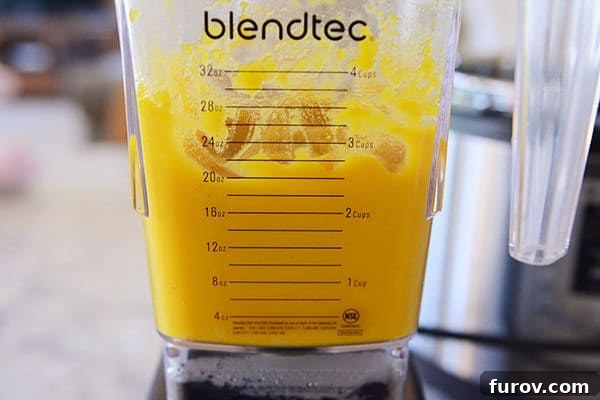
And there you have it! Beautiful, fresh, and incredibly easy homemade pumpkin puree. A typical 3-4 pound pumpkin will yield approximately 2-3 cups of delicious puree. This is often equivalent to 1-2 cans of store-bought pumpkin, depending on the can size.
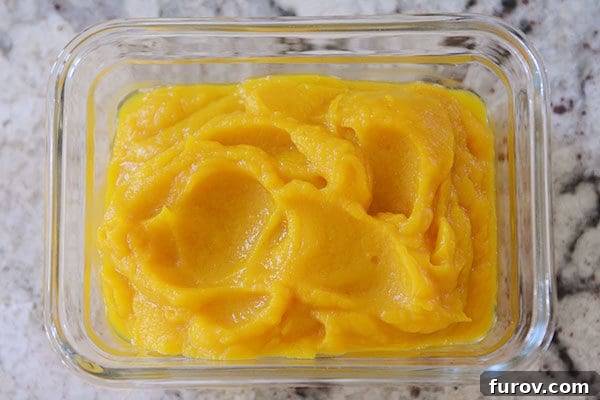
Storage Solutions for Homemade Pumpkin Puree
Once your pumpkin puree is ready, you have a few excellent options for storage:
- Refrigeration: Store the puree in an airtight container in the refrigerator for up to 5-7 days.
- Freezing: For longer storage, freezing is your best bet. Portion the puree into freezer-safe bags or containers. You can even freeze it in 1-cup increments in muffin tins, then pop out the frozen pucks and store them in a freezer bag. This way, you’ll have perfectly portioned pumpkin puree on hand for months, ensuring you’re never without for those unexpected baking cravings or holiday recipes, even when canned pumpkin is out of season. Frozen pumpkin puree can last for 6-12 months. Thaw in the refrigerator overnight before use.
Frequently Asked Questions About Homemade Pumpkin Puree
What if my pumpkin doesn’t fit in my pressure cooker?
No problem at all! Before cooking, simply remove the stem, cut the pumpkin in half, and scoop out all the seeds and fibrous innards. Then, quarter the pumpkin or cut the halves into even smaller, large chunks. Place these pieces in the steamer basket or on the rack (still adding 1 cup of water to the bottom of the pot). Cook on high pressure for a shorter time, usually around 5 minutes. Allow for natural release, then peel and blend as usual. This method ensures even cooking and perfect results for larger pumpkins.
What about the color of homemade pumpkin puree?
The final color of your homemade pumpkin puree can vary significantly depending on the specific pumpkin variety you use. Generally, homemade puree tends to be lighter in color than many store-bought brands, especially compared to the deep orange hues often seen in canned pumpkin. This is completely normal and does not affect the quality or flavor. Embrace the natural variations!
Is making homemade pumpkin puree truly worth the effort?
That’s an excellent question! In terms of pure cost, unless you are growing your own pumpkins or sourcing them at a very low price, buying store-bought pumpkin puree (even organic varieties) might sometimes be cheaper. However, the value of homemade goes beyond just cost. The fresh flavor is undeniably superior, free from any additives or preservatives. There’s immense satisfaction in knowing exactly what goes into your food, and the texture is often smoother and more luxurious. Plus, many claim that the best pumpkin pie they’ve ever tasted was made with homemade puree, offering a powerful incentive to try it yourself!
Can homemade pumpkin puree be substituted one-for-one in recipes?
Absolutely! Homemade pumpkin puree can be used as a direct, one-for-one substitute for canned pumpkin puree in virtually any recipe. Its fresh flavor often enhances dishes, making your favorite pumpkin breads, muffins, pies, and soups even more delicious.
What if I don’t have a pressure cooker?
While a pressure cooker is my preferred method for its speed and ease, you can certainly make homemade pumpkin puree without one. Roasting a pumpkin in the oven is a classic alternative:
- Preheat your oven to 375°F (190°C).
- Halve the pumpkin, scoop out the seeds and goop.
- Place the pumpkin halves, cut-side down, on a baking sheet.
- Roast until the flesh is very soft and easily pierced with a fork, typically 40-60 minutes, depending on the pumpkin’s size.
- Once cooled slightly, scoop out the soft flesh, peel any remaining skin, and blend until smooth.
This method takes longer but yields a wonderfully caramelized flavor.
How far can I take this pressure cooking principle?
The beauty of the pressure cooker method extends beyond just pumpkins! This same technique works incredibly well for other winter squashes. I have it on good authority that butternut squash, for instance, cooks to perfection using this exact pressure cooking method, making it ideal for soups, purees, and side dishes. Feel free to experiment with other gourds you enjoy – the possibilities are exciting!
Explore More Pumpkin & Comfort Food Recipes:
One Year Ago: Perfect Pumpkin Chocolate Chip Cookies
Two Years Ago: Crunchy-Topped Swiss Chicken Bake
Three Years Ago: Slow Cooker White Bean Chicken Chili

Easy Homemade Pumpkin Puree (Pressure Cooker)
2 cups (2-3 cups depending on pumpkin size)
13 mins
30 mins (for cooling & processing)
43 mins
Pin Recipe
Ingredients
- 3 ½ to 4 pound pie pumpkin
- 1 cup water
Instructions
- Remove the stem from the pumpkin.
- Place a rack or steamer basket in the bottom of your pressure cooker. Add 1 cup water.
- Place the pumpkin on the rack/basket. Ensure the lid can close without touching the top of the pumpkin.
- Seal the pressure cooker and cook on high pressure for 13 minutes.
- Allow the pressure to release naturally (for at least 10 minutes, then quick release any remaining steam).
- Carefully lift the pumpkin out using the rack’s handles and place it on a cutting board or plate. Let it cool until it is easy to handle (approx. 10-15 minutes).
- Slice the pumpkin in half, scoop out all seeds and fibrous material, and peel off the skin.
- Blend the soft pumpkin flesh in a blender or food processor until completely smooth. If needed, add a tablespoon of water to aid blending, but avoid adding too much.
- Store the homemade pumpkin puree in the refrigerator for up to a week, or freeze for longer-term storage.
Notes
Pumpkin Size: If your pumpkin is too large for the pressure cooker, cut it into halves or quarters, remove seeds, and cook on high pressure for 5 minutes with 1 cup of water. Then proceed with peeling and blending.
Mel
Side Dish, Ingredient
American
Pressure Cooker
Nutrition Information
Serving: 1 Cup,
Calories: 206kcal,
Carbohydrates: 52g,
Protein: 8g,
Fat: 1g,
Saturated Fat: 1g,
Sodium: 14mg,
Fiber: 4g,
Sugar: 22g
Recommended Products
Recipe Source: Method generously shared by my talented blogging friend, Liz – a true game-changer!