
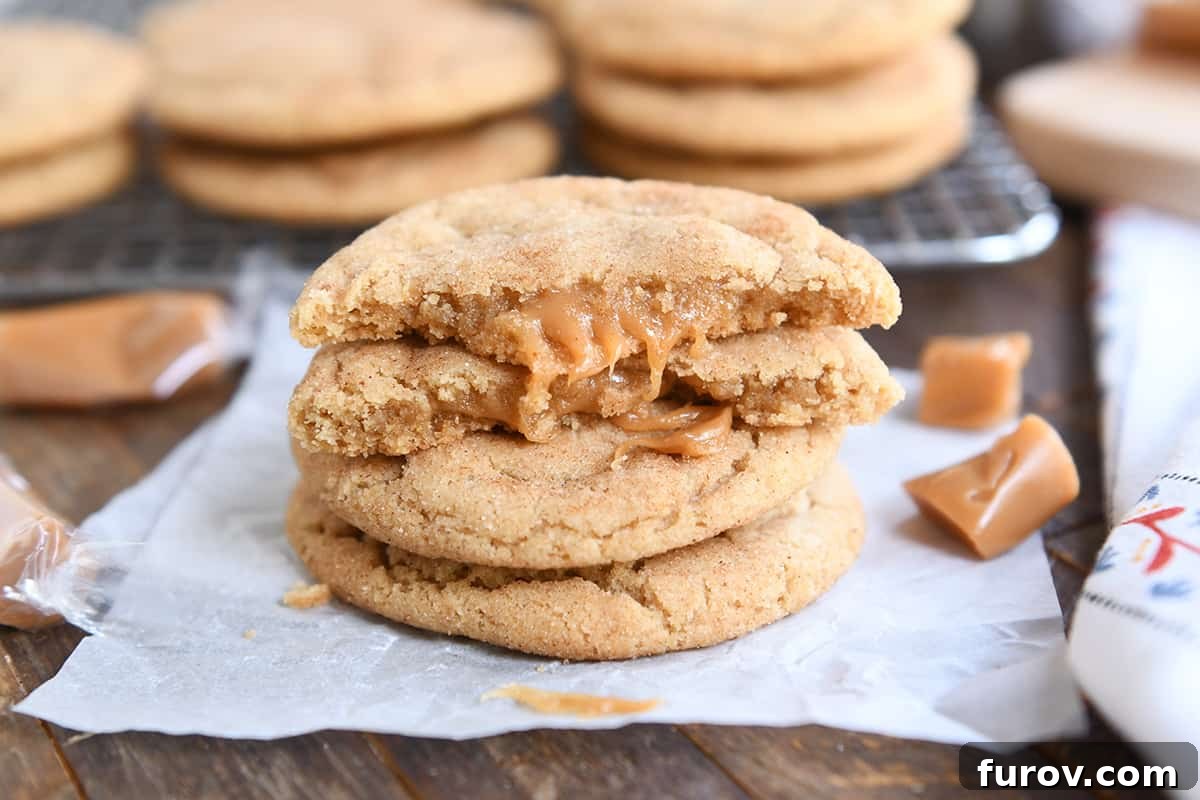
Prepare to embark on a truly extraordinary cookie journey! These Brown Butter Caramel Snickerdoodles aren’t just delicious; they’re an experience waiting to happen. Combining the rich, nutty depth of browned butter with a luscious, chewy caramel center and the classic comfort of a soft snickerdoodle, these cookies are destined to become a beloved staple in your baking repertoire. Even the most dedicated snickerdoodle skeptics (like myself!) are finding themselves utterly captivated by this unique and irresistible twist on a timeless favorite.
For years, I approached snickerdoodles with a certain reserve, always appreciating their simple charm but rarely feeling truly inspired. Then came the revelation of Pumpkin Snickerdoodle Blondies, which quickly soared to the top of my most popular recipes. The rave reviews were undeniable, and honestly, I couldn’t agree more – they’re absolutely spectacular.
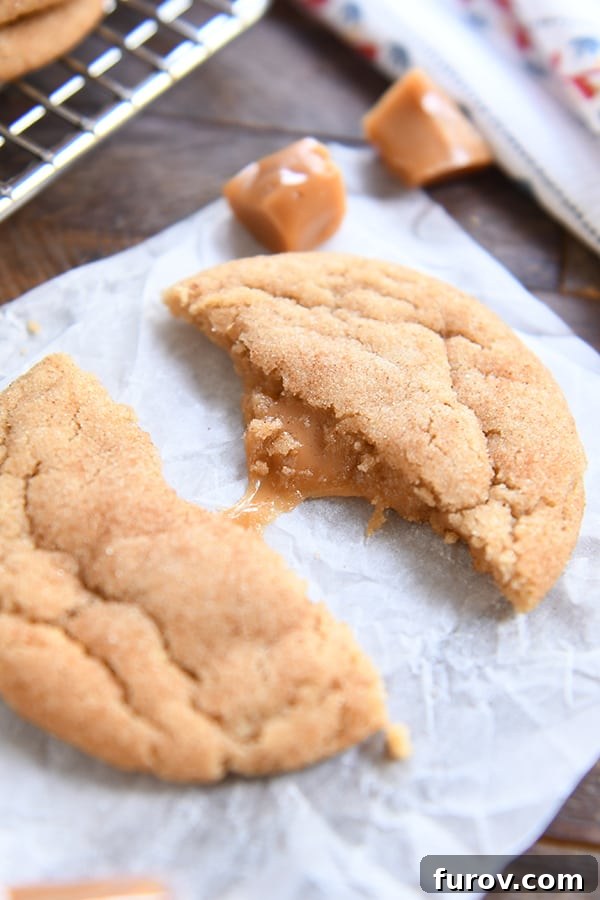
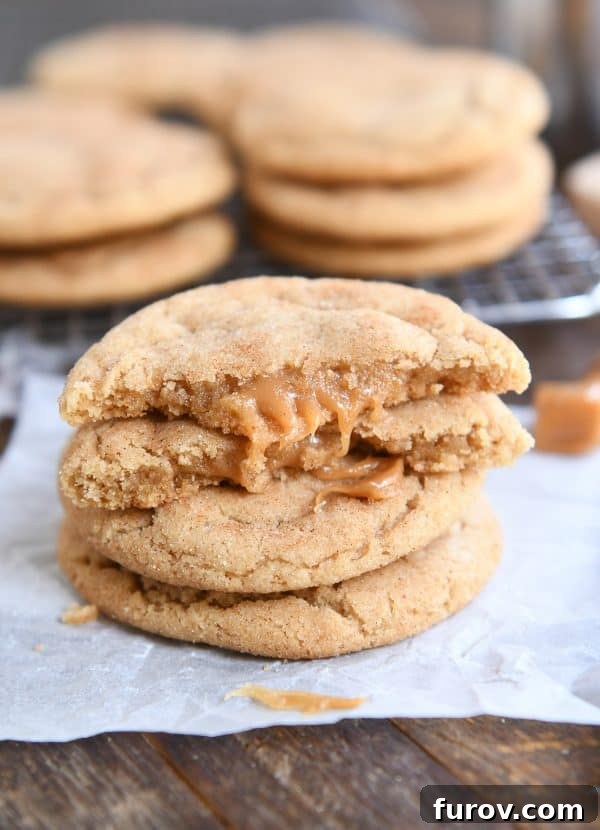
And now, the adventure continues with these incredible brown butter caramel snickerdoodles. This cookie transcends the ordinary, offering layers of flavor and texture that are simply unparalleled. Imagine the warmth of cinnamon, the tender crumb of a snickerdoodle, enveloped by the sophisticated notes of brown butter, all culminating in a delightful, melty caramel surprise with every bite. It’s a symphony of flavors that will leave you craving more.
Mastering the Art of Browning Butter
If the phrase “brown butter” has intimidated you in the past, consider today your liberation day! Browning butter is not just a technique; it’s a culinary superpower that will transform your baking. The process itself is surprisingly simple, yet the depth of flavor it imparts is utterly revolutionary. Trust me, once you master this, you’ll want to brown butter for everything!
All you need is a light-colored skillet or saucepan and a stick of good quality butter. The key is using a light-colored pan so you can easily observe the butter’s transformation. As the butter melts over medium-low heat, it will first bubble, then foam. During this stage, the water content evaporates, and the milk solids begin to separate and settle at the bottom of the pan. Continue to gently swirl or stir the butter, watching intently as these tiny milk solids turn from golden to a rich, toasty brown. You’ll notice a distinct nutty aroma filling your kitchen—that’s your cue!
These golden-brown bits are where all the magic happens. They develop an intensely nutty, almost caramel-like flavor that adds incredible complexity and dimension to baked goods. It typically takes only a few minutes, but vigilance is crucial. Butter can go from perfectly browned to burnt in a matter of seconds, so stay by the stove and remove it from the heat as soon as you achieve that beautiful amber color and fragrant aroma.
For a detailed visual guide, you can follow this brown butter tutorial. It’s an easy step that yields spectacular results every single time.
The Crucial Step: Cooling the Brown Butter
While many recipes call for using brown butter immediately while it’s still warm, this particular snickerdoodle recipe is a notable exception. For these cookies, patience is truly a virtue. It is absolutely essential to allow your beautifully browned butter to cool down until it reaches a thick, somewhat sludgy consistency, or at the very least, is no longer warm to the touch. This cooling period is critical for achieving the perfect cookie texture and preventing unwanted spreading.
Why is this step so important? Warm or melted butter behaves differently in cookie dough. The fat in warm butter is still in a liquid state, which can lead to cookies spreading too much and becoming excessively thin and crispy. Since snickerdoodles already tend to be on the flatter side, using overly warm brown butter would result in cookies that spread far beyond their desired shape, losing their chewiness and the perfect pocket for the caramel filling. By allowing the butter to cool and solidify slightly, you ensure that the dough holds its structure better during baking, yielding a thicker, chewier cookie with a perfectly nestled caramel center.
So, resist the urge to rush! Give that brown butter ample time to cool and thicken. You’ll be rewarded with cookies that boast an ideal balance of chewiness, softness, and incredible flavor, without flattening out excessively on the baking sheet.
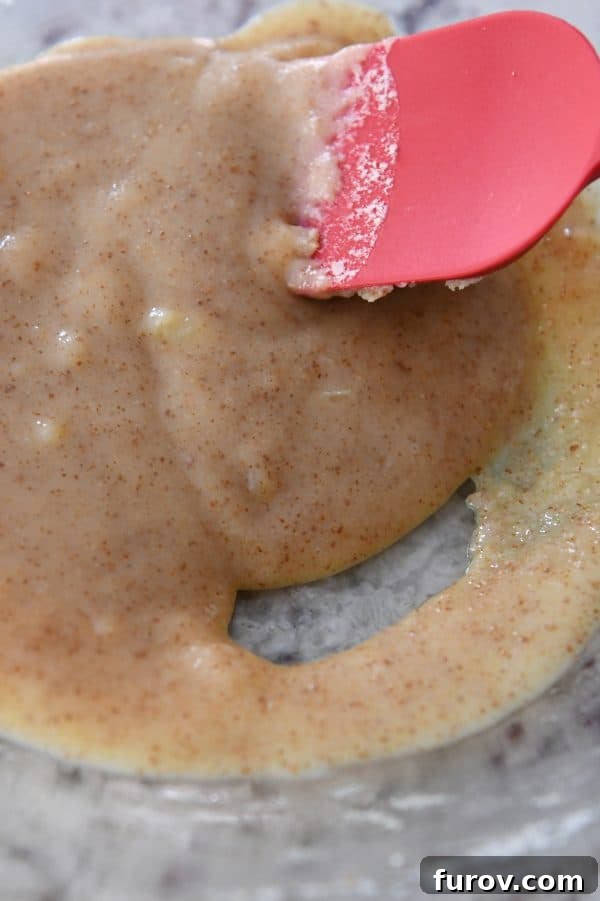
Crafting the Dough
Once your brown butter is perfectly cooled, it’s time to bring the dough together. For this recipe, I often find myself reaching for a good old-fashioned bowl and spoon. While an electric mixer certainly works, there’s something satisfying and remarkably easy about mixing this dough by hand. It also saves you from the extra cleanup!
The dough for these snickerdoodles will be fairly thick by the time all the ingredients are incorporated. Don’t be afraid to ditch the spoon and get your hands in there to ensure everything is thoroughly combined. This hands-on approach helps you feel the dough’s consistency and ensures a uniform mixture, which is key for consistent cookies.
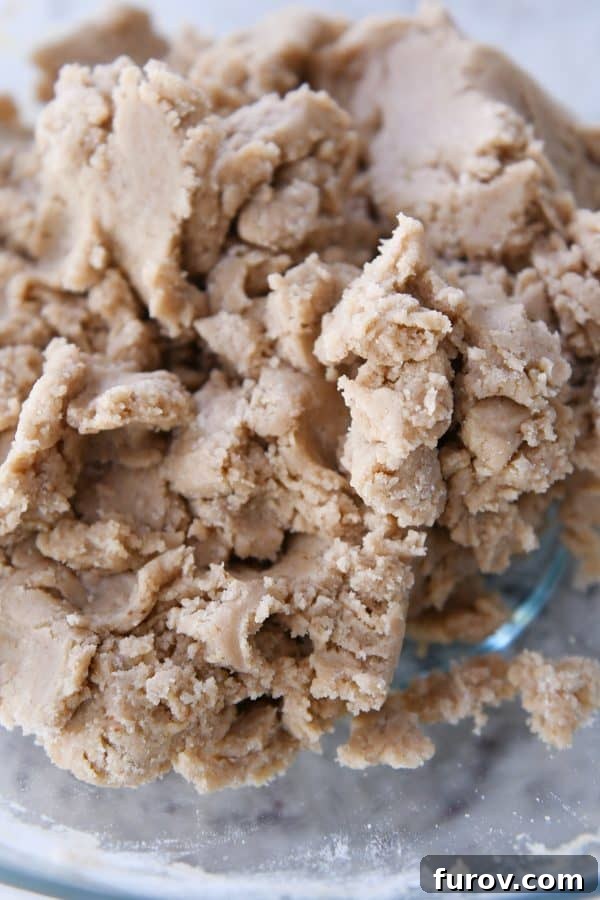
The Secret to the Caramel-Filled Center
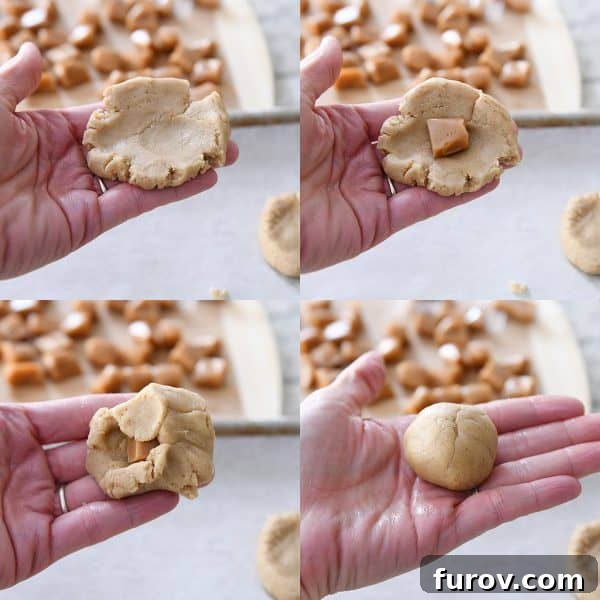
Here’s the glorious news: getting that chewy caramel into the heart of each cookie is not rocket science! It’s an incredibly simple technique that makes these cookies so special. The process involves a quick flatten, fill, and roll method that anyone can master.
Start by scooping out about two tablespoons of cookie dough for each cookie. Gently flatten this portion into a disc shape in the palm of your hand. Next, place half of a soft caramel candy in the center of the dough disc. Carefully bring the edges of the dough up and around the caramel, completely enclosing it. Once the caramel is sealed within the dough, roll the entire portion into a smooth, round ball. This ensures the caramel stays perfectly nestled inside during baking, creating that delightful melty surprise.
Choosing Your Caramel: For this recipe, I highly recommend using soft caramels. My personal favorite are Trader Joe’s sea salt caramels, which are wonderfully chewy and flavorful. However, any good quality store-bought soft caramels will work beautifully. If you’re feeling ambitious, you can even use homemade caramels! The key is to ensure they are soft and easy to work with. If your caramels are quite large, cut them into quarters. For the Trader Joe’s caramels I use, cutting them in half is usually sufficient to get the perfect amount for each cookie.
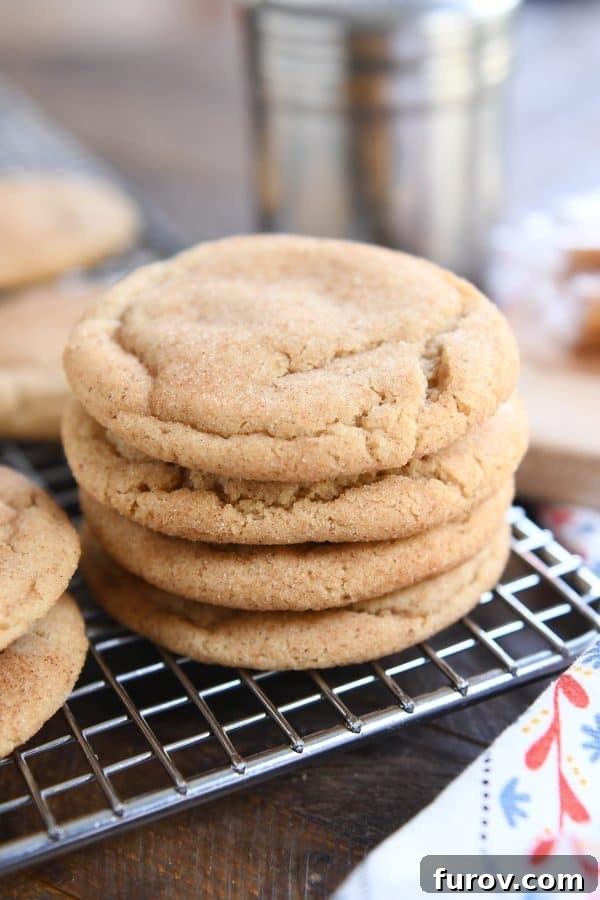
Just like traditional snickerdoodles, these caramel-filled wonders get their signature finish. Before they hit the oven, each dough ball receives a quick, generous roll in a fragrant mixture of cinnamon and sugar. This outer coating not only adds that iconic snickerdoodle sparkle and spice but also contributes to the beautiful crackled appearance and delightful texture as they bake.
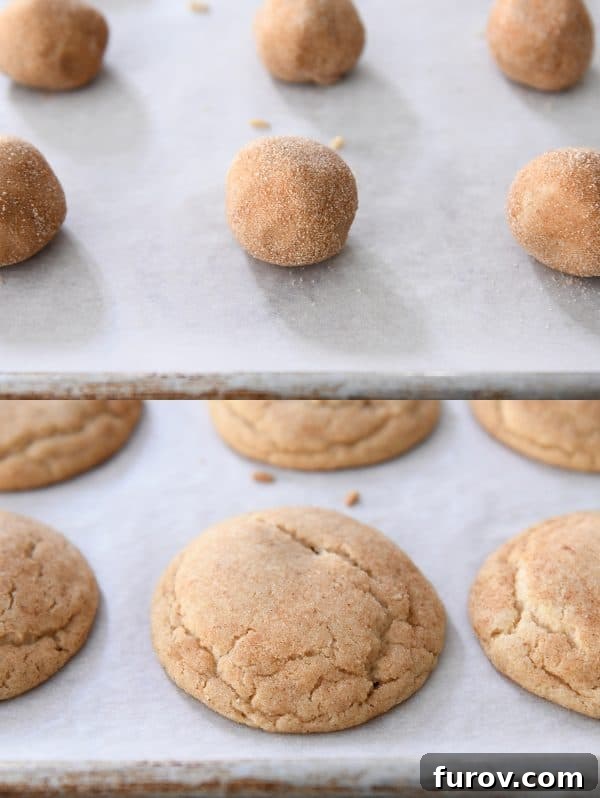
The Critical Role of Oven Temperature
After extensive testing and countless batches of these delicious cookies, I’ve learned that oven temperature plays a more crucial role than you might think in achieving perfect brown butter caramel snickerdoodles. Since these cookies are designed to be on the thinner side, there’s a delicate balance to strike: you want them to bake through beautifully without spreading excessively or becoming too flat.
It’s a well-known fact among bakers that every oven is a unique beast. Temperatures can fluctuate, and hot spots are common. What works perfectly in one oven might lead to vastly different results in another. For my oven, I’ve consistently found that the sweet spot for these cookies is baking them at 375 degrees F using a standard bake setting, or at 325 degrees F if using a convection bake setting.
However, if you know your oven tends to run hot and bakes quickly, you might find that 350 degrees F (standard bake) works best for you. The general principle here is to aim for an oven temperature that’s just slightly hotter than your typical 350-degree F cookie recipe. This slightly higher heat helps the edges set faster, preventing excessive spread while still allowing the center to bake to a soft, chewy perfection.
Troubleshooting Tips:
- If your cookies are spreading too much: Try increasing your oven temperature by 25 degrees F, or ensure your brown butter was sufficiently cooled and thickened before mixing. Chilling the dough briefly (15-30 minutes) can also help.
- If your cookies are staying too puffy and not flattening: This means your oven might be baking a bit too cool. Decrease the oven temperature by 25 degrees F. The slight flattening and the formation of a few delicate cracks on top are indicators of a perfectly baked snickerdoodle.
Understanding your oven’s nuances and making these minor temperature adjustments will be key to consistently baking brown butter caramel snickerdoodles that are nothing short of spectacular.
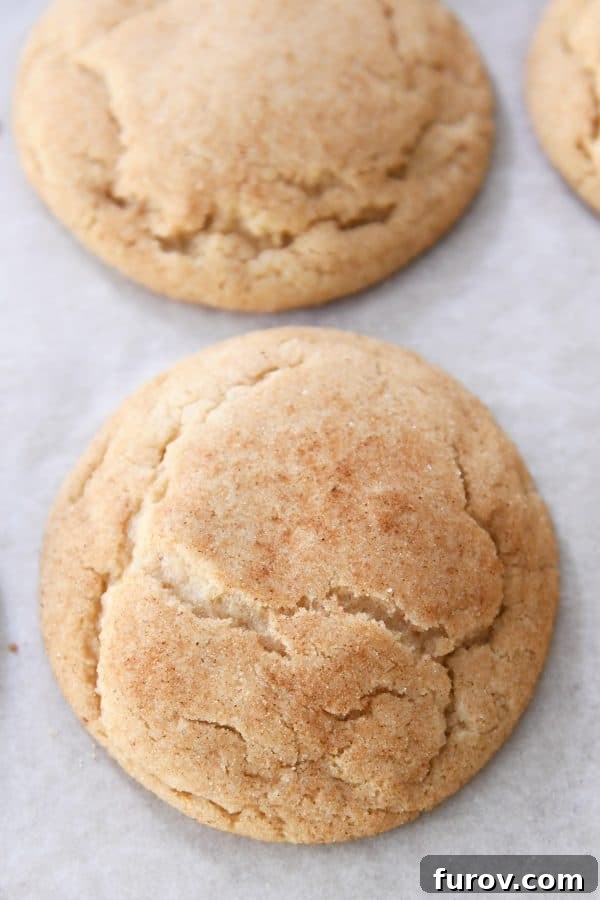
Enjoying Your Masterpiece
These cookies are truly a gift at any temperature. Right out of the oven, slightly warm, they are absolutely divine. The caramel inside is wonderfully melty and smooth, creating an irresistible molten core that oozes with every bite. There’s something undeniably comforting and luxurious about a warm cookie, and these deliver pure bliss.
But the magic doesn’t fade as they cool. Even at room temperature, these brown butter caramel snickerdoodles remain fantastic. The caramel center transforms into a delightfully chewy and soft surprise, making them an incredible treat for anyone who might be expecting just a regular snickerdoodle. They offer a delightful contrast of textures and flavors that will keep everyone guessing and reaching for another.
With their intoxicating aroma filling your home, their undeniable “wow” factor, and layers of flavor that are truly through the roof, these brown butter caramel snickerdoodles genuinely have it all. If they can win over a self-proclaimed snickerdoodle snob like me, I’d say they’re nothing short of miraculous. Get ready for an unforgettable baking experience and a new favorite cookie!
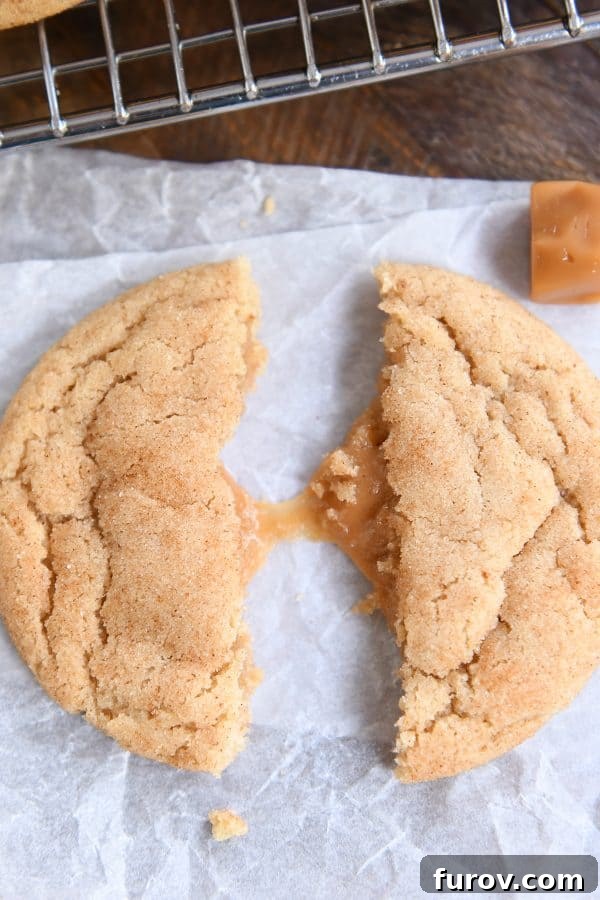
Frequently Asked Questions for Brown Butter Caramel Snickerdoodles
Can I make these cookies without browning the butter?
Technically, yes, you can use regular softened butter or melted and cooled butter. However, please be aware that a significant portion of the unique, nutty, and rich caramel-like flavor that defines these cookies comes directly from the browned butter. Skipping this step means you’ll miss out on that incredible depth and complexity, which would be a culinary tragedy!
Can I use homemade caramel for the filling?
Absolutely! Homemade caramel is a fantastic choice and will elevate these cookies even further. If you’re looking for an excellent recipe, this is my favorite homemade caramel recipe. For reference, the store-bought caramels I typically use are rectangular, measuring approximately 1.5 inches by 0.5 inches and weighing about 0.35 ounces (10 grams) each. I cut them in half to get the perfect amount for each cookie, so adjust your homemade caramel pieces accordingly.
Do these brown butter caramel snickerdoodles freeze well?
While I haven’t personally tested freezing these specific cookies, snickerdoodles generally freeze quite well. I anticipate these would also freeze successfully. If you do freeze them, make sure to let them thaw completely at room temperature before serving. This is important to ensure the caramel centers return to their soft, chewy consistency and aren’t hard enough to potentially chip a tooth!
Is cream of tartar necessary, or can I omit it?
Cream of tartar is a traditional ingredient in snickerdoodles that contributes to their characteristic tangy flavor and chewy texture, and it helps prevent crystallization of sugar. If you don’t have it on hand, you can substitute it with 1 teaspoon of baking powder. Baking powder is a combination of baking soda and an acid (like cream of tartar), so it will provide some of the leavening needed, though the flavor and texture might be slightly different from the classic snickerdoodle.
A Look Back Through Time:
One Year Ago: Perfect Homemade Caramel Apples {Tons of Tricks + Best Caramel to Use}
Two Years Ago: Perfect Small Batch Cinnamon Rolls
Three Years Ago: Easy Homemade French Bread
Four Years Ago: Harvest Pasta Sauce {Trader Joe’s Copycat}
Five Years Ago: Peanut Butter Cup Cheesecake with Chocolate Cookie Crust
Six Years Ago: Easy Homemade Egg Noodles {Step-by-Step Pictures Include Food Processor Method or By Hand}
Seven Years Ago: Black Bean and Butternut Enchilada Skillet
Eight Years Ago: Peanut Butter Oatmeal Chocolate Chip Cookies
Brown Butter Caramel Snickerdoodles
Yield: 36 cookies
Prep Time: 1 hour 30 minutes
Cook Time: 10 minutes
Total Time: 1 hour 40 minutes
Pin Recipe
Ingredients
Snickerdoodle Dough:
- 1 cup (227 g) salted butter
- 1 ¼ cups (265 g) light or dark brown sugar
- ½ cup (106 g) granulated sugar
- 2 large eggs
- 2 teaspoons vanilla extract
- 2 ¾ cups (391 g) all-purpose flour
- 2 teaspoons cream of tartar
- 1 teaspoon baking soda
- ½ teaspoon ground cinnamon
- ¼ teaspoon salt
Caramel + Cinnamon/Sugar:
- 18 square or rectangle soft caramels, cut in half
- ¼ cup (53 g) granulated sugar
- 1 teaspoon ground cinnamon
Instructions
- Preheat the oven to 375 degrees F (190°C). Line baking sheets with parchment paper or lightly grease with cooking spray. Set aside.
- For the browned butter: Cut the butter into pieces and add to a stainless steel skillet or saucepan. Heat on medium-low until the butter melts. Continue cooking, swirling or stirring occasionally; the butter will foam and sizzle as it cooks, and golden bits (the butter solids) will settle to the bottom. Cook until the butter has a nutty fragrance and the solids are golden brown. Watch closely, as it can burn quickly.
- Remove from the heat and scrape the butter and all the browned bits into a large bowl. Cool the butter until the texture is thick and sludgy – or at the very least, no longer warm. This cooling step is crucial to prevent the cookies from spreading too much while baking!
- Add the brown sugar, granulated sugar, eggs, and vanilla to the cooled brown butter, and mix until well combined.
- Add the flour, cream of tartar, baking soda, cinnamon, and salt, and stir until evenly mixed into a thick dough.
- In a separate shallow dish, whisk together the ¼ cup sugar and 1 teaspoon cinnamon for the coating.
- Scoop out two tablespoons of dough for each cookie (a #40 cookie scoop works perfectly). Flatten each portion into a disc. Place half a caramel in the center of each disc, then carefully roll the dough around the caramel, sealing it completely. Roll the balls until smooth.
- Roll each cookie dough ball generously in the cinnamon and sugar mixture. Place the coated cookie dough balls a couple of inches apart on the prepared baking sheets.
- Bake for 9-11 minutes, or until the cookies have flattened slightly and a few delicate cracks appear on top. (Refer to the notes below regarding oven temperature if your cookies are spreading too much or not flattening enough.)
Notes
Caramels: The caramels I typically use (e.g., from Trader Joe’s) are 0.35 oz (10 g) each and measure about 1.5 x 0.5 inches. I cut them in half to use one half per cookie. Adjust your caramel size accordingly.
Baking Temperature: These cookies are designed to be on the thinner side, but they should not melt and spread excessively across the pan. To help them maintain their shape: a) Bake on convection bake at 325 degrees F (160°C) OR b) Bake on a standard (conventional) bake at 375 degrees F (190°C). The only exception is if your oven is known to bake very hot; in that case, you might get away with 350 degrees F (175°C) on a standard setting. Conversely, if your cookies are staying puffy and not flattening as expected, consider decreasing your oven temperature by 25 degrees F.
Author: Mel
Course: Dessert
Cuisine: American
Method: Bake
Nutrition Information
Serving: 1 Cookie, Calories: 149kcal, Carbohydrates: 23g, Protein: 2g, Fat: 6g, Saturated Fat: 3g, Cholesterol: 23mg, Sodium: 110mg, Fiber: 1g, Sugar: 15g
Recommended Products
Recipe Source: Adapted from a recipe formerly available on Epicurious.