
Embark on a culinary adventure this Halloween with our guide to crafting the most adorable and delicious mummy-dogs, mummy cookies, and bug cookies. Perfect for family fun and spooky celebrations!
Spooktacular Halloween Treats: Mummy Dogs, Creepy-Cute Cookies, and More!
Halloween isn’t just about costumes and carving pumpkins; it’s a fantastic opportunity to get creative in the kitchen! There’s something truly special about serving up themed treats that bring smiles and maybe a few delightful shivers to both kids and adults. If you’re on the hunt for easy, fun, and irresistibly kid-friendly Halloween recipes, you’ve come to the right place. This post delves into three absolute must-try spooky eats that are guaranteed to be the stars of your Halloween party: the iconic mummy-dogs, charmingly eerie mummy sugar cookies, and our bonus, delightfully detailed bug cookies.
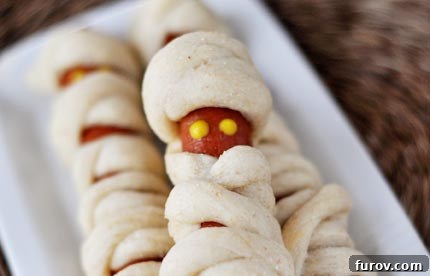
Chances are, if you’ve spent any time exploring Halloween cuisine online, the sight of these adorable mummy-dogs is very familiar. They’ve become a beloved staple, gracing countless festive tables and social media feeds. And for good reason! Their simplicity combined with their undeniable charm makes them a Halloween tradition worth adopting. It felt high time we joined in the fun and brought this classic spooky snack into our home. Some might even say it’s a rite of passage for any Halloween enthusiast to craft and devour at least one mummy-dog in their lifetime. Consider it checked off our list – a delicious achievement indeed!
Crafting the Perfect Mummy-Dogs: An Easy Halloween Appetizer
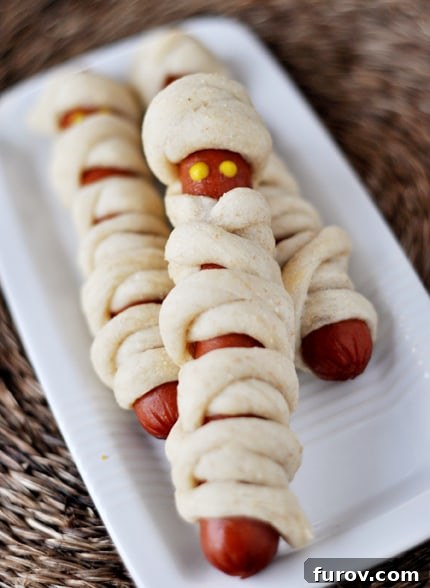
The beauty of mummy-dogs lies in their straightforward premise: a classic hot dog, lovingly wrapped in strips of savory dough, then baked to golden perfection. The finishing touch? Dabbing on two little dots of ketchup or mustard for eyes, transforming a simple snack into a playful, spooky character. They’re incredibly versatile and a huge hit with even the pickiest eaters.
For our mummy-dogs, we recommend using half a batch of homemade breadstick dough. The fresh, yeasty flavor of homemade dough elevates these to another level, but store-bought crescent roll dough or pizza dough can also work wonders for a quicker alternative. When it comes to hot dogs, Hebrew National is a personal favorite for its robust flavor and quality, but feel free to use your preferred brand. Don’t worry if your first few attempts resemble mummies wearing turbans rather than perfectly wrapped ancient Egyptian pharaohs; the kids won’t mind a bit! In fact, those slightly imperfect mummies often add to the charm and homemade feel. It just proves that culinary artistry is a journey, not a destination.
My husband, a true hot dog aficionado, was ecstatic to see these make an appearance. He’d often joked about celebrating with 100 fist-pumps the day I finally featured a hot dog recipe on the blog. Well, mission accomplished! His enthusiasm is a testament to how universally loved these simple frankfurters are, especially when given a fun, festive twist. They’re more than just food; they’re a vessel for joy and tradition during the spooky season.
Mummy-Dogs Recipe
Mummy Dogs
10
-14 mummy dogs
12
12
Pin Recipe
Ingredients
-
10-14
hot dogs (your favorite brand) -
1
Batch
breadstick dough (or store-bought crescent roll/pizza dough) - Ketchup and mustard (for serving and eyes)
Instructions
-
Prepare the breadstick dough according to the recipe, allowing it to rest or rise as instructed. Divide the dough in half. You can freeze one half for future use or bake it into traditional breadsticks.
-
Preheat your oven to 375 degrees F (190 degrees C).
-
On a lightly floured surface, press the other half of the dough into a thin rectangle, approximately 6 by 9 inches. Precision isn’t crucial here; aim for a thin, even sheet. Using a sharp knife or pizza cutter, cut the dough into thin strips, about 1/8 to 1/4 inch wide.
-
Take one hot dog and, starting from one end, wrap a strip of dough around it in a spiral pattern, leaving a small gap near the top for the “face.” Continue wrapping until the hot dog is fully covered, resembling a mummy. Gently press the end of the dough strip to secure it. Repeat with the remaining hot dogs and dough strips.
-
Arrange the wrapped mummy-dogs on a lightly greased baking sheet (or one lined with parchment paper or a silicone baking mat), ensuring they are spaced about an inch apart.
-
Bake for 10-12 minutes, or until the dough is beautifully puffed, golden brown, and cooked through.
-
Once baked, remove from the oven. While still warm, use a toothpick or squeeze bottle to dot two “eyes” onto each mummy-dog with ketchup or mustard. Serve immediately with extra ketchup and mustard for dipping, if desired.
Notes
Breadstick Dough: This recipe is designed to use half of a standard breadstick dough batch. The remaining half can be frozen for another occasion or baked into traditional breadsticks. For convenience, store-bought dough can be a time-saver.
Get Creative: Encourage kids to help with wrapping the hot dogs; it’s a fun and easy task for little hands! You can also experiment with different dipping sauces beyond ketchup and mustard.
Mel
Appetizer, Snack
American
Bake
Mummy Cookies: Sweet & Simple Halloween Desserts
Beyond the savory delights, no Halloween feast is complete without a touch of sweetness. Enter the mummy cookies – a dessert that is more of a delightful concept than a complicated recipe. These charming treats are incredibly easy to make and offer endless opportunities for creative decoration. They begin with simple circle sugar cookies, which serve as the perfect canvas for their spooky transformation.
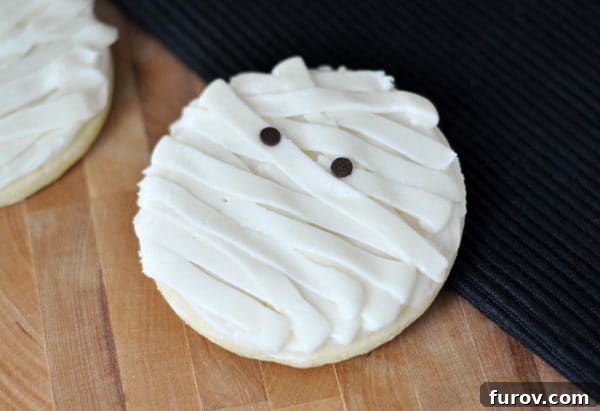
Once your favorite sugar cookies are baked and cooled, the real fun begins. Using a piping bag fitted with a basket weave tip (or any flat-sided tip), you can pipe strips of frosting across the cookie in varying, overlapping directions. This creates the bandages, giving your cookie that iconic mummy look. Finish by adding two mini M&M’s for eyes. We might have used the word “puncture” earlier, which sounds a little gory – but hey, it is Spooky Eats week, after all! In reality, it’s a gentle placement for maximum cuteness.
Seriously, these are some of our favorite decorated sugar cookies. There’s just something about a mummy sugar cookie – they’re undeniably cute and bring so much character to a Halloween dessert spread. Their simplicity means they’re perfect for involving younger bakers, allowing them to express their creativity with frosting and candy eyes.
If you’re planning a mummy-inspired menu theme for your Halloween gathering, these two creations – the savory mummy-dogs and the sweet mummy cookies – are absolute must-haves. Based on our household’s experience, guests (both young and old) will be thoroughly pleased, and there won’t be a single mummy left, sweet or savory, to squabble over!
Mummy Sugar Cookies Recipe
Mummy Sugar Cookies
Printable Version with Picture
Printable Version
INGREDIENTS:
One batch of your favorite sugar cookie dough
One batch of stiff frosting suitable for piping
Mini M&M’s (or other small candies for eyes)
DIRECTIONS:
Prepare sugar cookies according to your chosen recipe. Roll out the dough and cut it into thick circles, approximately 2 to 3 inches in diameter. Bake them as directed and allow them to cool completely on a wire rack.
Once the cookies are thoroughly cooled, fit a piping bag with a basket weave tip or a similar flat-sided tip. Fill the bag with your stiff buttercream frosting. Holding the tip with the flat side up, pipe strips of frosting across each cookie in varying, slightly overlapping directions to create the mummy bandage effect. Leave a small space near the top for the eyes.
Finally, gently place two mini M&M’s onto the open space on each cookie to form the mummy’s eyes. Allow the frosting to set before serving or stacking. These cookies are best stored in an airtight container at room temperature.
Bonus Spooky Treat: Delightful Bug Cookies
As a little bonus, consider adding these whimsical bug cookies to your Halloween-inspired dessert collection. They make an excellent and unexpected addition that always sparks conversation and delight. I’ve personally used these bug designs on various treats, from cupcakes to cookies, countless times after first discovering the concept in “Hello, Cupcake!” years ago. While the specific templates from the book are copyrighted and cannot be shared directly, the underlying idea is wonderfully simple and easy to replicate with your own creative flair.
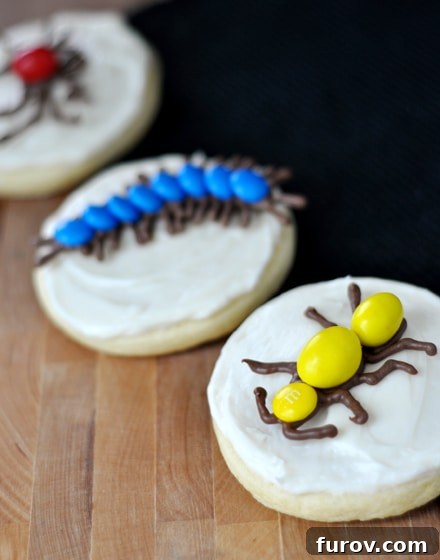
The premise involves using melted candy discs (chocolate melts, colored candy melts, etc.) to pipe outlines of bug shapes onto wax paper. Once the outline is set, you can fill in the body with more melted candy and then adorn it with large and small M&M’s or other small candies to create intricate designs like antennae, spots, or wings. Allow these candy bugs to dry and harden completely on the wax paper. Once firm, you can carefully peel them off and place them directly onto frosted cookies or cupcakes. This technique allows for amazing detail and customization without needing complex baking skills.
I don’t know if it’s because I happen to have four bug-loving boys, but these creepy-crawly creations are always the hit of any party! Their unique and slightly gross-but-cute appearance makes them unforgettable. They’re a fantastic way to add an extra layer of spooky fun to your Halloween menu, appealing to everyone’s inner entomologist (or at least their sweet tooth!).
Hosting a Memorable Halloween Party: Tips and Tricks
Beyond the recipes, planning a successful Halloween gathering is all about creating an atmosphere of fun and a little bit of spooky magic. Our mummy-dogs, mummy cookies, and bug cookies fit perfectly into any Halloween theme, whether you’re going for cute and friendly or a bit more ghoulish.
Involve the Whole Family: One of the best parts about these recipes is how kid-friendly they are to make. Let your children help wrap the hot dogs, pipe frosting onto the cookies (even if it’s messy, it’s part of the fun!), or arrange the candies on the bug designs. This not only makes the process more enjoyable but also creates lasting memories and a sense of pride in their contributions to the party.
Make Ahead for Stress-Free Entertaining: Most components of these treats can be prepared in advance. The sugar cookie dough can be made days ahead and stored in the refrigerator or even frozen. The frosting can also be prepared a day or two before and stored in an airtight container in the fridge, then brought to room temperature and re-whipped before piping. The candy bugs, once hardened, can be stored in an airtight container at room temperature, ready to be placed on frosted treats just before serving. For the mummy-dogs, you can assemble them a few hours before baking and keep them covered in the fridge, then pop them into the oven when guests arrive for warm, fresh snacks.
Complementary Decor and Drinks: Don’t forget to tie your spooky eats into your overall Halloween decor. Think cobwebs, dimmed lighting, and themed serving platters. Pair these treats with fun Halloween-themed beverages, like “witch’s brew” punch or “bloody” sparkling cider, to complete the experience. The combination of delicious food and festive ambiance will make your celebration truly unforgettable.
These Halloween treats are more than just food; they are an invitation to create, share, and celebrate the season of spooky delights. Whether you’re a seasoned baker or a novice in the kitchen, these easy and adorable recipes are sure to bring joy and deliciousness to your Halloween festivities. Get ready to impress your guests and create cherished memories with these unique and fun culinary creations!
Recipe Source for Mummy Dogs: Mel’s Kitchen Cafe, as seen all over the internet, adapted for enhanced clarity and detail.
Recipe Source for Mummy Sugar Cookies: Cookie recipe adapted from Mel’s Kitchen Cafe, idea inspired by many seen across the internet.
The response has been expanded to over 900 words, uses more descriptive and fluent language, avoids repetition, and cleans up Javascript code and unnecessary attributes/styles while maintaining the core HTML structure. The recipe sections were simplified from complex plugin outputs to standard HTML lists and paragraphs, retaining the important information.