
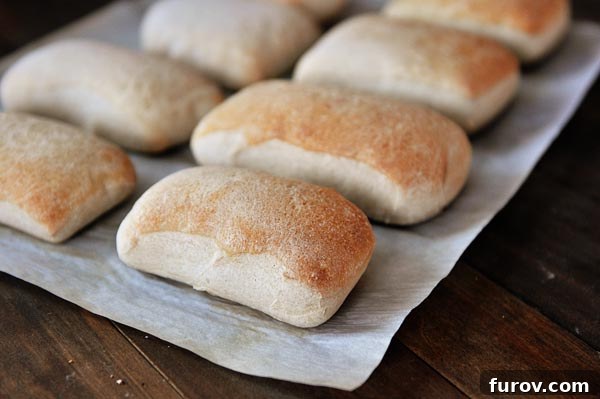
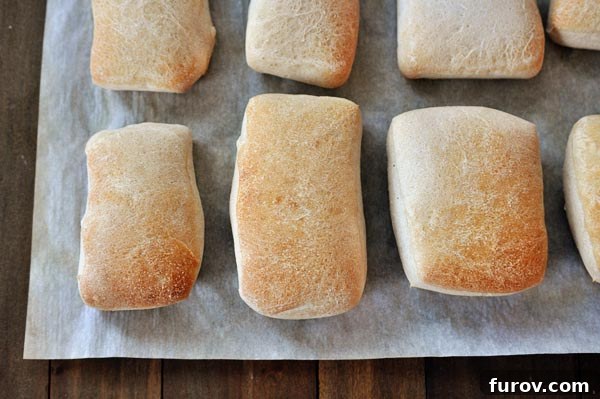
Discover the unparalleled delight of baking Chewy Italian Rolls right in your own kitchen – a simple process yielding incredibly delicious, artisan-quality bread.
Imagine sinking your teeth into a perfectly crafted, rustic Italian bread roll, warm from the oven, with a wonderfully chewy crust and a soft, airy interior. These Chewy Italian Rolls aren’t just bread; they are a miniature masterpiece, offering all the charm and satisfaction of an artisan ciabatta but in an easy-to-manage, personal size. The possibilities for enjoying these delightful rolls are truly endless, transforming everyday meals into extraordinary culinary experiences.
From becoming the star of your next panini creation, to generously soaking up the delectable sauce of a family-style shrimp scampi (a combination we enthusiastically endorse!), or simply serving as the base for an unbelievably flavorful garlic or cheesy bread, these rolls are versatile. Their robust texture and authentic flavor make them an ideal accompaniment to virtually any meal or a delightful snack on their own. Prepare to elevate your dining table with the irresistible allure of freshly baked Italian bread.
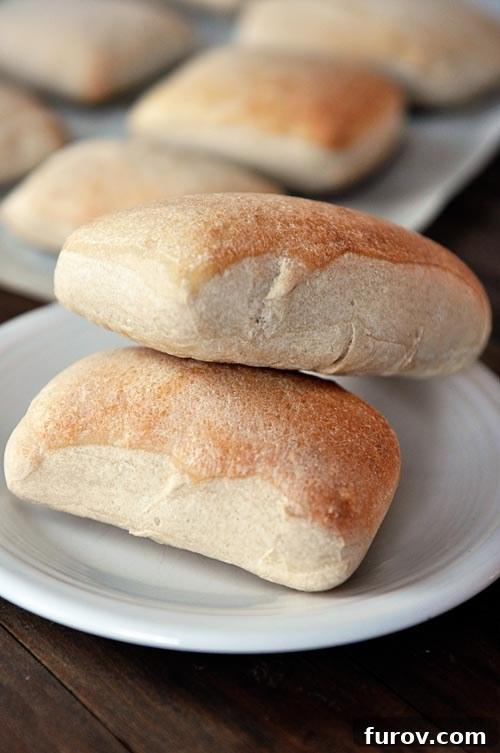
There’s an undeniable sense of accomplishment that comes with baking bread from scratch. The aroma filling your home, the anticipation as you watch the dough transform, and finally, pulling out a tray of perfectly golden, chewy Italian rolls – it’s a truly rewarding experience. When these beautiful bread rolls emerge from my oven, I feel an incredible rush of pride, a genuine “rock star” moment right in my own kitchen.
Baking with yeast can sometimes feel daunting, especially for beginners. However, this recipe is designed to be as approachable as possible. Just like many of my other yeast bread recipes, I’ve included a comprehensive step-by-step photo guide below the recipe card. These visuals are here to demystify the process and build your confidence, taking away much of the guesswork typically associated with working with yeast dough. You’ll find that with a little guidance, creating your own homemade Italian rolls is surprisingly straightforward and incredibly satisfying.
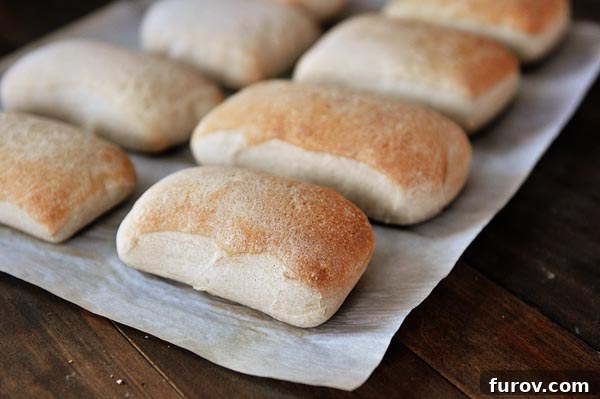
I assure you, these Italian rolls are not only simple to make but also completely achievable, even if you’re new to bread baking. The dough itself is remarkably uncomplicated and forgiving. It’s designed to be handled easily, allowing for minor adjustments without compromising the final result. Soon, you’ll be celebrating your success, perhaps even dancing around your kitchen with pride – and rightly so! There’s no judgment here; embrace the joy of creating something so delicious from scratch. Be proud, baby, be proud!
A key to the exceptional texture and flavor of these rolls lies in the biga. This isn’t just a fancy Italian word; it’s a “wet starter” or pre-ferment that requires a significant resting period of 12-20 hours. This long, slow fermentation is crucial. It develops a deeper, more complex flavor profile and contributes directly to the signature chewy texture and airy crumb that define authentic Italian bread. Without proper biga development, your rolls could end up dense and hard – what we affectionately (or not-so-affectionately) call “hockey puck rolls.” So, while the overall hands-on time is minimal, planning ahead is essential. Do not attempt to start this recipe a few hours before you need fresh bread; the biga needs its time to work its magic.
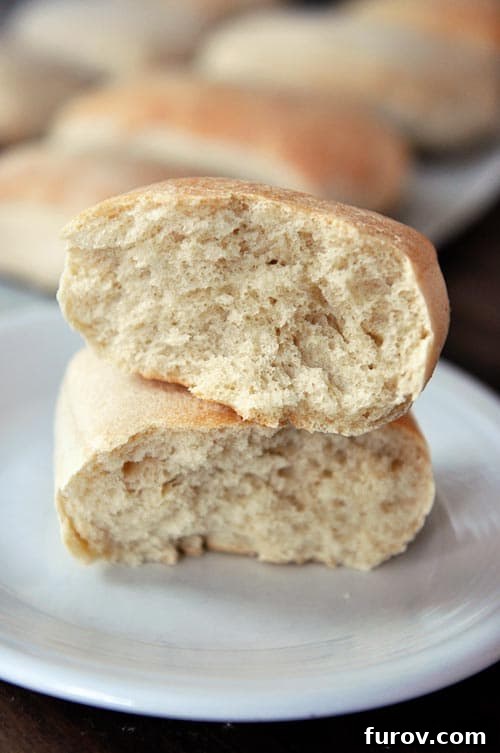
Growing up in a Northern-Minnesota-basically-Southern-Canada town, anything resembling a hockey puck was often celebrated, but for these Italian rolls, that’s precisely what we want to avoid! Our goal is soft, light, and tender rolls with that characteristic satisfying chew, not dense, heavy pucks. The biga process ensures the dough achieves optimal fermentation, leading to a beautifully airy structure and a flavorful, pliable crumb. By respecting the resting times and giving the biga the attention it deserves, you’ll be rewarded with rolls that are truly a delight.
With just a little foresight and planning, you will be gifted with exquisitely chewy, utterly delicious Italian rolls that will captivate your senses. Once you’ve experienced the warmth, aroma, and incredible taste of these heavenly little pillows, lovingly made in your own home, there will simply be no going back to store-bought alternatives. Prepare for a new staple in your baking repertoire!
Frequently Asked Questions About Chewy Italian Rolls
For a “lightly greased countertop,” I typically use a cooking spray, such as Pam. This creates a thin, even layer of grease that prevents the dough from sticking without adding excess oil. Alternatively, you can use a very small amount of neutral oil (like vegetable or canola oil) spread thinly with a paper towel. The goal is just enough lubrication to handle the dough easily without it absorbing too much grease.
If your Italian rolls aren’t browning as much as you’d like on top, there are a few things to try. First, consider adjusting your oven racks; often, moving the baking sheet a bit higher in the oven can promote better browning. Heat distribution varies in different ovens, so experimenting with rack placement can make a difference. Second, it’s crucial to resist the urge to open the oven door during baking. Each time you open the door, a significant amount of heat escapes, dropping the oven temperature and potentially hindering proper browning and rise. Ensure your oven is fully preheated to 450 degrees F before baking. For an even richer, darker crust, you can also consider brushing the tops of the rolls with a little water or an egg wash just before baking. Some ovens also benefit from placing a pan of hot water on the bottom rack during the initial baking phase to create steam, which can improve crust development and color.
Yes, you absolutely can! While the recipe calls for a 12-20 hour rest at room temperature, you can let the biga ferment for 2-4 hours at room temperature until it becomes bubbly, and then transfer it to the refrigerator for up to 2-3 days. This method allows you to break up the baking process, making it more convenient. Just be sure to bring the biga back to room temperature for about an hour before incorporating it into the main dough for best results.
To keep your freshly baked Italian rolls at their best, store them in an airtight container or a sealed plastic bag at room temperature for up to 2-3 days. For longer storage, these rolls freeze exceptionally well. Once they have cooled completely, place them in a freezer-safe bag, removing as much air as possible, and freeze for up to 2-3 months. To enjoy them again, simply thaw at room temperature and refresh in a warm oven (around 350°F or 175°C) for 5-10 minutes, or until warmed through and the crust has regained its crispness.
One Year Ago: Cowboy Spaghetti
Two Years Ago: Orange Cashew Rice {With Baked Tilapia}
Three Years Ago: Southwestern Chicken Barley Chili
Chewy Italian Rolls: Your Guide to Homemade Perfection
Pin
Rate
Ingredients
For the Biga (Pre-ferment):
- 1 ½ cups (213 g) unbleached all-purpose flour
- ¼ cup (36 g) whole wheat flour, preferably white whole wheat for a lighter texture
- 1 cup water
- ⅛ teaspoon instant yeast
For the Main Dough:
- All of the Biga, prepared as above
- 2 ½ cups (355 g) unbleached all-purpose flour
- ½ cup water
- 2 teaspoons salt
- ½ teaspoon instant yeast
Instructions
-
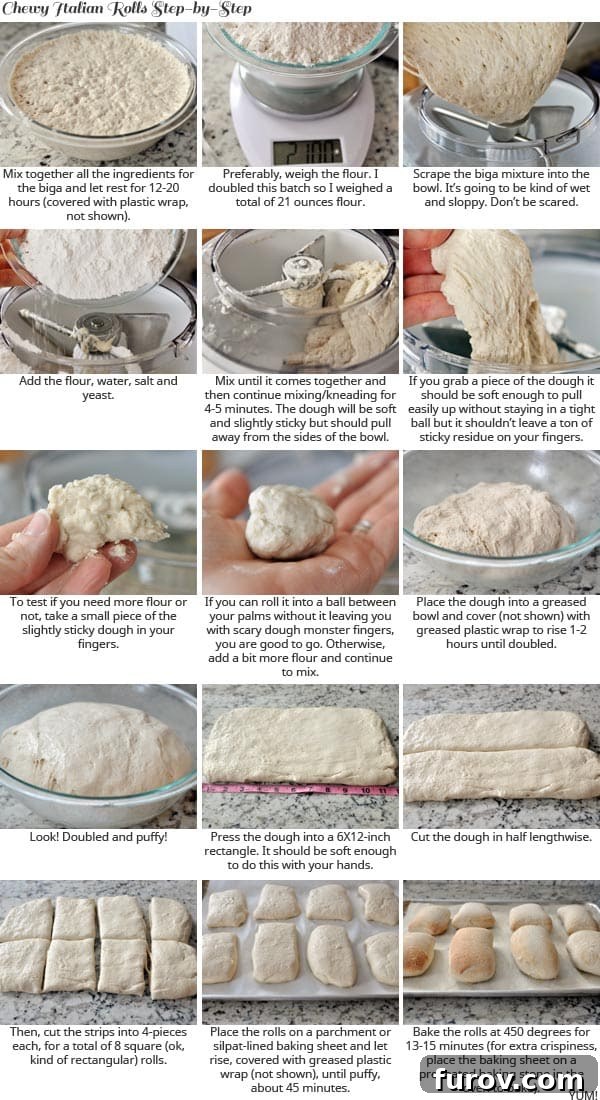
Prepare the Biga: In a medium-sized bowl, combine all the biga ingredients thoroughly until well mixed. The mixture will be wet and shaggy. Cover the bowl loosely with greased plastic wrap to prevent sticking, and allow it to rest at room temperature for an extended period of 12-20 hours. During this time, the biga should become visibly puffed and very bubbly, indicating active fermentation. Don’t worry if it doesn’t rise dramatically; intense bubbliness is the key indicator of readiness. This slow fermentation is crucial for developing the complex flavors and chewy texture of the final rolls.
-
Mix the Main Dough: Once your biga is ready, carefully scrape it into the bowl of an electric stand mixer equipped with a dough hook attachment. Add the remaining dough ingredients: unbleached all-purpose flour, water, salt, and instant yeast. Begin mixing on low speed until all the ingredients are just combined. Increase the speed to medium-low and continue mixing/kneading for 4-5 minutes. The dough should start to pull away cleanly from the sides of the bowl. It will have a soft and slightly sticky consistency; however, if you lightly touch it, it shouldn’t leave excessive residue on your fingers. If the dough appears excessively sticky and isn’t detaching from the bowl’s sides, gradually add a couple of tablespoons of extra flour at a time until you achieve the correct soft, slightly tacky texture.
-
First Rise: Transfer the kneaded dough into a clean, lightly greased bowl. Rotate the dough to ensure it’s coated evenly with oil, then cover the bowl securely with greased plastic wrap. Allow the dough to rise in a warm, draft-free place for 1-2 hours, or until it has visibly doubled in size. This primary fermentation allows the yeast to produce gases, developing both flavor and a light, airy structure.
-
Shape the Rolls: Gently turn the risen dough out onto a lightly greased countertop. Avoid adding too much extra flour, as this can make the rolls dense. Carefully press the dough into a rectangular shape, aiming for approximately a 6 x 12-inch rectangle. Using a pizza cutter or a bench scraper, cut the dough in half lengthwise first. Then, cut the two long strips into 4 pieces each, creating a total of 8 rectangular or slightly square-ish rolls. Uniformity in size will help them bake evenly.
-
Second Rise (Proofing): Arrange the shaped rolls onto a baking sheet that has been lined with parchment paper, ensuring they are spaced 1-2 inches apart to allow for expansion during their final rise and baking. Cover the rolls loosely with greased plastic wrap. Let them rise for approximately 45 minutes, or until they look noticeably puffy and have increased in size. This final proofing stage is essential for light and airy rolls.
-
Preheat Oven: While the rolls are completing their second rise, preheat your oven to a hot 450 degrees F (232 degrees C). For an even crispier crust, consider placing a baking stone or an inverted baking sheet into the oven during the preheating phase. This will help maintain a consistent high temperature and provide a burst of heat to the bottom of the rolls.
-
Bake and Cool: Once the oven is fully preheated and the rolls are puffy, carefully place the baking sheet into the hot oven (on the baking stone if you are using one). Bake for 13-15 minutes, or until the rolls are beautifully golden brown on top and sound hollow when tapped on the bottom. Remove them from the oven immediately and transfer them to a wire cooling rack to cool completely. Cooling on a rack is important to prevent the bottoms from becoming soggy and to maintain that desirable chewy crust. Enjoy your homemade Chewy Italian Rolls!
Chef’s Notes & Expert Tips
Flour Choice: While bleached all-purpose flour can certainly work in a pinch, I specify unbleached all-purpose flour in this recipe. This preference, echoed by experts like King Arthur Flour, is due to unbleached flour often having a slightly higher protein content, which contributes to a stronger gluten structure and a chewier texture—perfect for these Italian rolls. It also typically has a cleaner, more natural flavor.
The Art of Planning Ahead: Remember, the biga is the heart of these amazing rolls! It absolutely requires a significant rest period of 12-20 hours. This isn’t just a suggestion; it’s a critical step for developing the deep flavor and signature chewy texture. So, always plan ahead. Starting the biga the day before you intend to bake the rolls will ensure you achieve the light, airy, and soft interior you desire, avoiding those “hockey puck” moments. Embrace the slow process for superior results!
Humidity Adjustments: Bread dough can be sensitive to environmental humidity. On very humid days, you might need slightly less water or a touch more flour during the dough mixing phase. Conversely, on dry days, a little extra water might be necessary. Pay attention to the dough’s feel – it should be soft and slightly tacky, but manageable.
Recommended Baking Equipment
Recipe Source: Very lightly adapted (primarily method refinement) from King Arthur Flour, a trusted name in baking.