
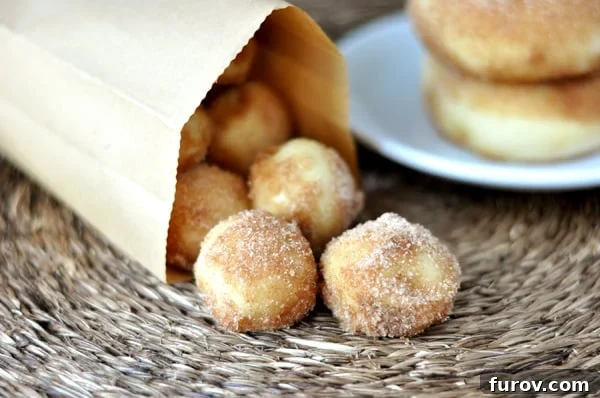
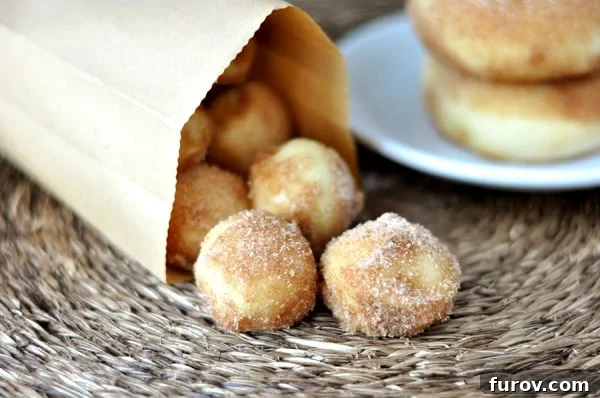
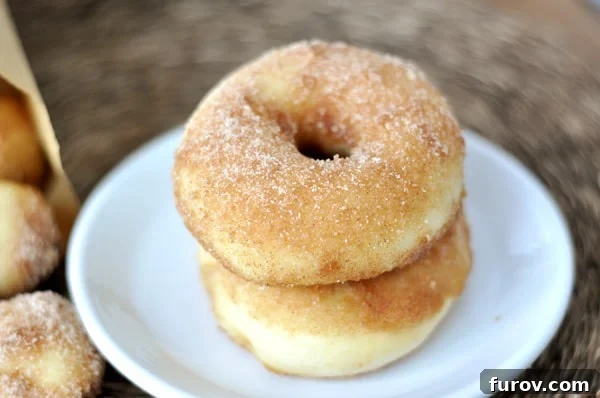
Imagine sinking your teeth into the fluffiest, chewiest homemade doughnut you’ve ever experienced. Warm from the oven, incredibly tender, and coated in a heavenly butter, cinnamon-sugar mixture – that’s precisely what awaits you with these baked delights. These aren’t just any doughnuts; they are a revelation that promises to elevate your breakfast or dessert routine to extraordinary new heights. And don’t even get me started on the doughnut holes… utterly irresistible, bite-sized perfection.
For too long, the idea of homemade doughnuts has been synonymous with messy, greasy deep-frying. But what if you could achieve that same mouthwatering flavor and irresistible texture without a single drop of hot oil? These baked doughnuts deliver on that promise, offering a fresh, cleaner take on a classic treat that will undeniably change the way you think about doughnuts. Get ready to fall in love with baking all over again.
Baked, Not Fried: A Healthier, Easier Doughnut Alternative
The truly astounding thing about this recipe is that these incredible doughnuts are baked. Yes, BAKED! Forget the splattering oil, the lingering smell of fried food, and the heavy feeling that often accompanies traditional doughnuts. While we’re not claiming these baked doughnuts are a health food, they undeniably offer a lighter, less greasy alternative to their deep-fried cousins. This method delivers a soft, tender crumb that simply melts in your mouth, making them a preferable choice for many home bakers and doughnut enthusiasts.
Opting for baked doughnuts means a significantly less complicated clean-up and a more approachable cooking process, even for novice bakers. You get all the comfort and joy of a freshly made doughnut without the hassle and added calories of frying. It’s a win-win situation, allowing you to enjoy a homemade treat that feels indulgent but is surprisingly simple to create. Once you experience the delightful texture and fresh taste of these oven-baked beauties, you might just wonder why you ever bothered with deep-frying in the first place.
Baked Doughnut FAQs: Your Questions Answered
Absolutely! These versatile doughnuts can be frozen in two ways: either after the dough has been shaped but before baking (for fresh-baked goodness anytime), or after they have been fully baked and cooled. If freezing shaped dough, arrange them on a baking sheet and freeze until solid, then transfer to an airtight container or freezer bag. Thaw overnight in the refrigerator before proofing and baking. If freezing baked doughnuts, simply place cooled doughnuts in a single layer in a freezer-safe bag or container, separating layers with parchment paper. Reheat gently in the microwave or oven from frozen for a quick treat.
For perfect, snackable doughnut holes, we recommend using a 3/4 inch to 1 inch round cutter. This size ensures they bake through evenly and have that ideal bite-sized appeal. If you don’t have a specific doughnut hole cutter, you can use the wide end of a piping tip, a small cookie cutter, or even a clean bottle cap to achieve similar results. Just be sure to handle the small dough circles gently to maintain their shape.
To grate fresh nutmeg, use a microplane zester or a rasp grater, the same tool you’d use for zesting a lemon or ginger. Freshly grated nutmeg offers a significantly more potent and aromatic flavor compared to pre-ground nutmeg, making a noticeable difference in your baked goods. We highly recommend using whole nutmeg if possible, as it’s widely available in most grocery stores in the spice aisle. However, if whole nutmeg is absolutely unavailable, you can substitute with pre-ground nutmeg, using about half the amount since its flavor might be less intense.
For optimal freshness, these baked doughnuts are best enjoyed on the day they are made, ideally warm from the oven. If you have leftovers, store them in an airtight container at room temperature for up to 1-2 days. The coating might absorb some moisture over time, but they’ll still be delicious. Avoid refrigerating, as it can dry them out. For longer storage, freezing (as described above) is your best bet.
Several factors can affect dough rising. Ensure your milk is at the correct temperature (95-105°F); too hot can kill the yeast, too cold can inhibit its activity. Check your yeast’s expiration date; old yeast may not be active. Also, ensure your kitchen is warm enough for proofing. If using active dry yeast, proof it with warm milk and a pinch of sugar first to ensure it’s active before adding other ingredients. A slightly sticky, soft dough is ideal for rising, so avoid adding too much flour during kneading.
One Year Ago: Pumpkin Chocolate Chip Bread
Two Years Ago: Strawberry Cream Puff Cake
Three Years Ago: Creamy Chicken Fettuccine

Homemade Baked Doughnuts
18
doughnut holes
25 minutes
10 minutes
1 hour
45 minutes
2 hours
20 minutes
Pin Recipe
Ingredients
Doughnuts:
-
1 ⅓
cups
warm milk,
95 to 105 degrees -
2
teaspoons
instant yeast -
2
tablespoons
(28
g)
butter -
⅔
cup
granulated sugar -
2
large eggs -
5
cups
(710
g)
all-purpose flour -
A pinch or two of nutmeg,
freshly grated -
1
teaspoon
salt
Topping:
-
½
cup
(113
g)
butter,
melted -
1 ½
cups
(318
g)
granulated sugar -
1
tablespoon
cinnamon
Instructions
-
Place the warm milk in the bowl of an electric mixer. Stir in the yeast and sugar until dissolved. Add the softened butter. Separately, beat the eggs, flour, freshly grated nutmeg, and salt.
-
Using the dough hook attachment (or a sturdy wooden spoon and your hands), beat the dough for 2-3 minutes at medium speed. The dough should start to pull away from the sides of the bowl, becoming very soft and smooth, yet still slightly sticky. If too wet, add flour one tablespoon at a time; if too dry, add a splash more milk. Avoid over-flouring! Knead the dough for a few more minutes until elastic, then transfer to a lightly greased bowl.
-
Cover the bowl with plastic wrap or a clean kitchen towel and let the dough rise in a warm place for about an hour, or until it has visibly doubled in size. The exact timing will vary depending on your kitchen’s temperature and humidity.
-
Gently punch down the risen dough to release the air. On a lightly floured surface, roll out the dough to an even 1/2-inch thickness. Using a doughnut cutter or a 2-3 inch round cookie cutter, cut out the doughnut shapes.
-
Carefully transfer the cut doughnut rounds to a baking sheet lined with parchment paper or a silicone baking mat. Then, use a smaller cutter (e.g., a 3/4 to 1-inch cutter or a piping tip) to stamp out the smaller inner circles, creating the classic doughnut hole. Ensure these holes are sufficiently large so they don’t disappear when the doughnuts rise and bake.
-
Loosely cover the baking sheet with lightly greased plastic wrap. Allow the doughnuts to rise again for approximately 45 minutes, or until they are visibly puffed up and nearly doubled in size. At this stage, you can also refrigerate the covered doughnuts overnight for baking the next morning. If refrigerated, let them sit at room temperature for about an hour before baking.
-
Preheat your oven to 375°F (190°C). Bake the doughnuts for 8 to 10 minutes, or until the bottoms are just golden. The tops should remain pale and not significantly browned, indicating they are just barely baked through. Start checking around the 8-minute mark to prevent overbaking.
-
Remove the doughnuts from the oven and let them cool on the baking sheet for just 1-2 minutes. While still warm, dip each doughnut in the melted butter, ensuring it’s fully coated. Immediately toss or sprinkle generously with the cinnamon-sugar mixture. Serve these homemade delights immediately for the best flavor and texture experience.
Notes
Serving: These exquisite baked doughnuts are truly at their peak when enjoyed the same day they are made, ideally warm right out of the oven. The fresh, tender crumb and warm cinnamon-sugar coating are an unbeatable combination.
Overnight Dough Option: For ultimate convenience, prepare the dough, roll it out, and cut your doughnuts the night before. After shaping, cover the baking sheet loosely with greased plastic wrap and refrigerate. The doughnuts will undergo their second rise slowly in the fridge. In the morning, remove them from the refrigerator about an hour before you plan to bake to allow them to come to room temperature and finish proofing. This method ensures fresh, warm doughnuts with minimal morning effort.
Yeast Type: This recipe calls for instant yeast due to its convenience. If you only have active dry yeast on hand, don’t worry! You can easily adapt the recipe. First, proof the active dry yeast by combining it with 1/3 cup of the warm milk and the granulated sugar (from the recipe ingredients) in your mixer bowl. Let this mixture sit for 5-10 minutes until it becomes foamy and bubbly, indicating the yeast is active. Once proofed, add the remaining milk and proceed with the recipe instructions as written.
Nutmeg’s Impact: While a pinch or two might seem insignificant, fresh nutmeg offers a warm, subtle complexity that truly elevates the flavor of these doughnuts. It’s highly recommended for an authentic taste.
Optimal Dough Consistency: The key to fluffy baked doughnuts is a soft, slightly sticky dough. Resist the urge to add too much flour during kneading, as this can result in dense, dry doughnuts. A well-kneaded, hydrated dough will yield the best results.
Mel
Bread, Dessert
American
Bake
Serving:
1
doughnut hole
,
Calories:
234
kcal
,
Carbohydrates:
41
g
,
Protein:
5
g
,
Fat:
5
g
,
Saturated Fat:
3
g
,
Cholesterol:
30
mg
,
Sodium:
179
mg
,
Fiber:
2
g
,
Sugar:
14
g
Recommended Products
Tips for Doughnut Perfection
Crafting the perfect baked doughnut is simpler than you might think, especially with a few helpful tips:
- Don’t Over-Flour: A common mistake when working with yeast dough is adding too much flour. The dough for these doughnuts should be soft and slightly sticky, not stiff. A sticky dough yields a much fluffier, more tender result. Resist the urge to add excess flour during kneading or rolling.
- Temperature Matters for Yeast: Ensure your milk is truly “warm” (95-105°F / 35-40°C). Too hot will kill the yeast, preventing your doughnuts from rising. Too cold, and the yeast won’t activate properly. A kitchen thermometer is your best friend here.
- Proper Proofing: Give your dough ample time to rise. This creates the light, airy texture characteristic of great doughnuts. A warm, draft-free spot is ideal for rising. If your kitchen is cool, a slightly warmed oven (turned off!) can work wonders.
- Handling the Dough Gently: Once the dough has risen, handle it as little as possible. Punching it down too vigorously or overworking it can make the final product tough.
- Baking to Perfection: Keep a close eye on your doughnuts as they bake. They should be just barely golden on the bottom and still pale on top. Overbaking will dry them out and make them less tender.
- Coat While Warm: The magic of the butter and cinnamon-sugar coating happens when the doughnuts are still warm from the oven. The warm surface helps the butter adhere, creating a sticky base for the sugar mixture to cling to, resulting in that irresistible crust.
Doughnut Variations & Customizations
While the classic butter and cinnamon-sugar coating is undoubtedly divine, these baked doughnuts are a fantastic canvas for your creativity. Here are a few ideas to customize your batch:
- Classic Glaze: For a simple yet irresistible glaze, whisk together 1 ½ cups powdered sugar with 2-3 tablespoons of milk (or cream) and ½ teaspoon of vanilla extract until smooth. Dip the warm doughnuts directly into the glaze.
- Chocolate Drizzle: Melt your favorite chocolate (dark, milk, or white) and drizzle it over glazed or plain warm doughnuts. A sprinkle of sea salt can enhance the chocolate flavor.
- Powdered Sugar Doughnuts: Skip the butter and cinnamon sugar. Instead, once the doughnuts are slightly cooled, toss them in a bag filled with powdered sugar until fully coated for a melt-in-your-mouth experience.
- Lemon Zest Glaze: Add a tablespoon of fresh lemon zest to your powdered sugar glaze for a bright, tangy twist.
- Spice Variations: Experiment with other warm spices in your sugar coating. A pinch of cardamom, allspice, or a touch of pumpkin pie spice blend can offer delightful new flavors.
- Nutty Topping: After dipping in butter, roll the doughnuts in a mixture of cinnamon sugar and finely chopped nuts like pecans or walnuts for added texture and flavor.
These homemade baked doughnuts are more than just a recipe; they’re an invitation to create joy in your kitchen. Whether you stick to the timeless cinnamon-sugar coating or venture into creative variations, the fluffy texture and warm, comforting flavors are sure to become a beloved tradition. Enjoy the process, savor the aroma, and delight in every single bite.
Recipe Source: adapted slightly from Tartlette who snagged it from 101 Cookbooks