
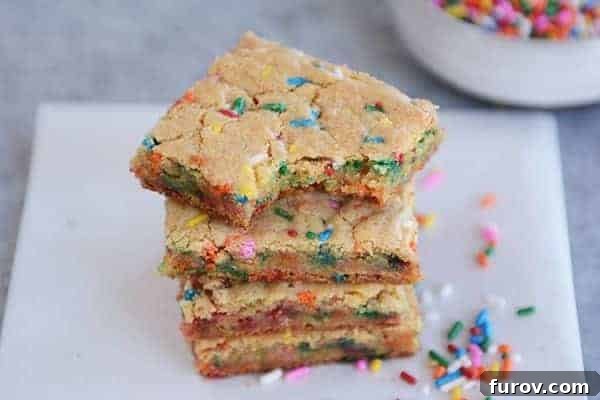
These thin and chewy funfetti blondie bars are a cinch to throw together and are so delicious, it will be hard to share!
Irresistible Thin and Chewy Funfetti Blondie Bars: Your Ultimate Homemade Recipe
Prepare yourself for a delightful indulgence! These thin and chewy funfetti blondie bars are not just a treat; they’re an experience waiting to happen. Deceptively simple in appearance, these sprinkle-filled wonders possess a unique power to captivate your taste buds and challenge your self-control. It’s hard to believe such unassuming cookie bars could pack such a punch, but trust us, they do.
For those who, like us, might initially underestimate the allure of a sprinkle-dotted blondie, be warned: these bars are a game-changer. While chocolate chips often steal the spotlight in the cookie bar world, these funfetti blondies confidently hold their own, offering a unique blend of texture and whimsical charm that is truly irresistible. We’ve been utterly won over by their subtle strength and utterly delicious flavor, finding it nearly impossible to resist “snitching” just one more nibble, or perhaps an entire quadrant, of these delightful squares.
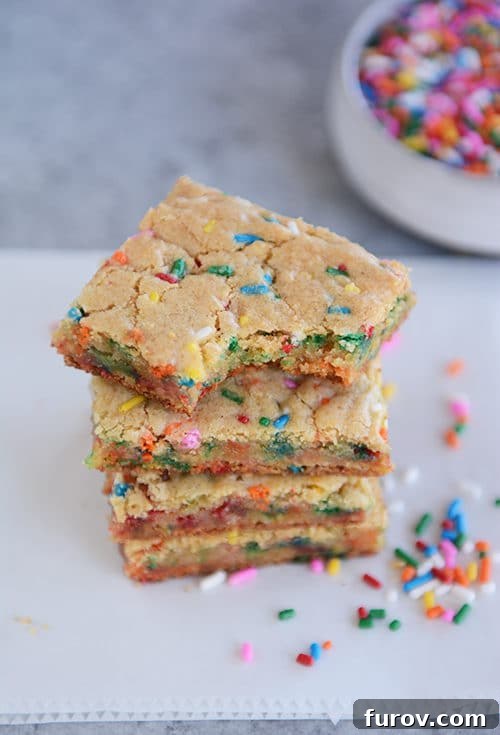
What makes these funfetti blondie bars so special? It’s their perfect balance. They don’t overwhelm with excessive richness or an overly grand presentation. Instead, their magic lies in their sheer simplicity and the incredible combination of being both wonderfully thin and delightfully chewy. This textural pairing is, in our humble opinion, the secret to a truly exceptional cookie bar. It’s no wonder our kids declared these the “best treats to hit 2016!” While we might have had other contenders that year (hello, molten chocolate!), these blondies undeniably possess a serious “yum factor” that makes them virtually impossible to pass up.
Why You’ll Fall in Love with These Funfetti Blondies
These Funfetti Blondie Bars aren’t just another dessert; they’re a celebration in every bite. Here’s why they’re destined to become a staple in your recipe collection:
- Perfectly Chewy Texture: Forget dry, crumbly blondies. Our recipe guarantees a tender, chewy interior with just the right amount of crispness at the edges, creating a truly satisfying bite every time.
- Vibrant and Fun: The rainbow sprinkles aren’t just for show! They add a playful burst of color and a subtle textural crunch that makes these blondies a joy to eat and a feast for the eyes, perfect for any party or casual treat.
- Effortlessly Easy: With simple ingredients and a straightforward mixing process, these blondies are a cinch to whip up, making them ideal for both seasoned bakers and beginners. They come together quickly, promising delicious results with minimal fuss.
- Ultimate Crowd-Pleaser: From kids’ birthday parties to adult potlucks, these funfetti blondies are universally loved. Their nostalgic flavor profile and cheerful appearance make them an instant hit with everyone.
- Homemade Goodness: There’s nothing quite like the taste of a homemade treat. These from-scratch blondies offer a depth of flavor and a comforting quality that store-bought versions simply can’t match.
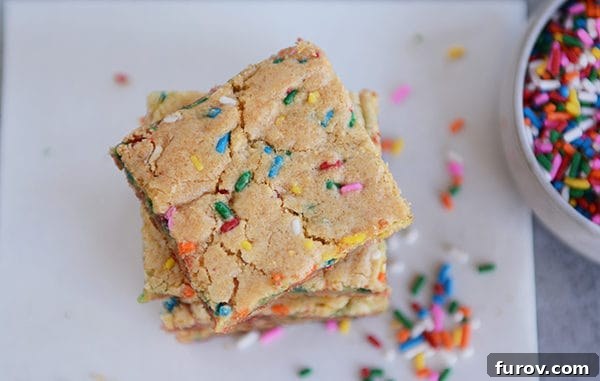
The Magic Behind the Perfect Thin and Chewy Funfetti Blondie
Achieving that coveted thin and chewy texture in a blondie isn’t just luck; it’s a science. Here’s a closer look at the key ingredients and techniques that make this recipe shine:
- Melted Butter is Key: Unlike many cookie recipes that call for softened butter, using melted butter is crucial here. It contributes to the dense, chewy texture we’re aiming for, preventing a cakey result. Ensure it’s cooled slightly, not piping hot, to avoid scrambling the eggs.
- The Sugar Combination: A blend of granulated sugar and light brown sugar provides the perfect balance of sweetness and moisture. Granulated sugar promotes crisp edges, while brown sugar adds depth of flavor, moisture, and that signature chewiness.
- The Role of Eggs: Eggs act as a binder and add richness to the blondies. Mixing them well with the sugars creates a creamy base that incorporates air, leading to a lighter, yet still chewy, texture.
- Clear Vanilla Extract: This might seem like a minor detail, but clear vanilla extract is a secret weapon for maintaining the vibrant, light color of your blondies. Regular vanilla extract can slightly darken the batter due to its brown hue, which you might want to avoid if you’re going for a true “funfetti” aesthetic. If you don’t have it, pure vanilla extract works perfectly fine, just know the color might be a touch deeper.
- Dry Milk Powder: This ingredient is often overlooked but provides incredible benefits. It contributes to a softer, more tender crumb and enhances the overall flavor, giving the blondies a richer, almost custardy taste. If you don’t have it, you can omit it, but it truly elevates the blondie.
- Baking Soda and Salt: These leavening agents and flavor enhancers are essential for the blondie’s structure and taste. Baking soda helps with the slight rise and creates a tender crumb, while salt balances the sweetness and brings out the other flavors.
- Choosing the Right Sprinkles: Not all sprinkles are created equal for blondies! “Jimmie” style sprinkles (the long, skinny ones) are preferred over nonpareils (the tiny round ones). Jimmies hold their shape and color better during baking, whereas nonpareils can sometimes bleed and melt, resulting in a less defined “funfetti” look.
Thin and Chewy Funfetti Blondies {From-Scratch}
24
Bars (9X13-inch pan)
15
25
40
Pin
Rate
Ingredients
-
12 tablespoons
(170 g)
1 1/2 sticks, salted butter, melted and cooled slightly so it isn’t piping hot (but don’t let it solidify) -
1 cup
(212 g)
granulated sugar -
½ cup
(106 g)
light brown sugar -
2
large eggs -
1 tablespoon
clear vanilla extract (see note) -
2 cups
(284 g)
all-purpose flour -
½ cup
(57 g)
dry milk powder -
1 teaspoon
baking soda -
½ teaspoon
salt -
½ to ¾ cup
(85 to 142 g)
rainbow sprinkles (see note)
Instructions
-
Preheat your oven to 350 degrees F (175 C). Lightly grease a 9X13-inch aluminum baking pan with butter or non-stick spray, then set it aside. While you can use a glass pan, you might consider reducing the oven temperature to 325 degrees F (160 C) as glass heats differently.
-
In a large mixing bowl, using either a handheld electric mixer or a stand mixer fitted with the paddle attachment, combine the slightly cooled melted butter, granulated sugar, and light brown sugar. Mix thoroughly until they are well-incorporated and creamy. Then, add the two large eggs and the clear vanilla extract, continuing to mix for 2-3 minutes until the mixture is lightened in color and fluffy.
-
In a separate medium bowl, whisk together the all-purpose flour, dry milk powder, baking soda, salt, and rainbow sprinkles. Whisk until all the dry ingredients are evenly distributed, paying special attention to dispersing the sprinkles.
-
Gently add the whisked dry ingredients to the wet batter. Using a wooden spoon or a spatula, stir just until everything is combined and no dry streaks of flour remain. Avoid overmixing, especially once the dry ingredients are added, as this can develop the gluten too much and make your blondies tough, and it can also break apart the delicate sprinkles.
-
Spread the batter evenly into your prepared 9×13-inch pan. Bake for 20-25 minutes, or until the edges begin to pull away slightly from the sides of the pan and appear lightly golden. The center should still look slightly soft, and a toothpick inserted into the center should come out with moist crumbs, not wet batter. Do NOT overbake, as this will lead to dry blondies! The edges may rise slightly higher than the center, which is completely normal and will level out as they cool. Allow the blondies to cool completely in the pan before cutting them into squares for the cleanest slices. These bars keep very well for several days covered at room temperature, or chilled for an extra chewy texture.
Notes for Success
Choosing Your Rainbow Sprinkles: For the best “funfetti” effect, we highly recommend using “jimmie” style sprinkles – these are the long, skinny ones. They hold their shape and vibrant colors much better during baking than tiny nonpareils, which tend to melt and bleed. You can find these at most grocery stores, craft stores, or online. Ensure you have enough to cover the recommended ½ to ¾ cup for a truly festive look!
Sprinkle Color Considerations: Feel free to experiment with different colors! While blue and green sprinkles can sometimes “muddy up” the overall color of the blondies a little, the flavor is still fantastic. We strongly suggest avoiding black and brown sprinkles, as they might create an unappetizing appearance. The key is to use the long, skinny jimmie sprinkles for the best visual appeal and texture.
Don’t Overmix the Batter: Once you add the dry ingredients to the wet, mix just until everything is combined. Overmixing can develop the gluten in the flour too much, leading to tough or dry blondies instead of the desired chewy texture. It can also cause the sprinkles to break down more.
The Golden Rule: Don’t Overbake! This is perhaps the most crucial tip for achieving perfectly chewy blondies. Blondies will continue to cook slightly as they cool in the pan. Pull them out of the oven when the edges are set and lightly golden, but the center still looks a bit soft and perhaps a little glossy. This ensures they remain moist and chewy once fully cooled.
Cool Completely Before Cutting: We know it’s tempting to dive into warm blondies, but resist! Allowing them to cool completely allows the blondies to set properly, resulting in cleaner cuts and a firmer, chewier texture. If you cut them while warm, they’ll be more prone to crumbling and might seem too soft.
Mel
Dessert
American
Bake
Serving:
1
Bar
,
Calories:
168
kcal
,
Carbohydrates:
25
g
,
Protein:
3
g
,
Fat:
6
g
,
Saturated Fat:
4
g
,
Cholesterol:
29
mg
,
Sodium:
165
mg
,
Fiber:
1
g
,
Sugar:
17
g
Recipe Source: Adapted from Mel’s Kitchen Cafe; inspired by their delicious chocolate chip blondie recipe, with special adjustments and additions to achieve this cake batter-esque funfetti version.
Customization and Variations for Your Funfetti Blondies
While these funfetti blondies are perfect as is, they also serve as a fantastic base for creativity. Here are a few ideas to customize your batch:
- White Chocolate Chip Funfetti Blondies: For an extra layer of sweetness and creaminess, fold in ½ cup of white chocolate chips along with the sprinkles.
- Nutty Funfetti Blondies: Add some crunch by mixing in ½ cup of chopped walnuts or pecans to the batter. The nutty flavor pairs surprisingly well with the sweet sprinkles.
- Different Flavor Extracts: Experiment with almond extract for a marzipan-like flavor, or a touch of butter extract to enhance the buttery notes. Just be mindful of quantities as some extracts are stronger than vanilla.
- Glaze Topping: For an extra touch of decadence, whip up a simple vanilla glaze (powdered sugar, a splash of milk, and vanilla extract) and drizzle it over the cooled blondies before serving.
- Seasonal Sprinkles: Tailor your blondies to any holiday or occasion by using seasonally colored sprinkles. Think red and green for Christmas, pastels for Easter, or orange and black for Halloween!
Storing Your Delicious Blondie Bars
To keep your funfetti blondies fresh and delicious for as long as possible, follow these simple storage tips:
- At Room Temperature: Store cooled blondies in an airtight container at room temperature for up to 3-4 days. This is our preferred method, as it maintains their perfect chewy texture.
- Refrigeration: If you prefer a slightly firmer, chewier blondie, or if your kitchen is particularly warm, you can store them in an airtight container in the refrigerator for up to a week. Let them come to room temperature for about 15-20 minutes before serving for optimal flavor.
- Freezing: For longer storage, freeze individual blondie bars. Once completely cooled, wrap each bar tightly in plastic wrap, then place them in a freezer-safe bag or container. They can be frozen for up to 2-3 months. Thaw at room temperature or gently warm in the microwave for a few seconds.
Frequently Asked Questions (FAQ) About Funfetti Blondies
Got questions about baking the perfect batch of funfetti blondies? We’ve got answers!
- Q: What’s the difference between a blondie and a brownie?
A: The main difference lies in the flavor profile. Brownies typically feature cocoa powder or melted chocolate as their base, giving them a rich, dark chocolate flavor. Blondies, on the other hand, are like chocolate-free brownies, relying on vanilla and brown sugar for their caramel-like, buttery taste. - Q: Can I make these blondies ahead of time?
A: Absolutely! These blondies store wonderfully at room temperature for several days, making them an excellent make-ahead dessert for parties or meal prep. They can even be frozen for longer enjoyment. - Q: Why are my blondies dry or crumbly?
A: The most common culprit for dry or crumbly blondies is overbaking. Blondies are meant to be chewy, so it’s crucial to remove them from the oven when the edges are set but the center still appears slightly soft. They will continue to set as they cool. Another reason could be overmixing the dry ingredients, which can develop gluten and lead to a tougher texture. - Q: Can I use different sized baking pans?
A: This recipe is designed for a 9×13-inch pan. If you use a smaller pan (e.g., 8×8 or 9×9), your blondies will be thicker and will require a longer baking time. Conversely, a larger pan will result in thinner blondies with a shorter baking time. Always adjust baking time and keep an eye on doneness. - Q: What if I don’t have dry milk powder?
A: While dry milk powder adds a wonderful tenderness and richness, you can omit it if you don’t have it. The blondies will still be delicious, but you might notice a slight difference in texture and depth of flavor.