
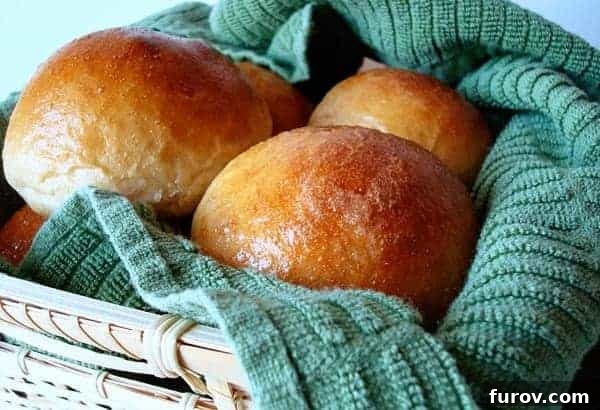
The Ultimate Thanksgiving Rolls: Soft, Chewy, and Absolutely Perfect
Prepare to fall in love with these Thanksgiving rolls! They are incredibly soft, delightfully chewy, bursting with flavor, and so tender they practically melt in your mouth. Seriously, they are simply perfect. And yes, they make for the most amazing leftover turkey sandwiches too!
For those who follow my culinary adventures, you might be raising an eyebrow at my enthusiastic declaration of a “new favorite roll.” I understand. I’ve shared many beloved roll recipes over the years, each with its own charm and special place in my heart. One might wonder, how many roll recipes can one person truly need? However, I’m here to tell you that this particular recipe transcends all others. It’s a bold statement, I know, but after making them countless times, I stand by it.
At the risk of offending my cherished collection of classic roll recipes, I must confess that this new addition to my repertoire has, quite frankly, trumped them all. This isn’t just another roll; it’s *the* roll. The one you’ll find yourself craving long after the holiday season has passed, the one your family will beg you to make again and again. These rolls are truly beyond description, but I’ll do my best to articulate their sheer perfection for you.
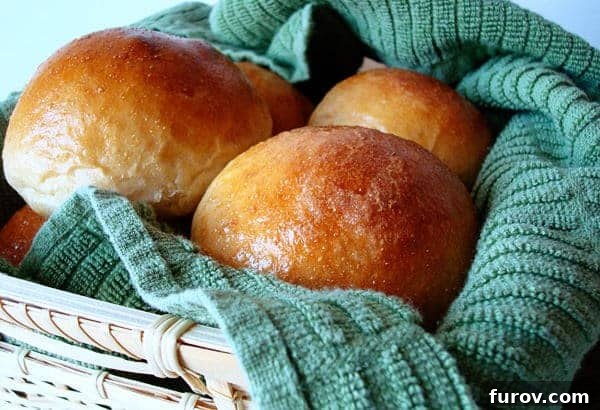
Why These Rolls Are an Absolute Must-Try
What makes these rolls so extraordinary? Let me elaborate. They possess an unparalleled softness that yields with the slightest touch, combined with a satisfying chewiness that gives them substance without being dense. Each bite is a symphony of flavor, rich and subtly sweet, with a tenderness that makes them melt in your mouth. They are, in every sense of the word, simply perfect. It’s the kind of roll that makes you close your eyes and savor the moment.
If you’re looking for an indication of just how profoundly these rolls have captured my roll-loving heart, consider this: I’ve baked them nine times in the last two months alone. And that’s no exaggeration, even though I confess I do love to exaggerate when it comes to my favorite foods! My family has become utterly obsessed, and I find myself whipping up batch after batch, not just for special occasions but for weeknight dinners too. They have quickly become an undisputed staple in our home.
Without a doubt, these are the **best rolls** I have ever made. This year, they are guaranteed to be the undisputed star of our Thanksgiving dinner, holding a place of honor right alongside the turkey and all the beloved side dishes. In fact, I predict they’ll be gracing our dinner table for many meals long after the holiday season, becoming a year-round family favorite.
One of the “secret” ingredients that contributes to their incredible texture is instant potato flakes. While it might sound unconventional, potato flakes work wonders in bread dough. They absorb moisture, creating a softer crumb and helping the rolls stay fresh longer. They also add a subtle richness to the flavor profile, making these rolls truly stand out.
Make-Ahead Magic:
Planning for a busy holiday? These rolls are incredibly forgiving and perfect for preparing in advance. After shaping and placing them on the baking sheet, you can refrigerate them for up to 24 hours. When you’re ready to bake, simply remove them from the refrigerator and let them sit at room temperature for two to three hours. This allows them to warm up and complete their final rise before baking, ensuring you have fresh, warm rolls without the last-minute fuss. This make-ahead tip is a game-changer for holiday meal prep!
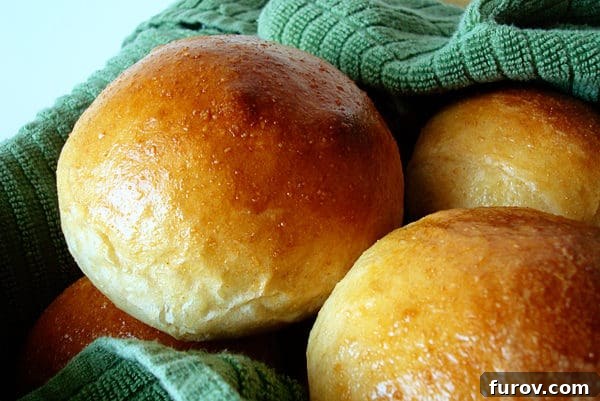

Thanksgiving Rolls
12
rolls
3 hours
15 minutes
3 hours
15 minutes
Pin
Ingredients
Gather your ingredients to create these incredibly soft and flavorful rolls. Using good quality ingredients will always yield the best results.
-
1 ¼ cups
warm water (about 105-115°F or 40-46°C) -
2 tablespoons
extra-virgin olive oil -
1 tablespoon
sugar (granulated white sugar works best) -
2 ¼ teaspoons
instant yeast (one standard packet) -
3 cups
(426 g)
all-purpose flour, I’ve had great results using half white, half wheat flour for a slightly healthier, nuttier flavor. -
½ cup
instant potato flakes (the secret to their exceptional tenderness) -
1 ½ teaspoons
salt -
1 large
egg, lightly beaten (for egg wash)
Instructions
-
1. Activate Yeast: In a small bowl or liquid measuring cup, whisk together the warm water, olive oil, sugar, and instant yeast. Let this mixture sit for 5-10 minutes until the yeast fully dissolves and becomes foamy. This indicates your yeast is active and ready to work. If it doesn’t foam, your yeast may be old, or the water temperature was incorrect.
-
2. Combine Dry Ingredients: In the bowl of a stand mixer fitted with a dough hook (or a large bowl if kneading by hand), combine the all-purpose flour, instant potato flakes, and 1 1/2 teaspoons of salt. Mix them thoroughly until well combined, ensuring the potato flakes are evenly distributed.
-
3. Mix and Knead Dough: With the mixer on low speed (or stirring by hand), slowly add the yeast mixture in a steady stream to the dry ingredients. Continue mixing until a shaggy dough forms and all the flour is incorporated, usually about one minute. Increase the mixer speed to medium-low and knead the dough for about 6 minutes, or until it becomes smooth, elastic, and pulls away cleanly from the sides of the bowl. If the dough seems too sticky, add a very small amount of additional flour, one teaspoon at a time, until it reaches the desired consistency – it should be soft but not excessively sticky. Briefly knead the dough by hand to form a smooth ball.
-
4. First Rise (Bulk Fermentation): Transfer the smooth dough ball to a lightly greased bowl, turning it once to coat the entire surface. Cover the bowl tightly with plastic wrap to prevent a skin from forming. Let the dough rise in a warm, draft-free place until it has doubled in size, which typically takes about an hour and a half.
Quick Rise Method: For a faster rise, preheat your oven to 200 degrees F (93 C) before you begin making the dough. Once it reaches temperature, turn the oven off. Place the covered bowl of dough into the warm, off oven and let it rise until doubled, which usually takes only about 45 minutes. -
5. Shape the Rolls: Gently punch down the risen dough to release the air. Transfer it to a lightly floured surface. Divide the dough into 12 equal pieces. A simple way to do this is to divide the dough into quarters first, and then cut each quarter into three equal portions. To form each roll, lightly cup the dough in the palm of your hand and roll it in a circular motion on an unfloured or ungreased surface until it forms a smooth, tight ball. This technique helps create a good structure for the rolls.
-
6. Second Rise (Proofing): Transfer the shaped dough balls to a parchment-lined or lightly greased rimmed baking sheet, spacing them evenly. Cover the baking sheet lightly with greased plastic wrap (to prevent sticking) and let the rolls rise again until they are doubled in size, which should take about an hour at room temperature.
Quick Rise Method: As with the first rise, you can utilize the warm (turned off) oven method to speed this up, allowing them to rise for about 20 minutes.
Make-Ahead Option: If you are preparing these rolls the night before, skip this second room temperature rise. Instead, immediately transfer the shaped rolls, covered with greased plastic wrap, to the refrigerator. On baking day, remove the rolls from the refrigerator two to three hours before you plan to bake them, allowing them ample time to come to room temperature and complete their final rise. -
7. Bake: Preheat your oven to 400 degrees F (200 C). Once the rolls have fully risen and the oven is preheated, gently brush the tops of the rolls with the lightly beaten egg wash. This will give them a beautiful golden-brown color and a lovely sheen. Bake for about 15 minutes, or until the rolls are deeply golden brown on top and sound hollow when tapped on the bottom.
-
8. Serve Warm: Remove the rolls from the oven and serve them warm with butter. Enjoy the irresistible aroma and taste of these perfect Thanksgiving rolls!
Mel
Bread
American
Bake
Nutrition Information
Calories: 160kcal,
Carbohydrates: 28g,
Protein: 5g,
Fat: 3g,
Saturated Fat: 1g,
Cholesterol: 16mg,
Sodium: 302mg,
Fiber: 2g,
Sugar: 1g
Recipe Source: adapted slightly from Cook’s Country
Pro Tips for Flawless Rolls
- Check Your Yeast: Always ensure your yeast is active. If your water, sugar, and yeast mixture doesn’t get foamy after 5-10 minutes, your yeast might be expired or the water temperature was off. Start with fresh yeast for best results.
- Proper Kneading is Key: Don’t skimp on the kneading time. This develops the gluten, which is essential for the rolls’ soft, chewy texture. A well-kneaded dough will be smooth, elastic, and pass the “windowpane test” (you can stretch a small piece thin enough to see light through it without tearing).
- The Perfect Rise Environment: A warm, draft-free spot is ideal for rising dough. If your kitchen is cool, the quick rise method in a turned-off oven is a fantastic hack. Consistency in temperature helps the yeast work efficiently.
- Don’t Overbake: Overbaking can lead to dry, tough rolls. Keep an eye on them towards the end of the baking time. They should be golden brown. You can also use an instant-read thermometer; the internal temperature should reach about 200-210°F (93-99°C).
- Egg Wash for Golden Perfection: Brushing the rolls with a lightly beaten egg before baking gives them that beautiful, glossy, golden-brown crust. It also adds a subtle richness to the exterior.
- Divide Evenly: For uniformly sized and baked rolls, consider using a kitchen scale to divide your dough. This ensures each roll bakes at the same rate and looks picture-perfect.
Variations to Explore
While these rolls are perfect as is, don’t hesitate to get creative and customize them!
- Herbed Rolls: Add 1-2 tablespoons of finely chopped fresh herbs like rosemary, thyme, or chives to the dough during the kneading stage. These are fantastic with savory meals.
- Garlic Butter Rolls: After baking, brush the warm rolls with melted butter infused with minced garlic and a sprinkle of fresh parsley.
- Cheesy Rolls: Incorporate ½ cup of shredded cheddar or Parmesan cheese into the dough during the last minute of kneading. You can also sprinkle some on top before baking.
- Sweet Rolls: For a dessert-like treat, brush warm rolls with melted butter and sprinkle with cinnamon sugar. A light glaze made from powdered sugar and milk would also be delightful.
- Whole Wheat Twist: As noted in the ingredients, using half white and half whole wheat flour adds a nutty flavor and some extra fiber without sacrificing too much tenderness. Experiment with the ratio to find your favorite balance.
Serving Suggestions Beyond Thanksgiving
These versatile rolls aren’t just for the holidays! Here are a few ways to enjoy them throughout the year:
- Classic with Butter and Jam: A simple spread of butter and your favorite fruit jam or preserves makes for a delightful breakfast or snack.
- Soup & Stew Companion: Their soft texture and ability to soak up rich broths make them the perfect accompaniment to hearty soups, chilis, and stews.
- Mini Sandwich Buns: Use them to make gourmet sliders with leftover turkey, ham, or even pulled pork.
- With Breakfast: Serve them alongside scrambled eggs, bacon, or sausage for a complete breakfast spread.
- Savory Dipping: Perfect for dipping into olive oil with a sprinkle of herbs and balsamic vinegar.
Storage and Reheating
To ensure your rolls stay delicious, follow these storage and reheating tips:
- Storing Freshly Baked Rolls: Once cooled, store leftover rolls in an airtight container or a large zip-top bag at room temperature for up to 2-3 days.
- Freezing Baked Rolls: For longer storage, allow the rolls to cool completely. Place them in a freezer-safe bag or container, removing as much air as possible. They can be frozen for up to 2-3 months. Thaw at room temperature.
- Reheating: To restore their fresh-baked warmth and softness, wrap rolls loosely in foil and reheat in a preheated oven at 300°F (150°C) for 10-15 minutes, or until warmed through. Alternatively, microwave individual rolls for 10-20 seconds until soft.
Frequently Asked Questions (FAQ)
- What makes these rolls so incredibly soft?
- The secret ingredient is instant potato flakes! They absorb moisture, creating a wonderfully soft and tender crumb, and help the rolls stay fresh longer.
- Can I use active dry yeast instead of instant yeast?
- Yes, you can! If using active dry yeast, you’ll still proof it with the warm water and sugar as instructed in step 1. The main difference is that active dry yeast often needs a slightly longer initial proofing time to activate fully (ensure it’s foamy) and sometimes a slightly longer rise time for the dough.
- Can I make the dough in a bread machine?
- While this recipe is designed for a stand mixer or hand kneading, you can adapt it for a bread machine. Add the liquids first, then the dry ingredients (except salt and yeast), with the yeast on top. Use the dough cycle. Once the cycle is complete, proceed with shaping and the second rise (step 5).
- How do I know if my yeast is active?
- When you combine warm water, sugar, and yeast, the mixture should become bubbly and foamy within 5-10 minutes. If it doesn’t, your yeast is likely no longer active, and you should discard it and start with fresh yeast.
- What if my dough isn’t rising?
- Several factors can cause dough not to rise: inactive yeast, water that was too hot (killed the yeast) or too cold (slowed the yeast), or a cold rising environment. Ensure your yeast is fresh and your water temperature is correct. Use the warm oven method for rising if your kitchen is cool.
- Can I make these rolls without a stand mixer?
- Absolutely! You can mix and knead the dough by hand. It will require more effort and time (about 10-15 minutes of kneading by hand), but the results will be just as delicious. Aim for a smooth, elastic dough.
Recommended Products
Conclusion: Your New Favorite Holiday Tradition
These Thanksgiving rolls are more than just a side dish; they’re an experience. They embody comfort, tradition, and the simple joy of sharing delicious homemade food with loved ones. Their unparalleled softness, delicate chew, and rich flavor will undoubtedly make them a cherished part of your holiday feast for years to come. Whether you’re a seasoned baker or new to the world of yeast breads, this recipe is straightforward and incredibly rewarding.
Don’t wait for Thanksgiving to roll around to try them out! Master this recipe now and enjoy these delightful rolls at any meal. We promise, you won’t regret making them a regular feature on your table. Bake a batch, gather your family, and prepare to create new, delicious memories.