
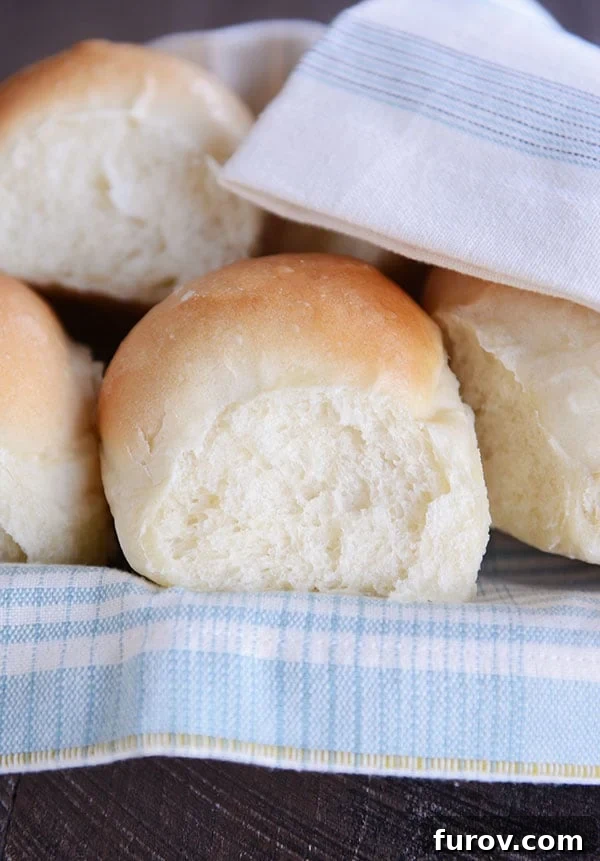
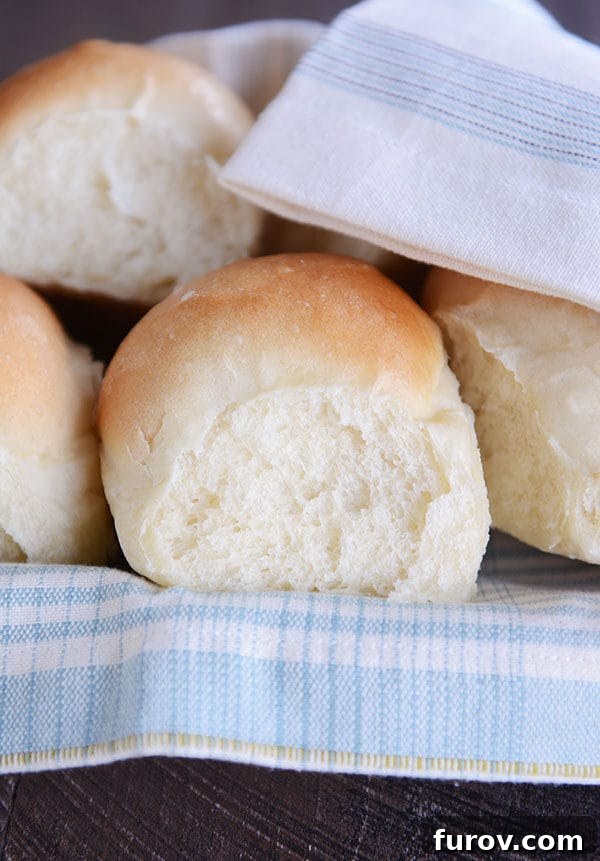
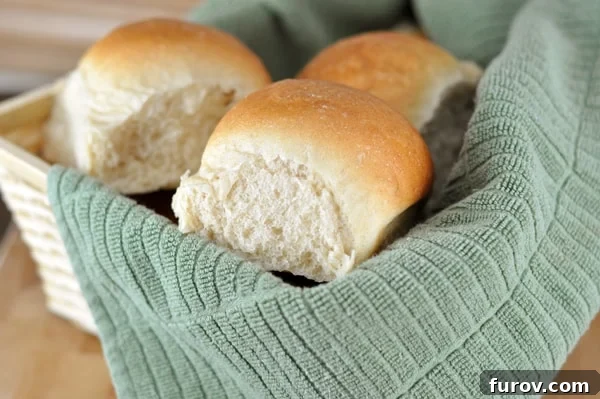
These French bread rolls are more than just a recipe; they are a culinary triumph, earning over 1,000 five-star reviews for a reason. They emerge from the oven light, incredibly fluffy, and perfectly golden, making them the ideal accompaniment to any meal. Whether you need classic dinner rolls, sturdy hamburger buns, or versatile sub buns, this recipe delivers exceptional results every time. It’s designed to be approachable for beginner bakers, yet satisfying enough for seasoned experts seeking a reliable staple.
⭐️⭐️⭐️⭐️⭐️ “Thank you so much for the recipe. The rolls were wonderful. Made a double batch for Easter and froze some. They freeze excellently. Will be my go-to rolls.” -Jackie
Why You’ll Adore This Foolproof French Bread Roll Recipe
This recipe for French bread rolls consistently receives rave reviews because its dough is incredibly forgiving and simple to work with. It removes common baking anxieties, making the process enjoyable and the outcome consistently perfect. Here’s why this recipe has become a trusted favorite for so many home bakers:
- Effortless Mixing: While a stand mixer equipped with a dough hook significantly streamlines the process, the dough is so pliable and easy that it can be comfortably mixed and kneaded by hand. This accessibility ensures anyone can make these rolls, regardless of their kitchen equipment.
- Simple, Wholesome Ingredients: Forget complicated steps like scalding milk or other fussy preparations. This recipe relies on basic, readily available ingredients that are naturally dairy-free (aside from an optional butter brush on top after baking). It’s straightforward, allowing the natural flavors of the bread to shine.
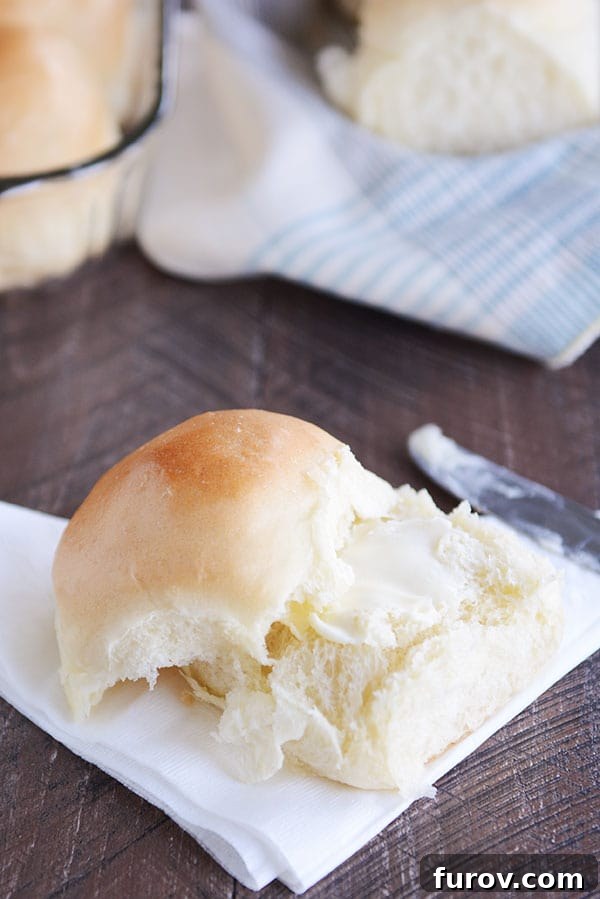
- Unmatched Texture: Prepare yourself for ultra-soft, exceptionally fluffy rolls that practically melt in your mouth. The texture is consistently perfect, providing a delightful chew without being heavy or dense.
- Incredibly Versatile Shaping: This single dough recipe offers endless possibilities. You can effortlessly shape it into classic dinner rolls, sturdy sub buns for hero sandwiches, or perfectly sized hamburger buns. Many enthusiastic reviewers have even reported successfully using this adaptable dough to create a delicious pizza crust!
- Perfect for Any Occasion: From a simple weeknight family dinner to an elaborate holiday feast, these French bread rolls fit every occasion. Their ease of preparation makes them stress-free, while their delicious flavor ensures they’re always a welcome addition to the table.
Essential Ingredients for Fluffy French Bread Rolls
Understanding the role of each ingredient is key to achieving the perfect French bread roll. Here’s a detailed breakdown of what you’ll need and why it matters:
- Warm Water: The temperature of your water is critical for activating the yeast. Aim for a range between 105 and 110 degrees F (40-43 degrees C). Water that is too cold won’t activate the yeast, while water that is too hot can kill it, leading to a flat dough. Using a thermometer ensures accuracy.
- Yeast: Both instant yeast and active dry yeast work beautifully in this recipe. Instant yeast can be mixed directly with the dry ingredients, while active dry yeast traditionally requires blooming in warm water first. However, modern active dry yeasts often have smaller particle sizes and can often be added directly as well. If using packets (typically 2 1/4 teaspoons), one packet is usually sufficient, though a full tablespoon might yield a slightly faster rise.
- Sugar: A small amount of granulated sugar or honey serves as “food” for the yeast, kickstarting its activity and helping the rolls rise more quickly and achieve a lovely golden-brown crust. This amount is carefully balanced to enhance yeast function without making the rolls taste overly sweet. Feel free to slightly adjust the sugar up or down based on your personal preference.
- Oil: A few tablespoons of canola, vegetable, or olive oil are incorporated into the dough to provide a wonderfully supple and smooth texture. Oil also plays a crucial role in maintaining the freshness of the rolls, keeping them soft and delicious even on the day after baking. It contributes to a tender crumb.
- Salt: Table salt is used to enhance the flavor of the bread, balancing the sweetness and enriching the overall taste profile. It also helps regulate yeast activity and strengthens the gluten structure, contributing to a better dough texture.
- Flour: The choice of flour significantly impacts the final texture. All-purpose flour will yield a soft, classic roll, while bread flour, with its higher protein content, will create a chewier and even fluffier roll. A combination of both can also be used. For those looking to incorporate whole grains, substituting up to 50% of the white flour with white whole wheat flour is recommended. White whole wheat offers the nutritional benefits of whole grain while maintaining a lighter color and softer texture than traditional whole wheat flour.
Mastering Yeast Dough: Insider Tips for Perfect Rolls
Baking with yeast can seem intimidating, but with a few key insights, you’ll be creating bakery-quality rolls in no time. The most important tip for consistent success with yeast dough at home is understanding the flour:
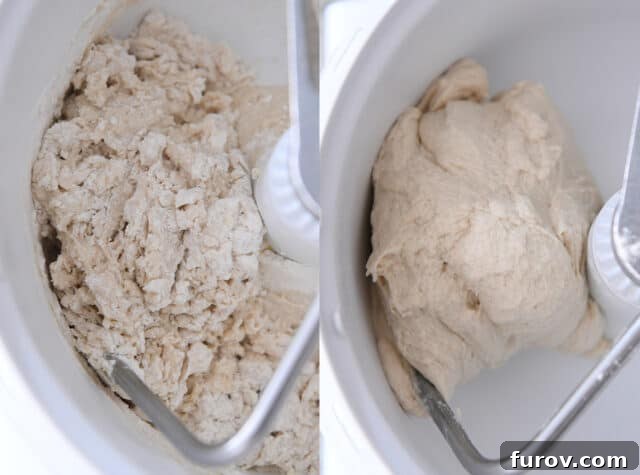
Stop stressing about adding the exact amount of flour specified in a recipe. Many factors, including your elevation, local humidity levels, and even how you measure flour (scooping vs. spooning and leveling), profoundly impact the actual amount of flour needed. Instead, add flour gradually and learn to judge the dough by its visual appearance and tactile feel. It’s perfectly acceptable if you need to add a bit more flour than the recipe suggests, or slightly less.
How to test this French bread roll dough for optimal consistency:
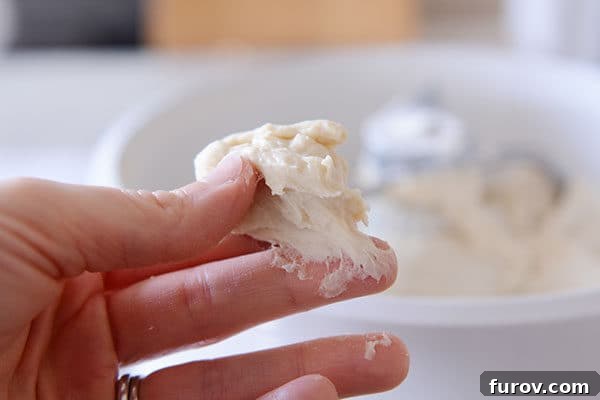
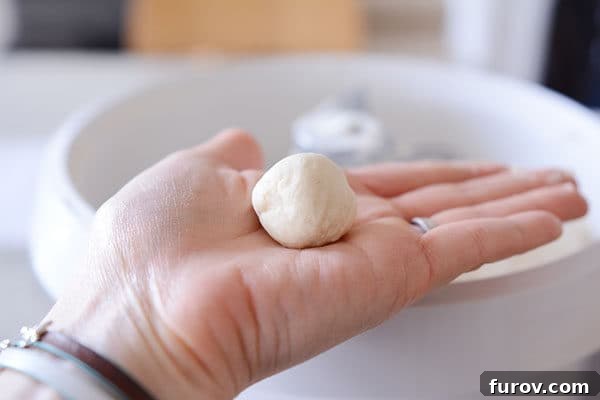
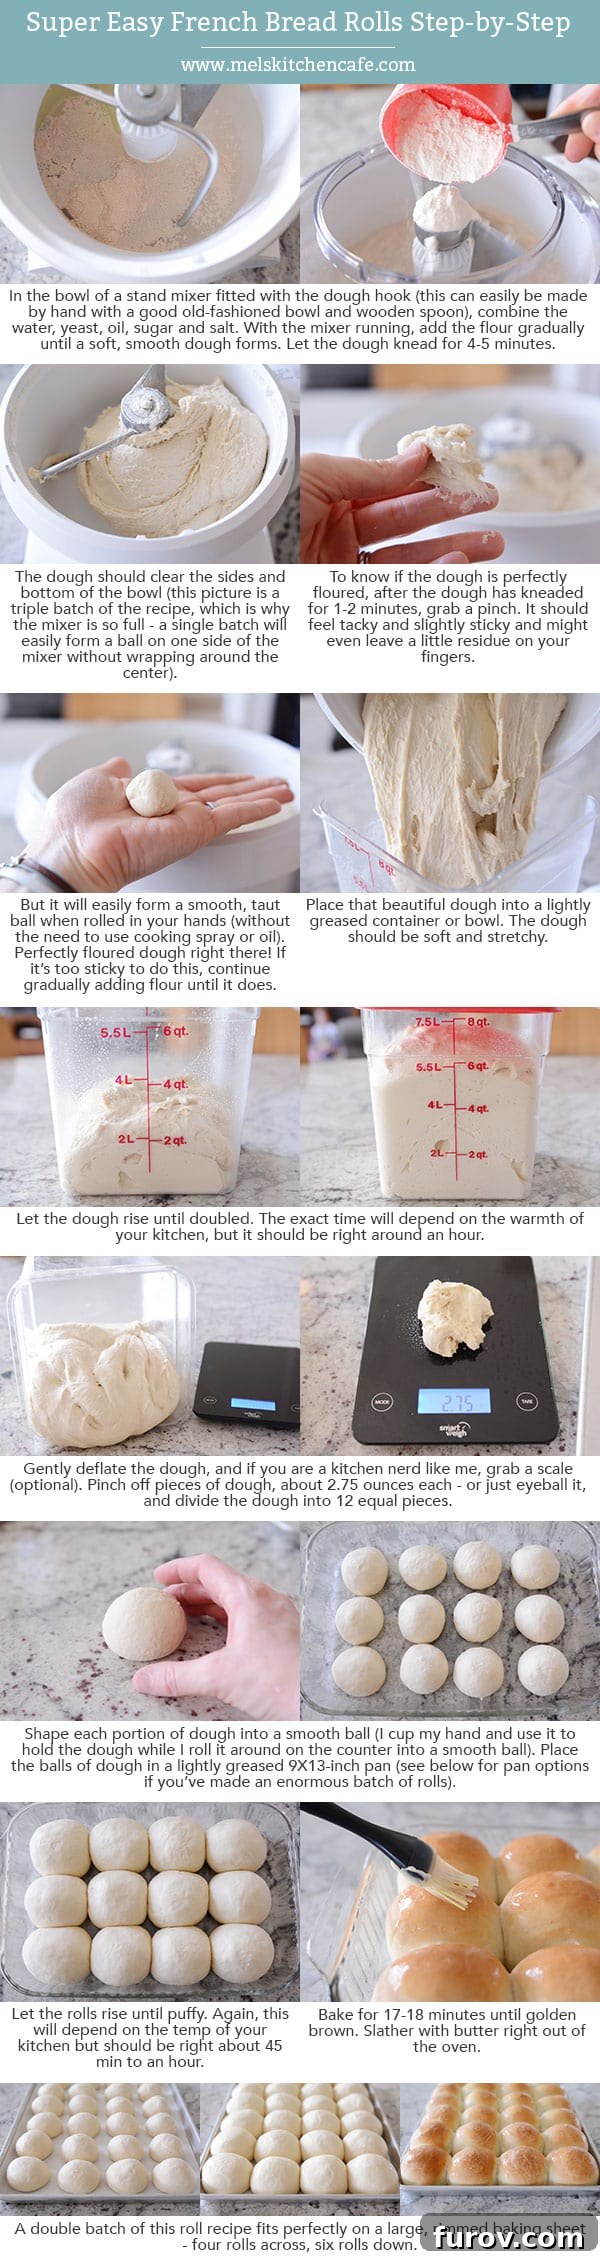
- After you’ve incorporated most of the flour and the dough has kneaded for a few minutes (either by machine or hand), pinch off a piece of dough roughly the size of a golf ball.
- Initially, this small piece of dough might leave a slight sticky residue on your fingers; this is normal.
- Now, without applying any oil or cooking spray to your hands, try rolling this piece of dough into a smooth ball.
- If you can successfully form a relatively smooth ball without the dough sticking excessively to your hands or becoming a shaggy, unmanageable mess, then your dough has reached the perfect consistency. If it’s still very sticky and hard to handle, add another tablespoon or two of flour, mix thoroughly, and repeat the test.
It’s crucial to understand that adding too much flour is a common pitfall that can lead to rolls that are dense, heavy, and dry, rather than light and fluffy. Take your time to truly understand and feel what a properly floured and kneaded dough looks and feels like—it should be soft, pliable, and slightly tacky, but not overly sticky.
Expert Shaping Techniques for Uniform and Beautiful Rolls
Achieving consistently beautiful and evenly baked rolls largely depends on proper shaping. Here’s a simple guide to forming perfect French bread dinner rolls:
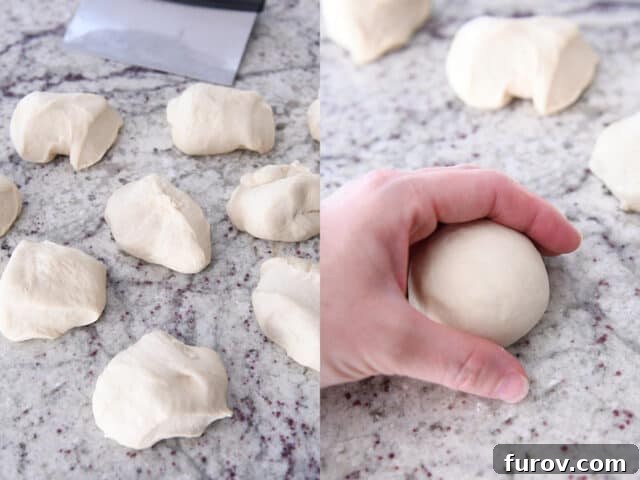
- Divide the Dough: Once your dough has risen, gently punch it down and turn it out onto a lightly greased countertop. Divide the entire batch of dough into 12 equal pieces. For the most uniform results, which ensures even baking, I highly recommend weighing each piece. Typically, each dough portion should weigh approximately 2.6 to 2.7 ounces (about 74-77 grams).
- Round and Smooth: To form a smooth, round ball, cup your hand around one piece of dough. With a gentle but firm motion, roll the dough against the counter, keeping the pinky side of your hand in contact with the surface. This motion creates surface tension, tightening the dough and creating a smooth top.
- Seal the Seams: As you roll, any rough edges or seams will naturally gather at the bottom of the dough ball. If needed, pinch these edges together at the bottom to create a neat, sealed finish. This helps the roll maintain its shape during the second rise and baking.
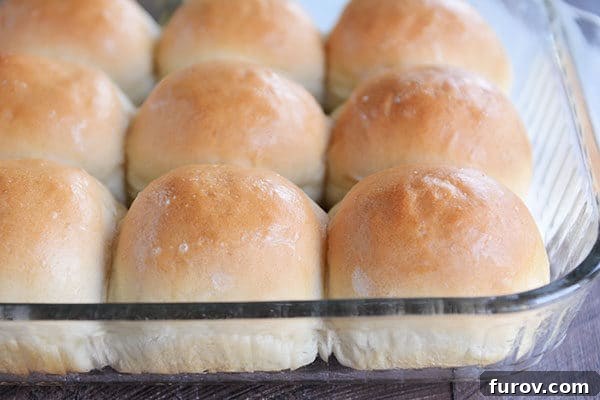
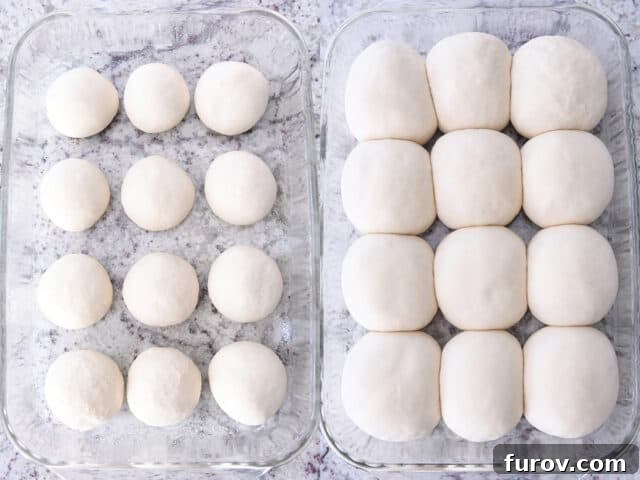
A single batch of this dough yields 12 perfectly sized rolls, which fit snugly in a standard 9×13-inch baking pan. For larger gatherings or meal prepping, I frequently double this recipe. The doubled batch, producing 24 rolls, fits perfectly on a half-sheet pan, allowing for optimal spacing and even baking.
Beyond Dinner: Creative Ways to Enjoy Your French Bread Rolls
While these French bread rolls are undeniably fantastic as a side to any meal, their versatility extends far beyond the dinner table. Over the years, this recipe has evolved into a go-to for a myriad of culinary creations. A quick glance through reader comments reveals that many of you are ingeniously adapting this roll dough for everything from hearty sloppy joes to robust sub sandwiches.
Here are some inspiring ideas and popular ways to utilize these incredible rolls, transforming them into the star of your next meal:
- Pull Apart Pizza Sliders: Use mini rolls for a fun, shareable appetizer or kid-friendly meal.
- Hearty Meatball Subs: The perfect vessel for savory meatballs and marinara sauce.
- Classic Pulled Pork Sandwiches: The soft rolls absorb the delicious BBQ sauce without falling apart.
- Messy but Marvelous Sloppy Joes: Or try the delightful Philly Cheesesteak Sloppy Joes for a flavorful twist.
- Tender Italian Beef Sandwiches: Or indulge in this aromatic Roasted Garlic Beef variation.
- Creamy Slow Cooker Philly Cheesesteaks: A comforting meal elevated by these fresh rolls.
- Homemade Hamburger Buns: Shape them larger for the ultimate burger experience, far superior to store-bought options.
- The Best Leftover Turkey Sandwich: Transform your holiday leftovers into a gourmet delight.
- Authentic Cuban Sandwiches: These rolls offer the perfect balance of softness and structure for pressing.
- Garlic Bread: Slice cooled rolls in half, spread with garlic butter, and broil for a quick, flavorful side.
- Croutons: If you have any leftover rolls that are a day or two old, cube them, toss with olive oil and herbs, and toast for homemade croutons.
Prep Ahead: Make-Ahead & Freezing Instructions
One of the fantastic benefits of this French bread roll recipe is its flexibility for make-ahead preparation and freezing, making it perfect for busy schedules or holiday meal planning:
Make-Ahead Options: The dough for these delightful rolls can be prepared in advance and refrigerated overnight. You have two main approaches:
- Bulk Dough Refrigeration: After the first rise, place the entire ball of dough in a lightly greased, airtight container and refrigerate. The next day, simply remove it from the fridge, let it come closer to room temperature for about 30-60 minutes, then proceed with shaping and the second rise.
- Shaped Roll Refrigeration: For even more convenience, you can shape the rolls after the first rise, arrange them on a baking pan, cover them tightly with greased plastic wrap, and refrigerate overnight. When you’re ready to bake, take the shaped rolls directly from the fridge and allow them to complete their full second rise at room temperature before baking. This might take slightly longer than a standard rise, but ensures freshly baked rolls with minimal last-minute effort.
Freezing Baked Rolls: These rolls freeze exceptionally well, allowing you to enjoy fresh-tasting bread anytime.
- Once baked, allow the rolls to cool completely to room temperature.
- Place the cooled rolls in a freezer-safe ziplock bag, ensuring all air is squeezed out before sealing.
- Store them in the freezer for up to one month without significant loss of quality.
- To reheat, simply thaw them at room temperature or warm them gently in a low oven (around 300°F/150°C) for 10-15 minutes until heated through and softened. They will taste almost as fresh as the day they were baked!
It’s genuinely hard to find an easier, more consistently perfect roll recipe out there. The robust reliability of this recipe is what makes it a cherished favorite.
I personally rely on these rolls for all my holiday dinners – from Thanksgiving feasts to Easter celebrations – precisely because they are so simple to prepare, they turn out absolutely perfect every single time, and they are always eagerly devoured by family and friends. As an added bonus, they make for truly excellent leftovers, if any manage to survive the initial meal!
Recommended Baking Tools for French Bread Rolls
Having the right tools can make your bread-making experience even more enjoyable and efficient. Here are some indispensable items that will help you create these perfect French bread rolls:
- Kitchen Scale: Essential for precise ingredient measurement, especially flour, and for ensuring uniform dough portions for evenly sized rolls.
- Dough Rising Containers: Containers with measurement marks are incredibly helpful for accurately tracking how much your dough has risen, ensuring you hit the perfect proofing stages.
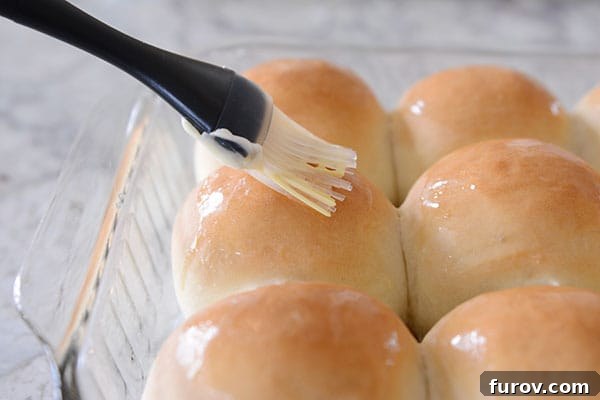
- Silicone Pastry Brush: Ideal for gently brushing your baked rolls with melted butter, adding a beautiful sheen and extra richness.
- Bench Knife (Dough Scraper): A versatile tool for easily portioning out dough, scraping work surfaces clean, and transferring ingredients.
A quick note about mixers: For all my bread making, I rely on a Bosch Universal stand mixer. Its powerful motor and unique bowl design are fantastic for kneading dough, but a sturdy KitchenAid or other good quality stand mixer will also work wonderfully for this recipe. You can find many helpful reviews online comparing different models to suit your needs.
French Bread Rolls
Yield: 12 rolls
Prep Time: 2 hrs 25 mins
Cook Time: 20 mins
Total Time: 2 hrs 45 mins
Ingredients
- 1 ½ cups warm water (105 to 110 degrees F)
- 1 tablespoon instant or active dry yeast (see note)
- 2 tablespoons granulated sugar or honey
- 2 tablespoons canola oil, vegetable oil, or olive oil
- 1 teaspoon table salt
- 3 ½ to 4 cups (497 to 569 g) all-purpose or bread flour, more or less (see note)
Instructions
- In the bowl of a stand mixer fitted with the dough hook, or in a large bowl by hand, combine the warm water, instant yeast, sugar, oil, salt, and 2 cups of the flour.
- Begin mixing, and continue to add the remaining flour gradually until the dough has pulled away from the sides of the bowl.
- Knead the dough for 4 to 5 minutes in a stand mixer (7 to 9 minutes by hand). Add additional flour a tablespoon or two at a time only if the dough starts to cling to the sides of the bowl and is really sticky to the touch (see note below for clarification on dough consistency).
- Place the dough in a lightly greased bowl and cover. Let the dough rise until doubled in size, typically 1 to 2 hours, depending on room temperature.
- Turn the risen dough out onto a lightly greased countertop.
- Divide the dough into 12 equal pieces (each weighing approximately 2.75 ounces). Form the dough into smooth, round balls by cupping your hand around the dough and spinning it into a round shape, pinching the bottom to seal any rough edges, if needed.
- Place the shaped rolls in a lightly greased 9×13-inch pan or on a lightly greased half-sheet pan. Space the rolls about 1/2 to 1-inch apart to allow for expansion.
- Cover the rolls loosely with a lightweight towel or greased plastic wrap and let them rise until very puffy and nearly doubled in size, which usually takes about 45 minutes to 1 hour.
- While the rolls are rising, preheat your oven to 400 degrees F (200 degrees C). If your oven tends to bake hot, consider preheating to 375 degrees F (190 degrees C).
- Bake for 17 to 20 minutes, or until the rolls are beautifully golden brown on top and baked through.
- Immediately after removing from the oven, brush the tops of the hot rolls with melted butter, if desired, for extra flavor and shine. Serve warm or at room temperature.
Notes
Yeast: When this recipe was first published, it was common practice to dissolve active dry yeast in water before use. However, active dry yeast has since been reformulated with smaller particle sizes, making direct addition possible. While I use 1 tablespoon of yeast (as I purchase it in bulk), if you’re using standard yeast packets (which typically contain 2 1/4 teaspoons), one packet will work for this recipe. Note that using a packet might result in a slightly longer rise time compared to a full tablespoon.
Flour: The precise amount of flour needed can vary based on several factors, including your local elevation, humidity, and even how you measure flour (e.g., spooning vs. scooping). Rather than strictly adhering to the exact measurement, learn to judge the dough by its appearance and feel. The ideal dough should be soft, smooth, and slightly tacky to the touch, and it should clear the sides of the mixing bowl. To test, after the dough has kneaded for a few minutes, turn off your mixer and take a golf-ball-sized piece. It might leave a small amount of sticky residue, but if you can roll it into a small ball without it excessively clinging to your hands, no more flour is needed. If it’s very sticky, gradually add another tablespoon or two of flour and re-test. Over-flouring can result in dry, dense rolls.
Freezable Option: These baked rolls are excellent for freezing. Once the rolls are baked and completely cooled, place them in a freezer-safe ziplock bag, remove as much air as possible, and seal tightly. Store in the freezer for up to a month. Thaw at room temperature or gently warm in the oven.
Author: Mel
Course: Bread
Cuisine: French
Method: Bake
Nutrition Information
Serving: 1 roll, Calories: 140kcal, Carbohydrates: 29g, Protein: 5g, Fat: 1g, Saturated Fat: 1g, Sodium: 197mg, Fiber: 2g, Sugar: 1g
Recommended Products
Bosch Universal Stand Mixer
Glass 9X13-inch Pan
Recipe Source: Mel’s Kitchen Cafe
Recipe originally published 12/2007; updated with new pictures, step-by-step tutorial, and recipe notes. This version has been further optimized for SEO and readability.
Other Irresistible Bread Recipes You Might Love: