

Discover the ultimate guide to crafting luscious dulce de leche quickly and easily using your pressure cooker. Forget long hours; rich, golden caramel is now just minutes away!
Dulce de leche, the enchanting caramel confection, holds an almost mythical status in the world of sweets. Its rich, velvety texture and deep, complex flavor are utterly irresistible, transforming simple desserts into extraordinary culinary experiences. For years, the traditional method of making this glorious treat involved hours of patient simmering, often in a slow cooker. While the slow cooker method (as detailed in my previous tutorial) is undeniably simple and foolproof, its primary drawback is the significant time commitment—typically a good eight hours or more. In our fast-paced lives, such a lengthy wait can test even the most dedicated dessert lover’s patience.

The culinary landscape is constantly evolving, and with the advent of modern kitchen appliances, efficiency in cooking has become a prized asset. This quest for speed led me to explore a game-changing method for dulce de leche production: the pressure cooker. Inspired by a fellow food enthusiast, Mollie (who I’ve had the pleasure of meeting through my blogging journey), I embarked on an immediate kitchen experiment. She had recently achieved fantastic results making dulce de leche in her pressure cooker, and I couldn’t help but wonder, “Why haven’t I tried this yet?” The idea was too compelling to resist, particularly for those of us who appreciate delicious results without the lengthy wait.
My swift dive into pressure cooker dulce de leche served two delicious purposes:
- **The Irresistible Allure of Dulce de Leche:** Naturally, the primary motivation was to create more of this heavenly confection. Whether spread on toast, drizzled over ice cream, or incorporated into baked goods, dulce de leche is a versatile delight that never disappoints.
- **A Comprehensive Comparison:** Beyond just making dulce de leche, I was keen to conduct a side-by-side comparison between two popular types of pressure cookers: my reliable stovetop pressure cooker (a Kuhn-Rikon model) and the ever-popular Instant Pot (an electric multi-cooker). My goal was to observe if the slight difference in internal pressure (PSI) between these models would yield noticeable variations in the final product. Stovetop pressure cookers typically reach up to 15 PSI, while electric models like the Instant Pot usually max out around 11.6 PSI. This subtle difference often impacts cooking times and results across various recipes, and I hypothesized it would do the same for our beloved caramel.
The Pressure Cooker Dulce de Leche Experiment: Stovetop vs. Electric
To ensure a fair comparison, I meticulously prepared identical starting points for both pressure cookers. I began with two standard pint-sized canning jars. Into each jar, I carefully divided three 14-ounce cans of sweetened condensed milk, ensuring the jars were filled to a consistent level, leaving appropriate headspace for expansion during cooking.
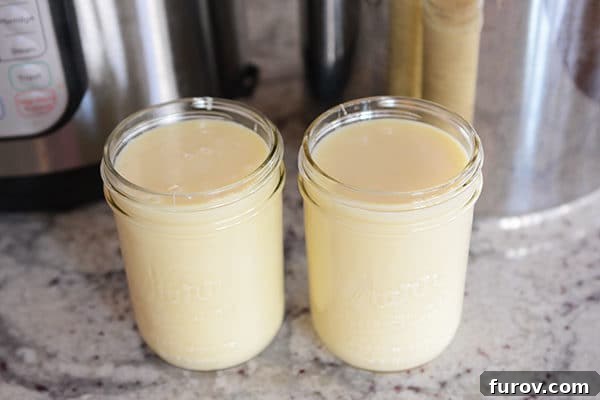
With the sweetened condensed milk securely inside, I placed the lids and rings onto the canning jars, ensuring they were finger-tight but not overly sealed (this allows for steam to escape during cooking, preventing jar breakage). Next, I positioned the steamer inserts—essential for elevating the jars above the water bath—into both the Instant Pot and the Kuhn-Rikon stovetop pressure cooker. The filled jars were then carefully placed in the center of each pot, resting on their respective steamer racks.
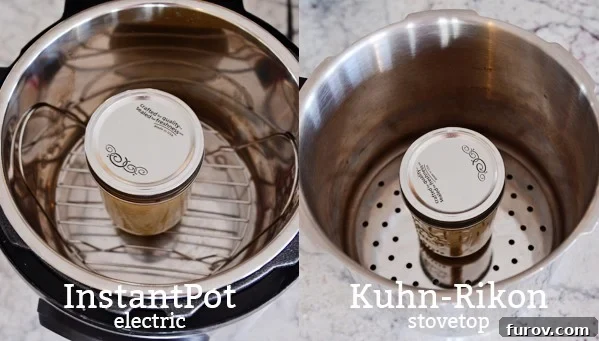
The next crucial step involved adding water to the pressure cooker pots. I filled each pot with water until it reached approximately halfway up the sides of the canning jars. For my specific pressure cooker models, this typically amounted to about 12-13 cups of water. **A critical safety reminder:** always consult your pressure cooker manufacturer’s directions regarding the minimum and maximum water fill lines. Overfilling can be dangerous, while underfilling might lead to the cooker running dry, affecting both results and safety.
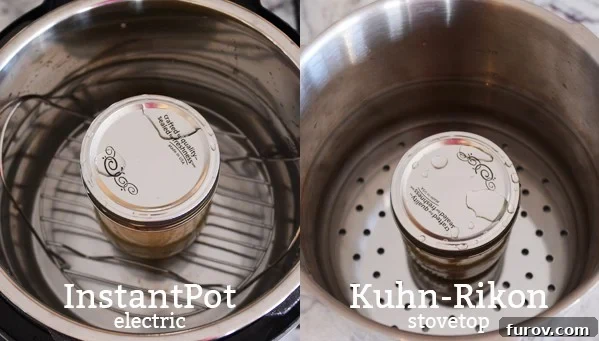
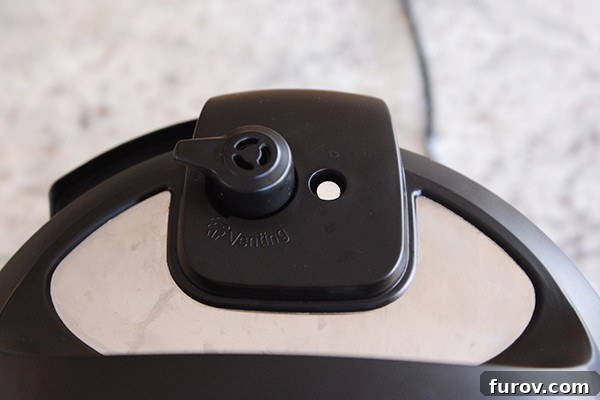
Once the water was added, I securely sealed both pressure cookers. For the Instant Pot, it’s vital to ensure the steam release valve is turned to the “Sealing” position, not “Venting,” otherwise, it won’t be able to build pressure. For stovetop models, you typically just secure the lid. Both units were then ready to begin their caramel-making journey.
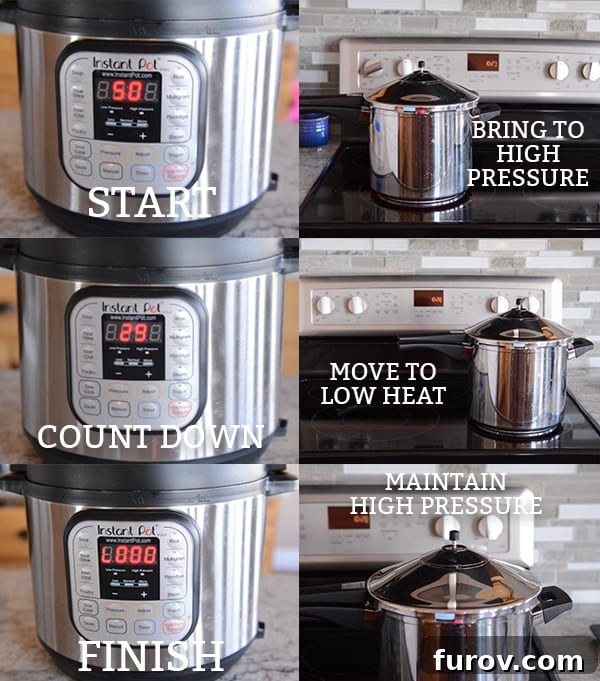
For the Instant Pot, I selected the “Manual” setting and adjusted the cooking time to 50 minutes. The Instant Pot then initiated its preheating cycle, which took approximately 19 minutes to reach high pressure before the 50-minute cooking countdown began. Simultaneously, the Kuhn-Rikon stovetop pressure cooker was brought to high pressure on a robust burner, then transferred to a preheated low burner to maintain that high pressure for the same 50-minute duration. The stovetop model reached high pressure slightly faster, in about 17 minutes. These pre-pressurizing times highlight a minor difference in operational speed between the two types, but overall, they were quite comparable.
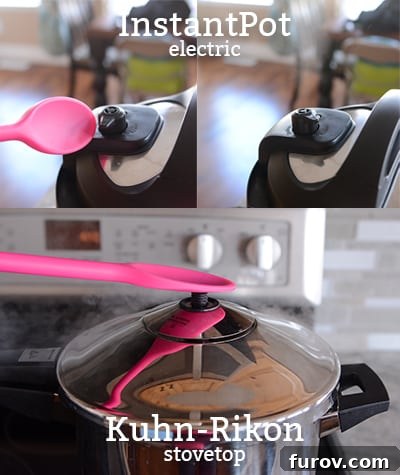
The moment the cooking cycle concluded, I opted for a quick release for both pressure cookers. This method, while requiring careful handling, allows for immediate access to the rich, warm dulce de leche—a truly satisfying reward. Using a spoon or the designated quick-release button/valve, I carefully vented all the steam. The Instant Pot’s quick-release mechanism is often simpler, requiring just a push of a button, whereas some stovetop models might involve holding down a valve. **Always exercise extreme caution when performing a quick release, as the escaping steam is incredibly hot and can cause severe burns.**
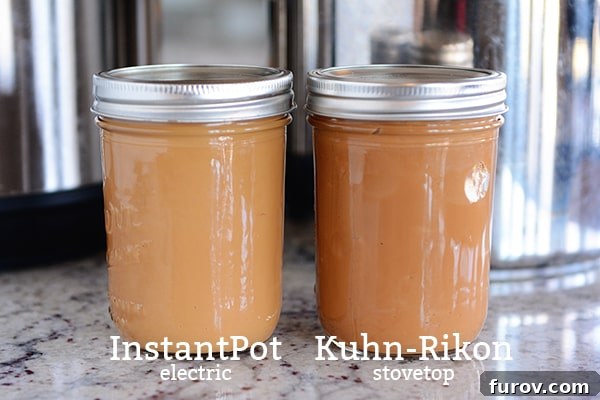
After carefully extracting the piping hot jars (a delicate operation requiring oven mitts and a steady hand!), the results of my 50-minute high-pressure cooking experiment were ready for evaluation. The dulce de leche from the Kuhn-Rikon stovetop pressure cooker exhibited a noticeably richer, deeper golden-brown color and a more pronounced caramelized flavor. In contrast, the Instant Pot’s version, while perfectly good, was a shade lighter in color and slightly less intense in flavor. Was this a significant difference? Perhaps not for everyone, but for those who appreciate the deepest, most authentic dulce de leche experience, it was certainly discernible.
Given my preference for a truly robust flavor, I decided to return the Instant Pot dulce de leche for an additional 10 minutes of high-pressure cooking. This further cooking time in the electric model helped it achieve a richness closer to that of the stovetop version. This mini-experiment clearly demonstrated that neither pressure cooker held exclusive “dulce de leche magic.” Instead, the key takeaway was that the Instant Pot’s slightly lower maximum PSI simply necessitates a longer cooking duration to achieve the same depth of flavor and color as a higher-PSI stovetop model. This is a crucial consideration for adapting recipes between different types of pressure cookers.
Key Learnings and Tips for Perfect Pressure Cooker Dulce de Leche
Based on this illuminating comparison, here are the essential takeaways for mastering homemade dulce de leche in your pressure cooker:
- **The Pressure Cooker Advantage is Real:** Without a doubt, making dulce de leche in a pressure cooker is a superior method to the slow cooker in terms of time efficiency. It transforms an eight-hour wait into a mere fraction of that, offering delicious results much faster. From now on, this will be my go-to method for preparing this beloved caramel.
- **Electric vs. Stovetop PSI Matters:** If you own an electric pressure cooker like an Instant Pot, be prepared to adjust cooking times. Due to their inherently lower maximum PSI compared to stovetop models, electric pressure cookers may require an additional 10-15 minutes of cooking to achieve a truly rich, dark, and full-flavored dulce de leche. This principle extends beyond just dulce de leche; it’s a general rule to keep in mind when adapting any pressure cooker recipe from a stovetop model to an electric one (and vice versa).
- **Jar Fullness Affects Cooking Time:** The amount of sweetened condensed milk in your jar significantly impacts the necessary cooking duration. For instance, my original inspiration, Mollie, achieved perfect dulce de leche in her Instant Pot in just 30 minutes, likely because her jar was only about three-quarters full with one 14-ounce can. In contrast, my fuller jars required a longer cooking time. Therefore, if you use less condensed milk or a smaller jar, consider reducing the pressure cooking time accordingly to prevent overcooking.
- **Don’t Stir While Hot!** A crucial tip for achieving a silky-smooth dulce de leche: resist the urge to stir it immediately after removing the hot jar from the pressure cooker. At piping hot temperatures, the mixture is prone to curdling. Allow it to cool to at least slightly warm before stirring to achieve that signature luscious consistency.
Troubleshooting Common Dulce de Leche Questions
Even with the pressure cooker’s efficiency, a few common questions and potential pitfalls can arise. Here’s how to address them:
- Why did my dulce de leche curdle? This usually happens if you stir it when it’s too hot. Always let the jar cool down until it’s just warm to the touch before stirring. Patience here is key for a smooth finish.
- Can I use reduced-fat or fat-free sweetened condensed milk? While it’s tempting to lighten things up, I strongly recommend sticking to full-fat sweetened condensed milk for the best results. Reduced-fat versions may not caramelize properly and can result in a thinner, less flavorful, or even grainy texture. This recipe relies on the specific composition of full-fat milk for its characteristic richness.
- How do I store homemade dulce de leche? Once cooled and transferred to an airtight container, homemade dulce de leche can be stored in the refrigerator for up to 2-3 weeks. For longer storage, it can be frozen for several months, though its texture might become slightly firmer.
- What if my dulce de leche isn’t dark enough? If you prefer a deeper color and richer flavor, you can always return the jar to the pressure cooker for an additional 5-10 minutes. Remember that electric pressure cookers generally need more time than stovetop models.
Delicious Ways to Enjoy Your Homemade Dulce de Leche
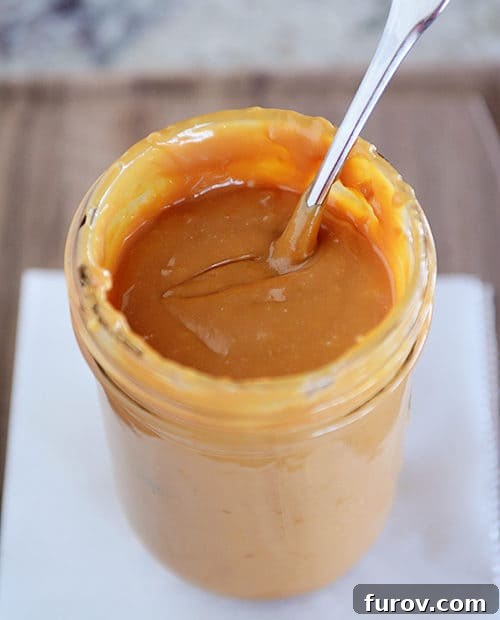
Once you’ve mastered the art of pressure cooker dulce de leche, the possibilities for enjoyment are endless. This versatile caramel sauce elevates countless dishes:
- Dessert Topping: Drizzle it generously over ice cream, pancakes, waffles, or crepes.
- Baking Ingredient: Use it as a decadent filling for cakes, cupcakes, tarts, and cookies. It’s particularly divine in Alfajores.
- Breakfast Delight: Swirl it into oatmeal, yogurt, or spread it on toast or croissants.
- Beverage Enhancer: Stir a spoonful into your coffee, hot chocolate, or milkshakes for a rich, caramel note.
- Fruit Dip: Serve it alongside sliced apples, bananas, or pears for a simple yet elegant treat.
- Straight from the Spoon: Let’s be honest, sometimes the best way to enjoy it is simply by the spoonful!
While I won’t always have the luxury of conducting extensive side-by-side comparisons for every recipe I share (a busy life with children and household duties often takes precedence!), I hope this detailed project has shed valuable light on the nuances of pressure cooking, particularly for a beloved classic like dulce de leche. It’s a testament to how small adjustments in technique or equipment can yield slightly different, yet equally delicious, results.
For those eager to explore more expedited cooking methods, I’ve established a dedicated Pressure Cooker category within my Recipe Index. While the current selection might be modest, my aim is to continually expand it with new and exciting pressure cooker recipes each month, often publishing them on Thursdays. Keep an eye out for these efficient culinary adventures!

Pressure Cooker Dulce de Leche
Pin
Rate
SaveSaved!
Ingredients
- 1 ½ cans, (14-ounces each) sweetened condensed milk
- Pint size canning jar
- Lid and ring for canning jar
- Pressure cooker (either stovetop or electric)
Instructions
-
**Prepare the Jar:** Carefully pour the sweetened condensed milk into a pint-sized canning jar, leaving about an inch of headspace at the top. Securely cap it with a canning lid and ring, finger-tight.
-
**Set Up Pressure Cooker:** Place the steamer insert or basket into your pressure cooker. Carefully place the jar of sweetened condensed milk onto the steamer insert. Fill the pressure cooker pot with water until it reaches approximately halfway up the sides of the jar. **IMPORTANT SAFETY NOTE:** Always consult your pressure cooker manufacturer’s directions to ensure you do not overfill the pot with water. The maximum fill line varies by model.
-
**Seal and Cook (Stovetop):** If using a stovetop pressure cooker, secure the lid and bring it to high pressure over high heat. Once high pressure is reached, reduce the heat to low to maintain constant high pressure for 50 minutes. After 50 minutes, perform a quick release of the pressure (follow your model’s instructions for safe steam release).
-
**Seal and Cook (Electric/Instant Pot):** If using an electric pressure cooker (like an Instant Pot), secure the lid and ensure the steam release valve is set to the “Sealing” position. Select the “Manual” (or “Pressure Cook”) setting and adjust the time to 60 minutes for richer dulce de leche. Once the cooking cycle is complete, perform a quick release by moving the valve to the “Venting” position to release all steam.
-
**Cool and Stir:** With extreme caution, remove the hot jar of dulce de leche from the pressure cooker using oven mitts or tongs. Place it on a heat-safe surface and allow it to cool until it is just slightly warm to the touch. Once cooled sufficiently, open the jar and stir the dulce de leche until smooth and creamy. If you stir it while it’s still piping hot, it may curdle.
Notes
Adjusting for Jar Size & Quantity: This recipe works well for 1 to 1.5 cans of sweetened condensed milk in a pint-sized jar. If you are using a single 14-ounce can and filling the jar only about three-quarters full, you may be able to reduce the cooking time by 10-20 minutes, especially in an electric pressure cooker. If making multiple jars, they will likely fit but the cooking time should remain similar.
Cooling is Key: Resist the temptation to stir your dulce de leche immediately after it comes out of the pressure cooker. It must cool down to a warm temperature first; stirring it while it’s still extremely hot will cause it to curdle, resulting in a less desirable texture.