
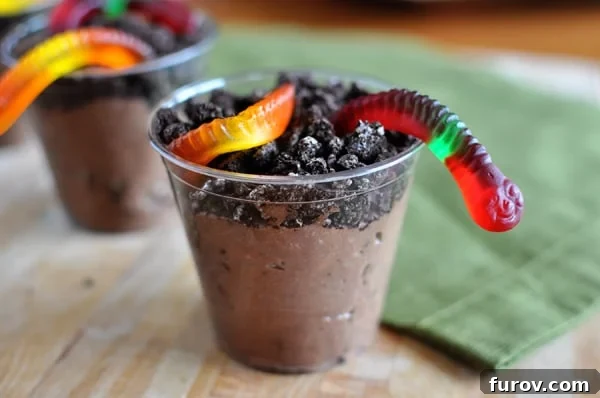
Every kid loves dirt pudding cups, and now every parent can love them too because this homemade version beats the boxed pudding version hands down!
Homemade Dirt Pudding Cups: The Ultimate Guide to a Fun & Delicious Dessert
There are some desserts that transcend generations, bringing a smile to faces young and old, and dirt pudding cups are undoubtedly one of them. For many, the mere mention of “dirt and worms” conjures up images of childhood joy, whimsical birthday parties, and delightful simplicity. What if we told you that this beloved classic could be even better, even more irresistible, with just a little homemade magic? Forget the boxed mixes; our homemade dirt pudding cups are a game-changer, offering a depth of flavor and a creamy texture that simply can’t be matched by store-bought alternatives.
I’m fairly convinced that everyone, and I mean everyone, needs a go-to recipe for dirt pudding cups. I mean, look at them? Aren’t they just screaming love and happiness? There’s an undeniable charm in a dessert that marries the rich indulgence of chocolate pudding with the playful crunch of cookie “dirt” and the squiggly surprise of gummy worms. It’s a treat that doesn’t just satisfy a sweet craving; it sparks imagination and brings out the inner child in all of us.
Maybe my house is the only one where dirt and worms translates into love and happiness (I have my four rowdy boys to thank for that), but I’m guessing these would be a hit with the little ladies, too. This isn’t just a dessert for kids; it’s a nostalgic journey for adults, reminiscent of simpler times and carefree days. Prepare to witness pure delight as these cups disappear faster than you can say “chocolatey goodness.”
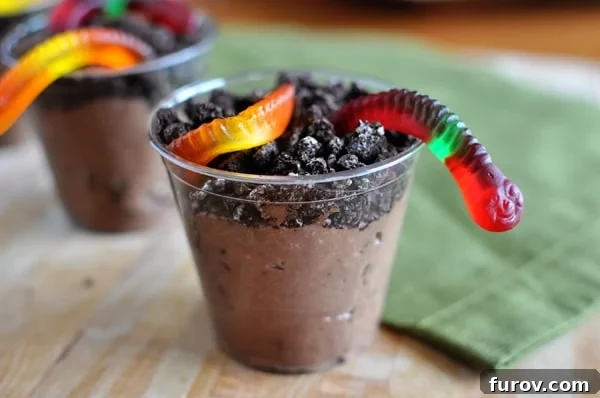
Why Choose Homemade Dirt Pudding Over a Box Mix?
A while back, I had an email exchange with Laura, a loyal reader, who wanted some insight into the famed Oreo dirt pudding cups. Well, it didn’t take much convincing for me to get to work doing some recipe testing. The motivation was clear: to create a dirt pudding that wasn’t just good, but exceptional. And the secret, as it often is, lies in making it from scratch.
While boxed pudding mixes offer convenience, they often fall short on flavor and texture. Homemade chocolate pudding, on the other hand, delivers a silky smooth, intensely chocolatey base that is incomparable. You control the ingredients, ensuring no artificial flavors or preservatives, just pure, wholesome goodness. This allows for a richer, more authentic taste experience that elevates the humble dirt pudding cup from a simple dessert to a truly memorable treat.
The difference is truly palpable. Imagine a pudding that’s lusciously creamy, with a deep chocolate essence, perfectly complemented by freshly whipped cream and the satisfying crunch of crushed chocolate sandwich cookies. It’s a symphony of textures and flavors that boxed versions simply cannot replicate. Plus, there’s an undeniable satisfaction that comes from preparing something delicious with your own hands, especially when it results in such enthusiastic smiles.
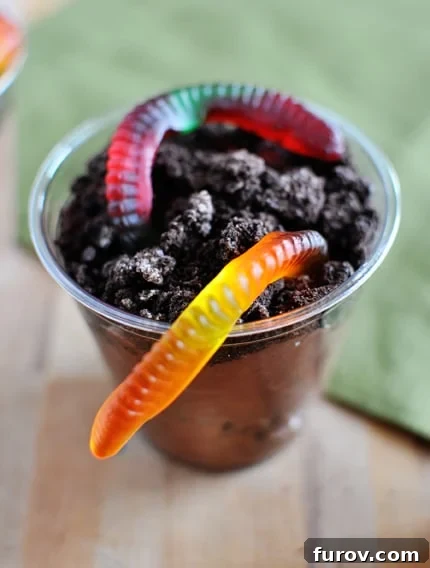
The Irresistible Charm of This Classic Treat
I mean really, Oreos (or Trader Joe’s Jo Jo’s in my case), freshly whipped cream, rich homemade chocolate pudding, and whimsical gummy worms – what’s not to love? (Ok, in the interest of full disclosure, gummy worms make me gag, but my kids could eat them for breakfast, lunch, and dinner, so I’ll rephrase: what’s not to love…unless you have a gummy worm gag reflex?) This combination is a classic for a reason. It’s simple, fun, and universally appealing.
The result is a classically fun and tasty treat that will please kids and adults alike. Just ask my husband. He was like a kid at Christmas. Apparently he’s been pining away for a good ol’ dirt pudding cup for the last year or three. I had no idea but am glad his craving was finally cured. This recipe isn’t just about food; it’s about creating happy memories and satisfying those long-held cravings for comforting, playful desserts.
Trust me, this homemade version beats the boxed pudding any day and doesn’t take a whole lot longer. Guaranteed or your money back (er, not really, but you know what I mean!). The extra effort is minimal, but the payoff in flavor and satisfaction is huge. It’s the perfect dessert for parties, picnics, or just a special weeknight treat that everyone in the family will adore.
One Year Ago: Grilled Pizza {How To}
Two Years Ago: Magic Vanilla Ice Cream
Three Years Ago: Hoisin Chicken Rice Bowls
Dirt Pudding Cups {Homemade Version}
Yield: 6 servings
Prep Time: 15 mins
Total Time: 15 mins
Pin Recipe
Ingredients
- 1 batch homemade chocolate pudding
- 1 cup heavy whipping cream
- 1 tablespoon powdered sugar
- 20 chocolate sandwich cookies, crushed (like Oreos or Jo Jo’s)
- Gummy worms
Instructions
-
Make pudding according to recipe and refrigerate until chilled and set up. This step is crucial for achieving the perfect pudding consistency.
-
In a separate bowl, whip the heavy cream and powdered sugar together using a handheld mixer on high speed (or an electric stand mixer or a blender) until stiff peaks form. Be careful not to over-whip.
-
Gently fold the whipped cream into the chilled, set pudding until just combined. The goal is to maintain the airy texture of the whipped cream while fully integrating it with the pudding.
-
Measure 3/4 cup of the crushed chocolate sandwich cookies and gently stir them into the pudding mixture. This creates the “dirt” effect within the pudding itself.
-
Divide the pudding mixture evenly between six individual cups (clear cups work best for showcasing the layers!). Top each with the remaining crushed cookies to create a thick layer of “dirt.” Finally, gently press one or two gummy worms into the top of each pudding cup, allowing them to peek out, for an authentic and fun presentation. Refrigerate until ready to serve for optimal chill and texture.
Author: Mel
Course: Dessert
Cuisine: American
Method: No-Bake
Nutrition Information (Approximate per serving)
- Serving: 1 Serving
- Calories: 451 kcal
- Carbohydrates: 60g
- Protein: 5g
- Fat: 23g
- Saturated Fat: 12g
- Cholesterol: 54mg
- Sodium: 301mg
- Fiber: 1g
- Sugar: 38g
Recommended Products
Recipe Source: Mel’s Kitchen Cafe
Tips for Crafting the Perfect Dirt Pudding Cups
While the recipe is straightforward, a few key tips can elevate your homemade dirt pudding cups from great to absolutely phenomenal:
- Chill Your Pudding Thoroughly: The foundation of this dessert is a well-chilled, firmly set chocolate pudding. Rushing this step will result in a runny dessert. Allow at least 2-3 hours in the refrigerator, or even overnight, for the best results.
- Use Quality Ingredients: Since there are so few components, the quality of each ingredient truly shines. Opt for good quality heavy whipping cream for the best texture and rich flavor. Homemade pudding makes a huge difference, so don’t skip that step!
- Perfectly Whipped Cream: Ensure your heavy whipping cream is very cold before whipping. Start on medium speed and increase to high, stopping as soon as stiff peaks form. Over-whipping can lead to a grainy texture.
- Gentle Folding: When combining the whipped cream with the pudding, use a spatula and fold gently. This technique helps to retain the airiness of the whipped cream, resulting in a lighter, more ethereal pudding.
- Crush Cookies Evenly: For the “dirt” layers, aim for finely crushed cookies with some small crumbs for texture. You can achieve this by pulsing them in a food processor or placing them in a Ziploc bag and crushing them with a rolling pin.
- Layering for Visual Appeal: While the recipe calls for mixing cookies into the pudding and topping, you can also create visually appealing layers by alternating pudding and crushed cookies in your cups. This adds to the “excavation” fun!
Creative Variations and Customizations
The beauty of dirt pudding cups lies in their versatility. Feel free to get creative and customize them to your liking:
- Pudding Flavors: While chocolate is traditional, experiment with vanilla, white chocolate, or even a blend of different puddings for a striped effect.
- Cookie Choices: Beyond Oreos or Jo Jo’s, try crushed graham crackers, shortbread cookies, or even gluten-free chocolate cookies for dietary needs.
- Fancier Toppings: Add a sprinkle of chocolate shavings, mini chocolate chips, colorful sprinkles, or even edible flowers for a more sophisticated presentation. Shredded coconut can add a tropical twist.
- Fruit Additions: Layer in some fresh berries (strawberries, raspberries) for a burst of freshness and a beautiful color contrast.
- “Rock” Candy: Small chocolate-covered candies or chocolate rocks can be added for extra crunch and a more realistic “dirt” feel.
- Adult Version: For an adult-friendly version, a splash of coffee liqueur or a hint of rum can be folded into the chocolate pudding for a boozy kick.
- Themed Treats: These are fantastic for themed parties! For Halloween, use green gummy worms or candy corn. For an Easter garden theme, add edible flowers and green-tinted coconut “grass.”
Serving and Storage Suggestions
These homemade dirt pudding cups are perfect for a multitude of occasions:
- Parties: Serve them at birthday parties, potlucks, or casual gatherings. They are always a crowd-pleaser and easy to serve in individual portions.
- Picnics: Pack them in a cooler for a delightful outdoor treat. Just ensure they stay chilled.
- After-School Snack: A fun and satisfying snack that kids will look forward to.
- Themed Events: Ideal for garden-themed parties, construction-themed birthdays, or any event where a playful, edible “dirt” is fitting.
For storage, keep your dirt pudding cups covered in the refrigerator. They are best enjoyed within 2-3 days. The crushed cookies may soften over time, but the flavor will remain delicious. If you’re making them ahead, you can store the pudding mixture and crushed cookies separately and assemble just before serving to maintain maximum crunch.