
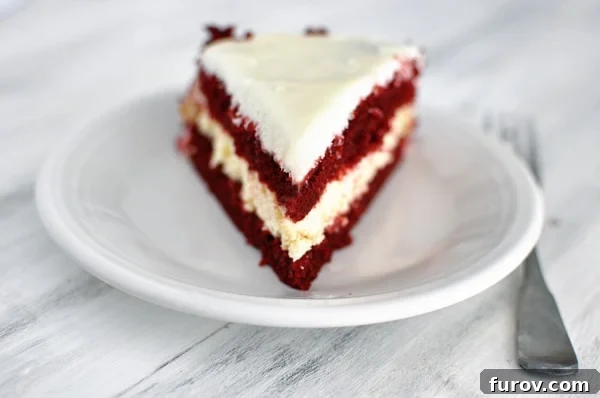
The Ultimate Red Velvet Cheesecake Cake: A Decadent Holiday Showstopper
Prepare to be amazed by this Red Velvet Cheesecake Cake – an undeniably decadent, showstopping holiday dessert that will leave everyone craving more. Imagine the rich, moist crumb of a classic red velvet cake perfectly paired with the creamy, tangy indulgence of a baked cheesecake, all enveloped in a luscious cream cheese frosting. This isn’t just a dessert; it’s an experience, guaranteed to be the star of any festive gathering.
The inspiration for this magnificent creation struck after encountering countless mesmerizing images of Junior’s legendary Red Velvet Cheesecake online. Its iconic layered structure and vibrant presentation seemed to beckon, challenging me to recreate that magic in my own kitchen. Having already explored the delightful realms of chocolate chip cookie dough cheesecake, brownie cheesecake, chocolate cheesecake, and even pomegranate cheesecake, it was high time to conquer a red velvet rendition that could stand proudly alongside its famous counterparts.
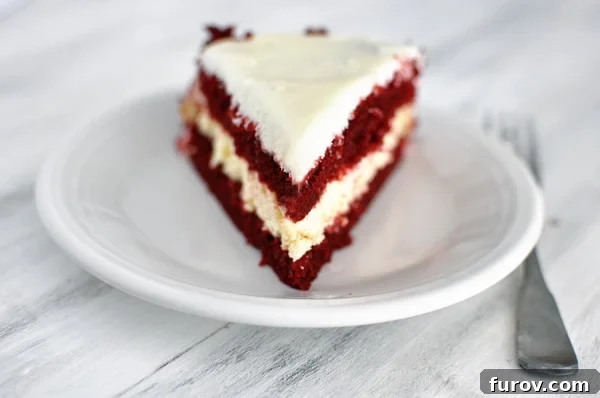
Unveiling the Layers: More Than Just a Cake
This recipe, while appearing grand, cleverly combines two beloved desserts into one harmonious masterpiece. It’s not solely cheesecake, nor is it merely a cake. Instead, it features two tender, ruby-red velvet cake layers that beautifully sandwich a dense, creamy, and exquisitely baked cheesecake. To the casual observer, this cheesecake layer might even be mistaken for an exceptionally thick frosting, adding to the cake’s allure. The entire confection is then lavishly coated with swirls of fluffy cream cheese frosting and adorned with delicate red velvet cake crumbs, creating a visual feast as much as a culinary one. Every bite offers an incredible balance of flavors and textures – the subtle cocoa of the red velvet, the tangy richness of the cheesecake, and the sweet, creamy frosting.
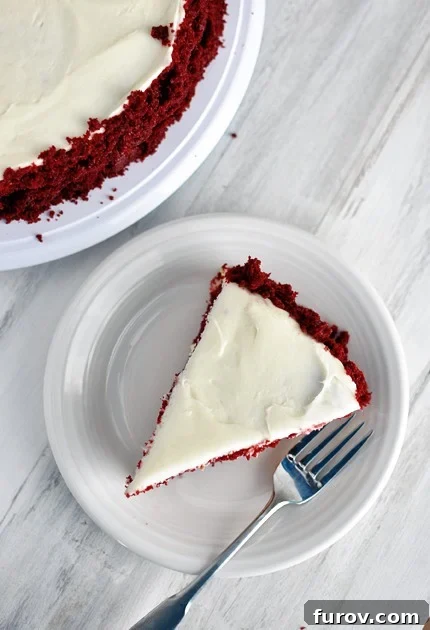
Don’t Be Intimidated: A Surprisingly Achievable Dessert
Despite its impressive appearance, creating this red velvet cheesecake cake is far more approachable than you might imagine. The key lies in its modular construction: each component – the cheesecake, the red velvet cake layers, and the cream cheese frosting – can be prepared independently. This allows for a flexible baking schedule, meaning you can tackle parts of it at your leisure without feeling rushed. I often find myself whipping up the cheesecake layer on one day, letting it chill, and then baking the cake layers and making the frosting on another. On a particularly cold winter’s day, I even leveraged the sub-zero temperatures outside to quickly cool and freeze my baked cheesecake, making assembly a breeze. While not everyone has a natural freezer on their back porch, a well-chilled cheesecake is crucial for easy handling and layering.
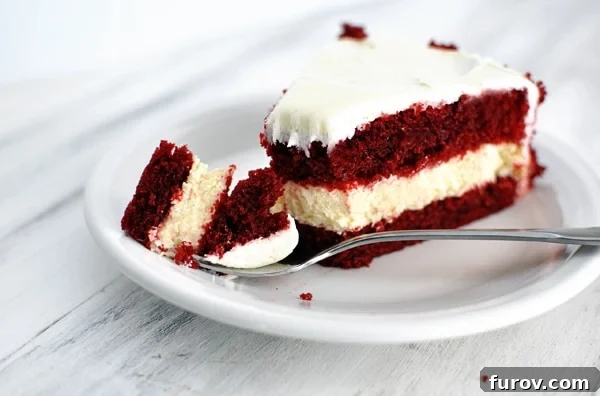
The Irresistible Allure: Taste and Presentation in Perfect Harmony
This cake is truly ridiculously appealing, captivating both the eyes and the palate. The sheer difficulty I faced in narrowing down the numerous photos for this post is a testament to how deeply I’ve fallen in love with it. While my homemade version may not precisely mirror the commercial perfection of Junior’s original, the moment you take that first bite, any minor aesthetic differences fade into oblivion. The harmonious blend of flavors and textures is what truly matters, and in that regard, this cake is an unparalleled success.
The combination of fluffy, moist red velvet sponge with a rich, dense, and subtly tangy cheesecake center creates a symphony of indulgence. Each bite is a journey through creamy, sweet, and slightly tart notes, all complemented by the smooth, luxurious cream cheese frosting. It’s a dessert that feels both comforting and spectacularly celebratory, making it ideal for any special occasion, from holiday feasts to significant milestones.
Tips for Red Velvet Cheesecake Cake Success
Achieving perfection with this layered marvel is within reach with a few simple tips:
- Room Temperature Ingredients: For both the cheesecake and the frosting, ensure your cream cheese and butter are at room temperature. This is vital for a smooth, lump-free batter and frosting. Cold ingredients will result in a clumpy texture that’s difficult to mix evenly.
- Don’t Overmix the Cheesecake: Mix the cheesecake batter just until smooth. Overmixing can incorporate too much air, leading to cracks during baking.
- Chill the Cheesecake Thoroughly: A well-chilled (or even partially frozen) cheesecake layer is much easier to handle and transfer without breaking. This step is non-negotiable for clean layers.
- Even Cake Layers: When baking your red velvet cake, divide the batter as evenly as possible between the two pans. After baking and cooling, carefully level the cakes if needed to ensure a stable and beautiful final assembly.
- Gentle Crumb Application: When applying the cake crumbs to the sides, be gentle but firm. Press them lightly to ensure they adhere to the frosting without disrupting the cake’s structure. Don’t worry about perfection; a rustic, crumb-covered side adds to its charm.
- Make Ahead Advantage: This cake is a fantastic make-ahead option. The cheesecake can be baked and frozen weeks in advance. The entire cake can be assembled and refrigerated for up to two days before serving, allowing the flavors to meld beautifully.
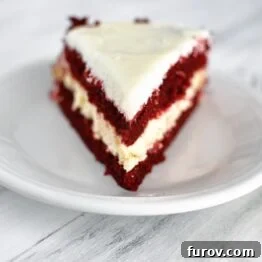
Red Velvet Cheesecake Cake
12 Servings
25 mins
1 hr
1 hr 25 mins
Pin
Rate
Ingredients
Cheesecake Layer:
- 2 packages (8-ounces each) (454 g) cream cheese, at room temperature
- ⅔ cup (141 g) granulated sugar
- Pinch of salt
- 2 large eggs
- ⅓ cup (75 g) sour cream
- ⅓ cup heavy whipping cream
- 1 teaspoon vanilla extract
Red Velvet Cake Layer:
- 2 ½ cups (355 g) all purpose flour
- 1 ½ cups (318 g) granulated sugar
- 3 tablespoons natural unsweetened cocoa powder (not Dutch-process)
- 1 ½ teaspoons baking soda
- 1 teaspoon salt
- 2 large eggs, at room temperature
- 1 ½ cups vegetable or canola oil
- 1 cup buttermilk
- ¼ cup two 1-ounce bottles red food coloring
- 2 teaspoons vanilla extract
- 2 teaspoons white vinegar
Cream Cheese Frosting:
- 2 packages (8-ounces each) (454 g) cream cheese, at room temperature
- ½ cup (113 g) butter, at room temperature
- 1 teaspoon vanilla extract
- 2 ½ cups (285 g) powdered sugar
Instructions
-
Begin by preparing the cheesecake layer to allow ample chilling time while the cake and frosting are being made. Preheat your oven to 325 degrees F (160°C). Lightly coat a 9-inch springform pan with a nonstick cooking spray. In a large mixing bowl, using either a handheld electric mixer or a stand mixer, beat the cream cheese until it is completely smooth and creamy, ensuring no lumps remain. Gradually incorporate the granulated sugar and a pinch of salt, blending for approximately 2 minutes. Remember to scrape down the sides of the bowl periodically to ensure all ingredients are well combined. Add the eggs, one at a time, mixing gently after each addition until just incorporated. Finally, mix in the sour cream, heavy whipping cream, and vanilla extract. Beat until the mixture is smooth and creamy, taking care not to overbeat, which can introduce too much air. Pour the prepared batter into your springform pan. Bake the cheesecake for 40-45 minutes, or until the edges are set and the center shows only a slight jiggle. Remove from the oven and allow it to cool completely on a wire rack. Once cooled, wrap the pan tightly in foil and place the cheesecake in the freezer for at least an hour, or until thoroughly chilled and firm, which will make assembly much easier.
-
For the red velvet cake layers, preheat your oven to 350 degrees F (175°C). Prepare two 9-inch round metal baking pans by greasing them thoroughly and dusting them with flour; tap out any excess flour. In a large bowl, whisk together the dry ingredients: all-purpose flour, granulated sugar, natural unsweetened cocoa powder (ensure it’s not Dutch-process for the proper chemical reaction with baking soda), baking soda, and salt. Create a well in the center of these dry ingredients. Into this well, add the wet ingredients: large eggs, vegetable or canola oil, buttermilk, red food coloring (using two 1-ounce bottles ensures that vibrant red hue), vanilla extract, and white vinegar. Begin whisking from the center, gradually incorporating the dry ingredients until everything is fully combined. Continue whisking for an additional minute or two until the batter is thick and smooth, stopping to scrape down the sides of the bowl as needed. Divide the batter evenly between your two prepared pans. Bake for 28-30 minutes. To check for doneness, insert a toothpick into the center of the cakes; it should come out with a few moist crumbs attached. Avoid overbaking, as this will result in dry cake layers. Let the cakes cool in their pans for 5-10 minutes before carefully running a knife around the edges to loosen them. Invert the cakes onto a piece of parchment paper or wax paper set on a cooling rack and allow them to cool completely before handling.
-
Next, prepare the decadent cream cheese frosting. In a large bowl, using an electric handheld mixer or a stand mixer, whip the softened cream cheese until it is smooth and creamy. Add the softened butter and vanilla extract, and continue to mix until well combined and fluffy. Gradually add the powdered sugar, one cup at a time, mixing on low speed until combined, then increasing to high speed. Beat until the frosting is light, fluffy, and perfectly creamy. Scrape down the sides of the bowl as necessary to ensure a smooth consistency.
-
To assemble this showstopping cake, you’ll first need to prepare your cake layers. Carefully cut each of the two red velvet cake layers horizontally in half, creating four thinner cake layers in total. Choose one of the flattest bottom halves to be your base layer and place it in the middle of your desired serving platter or cake plate. Retrieve the chilled cheesecake from the freezer. Using a flat knife or spatula that has been run under hot water and wiped clean, gently loosen the cheesecake from the sides and bottom of the springform pan. This warmth will help release it cleanly. Once removed, carefully lay the cheesecake layer directly on top of your first red velvet cake layer. Next, place another red velvet cake layer on top of the cheesecake. When selecting your cake layers, try to choose those that are the flattest on both top and bottom to ensure your finished cake is stable and presents evenly. Crumble the remaining two red velvet cake layers into fine, small crumbs. These crumbs will be used for decoration, so set them aside in a separate bowl.
-
Now it’s time to frost your magnificent cake. Scoop generous dollops of the cream cheese frosting onto the top of the cake. Using an offset spatula, spread the frosting evenly over the top and down the sides of the cake. Don’t worry if the sides aren’t perfectly smooth at this stage; they will soon be covered with cake crumbs. The goal here is to create an even layer of frosting so that the red velvet crumbs have something to adhere to. Once the sides are coated, create beautiful swirls or peaks on the top surface of the cake using your spatula, adding to its elegant presentation. Next, carefully gather handfuls of your reserved red velvet cake crumbs and gently press them into the frosted sides of the cake, working your way around the entire perimeter. This step can be a little messy, but don’t fret! Any fallen crumbs around the base of the cake can be easily swept away later for a clean presentation. Continue pressing crumbs until the entire vertical surface of the cake is completely covered, creating a striking contrast with the white frosting on top.
-
Once frosted and decorated, lightly cover the cake. It’s important not to seal it too tightly, as this could dry out the cake crumbs on the sides. Refrigerate the cake until you are ready to serve. This cake is ideal for making ahead; it can be fully assembled and chilled for up to two days in advance, allowing the flavors to meld beautifully and intensifying the delicious combination of red velvet and cheesecake.
Notes
Mel
Dessert
American
Bake
Recipe Source: Cheesecake, cake, and frosting adapted from a recipe spied on Recipe Girl. The method has been refined to mimic the stunning visual presentation of Junior’s Red Velvet Cheesecake Cake seen online.