
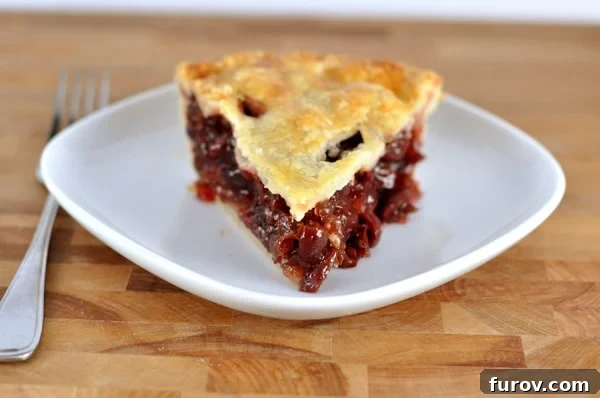
Welcome to the ultimate guide for crafting a delectable sweet cherry pie, complete with a buttery, flaky crust that will impress everyone. This post promises one of the yummiest sweet cherry pie recipes you’ll ever taste, alongside detailed, step-by-step pie crust tutorial pictures to ensure your success.
Ultimate Sweet Cherry Pie with Flaky All-Butter Crust: A Step-by-Step Guide
When it comes to holiday feasts, especially Thanksgiving, the debate over which pie reigns supreme is a cherished tradition in many households. While pumpkin pie often steals the spotlight, and apple pie holds its classic charm, I find joy in diversifying the dessert spread. Alongside traditional favorites, I love to introduce new, exciting flavors – perhaps a rich, dark chocolate creation to satisfy those deep cocoa cravings, or in this case, a truly spectacular sweet cherry pie.
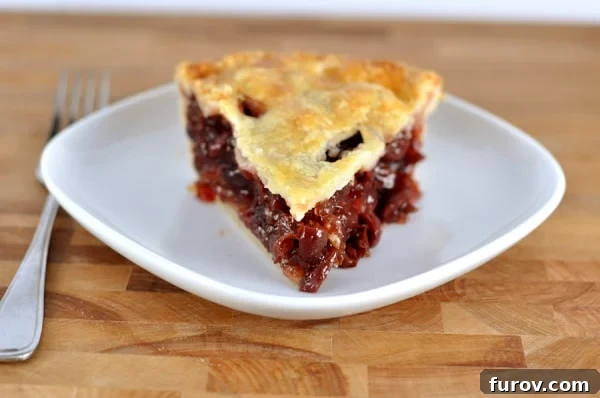
This year, I embarked on a delightful culinary experiment: a sweet cherry pie. Having never attempted one before, I must admit, the outcome was utterly enchanting. My initial concern was whether the filling would set properly, fearing a soupy and messy result. However, much to my delight, the sweet, intensely fruity filling thickened beautifully upon cooling, achieving that ideal consistency we all dream of in a cherry pie.
As a lifelong enthusiast of cherry pie, which has always held a top spot on my list of favorite desserts, discovering the sheer deliciousness of this recipe had me doing “heel-kicks” of joy in the kitchen! The vibrant flavors, combined with a perfectly crafted crust, truly elevate this pie to a whole new level of homemade goodness. It’s a dessert that not only tastes incredible but also fills your home with an irresistible aroma.
Mastering the Perfect Pie Crust: A Confident Approach
Let’s dedicate a moment to the often-intimidating topic of pie crust. I’ve shared my past struggles with pie crust on this blog before, admitting that it used to “scare the bejeebies out of me.” However, through consistent practice and a commitment to understanding the nuances of dough, I’m thrilled to report that it now only scares half the bejeebies out of me! This journey has taught me patience and precision, transforming fear into confidence.
I’m excited to share my go-to, all-butter pie crust recipe, renowned for its incredible flakiness and rich flavor. Alongside the recipe, you’ll find a series of detailed, step-by-step pictures. These visual aids are designed to demystify the process, helping you achieve a perfect crust every time and hopefully saving you from losing any of your own “bejeebies” in the kitchen. Creating a truly flaky, tender crust is one of the most rewarding aspects of pie making, and I’m here to guide you through it.
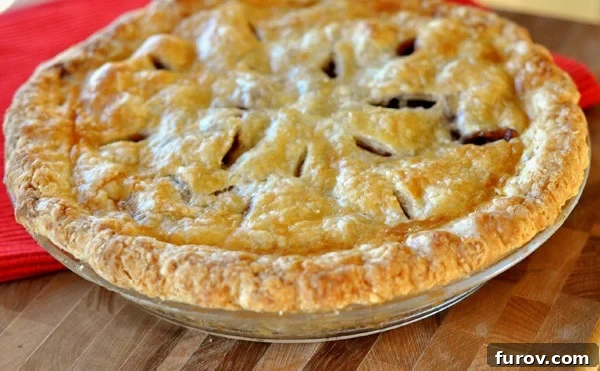
Boost Your Pie Making Confidence with Our Pie Boot Camp Series!
If you’re eager for an extra boost in your pie-making confidence, explore our comprehensive Pie Boot Camp Series. This invaluable resource covers everything you need to know, including:
- Essential Pie Making Equipment: A guide to the tools you need for success.
- How to Make Perfect Pie Crust: Our foolproof recipe, along with techniques for rolling out, crimping, and a video tutorial.
- All About Blind Baking: Understand why and how to blind bake, plus a bonus Chocolate Ganache Cream Pie Recipe.
- Crafting Double Crust Pies: Learn how to create an easy lattice crust, with a printable reference to summarize the entire series.
Looking Back:
One Year Ago: Pumpkin Cream Cheese Muffins
Two Years Ago: Banana Bars with Whipped Cream Cheese Frosting
Sweet Cherry Pie and Pie Crust Tutorial
Yield: 8 Servings (one 9-inch pie)
Prep Time: 35 minutes
Cook Time: 1 hour
Total Time: 1 hour 35 minutes
Pin Recipe
Ingredients
For the Pie Crust:
- Makes 2 pie crusts (for 2 single crust pies or 1 double crust pie)
- 1 cup (227 g) very cold butter, cut into about 16 small pieces and chilled in the freezer for 15 minutes
- 2 cups (284 g) all-purpose flour
- 1 tablespoon sugar
- ½ teaspoon salt
- ⅓ cup ice water, plus an additional tablespoon or two if needed
For the Cherry Filling:
- 2 red plums, halved and pitted
- 6 cups (about 2 pounds) pitted sweet cherries or 6 cups pitted frozen cherries, thawed, drained well and halved
- ½ cup (106 g) sugar
- ⅛ teaspoon salt
- 1 tablespoon juice from 1 lemon
- 2 tablespoons instant tapioca, ground (see notes for grinding tips)
- ⅛ teaspoon ground cinnamon
- 2 tablespoons (28 g) butter, cut into ¼-inch pieces
- 1 large egg, lightly beaten with 1 teaspoon water (for egg wash)
Instructions
- For the pie crust: In a large bowl, combine the flour, sugar, and salt. Whisk to blend thoroughly. Scatter the very cold butter pieces evenly across the flour mixture. Using a pastry cutter or two knives, quickly work the butter into the flour until the pieces of butter are roughly pea-sized, and the mixture resembles coarse crumbs. It’s crucial that the butter remains very cold and firm throughout this step. If the butter starts to soften excessively, place the mixture in the refrigerator for about 10 minutes before continuing. Drizzle the measured ice water over the flour/butter mixture. Using a fork, gently toss the ingredients to combine them lightly. The dough should just begin to come together into a shaggy mass. If the dough appears too dry and won’t clump together when squeezed, add an additional tablespoon of cold water at a time, mixing gently until it just starts to cohere. The dough should not be smooth like a sugar cookie dough; it might still seem crumbly, but it will fully come together as you roll it out.
- On a very lightly floured work surface, turn out the shaggy dough. Use your hands to gently press it into a large, thick disk. As you press, the dough will start to unify more. Cut the dough disk into two equal pieces. Loosely cover one piece with plastic wrap or a bowl to prevent it from drying out while you roll out the first piece.
- Working with one piece of dough, begin rolling from the center of the disk, moving outwards with short, firm, even motions. After every few rolls, lift the dough and rotate it slightly (about a quarter turn) to ensure it isn’t sticking to your work surface. Add a minimal amount of additional flour underneath if needed to prevent sticking, but avoid over-flouring, which can make the crust tough. Roll the dough to approximately an 11-inch circle for this 9-inch cherry pie, ensuring it’s about 1/8 inch thick. Carefully roll the dough loosely onto your rolling pin and then gently unroll it over your 9-inch pie dish. Lift the edges of the pie dough to gently ease it into the bottom and sides of the dish. Do not stretch the dough, as stretching will cause it to shrink back significantly during baking. Using kitchen scissors or a sharp knife, trim the dough around the edge of the pie plate. For this double-crust cherry pie, leave a one-inch overhang. Do not flute the edges yet! For a single-crust pie, you would leave a 1/4- to 1/2-inch overhang, fold this excess underneath to create a thick edge, and then flute. Refrigerate the pie plate with the fitted crust while you prepare the cherry pie filling.
- For the filling: Adjust an oven rack to the lowest position and preheat your oven to 400°F (200°C). In a food processor or blender, combine the halved red plums and 1 cup of the halved cherries. Process until completely smooth, about 1 minute, scraping down the sides of the bowl as needed. Strain this fruit puree through a fine-mesh strainer into a large bowl, pressing firmly on the solids with the back of a spoon to extract as much liquid as possible. Discard the remaining solids. Stir the remaining 5 cups of halved cherries, sugar, salt, lemon juice, ground instant tapioca, and ground cinnamon into the strained puree. Let the mixture stand for 15 minutes to allow the tapioca to begin absorbing liquid.
- Carefully transfer the cherry mixture, including all accumulated juices, into the chilled, dough-lined pie plate. Evenly scatter the small pieces of butter over the fruit filling. Now, roll out the second disk of pie dough on a lightly floured work surface to another 11-inch circle, approximately 1/8 inch thick. Gently roll this top crust loosely around your rolling pin and unroll it over the filled pie, ensuring it extends at least ½-inch beyond the edges of the bottom crust. Fold the one-inch overhang of the lower pie crust over the edge of the top pie crust and press firmly to seal the two crusts together. Flute the edges decoratively using your thumb and forefinger, or press them with the tines of a fork to create a sealed, patterned edge. Brush the entire top crust and the fluted edges generously with the prepared egg wash. Using a sharp knife, make 8 evenly spaced 1-inch-long vents in the top crust; these vents allow steam to escape during baking, preventing the crust from bursting. For the best flaky texture, freeze the assembled pie for 20 minutes before baking.
- Place the frozen pie on a foil-lined baking sheet (to catch any potential drips) and bake in the preheated 400°F (200°C) oven for 30 minutes. After 30 minutes, reduce the oven temperature to 350°F (175°C) and continue to bake for an additional 30 to 40 minutes, or until the juices around the edges are visibly bubbling thickly, and the crust is a deep, rich golden brown. To prevent the edges of the crust from over-browning, I typically cover them with a pie shield or strips of aluminum foil about 20 minutes into the 350°F baking phase.
- Once baked to perfection, carefully transfer the pie from the oven to a wire rack. Allow it to cool completely to room temperature, which will take approximately 2 to 3 hours. This extended cooling time is crucial for the filling to fully set and thicken, ensuring beautiful, clean slices. Once cooled, cut into wedges and serve your magnificent sweet cherry pie.
Notes
Fruit Considerations: If you opt to use frozen cherries, it is essential to measure them while frozen. However, allow them to thaw completely and drain them very well before incorporating them into the filling. Failing to do so can result in partially cooked fruit and undissolved tapioca, compromising the pie’s texture and consistency.
Tapioca Preparation: The recipe calls for instant tapioca to be ground into a fine powder. If you don’t have a coffee or spice grinder, a simple solution is to place the tapioca in a sturdy plastic bag and crush it a few times with a meat mallet or rolling pin. While it might not achieve a super-fine powder and may still be somewhat coarse, this method works perfectly well, and the tapioca will dissolve beautifully during baking, thickening your filling without a noticeable texture.
Author: Mel
Course: Dessert
Cuisine: American
Method: Bake
Nutrition Information
Serving: 1 Slice
- Calories: 500 kcal
- Carbohydrates: 62 g
- Protein: 6 g
- Fat: 27 g
- Saturated Fat: 17 g
- Cholesterol: 92 mg
- Sodium: 419 mg
- Fiber: 4 g
- Sugar: 32 g
Recommended Products
Mixing Bowl
Pastry Cloth
Rolling Pin
Recipe Source: Pie filling adapted from Cook’s Illustrated, pie crust from My Kitchen Cafe.
Pie Crust How-To: Printable Version with Pictures or PDF Version
Step-by-Step Pie Crust Tutorial with Pictures
Let’s walk through the pie crust process with detailed visuals. The key to a fantastic, flaky crust lies in keeping your ingredients, especially the butter, as cold as possible. This prevents the butter from fully integrating into the dough, creating pockets that steam during baking and yield those coveted flaky layers.
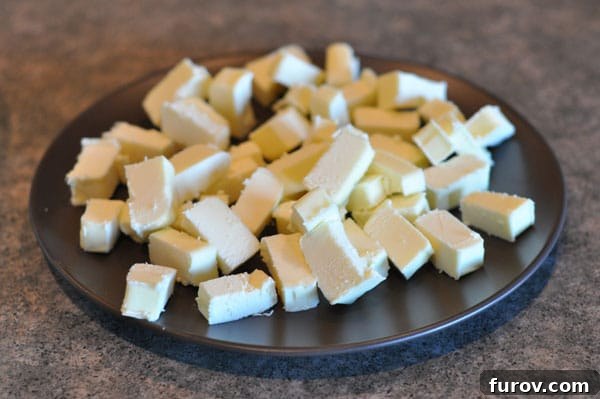
First, I start by preparing my butter. I meticulously cut two sticks of very cold butter into small, manageable pieces – usually about 16 cubes. These go onto a plate and straight into the freezer for 10-15 minutes. This crucial step ensures the butter is icy cold, which is vital for a truly flaky crust, while I gather the dry ingredients.
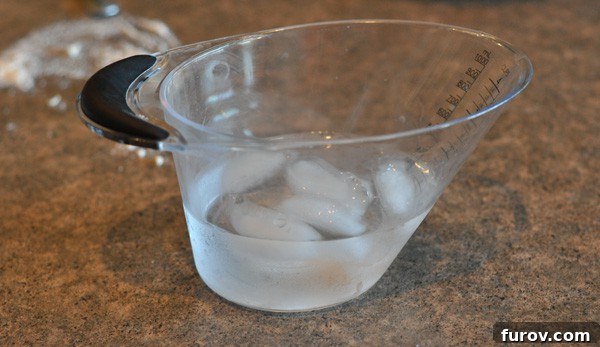
Simultaneously, I fill a liquid measuring cup with water and add a few ice cubes. This ensures my water is perfectly icy cold, ready to be added to the dough. Cold water prevents the butter from melting prematurely and helps bring the dough together without overworking it.
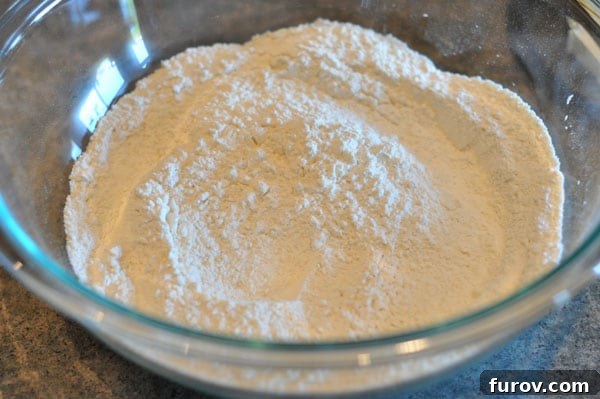
In a large mixing bowl, combine the all-purpose flour, a tablespoon of sugar (which adds a touch of sweetness and helps with browning), and a half teaspoon of salt. Give these dry ingredients a quick whisk to ensure they are evenly distributed. This forms the base for our magnificent crust.
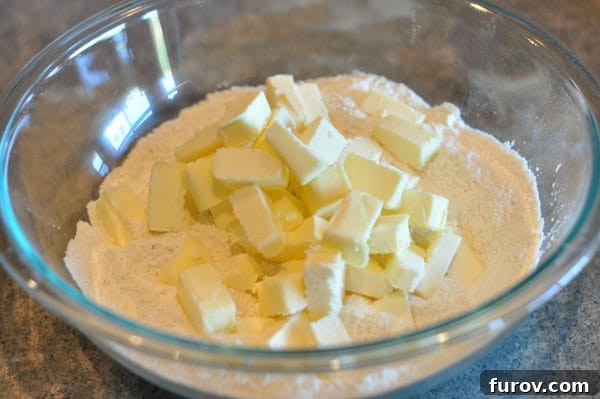
Once your butter is thoroughly chilled from the freezer, scatter the small, cold pieces over the flour mixture in the bowl. Distribute them as evenly as possible; this will make the next step much easier and more efficient.
Give the butter pieces a quick toss with the flour. This light coating of flour helps to separate the butter pieces and ensures they are ready to be worked into the mixture without clumping too much.
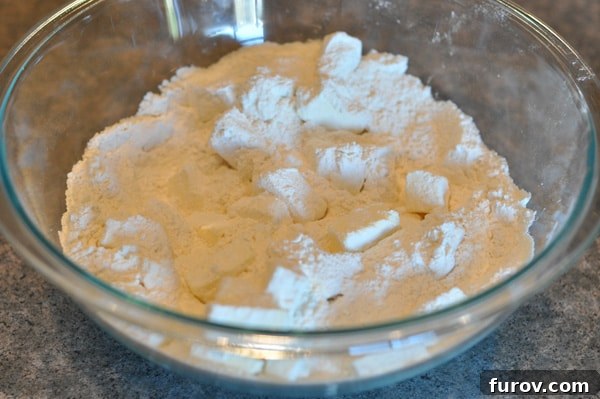
Now, using your trusty pastry blender (or a pair of sturdy knives, crossing them as you chop), begin working the cold butter into the flour mixture. The goal here isn’t to create a smooth dough yet, but rather to break down the butter into smaller, distinct pieces.
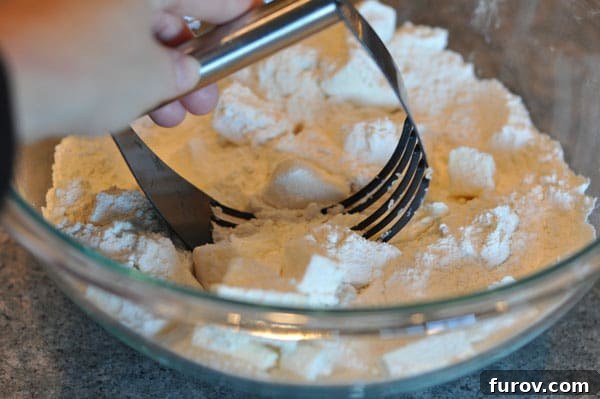
Continue to cut the butter into the flour until the mixture is crumbly and the butter pieces are approximately pea-sized. These small pockets of butter are what create those wonderful flaky layers in your baked crust. Stop as soon as you reach this stage to avoid overworking the butter.
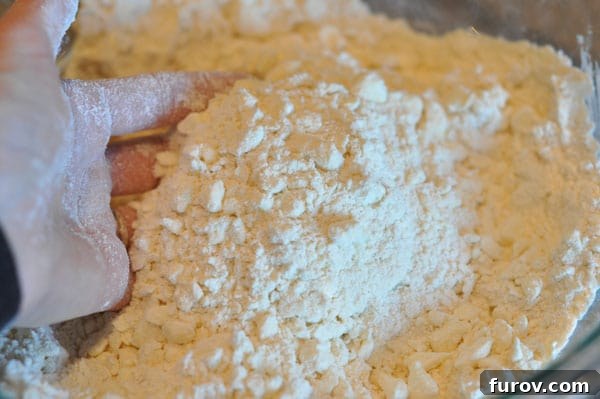
Measure out the required amount of ice water. Remember, precision is key in baking, and too much or too little water can drastically alter your crust’s texture. Keep extra ice water nearby, just in case your dough needs a little more moisture.
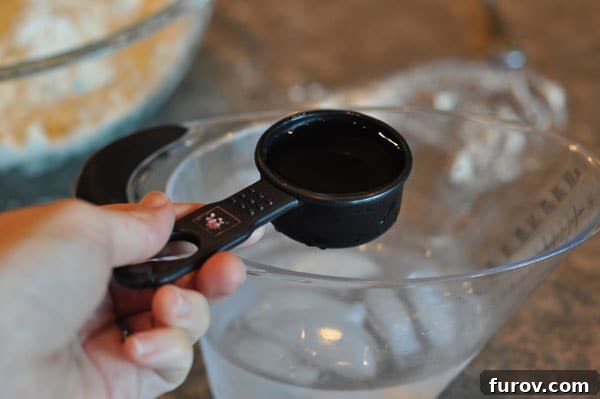
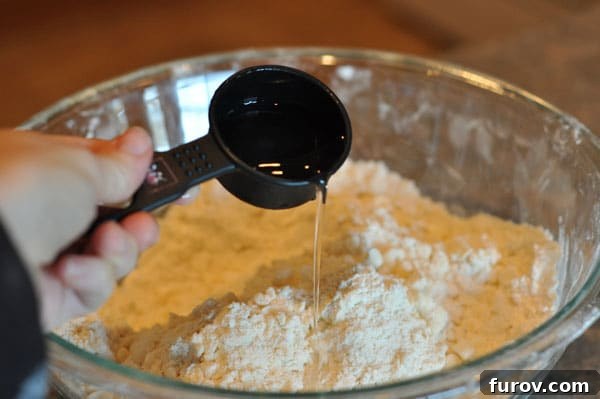
Drizzle the measured ice water evenly over the butter/flour mixture. Distribute it gently to ensure that all parts of the flour mixture have a chance to absorb some moisture. This is where the dough truly begins to form.
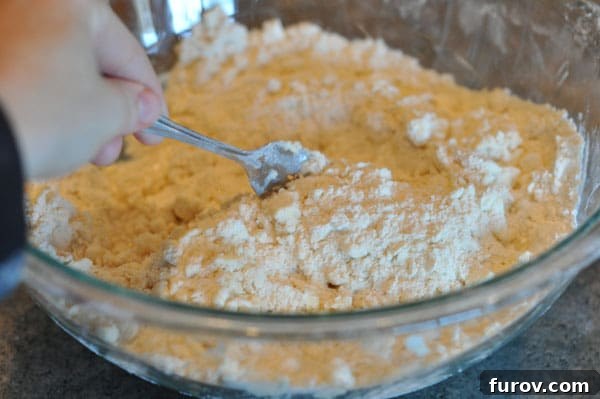
Using a fork, start lightly tossing the water and flour mixture together. The goal is to combine the ingredients just enough for them to start clumping together. Avoid overmixing, as this can develop the gluten too much, leading to a tough crust.
Eventually, you’ll find it more effective to abandon the fork and use your hands to finish mixing the dough. However, be mindful of your body heat; you want the butter to remain as cold as possible. If the butter starts to feel soft from the warmth of your hands, quickly pop the bowl into the refrigerator for a few minutes to re-chill the mixture.
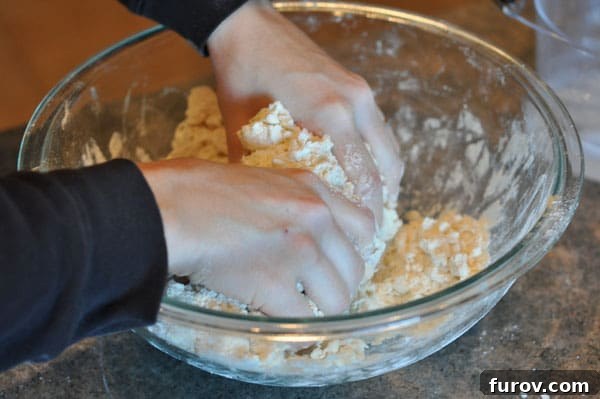
Mix the dough just until it forms a shaggy, somewhat messy ball. It shouldn’t be smooth and supple like bread dough. Instead, it should still appear a bit crumbly, but a pinch of dough squeezed between your fingers should hold its shape. Trust the process; this seemingly imperfect texture is exactly what you want for flakiness, and it will come together beautifully as you roll it out.
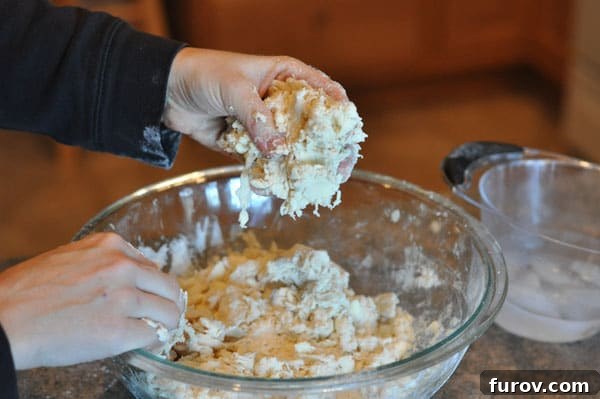
Turn the shaggy dough out onto a very lightly floured work surface. You’ll notice it still looks a little rough and crazy. This goes against my natural inclination for neatness, but I promise, this seemingly unkempt state is perfect. It will transform into a smooth, rollable dough with just a little effort.
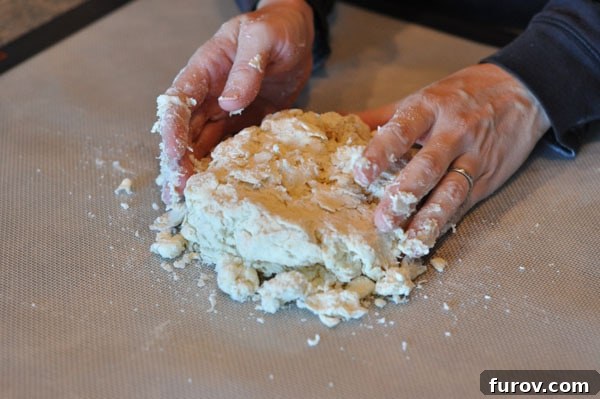
Begin rolling from the middle of the dough disk, applying firm, even pressure. Roll outwards in short, strong motions. After each roll or two, gently lift the dough and give it a quarter turn. This prevents sticking to the counter and helps you achieve an even circle. Add a minimal amount of additional flour underneath if needed to prevent sticking.
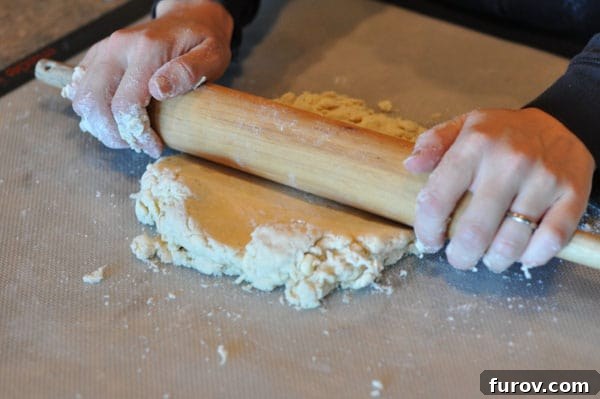
As you continue rolling, you’ll observe the dough becoming progressively smoother and more cohesive. It’s important to handle the dough with a light touch and avoid “manhandling” it too much. Excessive manipulation can cause the butter to warm up and melt into the dough, which will result in a tough, rather than light and flaky, crust. Work quickly and confidently.
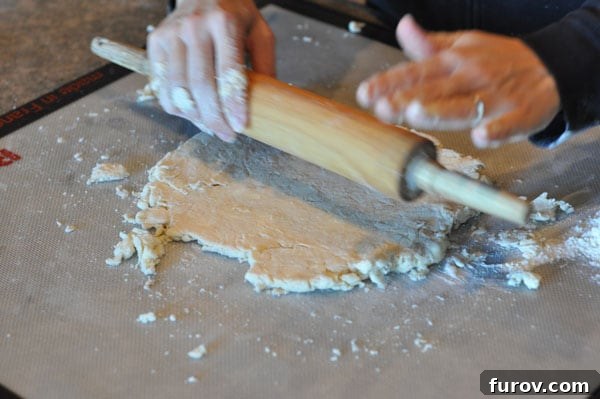
Once you’ve finished rolling, inspect your crust closely. You should still be able to discern tiny pockets and smears of butter embedded within the dough. While it might be subtle in pictures, these visible specks are a clear indicator of success! When these butter pieces melt during baking, they release steam, creating air pockets that expand and separate the layers of dough, resulting in that coveted flaky and tender texture. Flaky and tender is undeniably good!
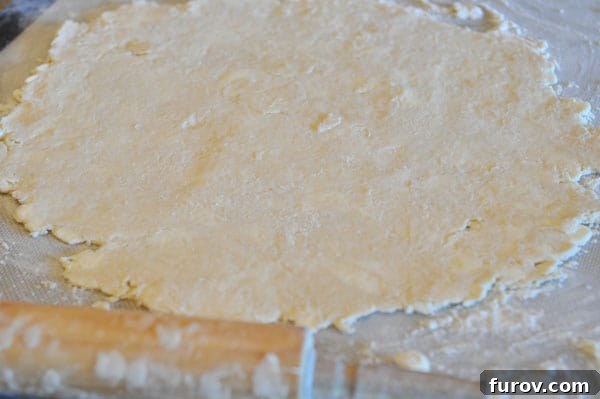
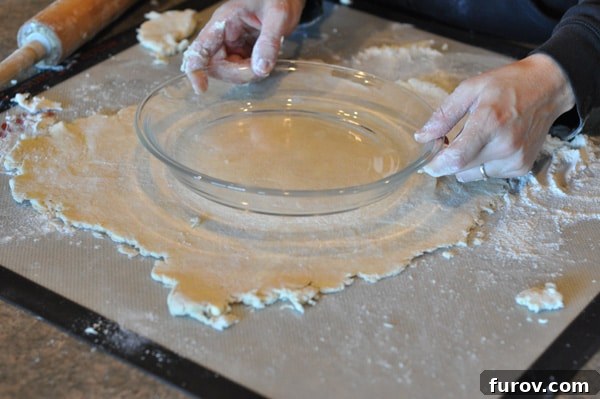
To gauge the correct size, I typically hold my pie plate over the rolled-out dough. This allows me to see exactly how much larger my dough circle needs to be. A good rule of thumb is to roll the dough approximately two inches wider than the diameter of your pie plate to allow for overhang and crimping.
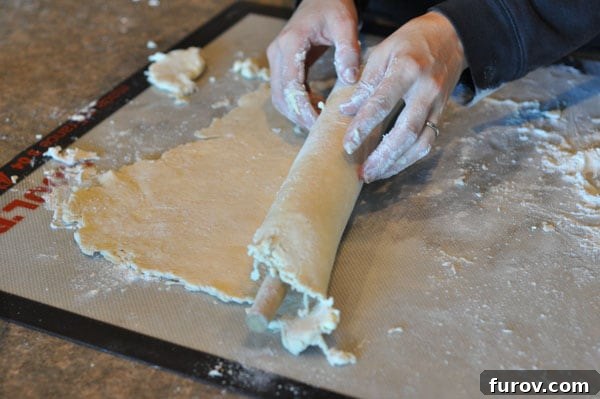
Carefully roll the crust around your rolling pin. Take your time with this step to avoid any rips or tears. If it does tear, don’t fret; pie dough is forgiving, and you can simply patch it with a little piece of excess dough and a gentle press.
Once the dough is securely on your rolling pin, gently transfer it to your pie plate and carefully unroll it. Position it so it drapes evenly over the dish.
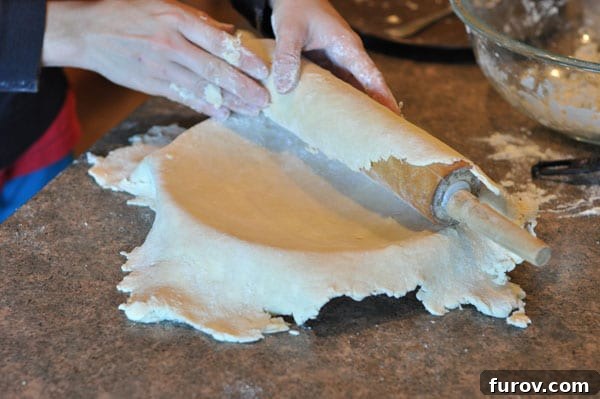
The pie crust will likely be sitting slightly above the bottom of the plate. Resist the urge to stretch and pull the crust down to line the plate. Instead, gently lift the crust from the side of the plate and ease it into place, allowing gravity to help it settle naturally. If you stretch it, the dough will shrink back significantly during baking, leading to an uneven or short crust. Shrinking is definitely something we want to avoid!
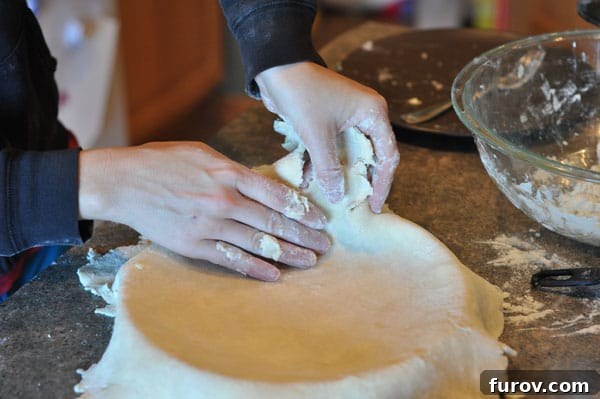
Trim the edges of the crust to leave about a 1/2 to 1-inch overhang beyond the edge of the pie plate. For a single-crust pie, at this point, you could fold the excess overhang underneath to create a thick edge and then flute it with your fingers. However, for our double-crust sweet cherry pie, we’ll wait to flute until both crusts are in place.
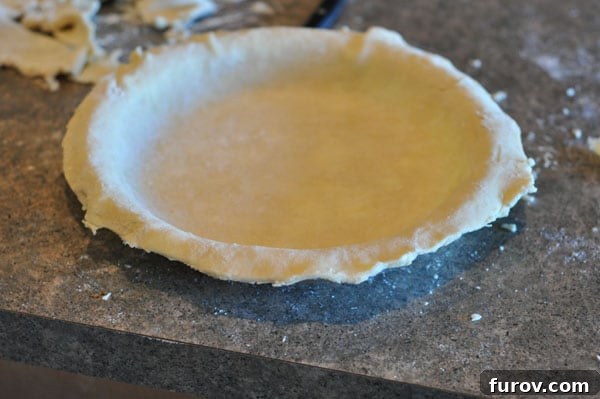
For a double-crust pie, you’ll repeat the rolling steps for your second piece of dough. After filling your pie, gently place the top crust over the fruit filling. Trim the edges of the top crust to about 1/2-inch past the pie plate, then fold the edges of the lower pie crust over and tuck them underneath the top crust. Press firmly to seal the two layers together, creating a beautiful, unified edge.
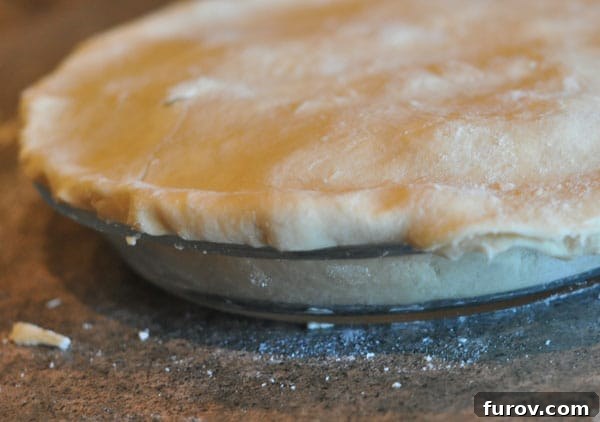
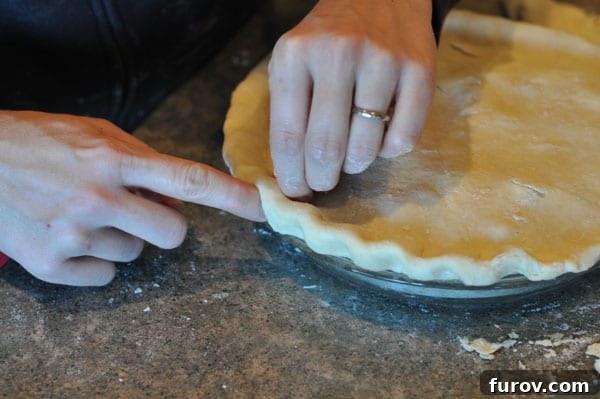
Finally, using your thumb and forefinger, flute the sealed edges of your pie to create a decorative and secure border. This not only makes the pie look professional but also helps to contain the delicious cherry filling during baking. With your pie crust perfected, it’s ready for the oven and ultimately, for your enjoyment!
And thus concludes our comprehensive guide to creating a truly irresistible sweet cherry pie with a flawless, all-butter crust. Enjoy the baking, and savor every single bite of this homemade masterpiece. Peace out!
Other Cherry Recipes You Might Love: