
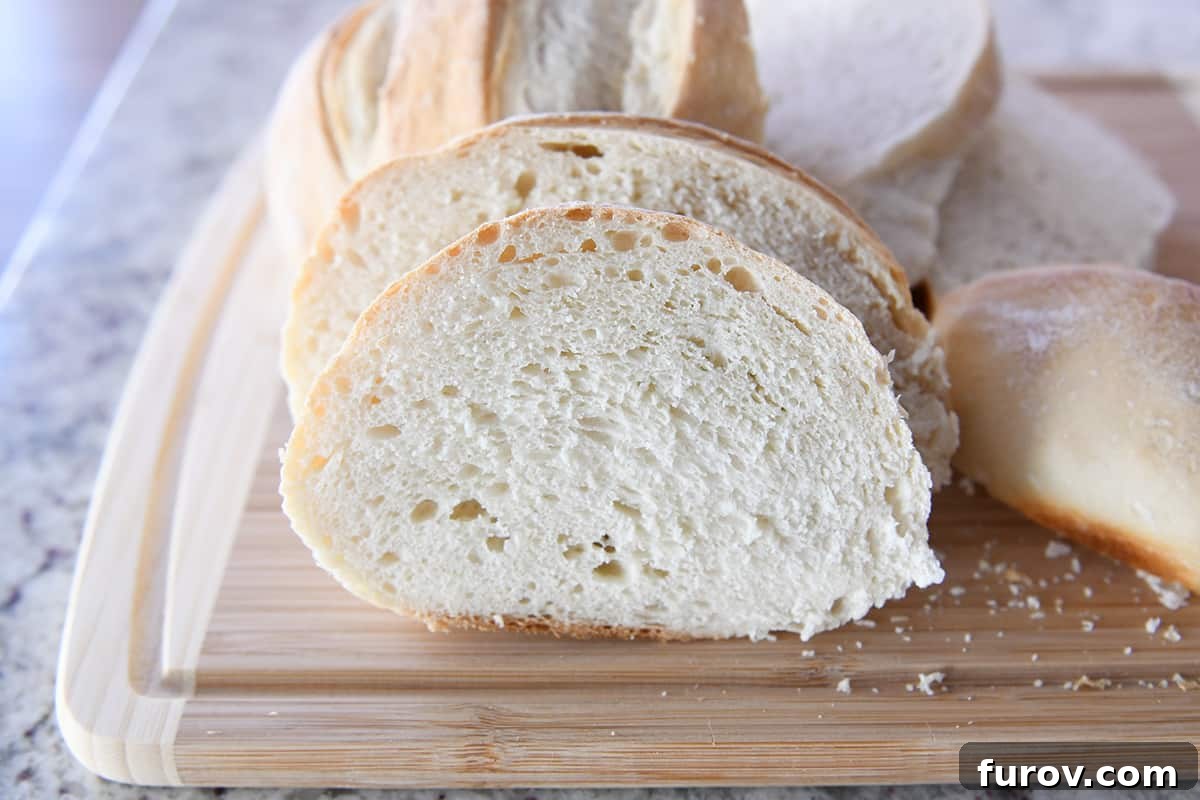
Sourdough baking might seem like a mystical art reserved for seasoned bakers, shrouded in scientific jargon and precise calculations. But what if it didn’t have to be? What if you could unlock the incredible world of sourdough with an approach that is easy, intuitive, fun, and results in deliciously satisfying bread? Welcome to the lazy girl’s guide to sourdough – your stress-free passport to mastering this ancient craft.
Unleash Your Inner Baker: The Lazy Girl’s Guide to Sourdough
Sourdough has certainly captured the imagination of home bakers, especially in recent years. Its rise in popularity is no surprise, offering a unique blend of historical tradition, incredible flavor, and satisfying texture that commercial yeast simply can’t replicate. While some might present sourdough as a complex science project, I’m here to demystify it. Having kept a sourdough starter for over a decade, I’ve discovered a wonderfully simple, adaptable, and genuinely enjoyable way to integrate it into my baking routine. You don’t need a lab coat or a precise thermometer – just a willingness to embrace a more relaxed approach.
Forget the intimidating myths; keeping a sourdough starter and baking with it can be incredibly straightforward. It’s about working with nature’s rhythm, not against it. My goal today is to share all my hard-earned, easy-going tips and tricks in what I affectionately call the “lazy girl’s guide to sourdough.” If you’ve ever dreamed of baking that crusty, tangy loaf or just want to add a unique depth of flavor to your everyday recipes, prepare to realize that not only can you do it, but it can be a genuinely simple and stress-free journey.
How to Get Your Sourdough Starter: Your First Step to Amazing Bread
The heart and soul of any sourdough creation is, without a doubt, the starter. This magical concoction of flour and water, teeming with wild yeasts and beneficial bacteria, is what gives sourdough its distinctive flavor, texture, and rise. Getting your hands on a good starter is your exciting first step into the world of natural leavening.
Ask Around: The Power of Community
You might be surprised by how many people in your social circle – friends, family, neighbors, or even colleagues – are secretly nurturing a sourdough starter in their refrigerator. Often, these starters are robust and well-established, having been fed and maintained for years, making them incredibly resilient and flavorful. This is how I acquired my current starter, a lively culture passed down from a church friend. An older, well-maintained starter often means it’s incredibly strong and forgiving, practically “hard to kill.” Don’t be shy; a simple inquiry can yield a precious gift!
Online Options: Dehydrated Starters for Convenience
For those without a local connection, purchasing a sourdough starter online is a viable option. Many reputable sources offer dehydrated starter cultures that you can rehydrate at home. While I haven’t personally explored this route extensively, it’s crucial to read reviews and do a little research. Look for sellers with positive feedback, especially regarding the starter’s activity and flavor profile once rehydrated. The rehydration process is usually straightforward, involving a few days of consistent feeding to bring the dormant culture back to life.
Create Your Own: The Ultimate DIY Project
If you’re up for a rewarding project, making your own sourdough starter from scratch is a fantastic way to begin. Years ago, I successfully cultivated my own starter while living in a remote area, proving that you don’t need exotic ingredients or a specific climate – just flour, water, and patience. While a newly created starter might take a little longer to develop the deep flavor and potent strength of an older one, it is absolutely doable. The process involves combining flour and water, allowing the wild yeasts in your environment to colonize and ferment the mixture over several days. Typically, a homemade starter can be ready to use in about 5-8 days, though some may take up to two weeks to become consistently active and strong.
To guide you through the exciting process of crafting your very own starter, here are some excellent resources that break down the steps clearly:
- Simple Sourdough Starter – A beginner-friendly guide to getting started.
- King Arthur Baking Sourdough Starter Tutorial – King Arthur Baking has been an invaluable mentor in my sourdough journey, offering clear, reliable instructions.
- 7 Easy Steps to Making Your Own Sourdough Starter – For those who appreciate the ‘why’ behind the ‘how,’ this article provides insightful, albeit slightly more detailed, scientific explanations.
Easy Sourdough Starter Maintenance: The Lazy Girl’s Secret
Search online for “sourdough starter maintenance,” and you’ll likely encounter a deluge of information, often contradictory, about feeding schedules, discard ratios, and optimal temperatures. It can quickly become overwhelming, with some stories even claiming sourdough starters have names, birth dates, and dedicated living quarters! While admirable, that level of commitment isn’t necessary for delicious, homemade sourdough.
The true lazy girl’s way to maintain a thriving sourdough starter is remarkably simple: keep it in the refrigerator, occasionally “forget” about it for a bit, and feed it only when you’re ready to bake or when it truly needs a refresh.
Refrigeration slows down the metabolic activity of the wild yeasts and bacteria, effectively putting your starter into a state of hibernation. This means you don’t need to feed it daily, or even weekly, unless you’re actively baking a lot. This flexible approach is what makes sourdough so accessible, fitting perfectly into a busy lifestyle without demanding constant attention.
Here’s my general, no-fuss method:
- Retrieve from the Fridge: Pull your sourdough starter out of the refrigerator when you’re ready to bake or feed it.
- Scoop for Use: Measure and scoop out the amount of sourdough starter required for your recipe. This also helps reduce the overall volume of starter before feeding.
- Feed the Remainder: Feed the remaining starter with fresh flour and water (more on ratios below!).
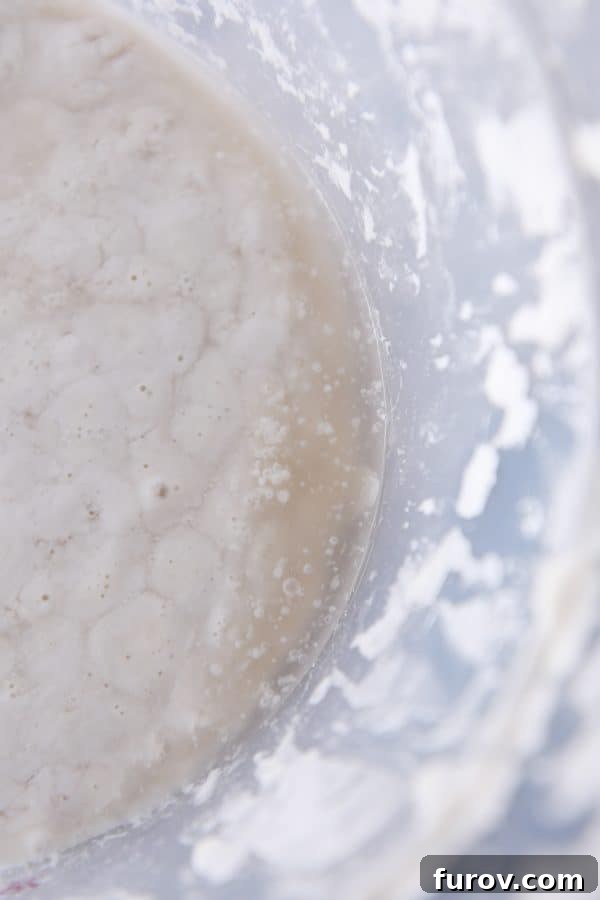
- Activate at Room Temp: Allow the newly fed starter to sit at room temperature until it shows signs of activity – typically bubbling, growing, and doubling in size. This can take anywhere from 4 to 12 hours, depending on your kitchen’s temperature and the starter’s vigor.
- Return to the Fridge: Once active, pop it back into the refrigerator. It’s now ready for its next period of rest, happily awaiting your next baking adventure.
Life happens, and sometimes you might use and feed your starter several times a week, while other times it might sit untouched for over a month. The beauty of sourdough is its resilience.
Understanding “Hooch” (The Liquid on Top)
If you retrieve your starter from the fridge and find a layer of gray or brown liquid on top, don’t panic! This liquid, often called “hooch,” is a natural byproduct of fermentation and indicates that your starter is hungry. You can simply pour it off or stir it back in. Stirring it in will add a more pronounced tangy flavor to your bread. However, a crucial warning: if the liquid appears orange, pink, or any other unusual color, or if you see visible mold, it’s a sign that your starter has gone bad and should be discarded immediately to avoid contamination.
Reviving a Sluggish Starter
Even if your starter has been neglected in the fridge for an extended period (weeks or even months) but shows no signs of spoilage (no strange colors, no mold), it’s likely still salvageable. It might be sluggish at first, but with consistent care, it will bounce back. To revive it to full strength and activity, you may need to feed it several times over the course of a couple of days, keeping it at room temperature during this revival period, until it consistently doubles in size after feeding.
Daily Baking? Countertop Care!
If you plan to bake with your starter every single day, then keeping it on the counter at room temperature and feeding it every 12 hours is ideal. This ensures it’s always at peak activity. Remember, though, with daily feedings, you’ll need to discard or use a significant portion of the starter before each feed, otherwise, you’ll quickly find yourself with a bathtub-sized batch of sourdough!
For those interested in the more intensive, daily maintenance routines, here are some helpful links. While I champion the lazy method, understanding the traditional approach can also be enlightening:
- King Arthur Baking’s Guide to Maintaining a Sourdough Starter – Yet another invaluable resource for comprehensive sourdough knowledge.
- Little Spoon Farm’s Sourdough Guide – This site offers an interesting perspective, including discussions on alternative feeding ratios like the 1:4:4 method.
- The Perfect Loaf’s Sourdough Maintenance Schedule – A detailed, informative guide for those who enjoy the intricate science of sourdough.
How to Feed a Sourdough Starter: The Simple 1:1:1 Method
Feeding your sourdough starter is where the magic truly happens, bringing it back to life and ensuring its continued vitality. While there are various feeding ratios, the 1:1:1 method (starter:flour:water by weight) is incredibly straightforward and effective, especially for the lazy baker. This ratio means you’re feeding your starter an equal weight of flour and water relative to the weight of the starter itself.
For consistency and ease, I always use the same dedicated container for my sourdough starter. This allows me to leverage a kitchen scale, making the feeding process quick, mess-free, and precise. Weighing ingredients is far more accurate for sourdough than using volume measurements, as flour density can vary wildly.
To streamline the process, I keep a crucial piece of information handy: the tare weight of my container. (It’s on a sticky note inside my kitchen cupboard, alongside other vital data like the yield of caramels from a triple batch and the secret to deodorizing stinky teenager feet – truly a repository of household wisdom!) My container weighs 325 grams.
Here’s the step-by-step process:
- Weigh the Starter: Place your starter container (with whatever starter is left after you’ve scooped some out for baking) on your kitchen scale. Note the total weight.
- Calculate Starter Weight: Subtract the container’s tare weight (e.g., 325 grams) from the total weight. For example, if the total weight is 865 grams, then you have 540 grams of sourdough starter (865 – 325 = 540 grams).
- Add Flour: Tare the scale back to zero. Add an equal weight of unbleached all-purpose flour. So, if you have 540 grams of starter, add 540 grams of flour. Unbleached all-purpose flour works beautifully, but you can also experiment with bread flour for a stronger starter or a touch of whole wheat flour for added nutrients and activity.
- Add Water: Tare the scale to zero again. Add an equal weight of room-temperature water (540 grams in our example). Using filtered water is often recommended, as chlorine can sometimes inhibit starter activity.
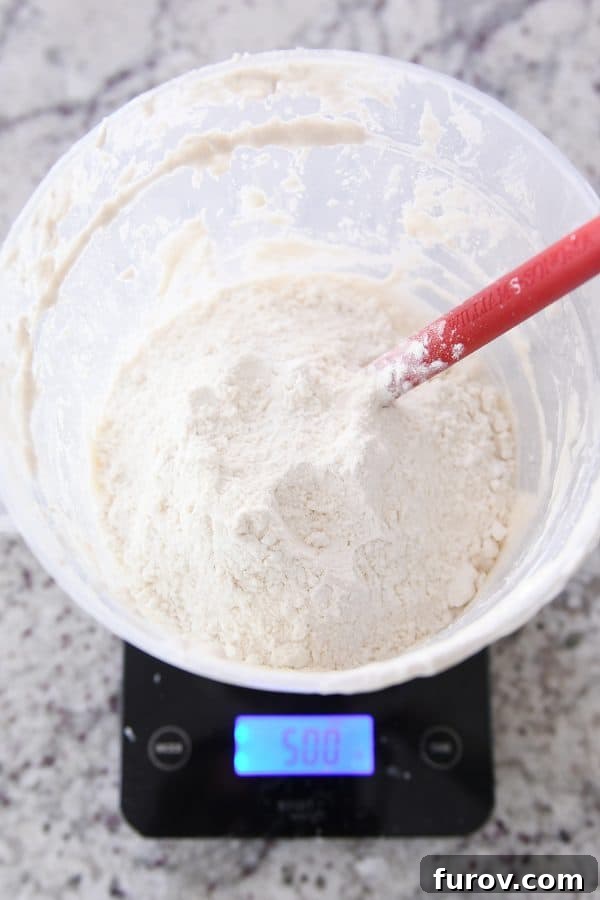
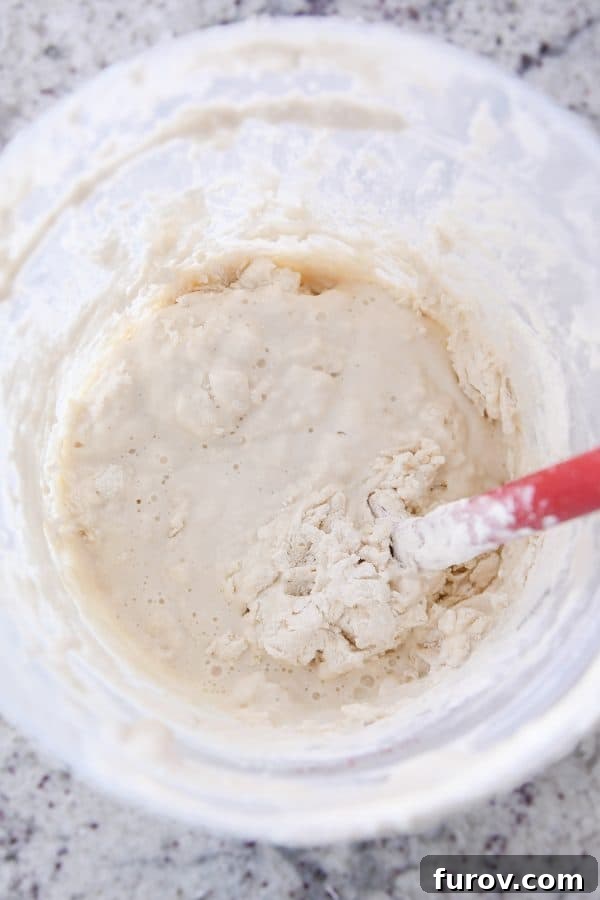
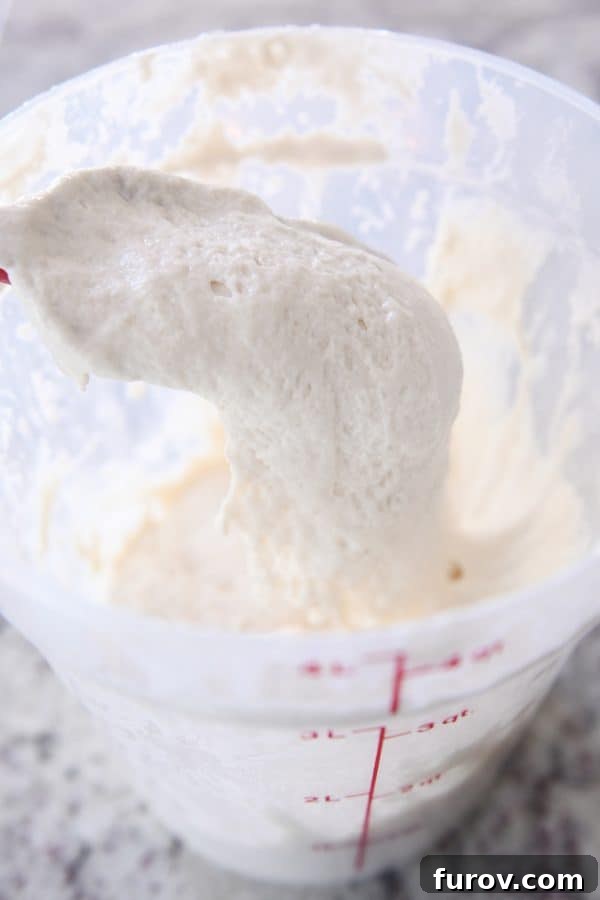
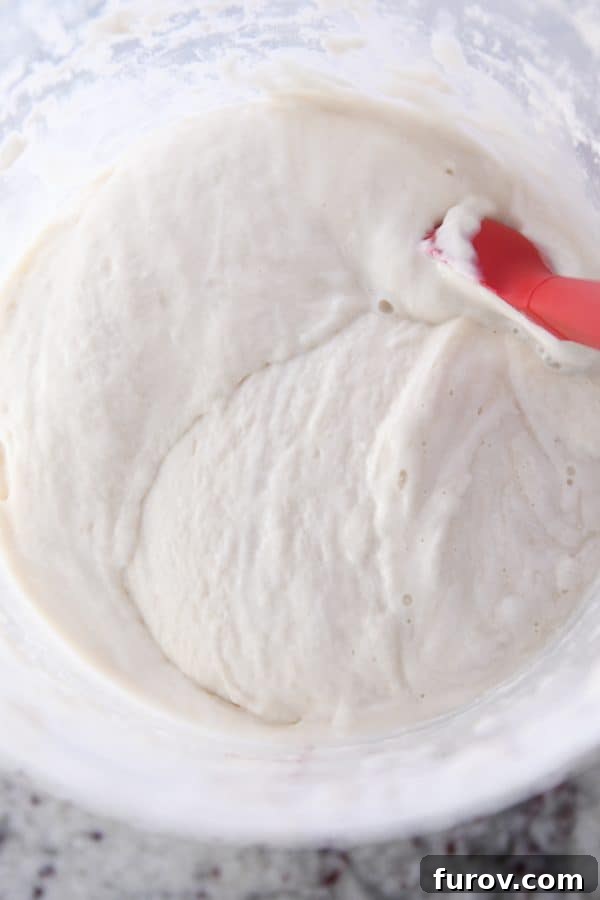
Once you’ve added the flour and water, mix it thoroughly with a sturdy spatula or spoon until all the dry bits of flour are fully incorporated and you have a smooth, consistent paste. The ideal consistency should be thick but pourable, much like a thick pancake batter or a well-stirred yogurt. It shouldn’t be too runny and thin, nor so thick that it resembles a stiff dough.
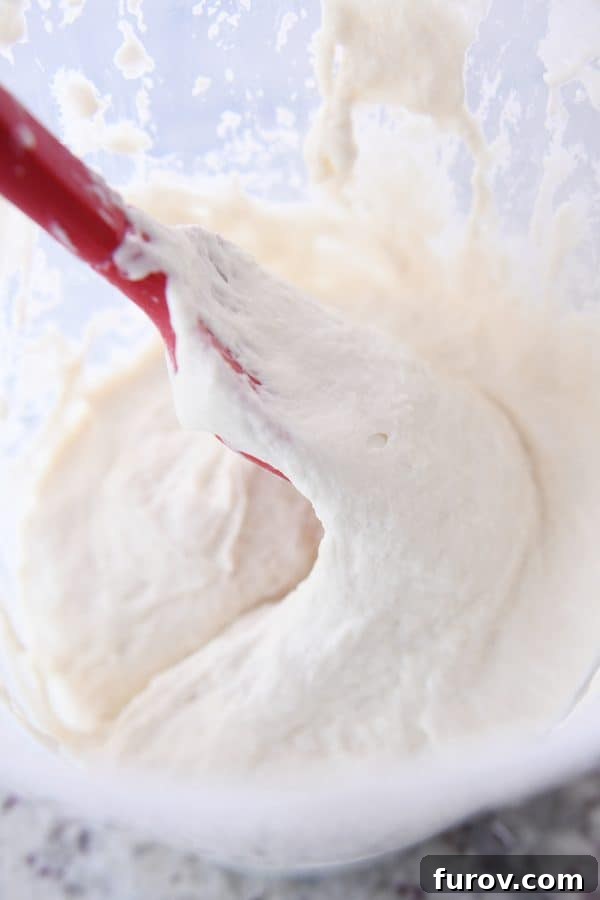
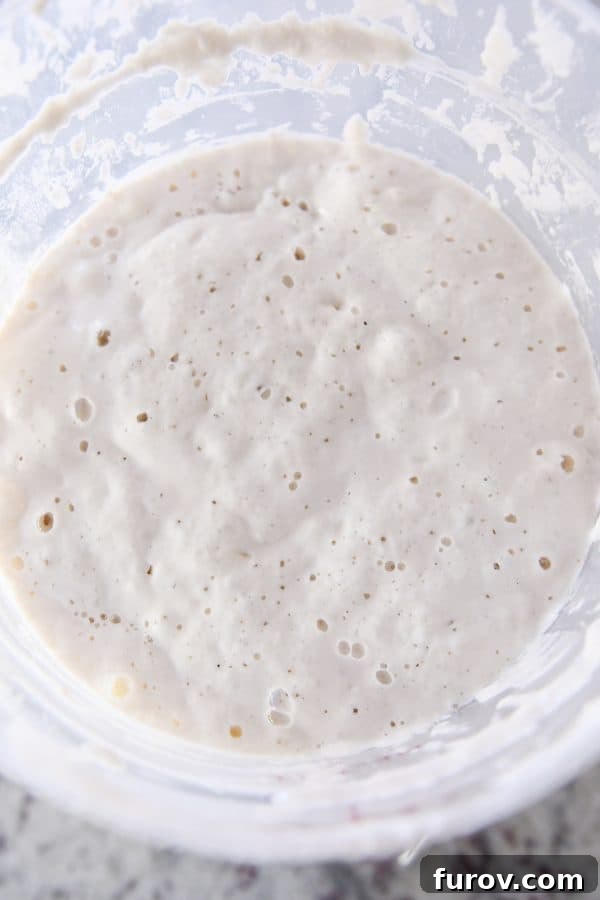
After mixing, cover your container loosely (allowing for some airflow but preventing it from drying out) and let it sit at room temperature. Over the next 4-8 hours (this timeframe can vary significantly based on your kitchen’s temperature and the starter’s activity), you’ll witness its transformation: it will visibly double in size, become light and airy, and be full of tell-tale bubbles – a clear sign of a happy, active, and hungry starter!
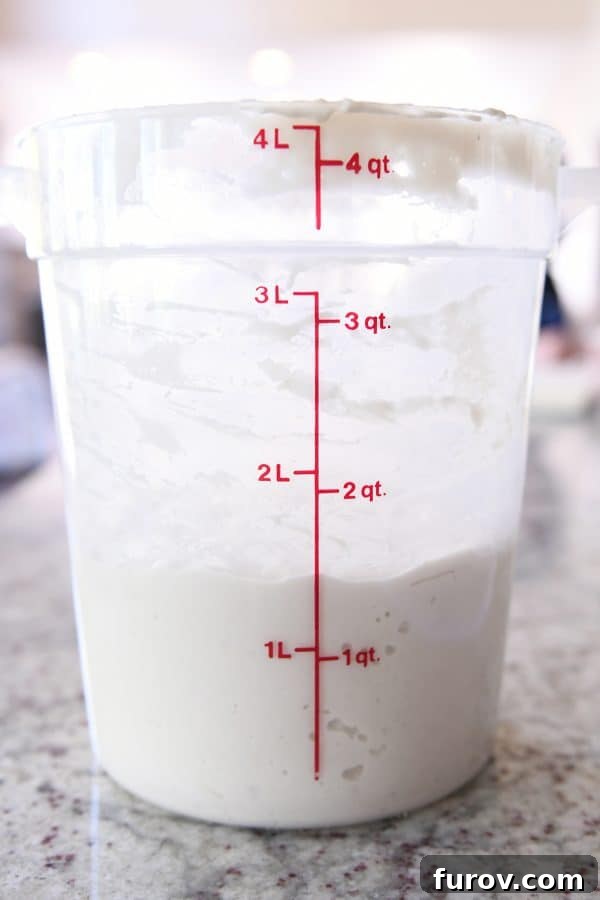
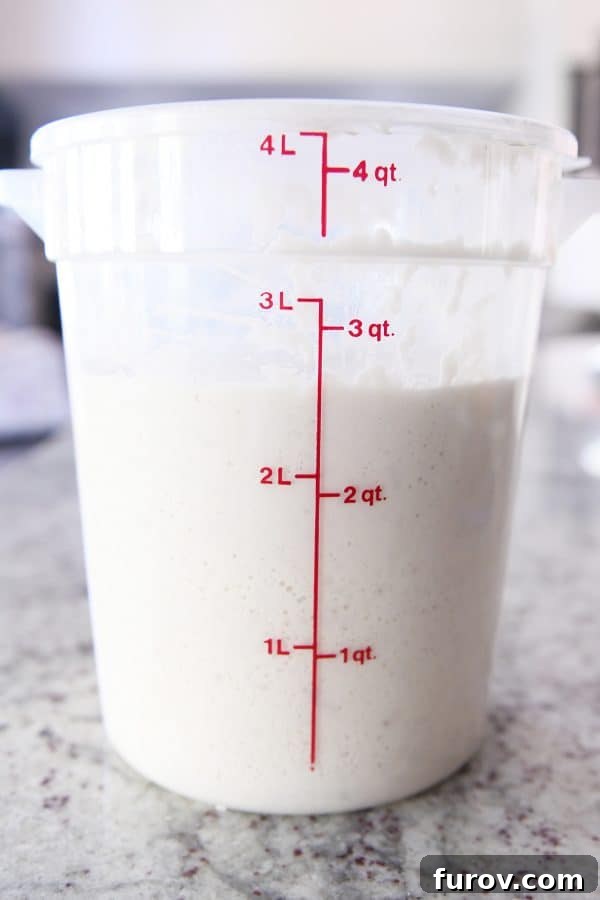
At its peak activity – that’s when it’s doubled and bubbly – your starter is ready to be used in a recipe that calls for fed sourdough starter. If you’re not baking immediately, simply place it straight back into the fridge. There, it will continue its laid-back life until you decide to awaken it for your next culinary creation.
*For reference, this 4-quart container is my go-to choice for starter storage. {affiliate link}
How to Bake with a Sourdough Starter: Fed vs. Discard
Once your sourdough starter is thriving, the next exciting step is to bake with it! You’ll find that most sourdough recipes specify whether they require “fed” (active) sourdough starter or “discard” sourdough starter. Understanding the difference is key to successful baking.
- Fed Sourdough Starter: This refers to a starter that has been recently fed with fresh flour and water and allowed to activate at room temperature until it is bubbly, full of life, and has visibly doubled in size. A fed starter is at its peak strength, ready to leaven bread and other baked goods, providing significant lift and a distinctive tangy flavor. Recipes that rely solely on sourdough for their rise, such as classic artisan loaves, will typically call for fed starter.
- Discard Sourdough Starter: This is sourdough starter that hasn’t been fed recently. It might come straight from the fridge (where it’s been dormant) or have been sitting on the counter for a while past its peak. It’s often sluggish, less active, and might have a layer of hooch on top. While it won’t provide significant leavening on its own, it’s a treasure trove of flavor and beneficial bacteria, perfect for recipes where you want the sourdough tang and texture without relying on it for the primary rise. These recipes often incorporate commercial yeast, baking soda, or baking powder to ensure proper lift.
Again, the internet abounds with countless resources and recipes for sourdough baking. However, embracing the “lazy girl’s” philosophy means choosing convenience without compromising on incredible results.
My preferred, lazy way to use my sourdough starter:
- Prioritize Sourdough Discard Recipes: My absolute go-to are recipes that specifically call for sourdough discard. This approach requires minimal planning on my part – I simply pull my starter from the fridge, use the discard, and then feed the remainder. These recipes are not only incredibly delicious but also a fantastic way to utilize the starter you’d otherwise discard, reducing waste and maximizing flavor.
- Infuse Sourdough into Regular Recipes: Beyond dedicated sourdough recipes, I love incorporating my starter into many existing bread and baked good recipes on my site that don’t originally call for it. It magically adds a depth of flavor and creates the most amazing, tender texture to various breads.
Baking with sourdough, whether active or discard, introduces a complex flavor profile – a subtle tanginess and an earthy depth that’s truly unmatched. Beyond taste, the fermentation process makes baked goods more digestible and can even enhance their nutritional value. It’s a win-win, offering both culinary delight and potential health benefits.
My Favorite Sourdough Discard Recipes: Delicious and Effortless
For those times when you want incredible sourdough flavor and texture without the fuss of meticulous timing or daily feeding, sourdough discard recipes are your best friend. They are perfect for using up excess starter and creating phenomenal baked goods. These are the top four recipes that make up 99% of my sourdough baking, consistently delivering outstanding results:
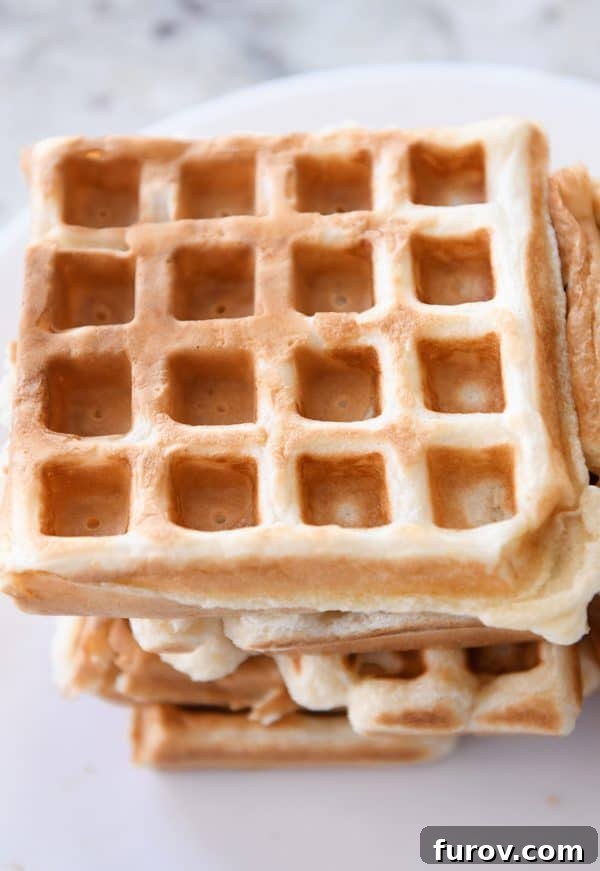
- Sourdough Waffles or Pancakes: This recipe, while requiring an overnight rest, is absolutely worth the minimal effort. I make these fluffy, tangy waffles at least once a week – they are a weekend breakfast staple!
- Sourdough Pizza Crust: Prepare for a pizza night upgrade! This crust offers an incredible depth of flavor and a wonderfully chewy texture that elevates any topping.
- Sourdough Chocolate Cake: This is not just any chocolate cake; it’s genuinely one of the best chocolate cakes on the planet. The sourdough discard adds an unbelievable moistness and subtle complexity to the chocolate flavor, making it a primary reason I keep my starter alive and thriving!
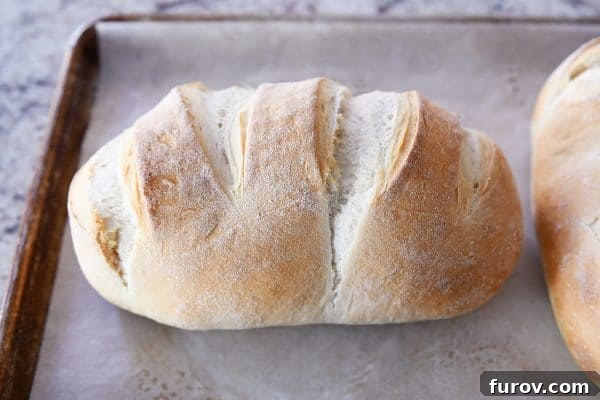
- Rustic Sourdough Bread or Basic Sourdough Bread: These recipes are perfect for beginning sourdough bread bakers. While they still call for a bit of commercial yeast for a reliable rise, the sourdough discard contributes immensely to the flavor and texture, resulting in a phenomenal and nearly foolproof loaf.
It’s clear I have a special affinity for King Arthur Baking’s sourdough recipes – their reliability and deliciousness are simply unparalleled.
Beyond King Arthur, Little Spoon Farm also offers a fantastic collection of sourdough discard recipes. Their sourdough biscuits, for instance, are truly delightful!
If your goal is to bake authentic sourdough bread without any commercial yeast, embracing the pure natural leavening, here are three excellent resources to guide you:
- Bless This Mess (Melissa’s) Sourdough Bread Recipe – A super popular and highly recommended recipe for yeast-free sourdough.
- King Arthur Baking’s No-Knead Sourdough Bread – A minimalist approach to achieving a fantastic, naturally leavened loaf.
- The Clever Carrot’s Beginner Recipe – An excellent guide for newcomers to the world of 100% sourdough baking.

How to Use Sourdough Starter in Regular Recipes: Flavor and Texture Boost
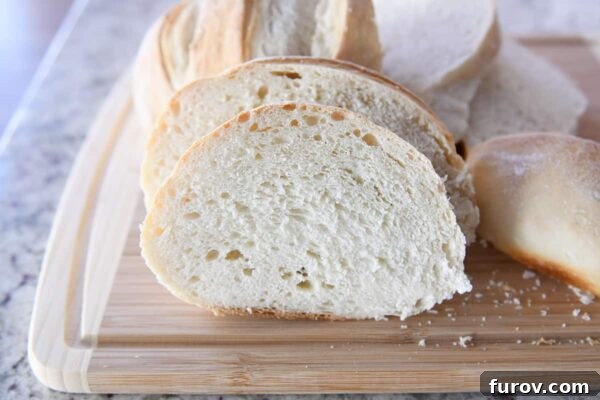
This is arguably the easiest and most “lazy girl” friendly method for incorporating your sourdough starter into your everyday baking. It doesn’t require finding specific sourdough recipes or worrying about activation times; you simply add a dollop to a bread recipe you’re already making!
I frequently pull my starter from the refrigerator and scoop a generous amount into a standard bread recipe that typically calls for commercial yeast. While it’s not an exact science and sourdough baking often embraces flexibility, I do follow a general rule of thumb for adjusting the other ingredients:
For every cup of sourdough starter you add, decrease the liquid (like water or milk) by approximately 1/2 cup and the flour by about 1/2 cup.
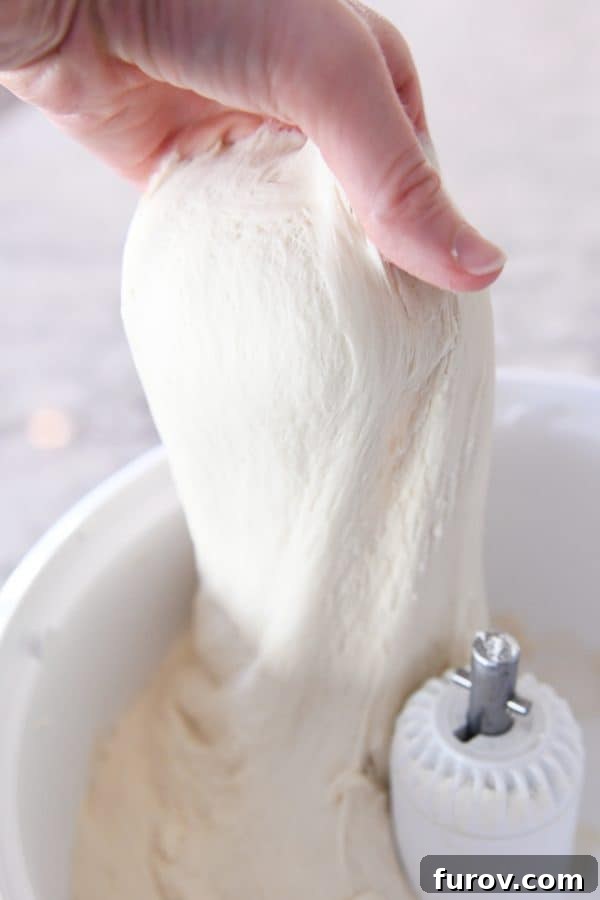
The key here is observation and feel. After incorporating the starter and making your initial adjustments, remember to add any remaining flour gradually, by look and feel. You’re aiming for a soft, supple, and stretchy dough that gathers cleanly from the sides of the bowl during mixing. Don’t get hung up on achieving the exact flour amount specified in the original recipe; flour absorption can vary based on humidity, altitude, and even how you measure, so trust your instincts and the dough’s consistency. The aim is a harmonious balance where the sourdough enriches the dough without making it too wet or too stiff.
Here are a few of my favorite “regular” bread recipes where I’ve had great success tossing in some sourdough starter:
- Soft Pretzel Rolls – The sourdough adds an amazing chew and depth.
- Pretzel Bites – For that ultimate soft, tangy bite.
- Homemade French Bread – Creates a more sophisticated crumb and flavor.
- 1-Hour Breadsticks – Adds a lovely tang to these quick favorites.
- Bread Bowls – Enhances the texture and flavor, making your soup experience even better.
I also frequently scoop some sourdough starter into my perfect white sandwich bread and this small batch whole wheat bread for an added boost.
Why incorporate sourdough starter into regular recipes?
There are several compelling reasons. Firstly, it undeniably adds a really great, complex flavor profile to your baked goods – a subtle tang and an earthy depth that’s hard to achieve otherwise. Secondly, the presence of sourdough starter often results in wonderfully soft, stretchy doughs and deliciously tender, moist baked bread, thanks to its enzymatic activity. This also improves the extensibility of the dough, making it easier to work with.
But beyond flavor and texture, this method serves a practical purpose: it’s a fantastic way to use your sourdough starter regularly, ensuring it stays active and healthy. A regularly used starter is a regularly fed starter, reducing waste and keeping your culture vibrant. And, as you may have heard, the fermentation process in sourdough can make bread more digestible and potentially enhance its nutritional benefits, contributing to better gut health. It’s an effortless way to sneak a little extra goodness into your homemade creations!
Lessons Learned from a Decade of Sourdough
After years of experimenting, neglecting, reviving, and ultimately cherishing my sourdough starter, the most profound lesson I’ve learned is this: it’s truly, remarkably hard to mess it up. Sourdough starters are incredibly resilient. They bounce back from periods of neglect, forgive inconsistent feeding schedules, and are far more robust than many online guides suggest. This inherent flexibility is what makes them so perfect for the “lazy baker.”
Beyond its forgiving nature, working with sourdough has brought a distinct joy to my kitchen. I genuinely feel like a rockstar every time I feed my bubbly starter, and even more so when I transform it into a phenomenal loaf of bread, waffles, or a decadent chocolate cake. There’s a deep satisfaction that comes from creating something so delicious and alive from just flour and water.
Another invaluable aspect is its practicality. It’s incredibly handy to keep around, especially for those unexpected moments when you find yourself out of commercial yeast. Sourdough offers a wonderful sense of self-sufficiency, ensuring you can always bake fresh bread or pastries, regardless of pantry stock.
Sourdough also provides a fantastic opportunity to challenge myself in the kitchen without requiring a significant investment of money or excessive time. Since I often integrate it into recipes I’m already making, it naturally fits into my routine. It’s a low-stakes way to explore new flavors and techniques, continually expanding my baking repertoire.
So, if you’ve been on the fence about diving into sourdough, or perhaps you’ve taken a hiatus and your starter is languishing in the depths of your fridge, consider this your gentle nudge. Hopefully, this guide will serve as a welcoming and stress-free starting point, encouraging you to embrace the rewarding world of sourdough baking without any pressure or intimidation. Happy baking!
Disclaimer: I am a participant in the Amazon Services LLC Associates Program, an affiliate advertising program designed to provide a means for me to earn fees by linking to Amazon.com and affiliated sites. As an Amazon Associate I earn from qualifying purchases.