
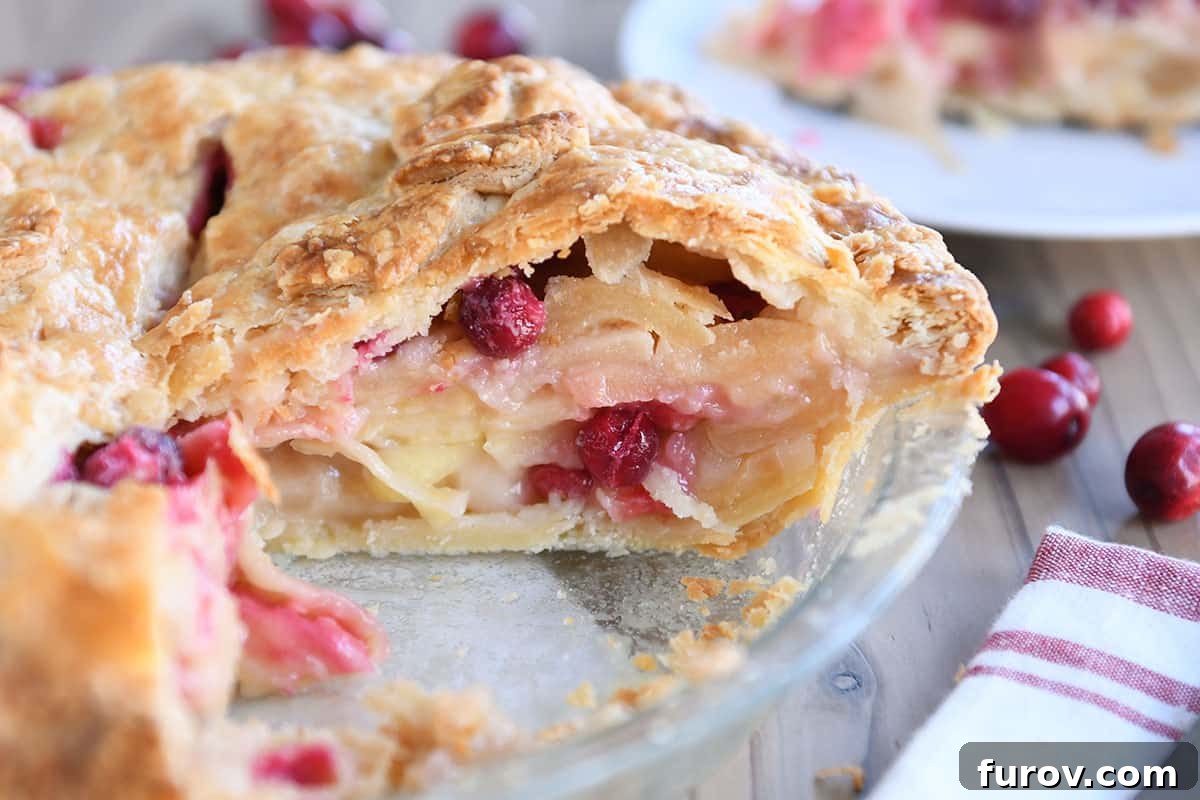
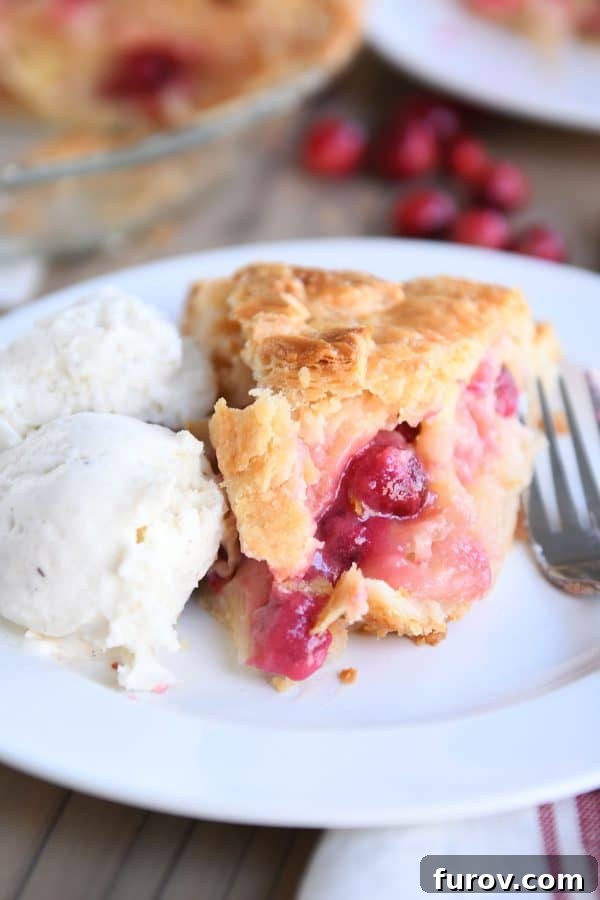
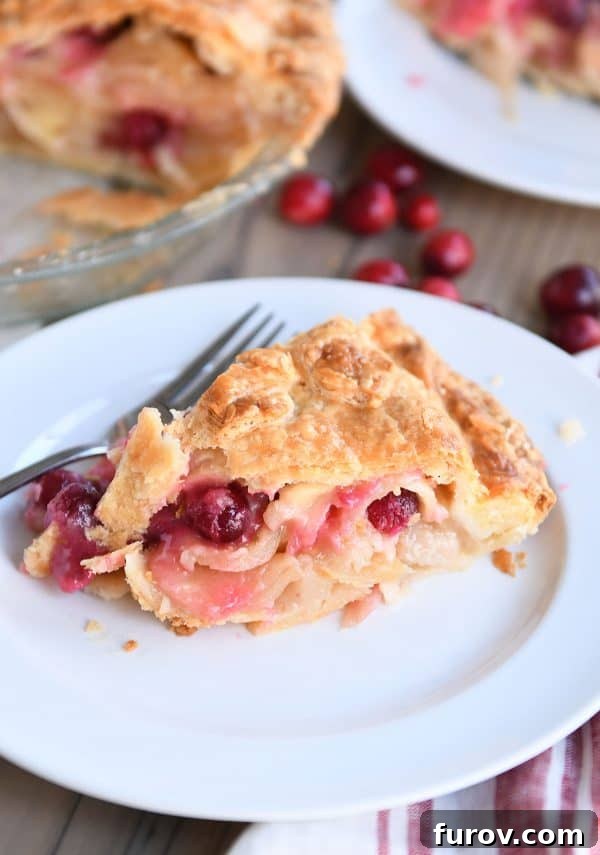
Welcome to the ultimate guide for creating the most unforgettable Apple Cranberry Pie you’ll ever taste. This isn’t just any pie; it’s a masterpiece of flavors, where the sharp tang of cranberries perfectly complements the tender, sweet apples, all nestled in a luscious, caramelly filling. It has quickly become my family’s favorite Thanksgiving pie, outshining all other contenders, and I’m thrilled to share every secret with you.
I first crafted this apple cranberry pie a few years ago, and its immediate success at our Thanksgiving feast was undeniable. It commanded the spotlight, earning unanimous praise and securing its place as a cherished holiday tradition. Since then, I’ve dedicated time to perfecting every nuance, ensuring it reaches its peak of deliciousness. After several rounds of enthusiastic taste-testing—not just at Thanksgiving, but even at Christmas—I can confidently say, this recipe is pure perfection.
Life, as it often does, can be delightfully chaotic and sometimes delays the best-laid plans. My apologies for not sharing this incredible recipe sooner! But rest assured, I am making amends this year, presenting you with this definitive guide well in advance. There’s ample time to incorporate this show-stopping apple cranberry pie into your holiday menu. Trust me, your taste buds will thank you.
Why This Apple Cranberry Pie is a Holiday Must-Have
Apple pie has always held a special place in my heart, a classic comfort that never fails to delight. However, the addition of vibrant cranberries elevates this beloved dessert to an entirely new level. The brilliant burst of tartness from the cranberries provides a stunning counterpoint to the sweetness of the tender baked apples and the rich, buttery caramel filling. It’s a flavor combination that is truly to die for.
The synergy between apples and cranberries creates a complex, irresistible taste that feels both familiar and excitingly fresh. This unique blend makes it the perfect Thanksgiving pie, offering a delightful twist on a traditional favorite. I once tried to find fresh cranberries in May, fueled by an intense craving for this pie’s magical flavor, only to discover they are notoriously difficult to source outside of autumn. This seasonal ingredient truly makes it a holiday specialty.
Another crucial element that sets this pie apart is the subtle hint of almond extract. I must admit, I haven’t always been its biggest fan, often omitting it from recipes to avoid an overpowering almond flavor. Yet, much like in my favorite cherry pie, a measured touch of almond extract here adds a layer of sophisticated depth and warmth. It’s a game-changer that enhances the fruit flavors without dominating them. Please, don’t skip it unless you have a severe allergy – it truly is the secret ingredient that binds all the delicious components together.
Choosing the Right Apples for a Perfect Pie
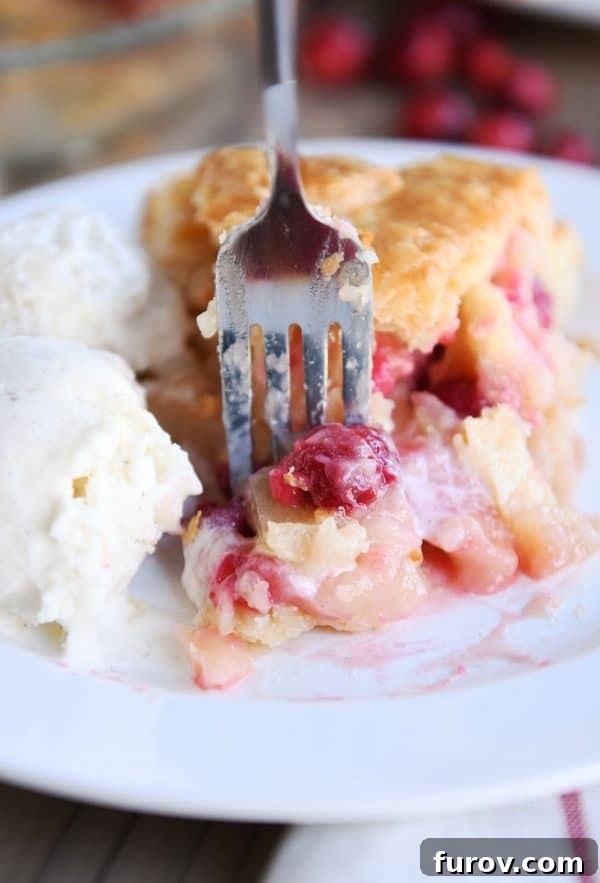
The success of any apple pie hinges significantly on the quality and type of apples you choose. For this apple cranberry pie, I almost exclusively use Honeycrisp apples. Their crisp texture and balanced sweetness hold up beautifully during baking, preventing them from turning into an undesirable mush.
While Honeycrisp are my go-to, feel free to experiment with other varieties or create your own blend. Key is to select firm, crisp apples that maintain their structure in the oven. If you prefer a tarter profile and opt for Granny Smith apples, I recommend pairing them with a sweeter apple like Fuji or Gala to balance the flavors. In such a case, you might also consider halving the amount of lemon juice to prevent the filling from becoming too tart.
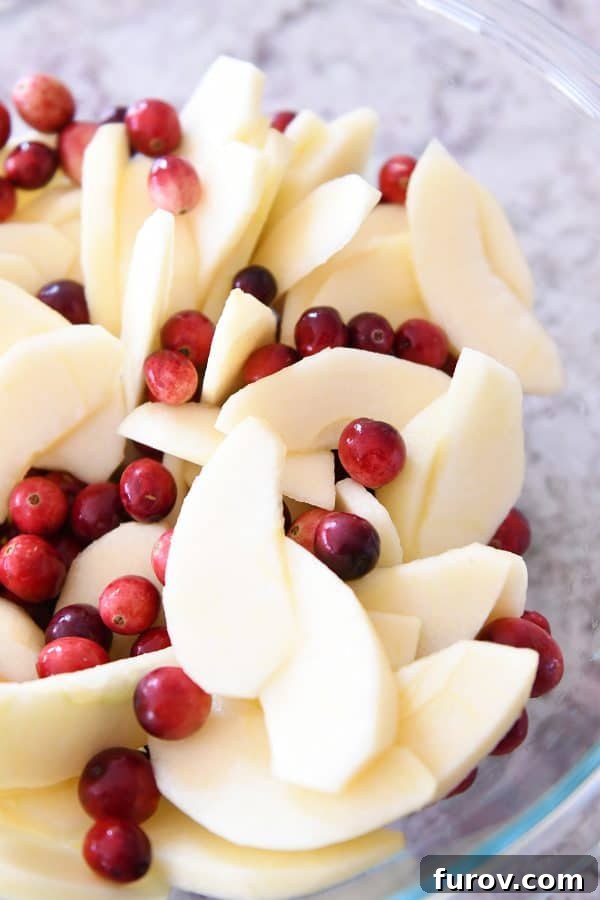
Preparation is key: I slice the apples to approximately 1/8-inch thick. This uniform thickness ensures even cooking and a pleasant bite in every slice. Once sliced, they are tossed with fresh lemon juice, almond extract, a pinch of salt, and the cranberries. It’s vital to have your apples and cranberries prepped and ready in the bowl. As you’ll discover, the warm caramel sauce needs to be poured over them immediately after it’s cooked to ensure proper coating and thickening.
Crafting the Irresistible Caramel Filling
What makes this apple cranberry pie filling truly exceptional and a bit unique is its luscious, caramelly sauce. Unlike many pies that rely on simply tossing fruit with flour or cornstarch for thickening, this recipe features a stove-top cooked caramel sauce that forms the heart of its exquisite flavor and texture. Yes, it’s an extra step, but I assure you, it’s absolutely worth the effort for the unparalleled richness it brings.
The process itself is surprisingly straightforward. You begin by melting butter in a saucepan or skillet, then stir in flour to create a roux—a classic thickening agent. Following this, granulated sugar and brown sugar are added to the mixture. This concoction simmers gently for just a couple of minutes until it becomes bubbly and beautifully thick, transforming into a glorious caramel sauce.
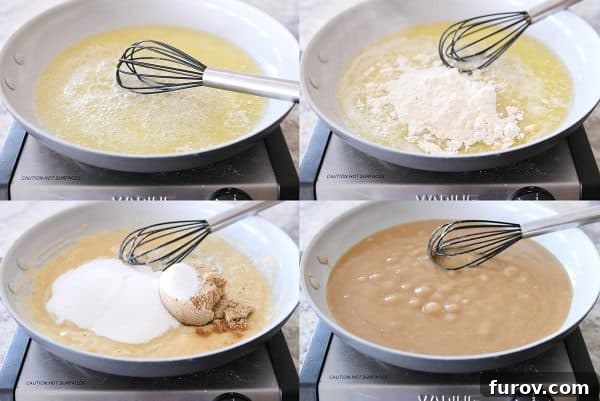
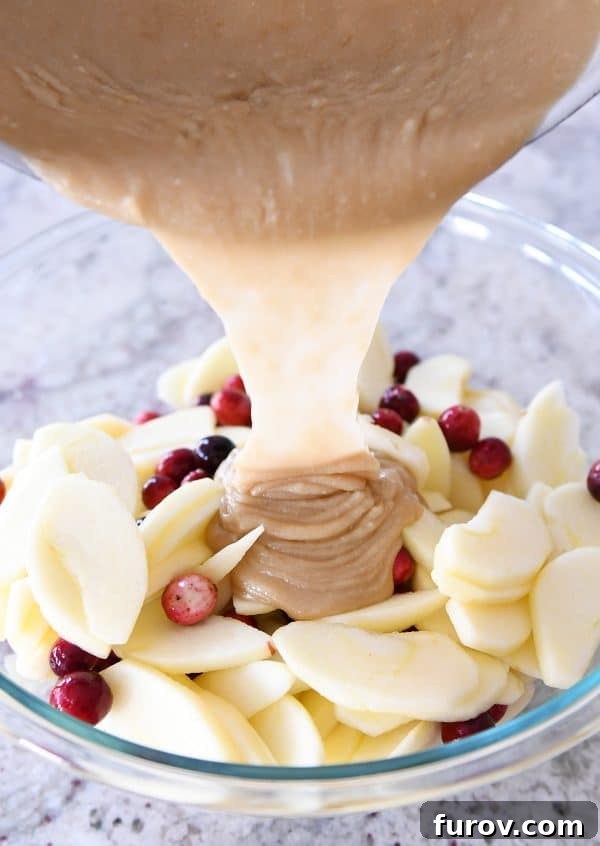
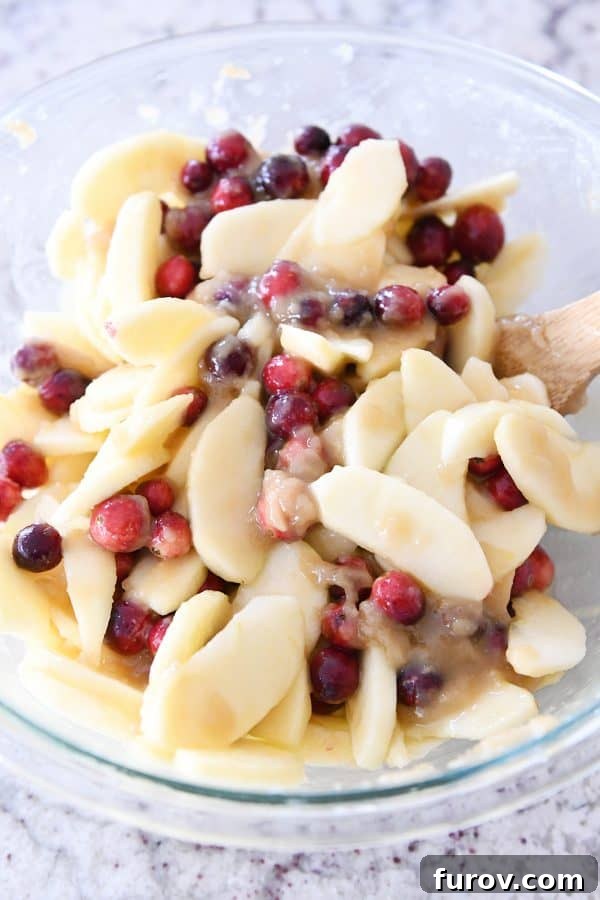
As mentioned earlier, the timing of pouring this warm caramel sauce over the prepared apples and cranberries is critical. The sauce thickens and can crystallize as it cools, so it needs to embrace the fruit as quickly as possible to ensure an even, delicious coating. Don’t be alarmed if, upon contact with the cold fruit, the warm sauce clumps up slightly. This is entirely normal and expected. Simply toss everything together as best you can. As the fruit mixture rests while you prepare your pie crust, the natural juices released from the apples will help to thin the sugary sauce, ensuring every piece of fruit is perfectly coated.
Mastering the Pie Crust: A Foundation for Perfection
A truly spectacular pie begins with a flawless crust. For my homemade pies, I almost exclusively rely on this tried-and-true pie crust recipe. Whether you choose to make your own dough from scratch or opt for a quality store-bought version, the key is to ensure you have enough for a double-crust pie, as this recipe calls for both a bottom and a top crust.
Interestingly, while a traditional top crust is wonderful, I’ve often considered how utterly delicious this pie would be with a crumble topping. Perhaps a streusel or crumble from another favorite pie recipe, like this apple crumb pie or this strawberry rhubarb pie? The idea sounds absolutely divine and offers a fantastic alternative if you’re looking for a textural contrast. If you try it, please let me know your results!
When rolling out the bottom crust, handle it gently. Carefully lift and tuck it into your pie plate without stretching or pulling the dough, which can lead to shrinking during baking. Leave about an inch of overhang around the entire rim of the pie plate. This excess dough will be crucial for sealing the top crust later.
For those who might appreciate a bit more guidance on mastering pie dough, I highly recommend checking out this comprehensive pie-making tutorial focused specifically on making and rolling out the perfect crust.
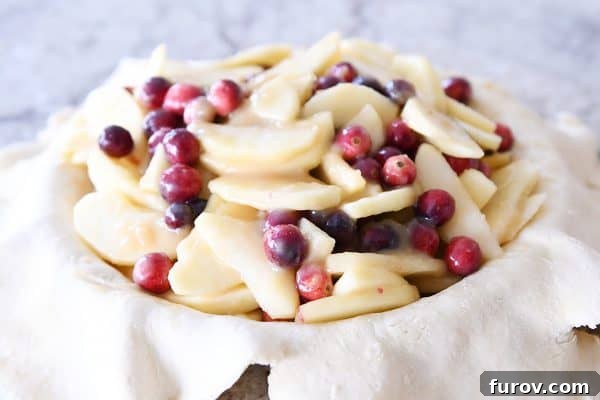
Once your bottom crust is in place, carefully scrape the apple and cranberry filling, making sure to get every last drop of that incredible caramel sauce, into the pie plate. Don’t worry if it looks piled high; the fruit will cook down as the pie bakes, settling into a perfect, tender mass.
Next, roll out your top crust and gently place it over the filling. Trim the top crust so it aligns evenly with the bottom crust, leaving about a half-inch overhang. Then, fold the bottom crust up and over the edge of the pie plate, pressing and pinching it together with the top crust to create a secure seal. If you need a visual aid for this step, refer to the image from my cherry pie recipe below.
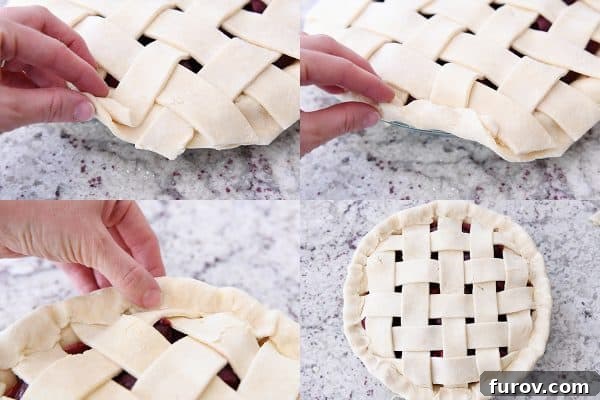
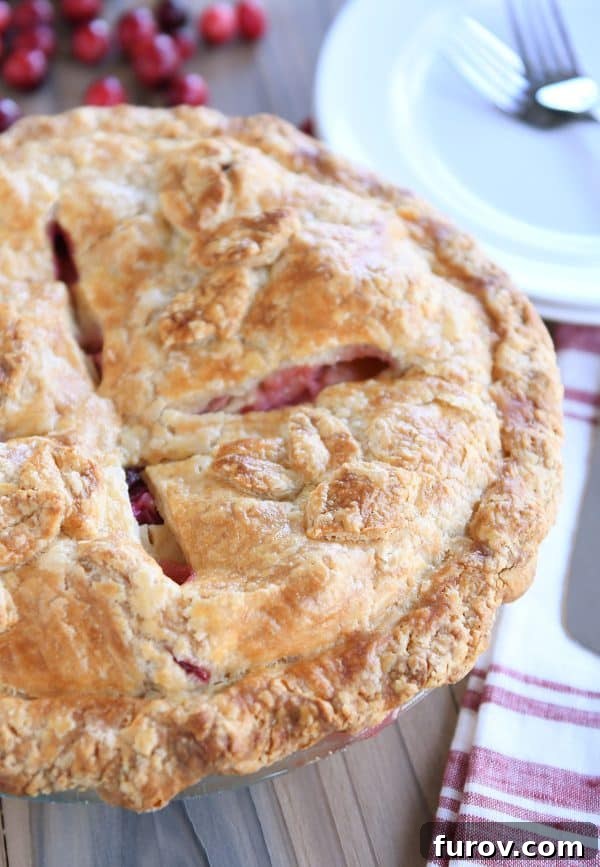
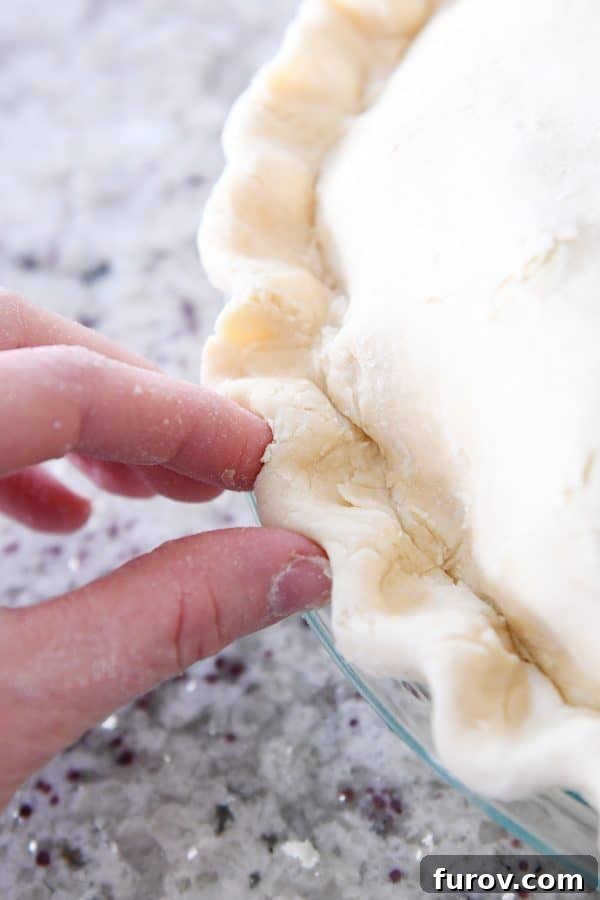
Now comes the fun part: fluting the edges. You can aim for picture-perfect crimps, or, as I’ve learned over the years, embrace the beauty of an imperfect, rustic pie. The goal is to create a seal and an attractive finish, but remember that charm often lies in imperfection. A pie made with love, regardless of its perfectly fluted edges, will always taste divine.
The Art of Baking: Slits, Egg Wash, and Avoiding Messes
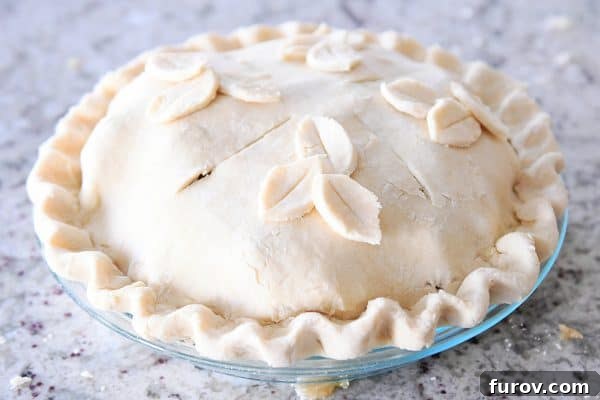
Before your masterpiece goes into the oven, there are a couple of crucial steps to ensure a perfectly baked pie. First, take a sharp paring knife and cut four slits into the top crust. These slits serve a vital purpose: they act as vents, allowing steam to escape during baking. This prevents the crust from becoming soggy and ensures that the pie filling cooks evenly and thoroughly.
Beyond their practical function, these slits are also a handy indicator of doneness. As the pie bakes, you can carefully peek into them to observe the filling. Look for active bubbling, which signals that the internal temperature has reached the right point and the fruit is softening beautifully. If you’re feeling particularly creative, you can even cut small decorative shapes from any leftover pie dough and place them on top, securing them with a dab of egg wash. Cute shapes or “weird blobs”—they all taste delicious!
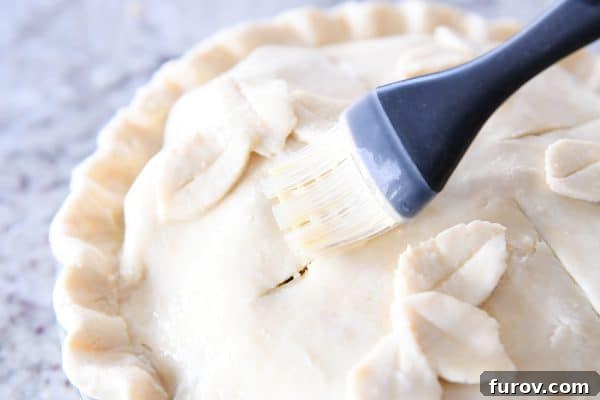
Speaking of egg wash, I highly recommend brushing the entire top crust with a simple mixture of one whisked egg and a tablespoon of water. This creates a beautiful, glossy finish and helps the crust achieve a rich, golden-brown hue as it bakes, making your homemade pie even more appealing.
Baking Your Pie: Expert Tips for a Clean Oven
Here’s a golden rule for baking pies that will save you a lot of grief: always place your unbaked pie on a foil-lined baking sheet. You’ll thank me profusely later. This apple cranberry pie, like many fruit pies, tends to bubble over slightly as its delicious filling cooks and caramelizes. Without protection, that sticky, sugary overflow will inevitably drip onto the bottom of your oven or an unlined pan, creating a dreaded, hard-to-clean mess.
I repeat: cleaning burnt, caramelized fruit off your oven is no fun at all. By simply lining a baking sheet with foil, you create a barrier that catches any drips. This small proactive step ensures a stress-free baking experience and a happy, non-cursing baker!
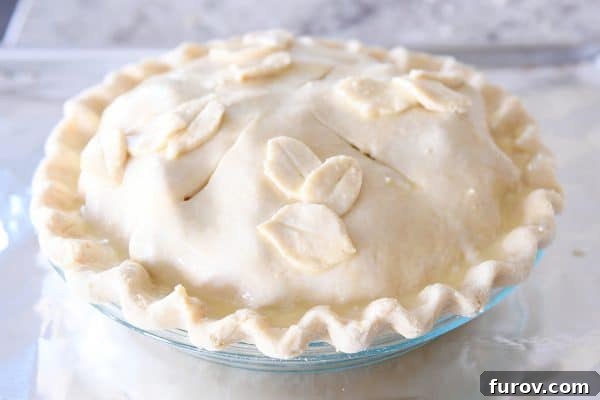
This pie typically bakes for about 65-75 minutes in my oven. However, baking times can vary based on your oven’s calibration and the thickness of your pie crust. Keep a close eye on the crust; if it begins to brown too quickly while the filling still needs more time, simply tent the top of the pie loosely with foil. This protects the crust from over-browning while allowing the filling to continue cooking to perfection. If you are using a glass pie plate, you should be able to see a lovely golden hue developing on the bottom crust, indicating it’s also cooking nicely.
Ensuring Your Apple Cranberry Pie is Perfectly Done
Knowing exactly when a pie is done can sometimes feel like a baker’s riddle, but there are clear indicators to guide you. A beautifully golden-brown crust and a vigorously bubbling filling are usually the most obvious signs. However, with fruit pies, it’s essential to confirm that the fruit inside is truly tender, especially when working with apples.
This is where those carefully cut slits in your top crust become invaluable. Gently pull the pie out of the oven for a moment and peer closely into these vents. You should see the filling bubbling consistently throughout, a sign that it’s reached a good internal temperature. To check the fruit’s tenderness, carefully insert a thin paring knife or the tines of a fork through one of the slits into the apples. If it slides in with little resistance, your fruit is perfectly cooked. If you feel a bit of firmness, simply return the pie to the oven for a few more minutes.
**One final tip:** When in doubt, it’s generally better to slightly overbake a pie than to underbake it. A slightly longer bake time ensures the fruit is tender and the filling is set, preventing a runny pie. As long as your crust isn’t burned, an extra few minutes in the oven can make all the difference in achieving that ideal texture and flavor.
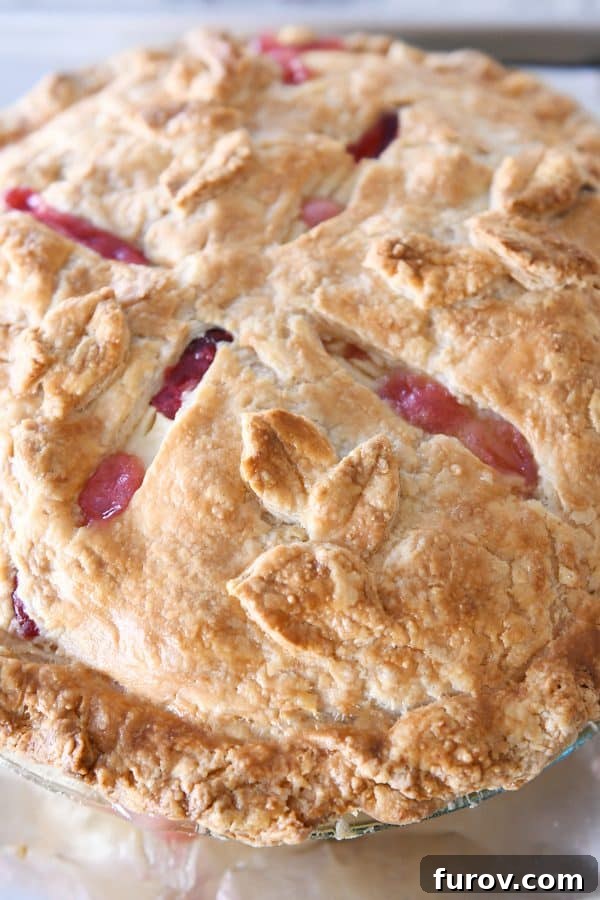
The Best Apple Cranberry Pie: A Holiday Showstopper
And there you have it – not just an apple pie, but truly the best apple cranberry pie I have ever tasted. Its arrival signals the official start of the holiday season for me, bringing a special meaning to our Thanksgiving table. While my kids might argue that dark chocolate and naps are more essential for my motherly patience, this pie certainly amplifies the joy in our home!
If you’re seeking to elevate your traditional Thanksgiving dessert offerings, or simply looking for a subtle yet impactful twist on a classic, this recipe is your golden ticket. The exquisite combination of tart cranberries and sweet apples, enveloped in that glorious caramel sauce, is guaranteed to impress every palate and create new, cherished holiday traditions. Prepare to be hailed as a culinary rock star!
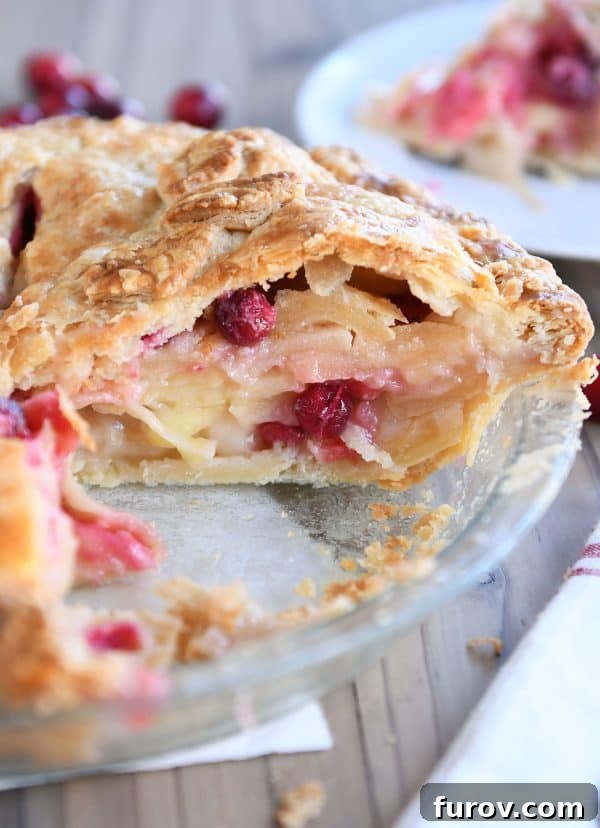
Making Your Holiday Pie in Advance: Tips for Success
A frequently asked question, especially around the busy holiday season, is whether pies can be made ahead of time. The answer is a resounding yes! I always prepare our holiday pies a day or two in advance to reduce last-minute stress.
Once your apple cranberry pie is completely baked and cooled, simply cover it loosely with foil. You can store it in the refrigerator, or if your fridge is overflowing, a cool garage works wonderfully. For fruit pies (excluding cream or dairy-based varieties), I’ve found they keep perfectly well at room temperature for up to 24 hours with no compromise in quality or safety.
When you’re ready to serve, about 20-30 minutes before dessert, I like to gently warm the entire pie in a 250-degree F oven. This brings out the aromatics and makes the crust wonderfully flaky again. Alternatively, individual slices can be quickly reheated in the microwave if you prefer them warm.
While I haven’t had consistent success freezing *unbaked* pies, I’ve successfully frozen fully baked and cooled fruit or pecan pies. To do so, wrap the cooled pie completely in a double layer of plastic wrap, then an additional layer of aluminum foil. Freeze it, then simply transfer it to the refrigerator to thaw overnight, or allow it to thaw at room temperature. Reheat using the same method described above for a warm, comforting slice.
One Year Ago: Instant Pot White Chicken Black Bean Chili {Slow Cooker Directions Included!}
Two Years Ago: Buttery, Flaky Make-Ahead Overnight Crescent Dinner Rolls {No Kneading/No Stand Mixer}
Three Years Ago: Chocolate Chip Cookie Pie
Four Years Ago: Stuffed Apple and Bacon Sweet Potato Casserole
Five Years Ago: Buttermilk Potato Rolls {Fluffiest Most Delicious Rolls I’ve Ever Met}
Six Years Ago: Healthy Applesauce Carrot Muffins {a.k.a. Carrot Cake Muffins}
Seven Years Ago: Chocolate Mousse Cheesecake Pie
Eight Years Ago: Sesame Chicken Stir-Fry
Apple Cranberry Pie
8 slices
4 hours 40 mins
55 mins
5 hours 35 mins
Pin
Ingredients
Pie:
- 9-inch double crust pie dough
- 4-5 medium apples, about 1.75 pounds; I use Honeycrisp, peeled, cored and sliced 1/8-inch thick (about 5-6 cups total)
- 2 tablespoons lemon juice
- 1 teaspoon almond extract
- Pinch salt
- 1 ½ to 2 cups (170 to 227 g) fresh cranberries
Sauce:
- ½ cup (113 g) salted butter
- ½ cup (71 g) all-purpose flour
- 2 tablespoons water
- ¾ cup (159 g) granulated sugar
- ½ cup (106 g) light brown sugar
Egg wash:
- 1 large egg
- 1 tablespoon water
Instructions
- Preheat oven to 375 degrees F. Place an oven rack in the middle or lower middle position of the oven. Line a large baking sheet with foil and set aside.
- In a large bowl, toss the sliced apples with the lemon juice, almond extract and salt. Add the cranberries and toss to combine.
- In a 10- or 12-inch skillet or small saucepan, melt the butter over medium heat. Stir in the flour and whisk constantly until smooth and well-combined. Add the water, granulated sugar and brown sugar and cook at a simmer, whisking or stirring constantly, for 1-2 minutes.
- Immediately pour the mixture over the apples and cranberries. Toss to combine. The sauce mixture may clump up a bit but it will thin out the more it is stirred together (or the longer it sits). It doesn’t have to be perfect.
- Roll out bottom crust and place evenly in pie plate (don’t stretch or pull it, just lift and tuck into the pie plate). Leave a 1- to 2-inch border all the way around.
- Scrape the apple/cranberry filling evenly into the pie plate (get all of the caramel mixture!) – try to get the apples in even layers instead of piled in at wonky angles. It will be piled pretty high; that’s ok as it will cook down in the oven.
- Roll out the top crust and place it over the filling. Trim the top crust evenly with the bottom crust (leaving about 1/2-inch overhang all the way around). Fold the bottom crust up and over evenly with edge of pie plate and press/pinch to seal. Flute the edges of the pie crust.
- Cut four slits with a sharp paring knife in the top crust.
- For the egg wash, whisk together the egg and water and brush a thin layer over the top and edges of the crust.
- Place the pie on the foil-lined baking sheet (important! the filling may bubble over a bit) and bake for 65-75 minutes until the crust is golden and filling is bubbling (tent the top of the pie with foil if it is browning too much partway through baking). If you are using a glass pie plate, the bottom crust should be lightly browned.
- Remove the pie from the oven and let cool completely, 4-5 hours (even longer is better). This is important so the pie isn’t soupy. If you like warm pie, individual pieces can be warmed in the microwave or the pie can be served warm, the filling just might be a little less set.
Notes
Pie Crust: this is my favorite pie crust recipe.
Apples: I almost always Honeycrisp apples in this pie, but you could use a different variety or a combination. Make sure to choose crisp apples that don’t turn to mush when baking.
Cranberries: if you want more cranberry in every bite, you could pulse the cranberries in a food processor until coarsely chopped.
Mel
Dessert
American
Bake
Calories: 411kcal
Carbohydrates: 62g
Protein: 3g
Fat: 18g
Saturated Fat: 9g
Cholesterol: 51mg
Sodium: 202mg
Fiber: 3g
Sugar: 41g
Recipe Source: from Mel’s Kitchen Cafe (inspired by this crazy popular recipe on allrecipes)