
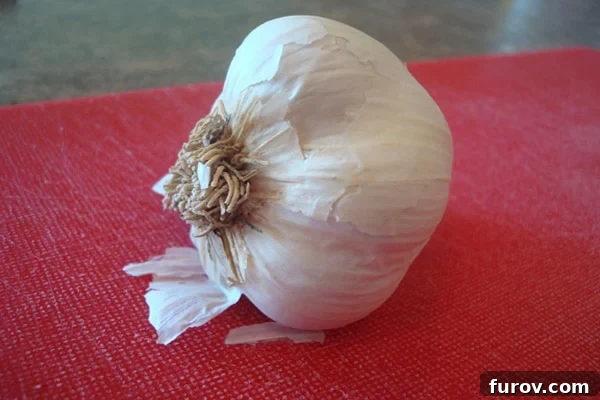
Welcome, culinary enthusiasts, to the ultimate guide for mastering one of the most fundamental yet often frustrating kitchen tasks: peeling and mincing garlic. Garlic, with its pungent aroma and unparalleled flavor, is a cornerstone of cuisines worldwide, transforming ordinary dishes into extraordinary culinary experiences. However, wrestling with its papery skin and sticky cloves can deter even seasoned cooks. Fear not! This comprehensive guide will equip you with easy-to-follow techniques, ensuring you can prepare garlic efficiently and effortlessly, enhancing your cooking adventures.
Whether you’re a novice in the kitchen or looking to refine your existing skills, we’ll delve into effective methods for separating cloves from the head, peeling them with ease, and achieving that perfect mince, all while embracing the fresh, vibrant taste that only freshly prepared garlic can offer. Let’s peel back the layers and uncover the secrets to perfect garlic prep!
Unveiling the Head of Garlic: Getting Started
Before we dive into the nitty-gritty of peeling and mincing, let’s begin with the star of our show: a whole head of garlic. While it might appear a bit rustic or “ugly” at first glance, trust us, beneath that protective outer layer lies a treasure trove of individual cloves, each bursting with flavor. The key to unlocking this flavor begins with efficiently separating these cloves from the main bulb.
Step 1: Liberating Cloves from the Head
The first crucial step in garlic preparation is to remove the desired number of individual cloves from the whole head. While some might painstakingly try to pry them apart, there’s a much simpler, more effective method that requires minimal effort and no special tools. This technique is designed to loosen the entire structure, making subsequent steps a breeze.
To begin, place the head of garlic on a sturdy cutting board with its pointy, stem-side down. This positioning provides a stable base and allows for optimal force distribution in the next step. Ensure your cutting board is stable and won’t slip during this process for safety.
Now, using the palm of your hand, apply significant downward pressure onto the garlic head. You’re aiming to “smash” it gently but firmly. You should feel the head “give” or loosen, similar to how a head of lettuce loosens when you press down to remove its core. The goal here isn’t to obliterate the garlic, but rather to break the connective membrane that holds the individual cloves together within the head. This action effectively dislodges the cloves from their tight formation, preparing them for easy removal. Don’t be shy with the force; a good, firm press is key to success here.
Once the garlic head has been sufficiently loosened by the force of your hand, the individual cloves will be much easier to manage. You can now easily pry your fingers in between the separated cloves to remove precisely the number you need for your recipe. This method is incredibly efficient, especially when you need multiple cloves and don’t want to struggle with peeling them one by one from an intact head. The remaining cloves can be stored as usual for future use.
Mastering the Peel: Effortless Garlic Skin Removal
With your individual garlic cloves separated, the next common hurdle is removing that stubborn, papery skin. Many cooks find this step to be the most tedious, as the skin often clings stubbornly to the clove, making it difficult to peel with just fingers. While small garlic cloves can be particularly frustrating, a simple technique can transform this chore into a quick and satisfying task. We want that papery white stuff gone, and thankfully, there’s an ingenious way to achieve it without a struggle.
The Gentle Smash Method for Peeling
This method leverages a bit of controlled force to loosen the skin without damaging the precious clove inside. It’s an essential skill for anyone who frequently cooks with fresh garlic.
First, place the garlic clove on your cutting board with its rounded side facing upwards. This orientation provides a stable surface for the next step, ensuring the clove doesn’t roll around and allows for even pressure application. Ensure your cutting board is clean and provides a stable, non-slip surface.
Now, grab your widest, flat-bladed chef’s knife. If you don’t have an adequately wide knife, the bottom of a small saucepan or even a heavy skillet can work just as effectively. Place the wide, flat part of the knife blade (or the bottom of your chosen alternative) directly on top of the garlic clove. Position it so that the entire clove is covered by the flat surface of your tool. Safety is paramount here; make sure your fingers are well clear of the blade’s edge.
With your free hand, give the flat of the knife a firm, quick tap-push action. This isn’t a full-blown smash that pulverizes the garlic; rather, it’s a controlled burst of pressure. The goal is simply to apply enough force to hear a slight “pop” and feel the skin around the clove loosen and crack. You don’t want to beat the clove to smithereens at this stage (we’ll explore that method for mincing in a moment); instead, you just want to create enough internal pressure to separate the papery skin from the edible clove. This gentle yet firm action ensures the skin is compromised without excessive damage to the garlic itself.
After this “love tap,” your garlic clove should look noticeably different. Take a moment to observe how the skin around the clove has ripped, creased, and visibly loosened. This is the perfect outcome! The structural integrity of the clove itself remains largely intact, but its protective papery layers are now compromised and ready for removal. This visual cue confirms that you’ve applied just the right amount of pressure, making the next step incredibly easy.
Now, pick up that once-stubborn clove. You’ll find that the papery skin can be gently pulled away with remarkable ease. The previous pressure has done all the hard work for you, separating the skin from the flesh. Discard the skin, and behold your perfectly peeled, “naked” clove. Isn’t it just the cutest little clove you’ve ever seen? Ready for the next stage of its culinary journey, it’s now primed to release all its aromatic potential into your dish.
Mincing Mastery: Transforming Cloves into Flavorful Bits
With your garlic cloves perfectly peeled, you now have some exciting options for how to further prepare them, depending on your recipe and preferred texture. From quick and easy pressing to robust, finely minced pieces, each method offers a slightly different result. Here, we’ll explore two primary approaches to mincing garlic, ensuring you can choose the best fit for your culinary needs.
Option 1: The Convenience of a Garlic Press
For those seeking speed and uniformity, the garlic press is an indispensable tool. It’s particularly useful when you need a consistent texture or are short on time. Once your clove is peeled (using the gentle smash method above), simply pop it into the press.
Take that beautifully peeled clove and toss it into your garlic press. Apply firm pressure on the handles, and watch as finely minced garlic emerges through the small holes on the other side. This method offers instant gratification, producing uniform bits of garlic that integrate smoothly into sauces, dressings, and stir-fries. It’s my method of choice for many recipes due to its efficiency and the consistent texture it provides. However, I understand that not everyone has a garlic press readily available, which leads us to our next versatile option.
While garlic presses are excellent for convenience, they do have a few considerations. Some argue that pressing garlic can slightly alter its flavor profile by breaking more cell walls and releasing more juices, leading to a stronger, sharper taste compared to finely chopped garlic. Additionally, cleaning a garlic press can sometimes be a minor chore due to the small holes. Nevertheless, for quick, consistent results, a garlic press remains a favorite for many home cooks.
Option 2: The Art of Knife Mincing (The “Hard Smash” Technique)
For those who prefer a more robust garlic flavor, desire specific textures, or simply don’t own a garlic press, knife mincing using a “hard smash” technique is the way to go. This method not only makes mincing easier but also unlocks a deeper garlic essence. For this approach, you can actually skip the “gentle smash” peeling step entirely. Instead, once you’ve removed the garlic clove from the head (as shown in our initial steps), you’ll proceed directly to a more aggressive smash.
Again, place the garlic clove rounded-side up on your cutting board. This ensures stability. This time, after you place the flat of your wide knife on top of the clove, you are going to apply a much greater force.
Now, channel all the force known to humankind (or at least a good, solid kitchen smash!) and slam your hand down on the flat of the knife – hard enough to utterly flatten and partially obliterate the garlic clove. You want it to be significantly crushed. It will look something like this: rather than just loosened, the clove will be pretty much flattened and its structure compromised. This is exactly what you want! The intense smash not only completely separates the skin from the garlic flesh but also pre-minces the clove, making the final chopping incredibly easy and fast. This method is particularly effective for releasing the maximum aromatic compounds from the garlic, resulting in a more potent flavor in your dishes.
Once again, you’ll find that the papery skins have been thoroughly separated and can be easily peeled away from the smashed garlic. Because the clove has been so thoroughly flattened and loosened, the skins will practically fall off, making removal from all the nooks and crannies surprisingly simple. Just gently gather and discard them.
Now, with your garlic clove pre-smashed into a nearly minced state, the actual chopping is minimal. All you should have to do is gently move your knife through the garlic one or two times, using a rocking motion, to achieve your desired fineness. The initial smash has done most of the work, breaking down the tough fibers. This makes quick work of what might otherwise be a tedious mincing process.
And thanks to this powerful pre-smash action, you’ll have beautifully and finely minced garlic in no time! This method yields a coarser, more rustic mince compared to a press, which many chefs prefer for its textural contribution and more intense, authentic garlic flavor. It’s perfect for sautéing, adding to marinades, or incorporating into dishes where garlic is meant to shine.
Beyond Mincing: Other Garlic Preparations
While mincing is a frequent requirement, garlic’s versatility extends to various cuts, each impacting flavor and texture differently. For a milder flavor and softer texture in dishes like roasted vegetables or confit, thinly slicing garlic cloves can be ideal. For a more intense but less overwhelming flavor than mince, grating garlic with a microplane zest or fine grater provides a paste-like consistency that melts into sauces. Knowing these options allows you to tailor your garlic preparation precisely to the demands of your recipe.
Storing Your Garlic (Prepped & Whole)
Proper storage ensures your garlic remains fresh and flavorful. Whole, unpeeled heads of garlic should be stored in a cool, dry, dark place with good air circulation, such as a mesh bag or an open basket, away from direct sunlight and humidity. Avoid refrigerating whole garlic, as it can encourage sprouting and lead to a rubbery texture. It can typically last for several weeks to months under these conditions.
Once peeled or minced, garlic’s shelf life significantly shortens. Peeled cloves can be stored in an airtight container in the refrigerator for about a week. Minced garlic, however, is best used immediately. If you have excess minced garlic, it can be frozen in small portions (e.g., in ice cube trays with a little oil) for up to several months. Always be cautious with storing garlic in oil at room temperature, as it can create an anaerobic environment conducive to the growth of Clostridium botulinum. If making garlic-infused oil, always refrigerate and use within a few days.
Conclusion: Embrace the Power of Garlic
There you have it – a comprehensive guide to effortlessly peeling and mincing garlic, unlocking its full potential in your kitchen. From the initial smash that liberates the cloves to the gentle tap that frees them from their papery skin, and finally, to the choice between the swift garlic press or the robust knife mince, you now possess the techniques to conquer this culinary staple. Freshly prepared garlic truly makes a difference in any dish, adding depth, aroma, and an undeniable zest. So, go forth, practice these methods, and let the magnificent flavor of garlic elevate your cooking to new heights. Happy cooking!