
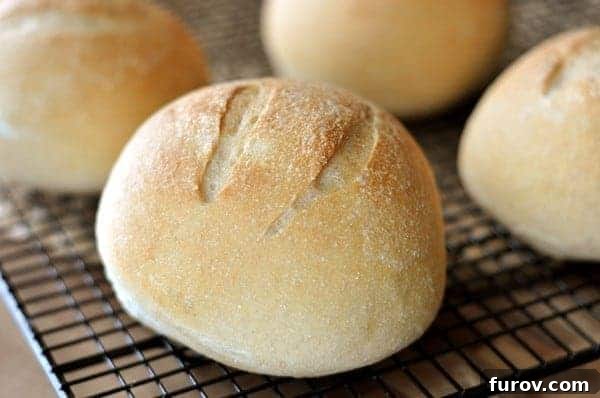
These homemade Artisan bread bowls are hearty and dense, providing the perfect edible vessel for scooping out and savoring a delicious, comforting soup.
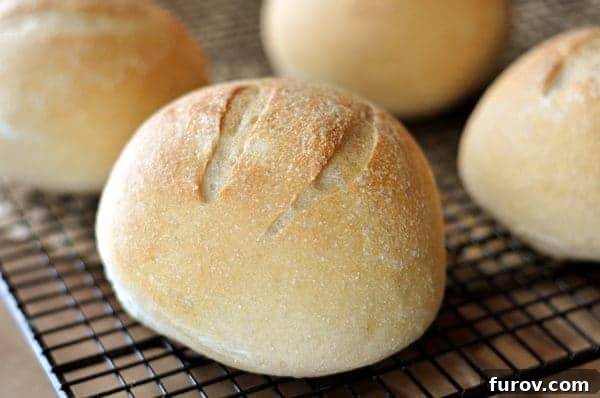
Homemade Artisan Bread Bowls: The Ultimate Edible Vessel for Your Favorite Soups
Imagine the sheer delight of a warm, crusty bread bowl, perfectly sculpted to cradle your favorite hearty soup. This isn’t just a meal; it’s an experience, transforming a simple bowl of soup into an extraordinary culinary adventure. Our homemade Artisan Bread Bowls are designed to deliver exactly that – a robust, dense, and wonderfully chewy bread that’s not only delicious on its own but also serves as the ultimate edible container for comforting stews, creamy chowders, or zesty chili. Forget flimsy, store-bought options; these artisan bread bowls promise a rustic charm and incredible flavor that elevates any soup night into a special occasion.
Why Bake Your Own Artisan Bread Bowls?
There’s an undeniable magic in homemade bread, and when that bread doubles as a bowl, the enchantment multiplies. Baking your own bread bowls offers a multitude of benefits that packaged alternatives simply can’t match. Firstly, the freshness and superior taste are unparalleled. You control the ingredients, ensuring no unwanted additives and a rich, authentic flavor profile that store-bought versions simply can’t replicate. The aroma of fresh bread filling your kitchen alone is worth the effort!
Secondly, customization is key. Want a slightly larger bowl for a generous serving of your favorite stew? Prefer a hint of whole wheat for added texture and nutrition? This artisan bread bowl recipe empowers you to tailor your creation to perfection, adjusting sizes and even experimenting with flour blends to suit your family’s preferences. Beyond taste and customization, there’s the profound satisfaction of creation. The therapeutic process of kneading dough, watching it rise, and then pulling golden-brown, perfectly formed bread bowls from the oven is immensely rewarding.
Moreover, homemade bread bowls are often more cost-effective than their gourmet bakery counterparts, allowing you to enjoy this luxurious dining experience without breaking the bank. And let’s be honest, few things impress guests quite like serving a steaming bowl of soup inside a beautifully baked, edible vessel. It’s a charming, rustic touch that makes any meal memorable and is a fantastic conversation starter. This recipe, building on a tradition of beloved bread bowl creations (including our classic favorite bread bowls), is meticulously crafted to bring that delightful experience right into your home kitchen, ensuring a perfect outcome every time.
The Secret to Incredible Artisan Bread Bowls: Flavor and Texture
What sets this Artisan Bread Bowl recipe apart and makes it stand out from the rest? It’s all about achieving that ideal balance of a hearty, dense crumb with a delightfully crisp-chewy crust. The secret lies in a carefully structured recipe that incorporates a crucial refrigeration step. This extended cold fermentation isn’t just a waiting game; it’s a flavor accelerator, allowing the dough to develop profound depths of taste that mimic the complexity of professional artisan loaves. The slow rise in the cold also contributes significantly to the bread’s incredible texture, ensuring a robust structure and that satisfying chewiness we all crave.
The result is a bread bowl that maintains its integrity without becoming soggy, even when filled with a rich, creamy chowder or a thick chili. Each bite offers a perfect blend of soft interior and firm, flavorful crust. We’ve simplified the process to ensure that even those new to bread making can achieve professional-quality results, guiding you from basic ingredients to stunning, golden-brown bread bowls. Whether you prefer to mix and knead by hand, with a stand mixer, or even a bread machine, the journey to these incredible edible bowls is straightforward and immensely gratifying. Get ready to impress yourself and your loved ones with these restaurant-quality bread bowls right from your own oven!
Artisan Bread Bowls Recipe
5 -6 bread bowls
6 hours
28 minutes
6 hours
28 minutes
Pin Recipe
Rate This Recipe
Ingredients
- 3 ¾ cups (533 g) all-purpose flour (see note on flour amount)
- ½ cup (71 g) whole wheat flour
- ¼ cup nonfat dry milk
- 2 teaspoons active dry or instant yeast
- 2 teaspoons salt
- 2 tablespoons vegetable oil or olive oil
- 1 ½ cups lukewarm water, enough to make a smooth, soft dough
Instructions
-
Activate the Yeast: In a large mixing bowl or the bowl of a stand mixer, let the yeast dissolve in the lukewarm water for about 5 minutes, until it becomes creamy and foamy. This indicates the yeast is active.
-
Combine Ingredients and Knead: Add the all-purpose flour, whole wheat flour, nonfat dry milk, salt, and oil to the yeast mixture. Mix by hand, with a stand mixer (using the dough hook attachment), or in a bread machine. Knead the dough for 7-10 minutes, or until it is smooth, elastic, and pulls away from the sides of the bowl. If kneading by hand, it should feel soft and slightly tacky but not sticky.
-
First Rise: Place the dough in a lightly greased bowl, turning once to coat. Cover the bowl with plastic wrap or a clean kitchen towel. Allow the dough to rise in a warm place for about 45 minutes, or until it has become visibly puffy and almost doubled in size.
-
Shape the Bread Bowls: Gently punch down the risen dough to release the air. Divide the dough into 5 or 6 equal pieces, depending on your desired bread bowl size. Roll each piece into a tight, smooth ball. Arrange the shaped dough balls on a lightly greased baking sheet or one lined with parchment paper, ensuring they have enough space between them.
-
Cold Fermentation (Crucial Step for Flavor and Texture): Cover the shaped bread bowls loosely with greased plastic wrap. Refrigerate them for a minimum of 4 hours, and up to 24 hours. This extended cold fermentation period is key to developing a rich, complex flavor and the signature crisp-chewy texture of artisan bread bowls.
-
Prepare for Baking: Two to three hours before you plan to serve, remove the bread bowls from the refrigerator. Uncover them and let them sit at room temperature for about one hour while your oven preheats. Preheat your oven to 425°F (220°C).
-
Slash and Bake: Just before placing them in the oven, use a very sharp razor blade or a serrated knife to make several shallow slashes (about ¼ to ½ inch deep) across the top surface of each bread bowl. This allows the bread to expand properly during baking. Bake the bread bowls for 22 to 28 minutes, or until they are deep golden brown and sound hollow when thumped on the bottom.
-
Cool: Carefully remove the baked bread bowls from the oven and transfer them to a wire cooling rack. Allow them to cool completely before slicing and serving. This is important for the interior texture to set properly.
Notes from the Baker
Flour Amount: As with all yeast doughs, the exact flour amount listed is a guideline, not a hard-and-fast rule (unless using a kitchen scale for precise weight measurements, which is highly recommended). Factors such as humidity, temperature, and altitude can significantly impact how much flour your dough will absorb. Instead of strictly adhering to the recipe’s measurement, judge when to stop adding flour by the dough’s texture: it should be smooth, soft, and slightly tacky but not sticky.
Working with Yeast: If you’re new to yeast baking, or simply want to refresh your knowledge, this tutorial on working with yeast offers helpful tips to ensure your dough rises perfectly every time.
Whole Wheat Flour Variations: You can easily experiment with the flour blend. I often use half to three-quarters finely ground white whole wheat flour with excellent results, lending a nuttier flavor and denser texture. For a truly rustic feel, you can even use 100% whole wheat flour (finely ground white wheat works best), though this will result in a noticeably denser bread bowl. If incorporating more whole wheat flour, add a few extra minutes to the kneading time to help develop the gluten adequately.
Mel
Bread
American
Bake
Nutrition Information (per 1 bread bowl):
Serving: 1 Bowl, Calories: 470kcal, Carbohydrates: 85g, Protein: 16g, Fat: 7g, Saturated Fat: 1g, Cholesterol: 1mg, Sodium: 969mg, Fiber: 5g, Sugar: 4g
Recommended Products
Recipe Source: adapted from King Arthur Flour
Expert Tips for Perfect Artisan Bread Bowls Every Time
Achieving bakery-quality artisan bread bowls at home is entirely within reach with a few simple techniques and considerations:
- Embrace the Dough’s Feel: As mentioned in the recipe notes, don’t be afraid to adjust flour quantities based on how your dough feels. It should be supple, smooth, and elastic, not overly stiff or excessively sticky. Humidity and even the brand of flour can affect absorption. Trust your hands!
- The Magic of Cold Fermentation: The 4-24 hour refrigeration step is not optional; it’s a game-changer. This slow, cold rise allows enzymes to break down starches, creating more complex flavors and a superior crumb structure. It also contributes significantly to the bread’s characteristic chewy texture and crisp crust. Plan ahead to include this crucial step.
- Perfect Kneading: Whether by hand or machine, proper kneading develops the gluten, which is essential for the bread’s structure and elasticity. Look for a dough that is smooth, cohesive, and passes the “windowpane test” – where a small piece of dough can be stretched thinly enough to see light through it without tearing.
- The Art of Slashing (Scoring): Don’t skip slashing the tops of your bread bowls before baking. This not only adds a beautiful, rustic aesthetic but also controls how the bread expands in the hot oven. It prevents uncontrolled cracking and ensures a more even rise, resulting in a lighter crumb and a beautiful crust.
- Achieving the Ideal Crust: For a truly artisan crust, consider placing a pan of hot water in the bottom of your oven during the first 10-15 minutes of baking. The steam helps to keep the crust soft initially, allowing the bread to fully expand before it hardens, leading to a thinner, crispier crust.
- Cooling is Key: Resist the urge to cut into your bread bowls right out of the oven. Cooling on a wire rack allows residual heat to escape and the internal structure to set properly. Cutting too soon can result in a gummy texture.
Serving Suggestions: What to Fill Your Bread Bowls With
These versatile artisan bread bowls are designed to elevate any meal. While they are a match made in heaven for nearly any soup, here are some ideas to get your culinary creativity flowing:
- Creamy Soups: Think classic New England Clam Chowder, creamy Broccoli Cheddar, or a rich Potato Leek Soup. The dense bread will hold up beautifully.
- Hearty Stews and Chilis: Beef Stew, Chicken Noodle Soup, or your favorite spicy chili are excellent choices. The bread helps to soak up all the flavorful broth and juices.
- Cheesy Dips: For an appetizer, hollow out smaller bread bowls and fill them with warm spinach and artichoke dip, or a decadent cheese fondue.
- Salads (with a twist): A rustic bread bowl can even hold a hearty grain salad or a chicken salad, offering a unique presentation for a lighter meal.
Don’t forget to cut out the top and some of the interior to create the cavity, reserving the removed bread for dipping or enjoying alongside your meal!
Storage and Reheating Your Bread Bowls
If you happen to have any leftover homemade artisan bread bowls, proper storage will help maintain their freshness:
- Storage: Once completely cooled, store unused bread bowls in an airtight container or a large resealable plastic bag at room temperature for up to 2-3 days. For longer storage, you can freeze them for up to 2-3 months. Wrap them tightly in plastic wrap, then aluminum foil.
- Reheating: To refresh frozen bread bowls, thaw them at room temperature. For both refrigerated and thawed bread bowls, a quick reheat in a preheated oven (around 350°F / 175°C for 10-15 minutes) will crisp up the crust and warm the interior, making them almost as good as fresh.
Other Recipes You Might Love:
Conclusion: Your Homemade Bread Bowl Adventure Awaits!
Embarking on the journey to create these homemade artisan bread bowls is more than just baking; it’s an investment in a truly memorable dining experience. The rich flavor, robust texture, and undeniable charm of these edible vessels will transform any soup night into a cherished occasion. With our clear, step-by-step instructions and expert tips, you have everything you need to bake perfect, golden-brown bread bowls that will impress everyone at your table. So grab your apron, gather your ingredients, and get ready to enjoy the ultimate comfort food experience. Your kitchen is about to become your favorite bakery!