
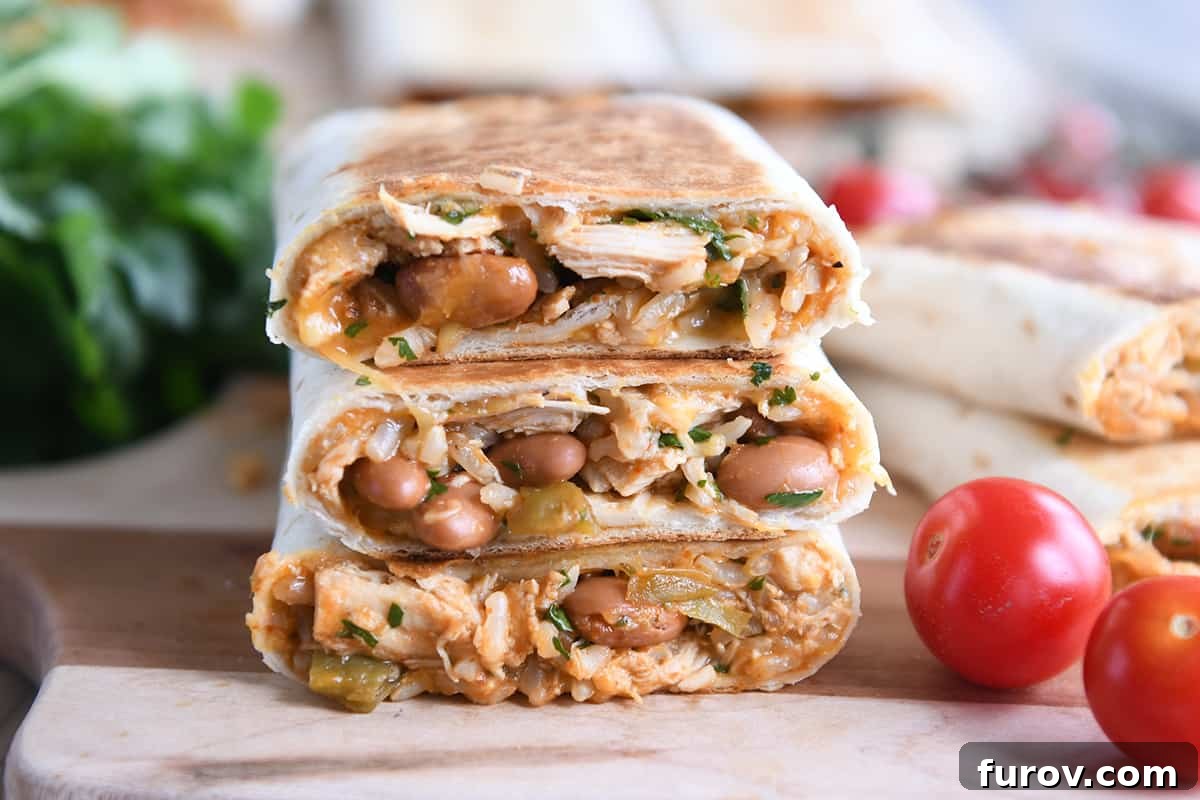
Crispy Chicken Enchilada Wraps: Your New Favorite Weeknight Meal
Searching for a dinner solution that’s both incredibly delicious and refreshingly easy? Look no further! These crispy chicken enchilada wraps are a culinary revelation, perfect for transforming any busy weeknight into a flavorful fiesta. Designed for speed, ease, and ultimate customization, they deliver an irresistible combination of crunchy texture and rich, savory filling. Prepare to make these a regular highlight in your meal rotation!
It’s no exaggeration to say that these wraps have earned their permanent spot in our household’s dinner rotation, gracing our table more often than almost any other meal. Their unparalleled versatility and sheer convenience make them an absolute lifesaver on the most hectic evenings, or whenever you crave a quick, wholesome, and profoundly satisfying bite that doesn’t compromise on taste.
One of the most remarkable aspects of this recipe is its incredible adaptability. Whether you have an abundance of leftover cooked chicken, a handful of various beans in your pantry, or just a bit of rice, these wraps empower you to whip up a fantastic meal with minimal fuss. They aren’t just a recipe; they’re a smart solution for thoughtfully utilizing ingredients you already possess, transforming them into something truly special and deeply comforting.
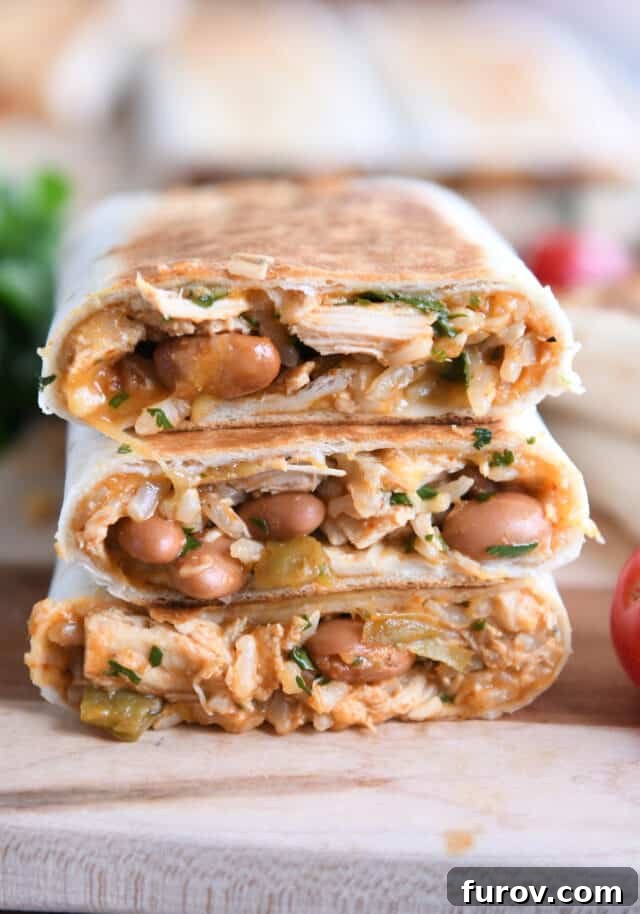
Crafting the Perfect Filling: Endless Customization for Your Crispy Enchilada Wraps
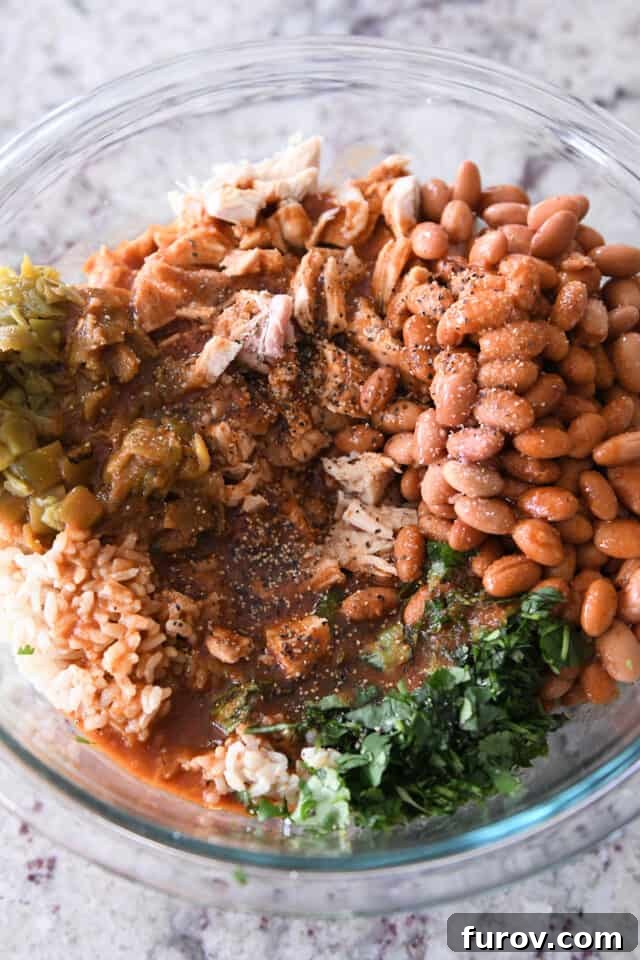
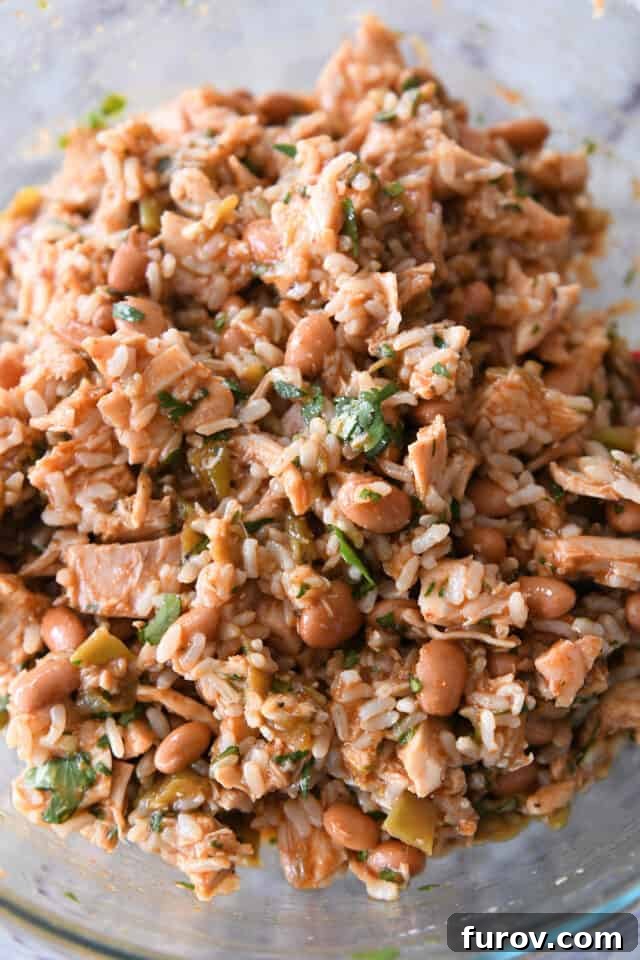
The true genius of these wraps begins with their remarkably versatile filling. This recipe is designed to be highly adaptable, catering to your specific taste preferences, the ingredients you currently have on hand, and even various dietary needs. The core components effortlessly create a harmonious blend of textures and deeply satisfying flavors, all while providing ample room for your personal culinary touch.
Essential Ingredients for a Flavorful Base:
- Cooked Rice: Both brown and white rice perform beautifully in this recipe, adding substantial bulk and a pleasing textural contrast. Don’t hesitate to utilize any leftover rice you might have – it makes prep even quicker!
- Beans: My personal favorites are pinto or black beans, as they contribute a wonderfully creamy texture and an earthy flavor that perfectly complements the other ingredients. For a slightly different consistency, you can even lightly mash a portion of the beans before mixing.
- Cooked Chicken: Shredded or finely diced, cooked chicken is an excellent choice. This is where convenience foods like rotisserie chicken, any leftover grilled or roasted chicken, or even quality canned chicken truly shine, drastically reducing preparation time. For those seeking variety, cooked ground beef serves as an equally delicious and hearty substitute.
- Green Chiles: These peppers introduce a mild, tangy zest without overpowering the overall flavor profile. You can easily adjust the heat level of your wraps by selecting mild, medium, or hot varieties of green chiles.
- Enchilada Sauce: Whether your preference leans towards green or red, a good quality enchilada sauce is the unifying element that ties all the individual flavors together. Opt for a sauce with a thicker consistency to ensure the filling remains robust and not overly watery. Most importantly, choose a brand whose taste you genuinely enjoy.
- Fresh Lime Juice: A generous squeeze of fresh lime juice is crucial for brightening the entire mixture. Its vibrant acidity cuts through the richness, elevating and harmonizing all the complex flavors.
- Cilantro: Freshly chopped cilantro is indispensable, providing a burst of aromatic, herbaceous flavor that is absolutely essential for that authentic Mexican-inspired taste.
- Pantry Spices: Ground cumin, dried oregano, chili powder, salt, and black pepper are the unsung heroes that infuse the filling with warmth, depth, and that comforting, familiar enchilada profile. Consider adding a pinch of garlic powder for an extra layer of savory aroma.
As you can clearly see, the true appeal of this recipe lies in its profound flexibility. Do not hesitate to creatively swap out the meat for plant-based proteins, experiment with different types of beans, or even combine green and red enchilada sauces for a truly unique flavor adventure. I’ve personally experimented with making these wraps entirely meatless, doubling the bean quantity when rice was scarce, and even successfully using green salsa as a stand-in for enchilada sauce when needed. This is genuinely a recipe designed to work *with* you, graciously embracing whatever culinary components you have readily available.
Perfecting the Art of Assembly: A Step-by-Step Guide for Flawless Crispy Wraps
Assembling these wraps correctly is not merely a suggestion; it’s a critical step for achieving that coveted crispy exterior and, equally important, ensuring that the flavorful filling remains snugly contained within. By following these straightforward steps, you’ll consistently create a perfectly folded wrap, ready for its crispy transformation:
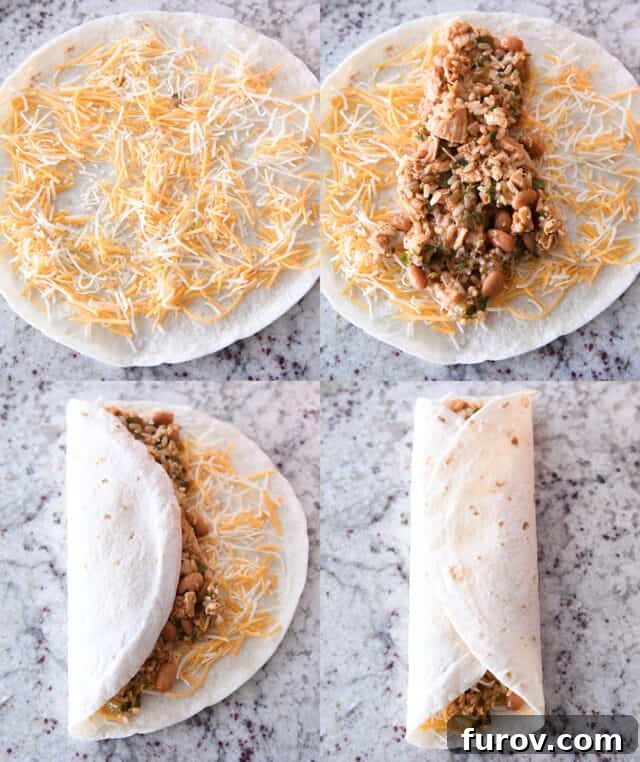
- Prepare Your Tortilla: Begin by laying an 8- or 9-inch flour tortilla flat on your work surface. Generously sprinkle shredded cheese (a Mexican blend, Monterey Jack, or cheddar works exceptionally well) evenly over the tortilla, making sure to leave a slight, clean border around the entire edge. This initial layer of cheese will serve as a delicious, melty glue during the cooking process.
- Add the Filling: Carefully spoon approximately 1/2 cup of your prepared enchilada filling in a wide, even strip down the center of the tortilla. It’s important to resist the temptation to overfill, as an excessively loaded wrap will become challenging to fold neatly and prone to spilling its delicious contents.
- The First Fold: Gently but firmly fold one side of the tortilla up and over the filling, pulling it snugly against the mixture. This initial fold begins to secure the ingredients.
- The “Thirds” Folding Technique: Now, bring the other side of the tortilla over, ensuring it slightly overlaps the first folded side. This specific method effectively folds the tortilla into thirds, resulting in a robust, flat, and securely packaged wrap – a distinct advantage over the typically rounded shape of a burrito.
- Flatten and Prepare: With the wrap now folded, gently press down on it with your palm or a spatula to flatten it slightly. This crucial step helps to compact the filling and cheese, further preparing the wrap for cooking and ensuring it maintains its desirable flat shape as it crisps up beautifully on the griddle.
The Secret to Ultimate Crispiness: Cooking Your Enchilada Wraps to Golden Perfection
What truly elevates these enchilada wraps from good to absolutely extraordinary is the remarkable transformation they undergo during the cooking process. The exterior achieves an incredibly desirable golden-brown crispness, while the interior heats through beautifully, becoming warm, bubbly, and bursting with rich flavor. Mastering this perfect crispiness hinges on two critical steps that are absolutely essential and should never be overlooked:
Crucial Step One: Prepare the Seam Side. Prior to introducing your wrap to the heat, it is vital to lightly brush olive oil or generously spray cooking spray directly onto the seam side of the folded tortilla. This isn’t merely for enhancing crispness; it serves as a critical sealant, helping to hold the wrap together.
Crucial Step Two: Cook Seam Side Down First. Always, without exception, place the assembled wrap seam side down onto your preheated griddle or skillet. This initial contact with the hot surface rapidly helps to seal the tortilla’s seam, which is paramount for preventing the wrap from unraveling when it’s time to flip. The oil or cooking spray applied to this side simultaneously works its magic, contributing significantly to the development of that irresistible golden-brown crispness.
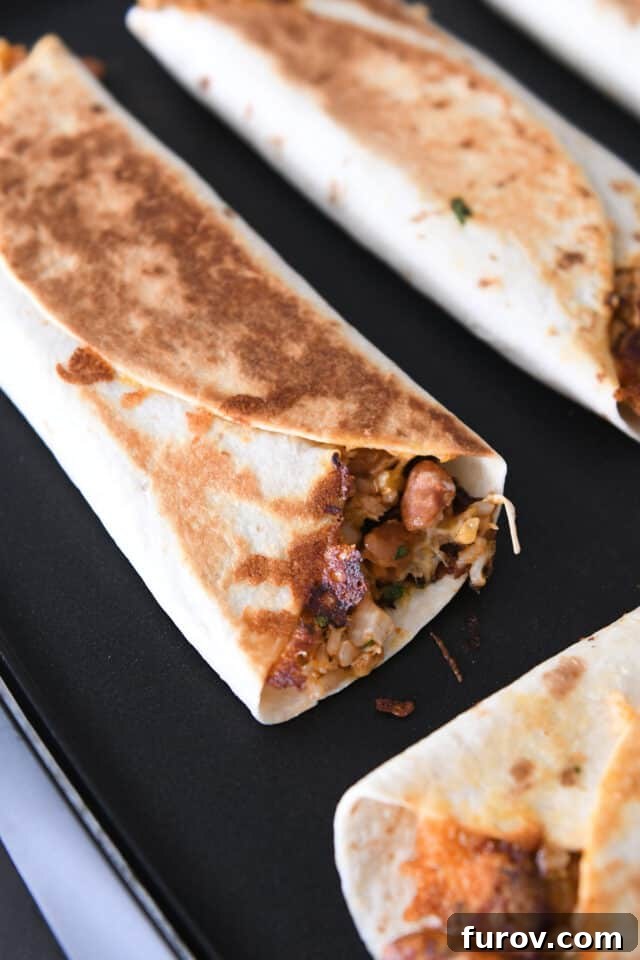
To begin, heat a large non-stick griddle or skillet over medium heat until it is thoroughly hot. An electric griddle set to approximately 350 degrees F (175 C) is an ideal choice, offering consistent heat. Once your cooking surface is ready, carefully place your prepared wraps, seam side down, onto the griddle or pan. Allow them to cook undisturbed for about 2-4 minutes, or until that initial side achieves a beautiful golden-brown color and feels wonderfully crisp to the touch.
While the first side is cooking to perfection, you can take a moment to lightly spray or brush the uncooked top side of the wraps with a bit more oil. Then, using a wide, sturdy spatula, very carefully flip each wrap to its other side. It’s entirely normal if a small amount of filling slightly escapes during this flip; there’s no need to worry! Simply use your spatula to gently tuck any loose filling back into the ends of the tortilla as it continues to cook.
Continue cooking the wraps on the second side for another 2-4 minutes, or until this side also becomes gloriously golden brown and crisp. By this point, you should be able to sense that the delicious filling inside is piping hot, and the cheese has achieved a wonderfully melted, bubbly consistency. The culmination of this careful cooking process is a sensationally crispy exterior that beautifully gives way to a warm, rich, and lusciously cheesy interior.
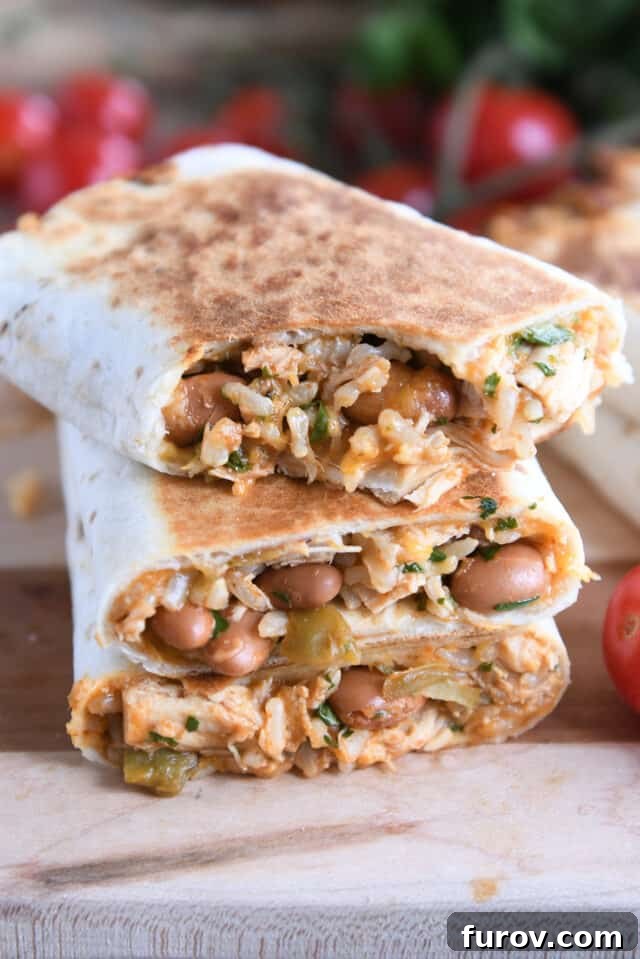
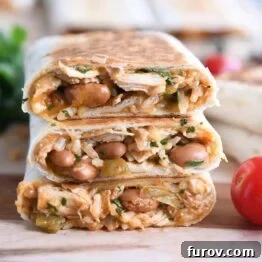
Once your wraps have reached that coveted state of beautiful crispness and are piping hot, carefully transfer them to a sturdy cutting board. I typically slice them in half diagonally; this presentation not only makes them easier to handle and eat but also allows for a lovely stacking presentation. Dinner in our home is almost always a wonderfully casual affair, and these crispy chicken enchilada wraps fit that relaxed vibe perfectly.
For those incredibly busy evenings when family members are rushing out the door to sports practices, evening classes, or other commitments, these wraps prove to be an outstanding grab-and-go meal option. Simply wrap each cooked wrap snugly in aluminum foil to keep it warm, and they are ready to be enjoyed on the move, providing a wholesome and satisfying meal wherever life takes you.
Bonus Tip: Prepare in Advance and Freeze for Future Feasts! These versatile wraps also freeze exceptionally well, making them an ideal candidate for meal prepping. Prepare a larger batch as directed, cook them until they are beautifully golden, and then allow them to cool completely. Once cooled, individually wrap each wrap tightly in plastic wrap, followed by a layer of aluminum foil, and then freeze them for up to 3 months. When you’re ready for another quick and delicious meal, simply reheat them in a preheated oven or an air fryer until they are thoroughly heated through and, crucially, crispy once again. They will taste every bit as delicious as if they were freshly made!
Elevate Your Wraps: Delicious and Dynamic Topping Ideas
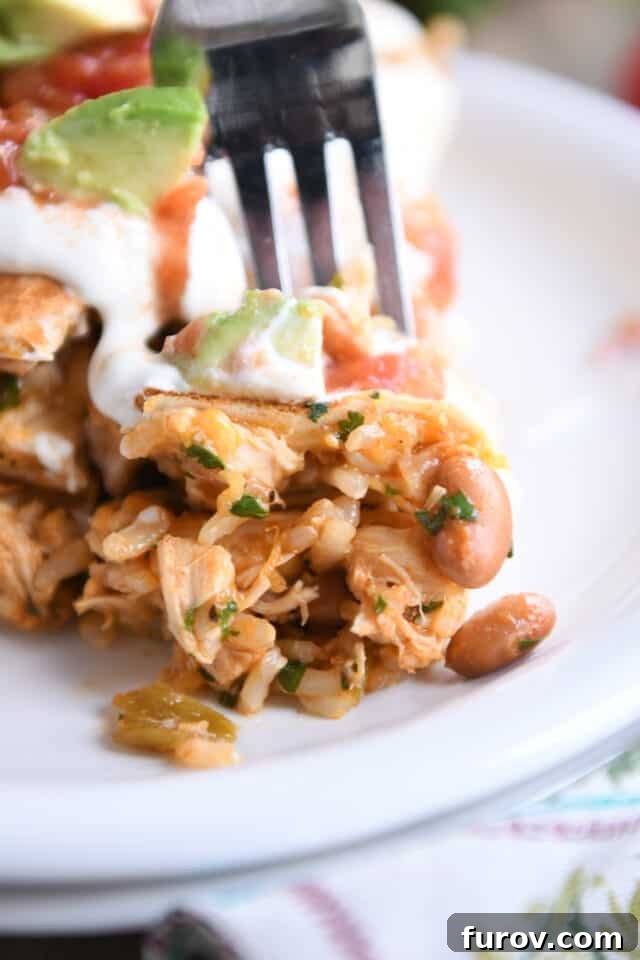
While these crispy chicken enchilada wraps are undeniably delicious consumed plain, straight off the griddle, they truly ascend to new culinary heights when generously adorned with an array of fresh, vibrant, and incredibly flavorful toppings. Envision them as a delightful culinary canvas, eagerly awaiting your favorite Mexican-inspired condiments!
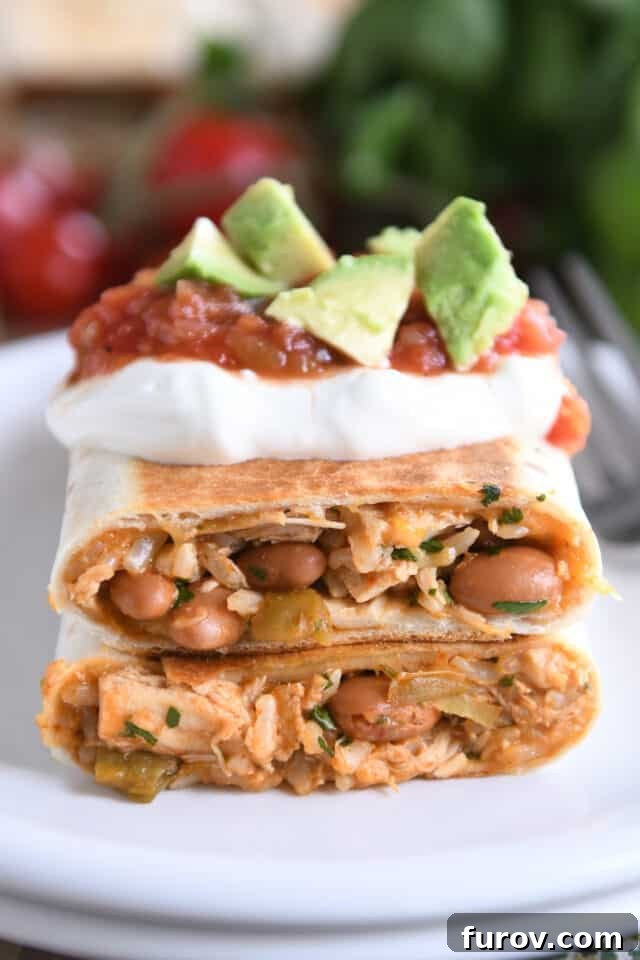
Elevate your wraps by piling them high with classic, refreshing choices such as cool, tangy sour cream (or a lighter Greek yogurt for a healthier alternative), a dollop of vibrant homemade or premium store-bought salsa, and creamy, perfectly ripe slices of fresh avocado or a spoonful of rich guacamole. Essentially, any topping you would typically enjoy with your favorite tacos or traditional enchiladas will be an exquisite and perfect fit for these wraps.
For an extra layer of indulgent pleasure, I highly recommend trying them dipped into warm, velvety white queso. The harmonious combination of the shatteringly crispy tortilla, the deeply savory and satisfying filling, and the luxurious, rich cheese dip creates an absolutely divine culinary experience – truly a taste sensation that transports you directly to food heaven!
Versatility at Its Best: A Truly Great Meal for Any Occasion
The concept of crispy wraps, particularly those featuring tender chicken, has been a long-standing and cherished favorite in kitchens everywhere. The core appeal of these culinary creations lies deeply in their incredible adaptability and the sheer ease with which they can be prepared. Over the years, I’ve had the immense pleasure of developing and enjoying numerous variations, all built upon the same fundamental principles of customizability, delicious flavor, and that utterly satisfying crunch:
- Classic Crispy Chicken Wraps
- Zesty Crispy Southwest Chicken Wraps
- Flavorful Crispy Bacon Ranch Chicken Wraps
And rest assured, there are always more exciting and innovative variations bubbling up in my culinary imagination! What makes all these recipes, including today’s star – the crispy chicken enchilada wraps – so universally beloved is their inherent flexible nature. You are genuinely encouraged to “follow your heart” – and more practically, the contents of your fridge and pantry – to tweak, adapt, and create a meal that perfectly suits your current mood, cravings, and available ingredients.
Each time we prepare these delightful enchilada wraps, they somehow manage to taste just a little bit different, a beautiful reflection of the unique combinations of ingredients and seasonings we choose to incorporate. This wonderful dynamic quality ensures that they never become mundane or boring. We sincerely hope that you will discover as much joy, ease, and mouth-watering deliciousness in these versatile wraps as we consistently do!
Perfect Pairings: What to Serve With Crispy Chicken Enchilada Wraps
To transform your meal into an even more complete, balanced, and utterly satisfying experience, consider serving these crispy chicken enchilada wraps alongside a fresh and vibrant side dish. Here are some excellent and complementary choices that will enhance your dining:
- A simple yet refreshing bowl of crisp, vibrant fresh fruit.
- A selection of crunchy, raw vegetables served with your favorite creamy dip, such as The Best Veggie Dip.
- A light and zesty Chopped Mexican Green Salad with a bright Cilantro-Lime Vinaigrette.
Explore More Delicious Recipes From Our Archive:
- One Year Ago: Crazy Good Kale and Wild Rice Salad
- Two Years Ago: Peanut Butter Banana Bread
- Three Years Ago: Slow Cooker Beef Vegetable Noodle Soup
- Four Years Ago: Instant Pot Banana Bread Steel Cut Oats
- Five Years Ago: Perfect Instant Pot Beef Stew
- Six Years Ago: Southwestern Chicken Barley Chili
- Seven Years Ago: Brownie Pudding
- Eight Years Ago: White Chocolate Oatmeal Craisin Coconut Cookies
- Nine Years Ago: Vanilla Bean White Chocolate Mousse Cheesecake
- Ten Years Ago: DIY Homemade Yogurt
Crispy Chicken Enchilada Wraps Recipe
8
wraps
20
mins
10
mins
30
mins
Pin Recipe
Ingredients
For the Filling:
- 2 to 3 cups cooked, chopped chicken (rotisserie, leftover, or canned)
- 1 ½ to 2 cups cooked white or brown rice
- 1 (15-ounce) can pinto or black beans, thoroughly rinsed and drained
- 1 (10-ounce) can green or red enchilada sauce (see note for consistency)
- 1 (4-ounce) can diced green chiles, drained (mild or medium)
- ½ cup freshly chopped cilantro
- 1 tablespoon fresh lime juice, adjust to taste
- ½ teaspoon ground cumin
- ½ teaspoon dried oregano
- ¼ teaspoon chile powder
- ¼ teaspoon garlic powder
- ¼ teaspoon salt, or to taste
- Pinch of black pepper, or to taste
For the Wraps:
- 8 to 10 (8-inch) flour tortillas
- 2 to 3 cups shredded Mexican-style cheese (or a delightful blend of Monterey Jack and cheddar)
- Cooking spray or olive oil, for pan-frying
Instructions
-
In a large mixing bowl, combine all the filling ingredients: chopped chicken, cooked rice, rinsed and drained beans, enchilada sauce, drained green chiles, chopped cilantro, fresh lime juice, ground cumin, dried oregano, chile powder, garlic powder, salt, and black pepper. Mix thoroughly until all components are well combined and evenly distributed.
-
To assemble each wrap: lay one 8-inch tortilla flat on a clean surface. Sprinkle approximately 1/4 cup of shredded cheese over the tortilla, ensuring you leave a small, uncovered border around the edges. Then, spoon about 1/2 cup of the prepared filling mixture down the center of the tortilla, forming a wide, even strip.
-
Carefully fold one side of the tortilla tightly over the filling. Next, fold the opposite side over the first, creating a neat, flat package. This method folds the tortilla into thirds. Gently press down on the wrap to flatten it slightly; the goal is a thick, flat profile, not a rounded one like a traditional burrito.
-
Heat a large non-stick griddle or skillet over medium heat until it is adequately hot. If you are using an electric griddle, set the temperature to approximately 350 degrees F (175 degrees C) for optimal results.
-
Lightly spray or brush the seam side of each assembled wrap with nonstick cooking spray or a touch of olive oil. Carefully place the wraps, seam side down first, onto the hot griddle or pan. Cook for about 2-4 minutes, or until that side turns a beautiful golden brown and develops a satisfying crisp texture.
-
While the first side is cooking, lightly spray or brush the top side of the wraps with additional cooking spray or olive oil. Using a wide, sturdy spatula, carefully flip each wrap to cook the second side. It is quite normal for a small amount of filling to spill out during this process; simply use your spatula to gently tuck any loose filling back into the ends of the wrap. Gently press down on the wraps to help them flatten and crisp up evenly.
-
Continue to cook for another 2-4 minutes on the second side, until it is also perfectly golden and crispy. At this point, the filling inside should be thoroughly heated through, and the cheese should be wonderfully melted and bubbly.
-
Transfer the crispy wraps to a cutting board, slice them in half (often diagonally), and serve warm with your preferred toppings, such as sour cream, salsa, guacamole, or a delicious white queso!
Recipe Notes
Unleash Customization: This recipe is designed to be incredibly flexible, encouraging you to make it your own. Feel free to adjust the quantities of any ingredient based on your personal preference or what you have available. For instance, cooked ground beef serves as an excellent, hearty substitute for chicken. High-quality canned chicken (such as the Costco brand) can also yield wonderfully convenient and tasty results. Don’t shy away from experimenting with different types of beans, or even incorporating finely diced vegetables like bell peppers or corn for added flavor and nutrition.
Managing Spice Levels: Always be mindful of the inherent spiciness of your chosen enchilada sauce and green chiles. If you prefer a milder wrap, opt for mild sauces and chiles. For those who relish a bit more heat, selecting medium or hot varieties will deliver a delightful kick to your meal.
Meal Prep & Freezing Instructions: These wraps are an absolute dream for meal preparation! Assemble and cook them as directed in the instructions, then allow them to cool completely to room temperature. Once cooled, wrap each individual wrap tightly in plastic wrap, followed by a layer of aluminum foil, and store them in the freezer for up to 3 months. To reheat, simply place them in a preheated oven (at 375°F/190°C) for 15-20 minutes, or until they are thoroughly heated through and, crucially, regain their irresistible crispiness. An air fryer is another fantastic option for reheating, often restoring that incredible crunch even more effectively!
Mel Gunnell
Main Course
American, Mexican-inspired
Stovetop, Griddle
Nutrition Information (per wrap, approximate)
- Serving Size: 1 wrap
- Calories: 385 kcal
- Carbohydrates: 42g
- Protein: 26g
- Fat: 12g
- Saturated Fat: 6g
- Cholesterol: 56mg
- Sodium: 857mg
- Fiber: 7g
- Sugar: 4g
*Nutrition facts are an estimate and will vary based on specific ingredients, brands, and preparation methods used.
Recommended Products
Explore More Irresistible Crispy Wrap Recipes: