
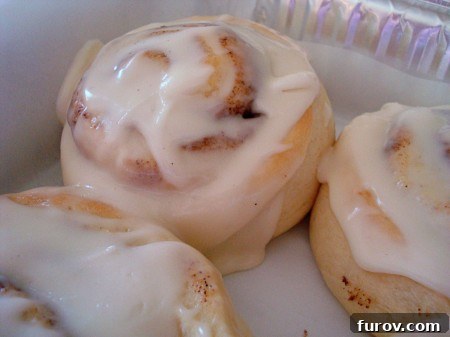
Irresistible Homemade Cinnamon Rolls: A Step-by-Step Guide to Fluffy Perfection
There’s something uniquely comforting about the aroma of freshly baked cinnamon rolls wafting through the house. It’s a scent that promises warmth, sweetness, and a moment of pure bliss. As I slowly but surely recover from recent surgery, embracing the simple joys has become my daily mantra. For weeks, I admit, I’ve been indulging in the well-deserved luxury of rest and recovery. But today, the yearning for the familiar rhythm of the kitchen, for the creative act of baking, finally called me back.
Leaving the comfort of my bed to engage in a bit of baking may seem like a small feat, but after a period of intense rest, it felt like a monumental achievement. And what better way to mark this return to my family and food blog than with a batch of gloriously soft, sticky, and utterly delicious homemade cinnamon rolls? This wasn’t just baking; it was an act of rediscovery, a gentle nudge back into the passions that make life so sweet.
These particular cinnamon rolls, which I had the pleasure of baking a few weeks prior, were an absolute triumph. They proved to be the perfect gesture of gratitude for our wonderful neighbors who had lent a hand with some concrete work in our backyard. Watching their faces light up as they enjoyed these homemade treats reminded me of the profound joy that comes from sharing good food and good company. It’s moments like these that truly make the effort worthwhile.
While I cherish a long-standing, tried-and-true cinnamon roll recipe that ingeniously incorporates vanilla pudding into the dough for an extra tender crumb, this new recipe has carved out a special place in my heart. It’s equally delicious, remarkably forgiving, and destined to become a staple in my baking repertoire. My heartfelt thanks go to Melanie from The Sister’s Cafe for sharing this incredible creation. Her photographs of these magnificent rolls were so captivating, I knew instantly I had to try them. I highly recommend visiting her site for a visual feast that will surely inspire you to roll up your sleeves and get baking!
Why Choose Homemade Cinnamon Rolls?
In a world full of shortcuts and store-bought conveniences, making cinnamon rolls from scratch might seem like a daunting task. However, the rewards far outweigh the effort. Homemade cinnamon rolls offer an unparalleled freshness, a melt-in-your-mouth texture, and a depth of flavor that simply cannot be replicated by mass-produced versions. You control the quality of ingredients, ensuring no artificial additives, and you can customize the amount of cinnamon, sugar, and butter to suit your preference. Beyond the taste, there’s a therapeutic aspect to the baking process itself – the kneading, the waiting for the dough to rise, and the glorious moment when those golden-brown spirals emerge from the oven, filling your home with an intoxicating aroma. It’s more than just a treat; it’s an experience.
Mastering Yeast Dough: A Baker’s Essential Guide
One of the most crucial aspects of baking truly exceptional cinnamon rolls lies in understanding and properly handling yeast dough. This is often where aspiring bakers feel intimidated, but with a few key insights, you can master it. As a general rule with yeast doughs, it’s vital to remember that the specified flour amount in any recipe serves as a guideline, not a strict mandate. Unless a precise weight measure is given, which calls for the accuracy of a kitchen scale, you’ll need to develop a feel for the dough.
Many environmental factors play a significant role in how much flour your dough will actually need. Humidity levels in your kitchen, the ambient temperature, and even your altitude can all impact the dough’s hydration. This means that on a humid day, you might need slightly less flour, while a dry day might call for a bit more. The key is to trust your senses: look at the dough, feel its texture, and observe its behavior. A perfectly floured dough should be firm yet still slightly sticky, elastic, and smooth. It should pull away from the sides of the bowl or your hands but not be dry or crumbly. For a deeper dive into working with yeast and identifying that perfect dough consistency, this tutorial on yeast offers invaluable guidance.
The Ultimate Homemade Cinnamon Rolls Recipe
This recipe promises light, airy rolls generously swirled with a sweet cinnamon filling and topped with a decadent butter cream glaze. Prepare to impress everyone lucky enough to try them!
Ingredients:
- 2 cups milk
- 2 cubes butter (1 cup), plus 1 cube (1/2 cup) for filling
- 2 packages active dry yeast (4 ½ teaspoons)
- 1/3 cup warm water (105-115°F / 40-46°C)
- 1 1/3 cups granulated sugar, plus extra for filling
- 1 teaspoon salt
- 4 large eggs, beaten
- 8 cups all-purpose flour (approximate, see note above)
- **For the Filling:** Ample cinnamon (to taste) & sugar
Directions:
- Prepare the Milk & Butter: In a medium saucepan, gently heat the 2 cups of milk and 2 cubes (1 cup) of butter together over low heat until the butter is completely melted. Be careful not to boil the milk. Once melted, remove from heat and set aside to cool until it is lukewarm (around 100-110°F / 38-43°C). It’s crucial that the mixture is not too hot, as it will kill the yeast.
- Activate the Yeast: In a large mixing bowl, combine the 2 packages of yeast with 1/3 cup of warm water. Let it stand for 5-10 minutes. The mixture should become foamy, indicating the yeast is active and alive.
- Combine Wet Ingredients: To the activated yeast mixture, add the cooled milk and butter mixture, 1 1/3 cups of granulated sugar, 1 teaspoon of salt, and the 4 beaten eggs. Whisk gently until well combined.
- Incorporate Flour: Gradually add the flour, starting with 4 cups, and mix until just incorporated. Then, gradually add the remaining 4 cups of flour, one cup at a time, mixing well after each addition. Remember the note about flour quantity: stop adding flour when the dough forms a firm but still slightly sticky ball that pulls away from the sides of the bowl. It should be soft and elastic, not dry.
- First Rise: Cover the bowl with a clean kitchen towel or plastic wrap (lightly sprayed with cooking spray to prevent sticking). Place the dough in a warm, draft-free place for 1 ½ to 2 hours, or until it has nearly doubled in size.
- Prepare Work Surface & Divide Dough: Once the dough has risen, gently punch it down to release the air. Turn the dough out onto a lightly floured surface. Divide the dough in half.
- Roll and Fill the First Half: Take one half of the dough and knead it briefly, just enough to form a smooth ball. Using a rolling pin, roll the dough into a large rectangle, approximately ½ inch thick. Spread ½ cube (1/4 cup) of the softened butter evenly over the entire surface of the dough, making sure to go all the way to the edges. Sprinkle a generous coating of granulated sugar over the butter, followed by an equally generous layer of ground cinnamon. Don’t be shy with the cinnamon; it’s the heart of the flavor!
- Roll and Slice: Starting from one long edge, carefully roll the dough into a tight log. Pinch the seam closed firmly to seal the roll. To slice, the easiest method is to use unflavored dental floss. Slide a piece of floss under the roll, cross the ends over the top, and pull firmly to cut through the dough, creating perfectly round slices. Each slice should be about 1 ½ to 2 inches thick.
- Arrange for Second Rise: Place the sliced cinnamon rolls onto a cookie sheet lined with a Silpat baking mat or parchment paper, leaving a little space between each roll.
- Repeat for Second Half: Repeat steps 7, 8, and 9 with the remaining half of the dough.
- Second Rise: Cover the cookie sheets with a clean dishtowel or plastic wrap (again, sprayed with cooking spray) and return them to a warm, draft-free place for their second rise. This can take anywhere from 2 to 5 hours, depending on the warmth of your environment and the vigor of your yeast. The rolls should noticeably double in size. This slow rise is crucial for developing flavor and achieving a truly tender texture.
- Bake: Preheat your oven to 350°F (175°C). Bake the cinnamon rolls for approximately 10-15 minutes, or until they are barely browned on the edges. Be careful not to overbake, as this will dry them out. They should still be soft and slightly pale in the center.
- Cool & Glaze: Remove from the oven and let the rolls set on the baking sheet for about 5 minutes. While still warm, generously drizzle with the prepared Butter Cream Glaze.
This recipe yields approximately 3-4 dozen delicious cinnamon rolls, perfect for sharing or freezing for later enjoyment.
The Perfect Butter Cream Glaze
No cinnamon roll is complete without a luscious, sweet glaze. This butter cream glaze is incredibly easy to make and perfectly complements the warm, spicy rolls.
Glaze Ingredients:
- 1 cube softened butter (1/2 cup)
- 1 teaspoon vanilla extract
- Dash of salt
- Dash of cream of tartar (optional, for extra creaminess and stability)
- 1 1/2 lbs powdered sugar (confectioners’ sugar)
- Scalded milk or cream (start with 2-3 tablespoons)
Glaze Directions:
In a medium bowl, combine the softened butter, vanilla extract, salt, and cream of tartar (if using). Gradually add the powdered sugar, alternating with small amounts of scalded milk or cream. Scalding the milk (heating it until just before boiling) can help create a smoother glaze. Start with a few tablespoons of milk and add more, a teaspoon at a time, until you reach your desired consistency. For cinnamon rolls, you want a glaze that is a little thinner than regular frosting – pourable but still opaque enough to coat the rolls beautifully. It should drizzle smoothly without being too watery or too stiff. Whisk well until completely smooth and free of lumps.
Pro Tips for Cinnamon Roll Success
- Don’t Rush the Rise: Patience is truly a virtue when working with yeast. Allow the dough ample time to rise in both stages. A slower, colder rise (e.g., in the refrigerator overnight for the second rise) can even develop deeper flavors.
- Quality Ingredients: Use fresh yeast, good quality butter, and fresh eggs for the best results. The quality of your ingredients directly impacts the final taste.
- Generous Filling: Don’t be shy with the butter, sugar, and cinnamon in the filling. This is where a significant amount of the rolls’ flavor comes from. A thick, gooey layer is what you’re aiming for.
- Even Rolling: Try to roll your dough into an even rectangle with consistent thickness. This ensures that all your rolls bake uniformly and have a similar swirl.
- Freezing Options: You can freeze unbaked rolls! Arrange them on a baking sheet, freeze until solid, then transfer to a freezer-safe bag. When ready to bake, thaw overnight in the refrigerator, then let rise at room temperature until doubled before baking. You can also freeze baked, unglazed rolls. Thaw and warm gently in the oven before glazing.
- Serving Suggestions: While perfect on their own, warm cinnamon rolls are delightful with a cup of coffee or tea, or as a special breakfast treat on holidays or lazy weekends.
Embrace the Joy of Baking
Making homemade cinnamon rolls is more than just following a recipe; it’s an act of love, patience, and creativity. From the moment the yeast begins to bubble to the final drizzle of glaze, each step contributes to a truly rewarding experience. The satisfaction of pulling a pan of golden, aromatic rolls from your oven is unmatched, and the joy of sharing them with loved ones makes every moment worthwhile. So, whether you’re a seasoned baker or just embarking on your culinary journey, I wholeheartedly encourage you to try this recipe. It’s a sweet reminder that sometimes, the best things in life are made right in your own kitchen.