
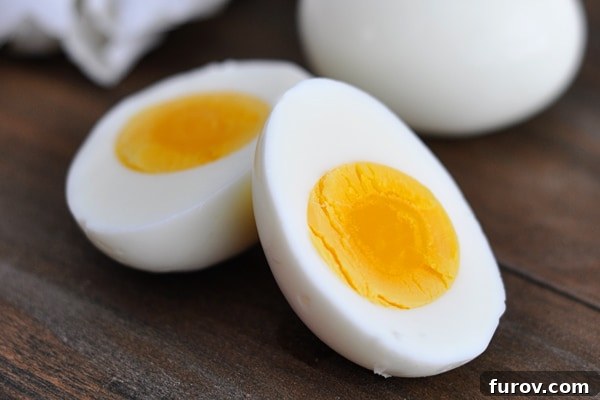
Mastering the Perfect Hard-Boiled Eggs: An Easy-Peel, No-Fail Method
For years, the quest for perfectly cooked, easy-to-peel hard-boiled eggs has been a culinary challenge for many. While seemingly simple, achieving that flawless yolk and smooth shell removal often feels like a lottery. From frustrating sticky shells to unsightly green rings around the yolk, common pitfalls can turn a quick snack into a kitchen dilemma.
But fear not! We’re finally sharing the tried-and-true method that guarantees success every time. Forget the myths and embrace the science-backed techniques that will transform your egg-boiling experience. Whether you’re a seasoned chef or a kitchen novice, this comprehensive guide will equip you with everything you need to know to create impeccable hard-boiled eggs for any occasion.
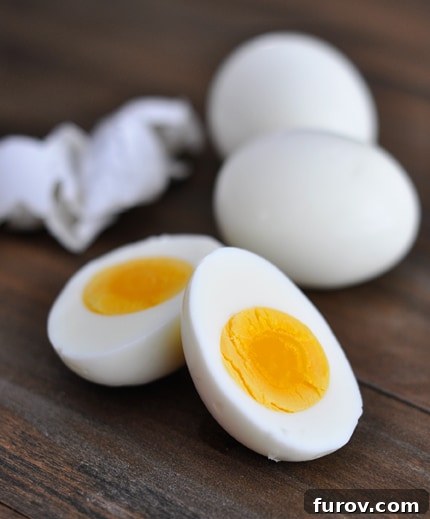
Why Hard-Boiled Eggs Are a Kitchen Staple
Hard-boiled eggs are more than just a breakfast item; they are a nutritional powerhouse and an incredibly versatile ingredient. Packed with high-quality protein, essential vitamins (like B12, D, and A), and minerals (like iron and selenium), they make an excellent addition to a healthy diet. Their convenience makes them ideal for:
- Quick Snacks: A protein-rich bite that keeps you feeling full and energized.
- Meal Prep: Easily made in batches for grab-and-go breakfasts or additions to lunches throughout the week.
- Salads: Elevating simple greens to a satisfying meal.
- Sandwiches: The star of classic egg salad or a hearty addition to club sandwiches.
- Appetizers: The foundation for beloved deviled eggs, perfect for parties and gatherings.
With their affordability and long shelf life in the fridge, hard-boiled eggs truly earn their spot as a culinary essential. And let’s be honest, few things are as satisfying as a perfectly cooked egg.
The Secret to Effortlessly Peelable Eggs: It’s All About Age and Shock!
The most common frustration with hard-boiled eggs is undoubtedly the peeling process. We’ve all been there: bits of egg white stubbornly clinging to the shell, leaving cratered, imperfect eggs. The key to easy peeling lies primarily in two factors: **the age of the eggs** and **the temperature shock** they receive after cooking.
The Importance of Egg Age
Contrary to popular belief, fresh eggs are a nightmare to peel. This is because the albumen (egg white) in fresh eggs has a lower pH, which makes it adhere more strongly to the inner membrane of the shell. As an egg ages, its pH naturally increases, causing the albumen to shrink slightly and the membrane to separate more easily from the egg white. Therefore, for truly easy-to-peel hard-boiled eggs, use eggs that are at least a week or two old. Plan ahead by purchasing your eggs in advance and letting them sit in your refrigerator until you’re ready to boil them.
The Magic of an Ice Bath
Another critical step for easy peeling is the immediate transfer of cooked eggs to an ice bath. This rapid cooling process does two important things: it stops the cooking process instantly, preventing overcooked yolks, and it causes the egg white to contract quickly, pulling it away from the shell’s inner membrane. This separation makes peeling significantly smoother and less prone to tearing the egg white.
Addressing Common Myths: Salt and Other Tricks
You may have heard various tips and tricks over the years: adding salt, vinegar, or even baking soda to the boiling water. While some people swear by these methods, their scientific impact on peeling is generally minimal compared to egg age and the ice bath. Adding a bit of salt to the water may help slightly with coagulation if an egg cracks, but it won’t magically make fresh eggs peel like old ones. Our focus remains on the most effective, tried-and-true techniques.
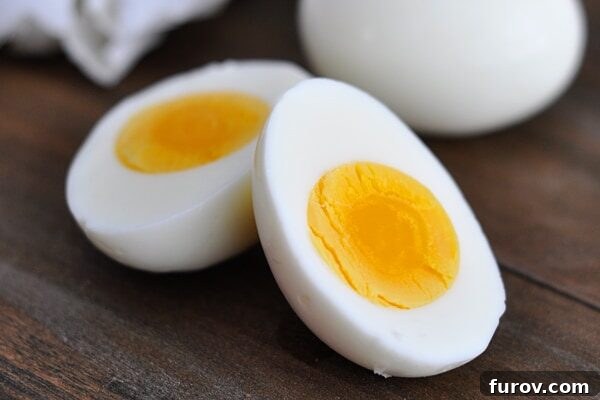
This foolproof method has been our go-to for years, ensuring perfect hard-boiled eggs for everything from our weekly breakfast rotation to festive deviled eggs during the spring season. Now, let’s dive into the step-by-step instructions.
Hard-Boiled Eggs: A No-Fail Method
5 mins
15 mins
20 mins
6-8 hard-boiled eggs
Pin
Ingredients
- 6-8 large eggs (ideally 1-2 weeks old for easy peeling)
- 1 teaspoon salt (optional, for every 6-8 eggs)
- Cold water
Instructions
-
Prepare the Eggs for Boiling
Carefully place your desired number of eggs in a single layer at the bottom of a saucepan. Ensure they are not crowded. Cover the eggs with cold water by at least one inch. If using, add about 1 teaspoon of salt for every 6-8 eggs to the water. This can help prevent further cracking if an egg shell breaks during boiling.
-
Bring to a Rolling Boil
Place the uncovered saucepan over medium-high heat. Bring the water to a rapid, rolling boil. This means the water should be bubbling vigorously and continuously. Watch closely to ensure the water doesn’t boil over, but reaches a strong boil.
-
Remove from Heat and Let Sit
Immediately remove the pan from the heat once a rolling boil is reached. Do not let the eggs continue to boil. Cover the pan tightly with a lid and let the eggs sit in the hot water for 15-17 minutes. The exact time depends on how firm you prefer your egg yolks and the size of your eggs. For perfectly firm yet creamy large egg yolks, we recommend exactly 16 minutes. Adjust to 15 minutes for slightly softer yolks or 17 minutes for very firm yolks.
-
Prepare an Ice Water Bath
While the eggs are sitting, prepare a large bowl filled with ice and cold water. This ice bath is a crucial step for easy peeling and preventing the dreaded green ring around the yolk.
-
Shock the Eggs
Once the sitting time is complete, use a slotted spoon to carefully transfer each egg from the hot water directly into the ice water bath. Discard the hot water from the saucepan. Let the eggs sit in the ice water bath for at least 5-10 minutes. This rapid cooling halts the cooking process and helps the egg whites separate from the shell membrane, making them much easier to peel.
-
Peel and Enjoy!
After their ice bath, the eggs are ready to be peeled or stored. For easiest peeling, gently tap the egg all over on a hard surface to create many tiny cracks. Then, start peeling at the wider end of the egg, where the air pocket is usually located, working your fingers underneath the membrane. Peeling under a gentle stream of slightly warm running water can also aid in separating the shell from the egg white. Enjoy your perfectly hard-boiled, easy-to-peel eggs!
Notes
Egg Age is Key: For the absolute easiest-to-peel hard-boiled eggs, the age of the eggs is paramount. Older eggs (about one to two weeks past their purchase date) peel significantly better than fresh eggs. If you plan on boiling eggs, buy them a week in advance and store them in your refrigerator. This simple trick makes a huge difference and eliminates the frustration of sticky shells.
Preventing the Green Ring: The green-grey ring sometimes seen around the yolk is due to a reaction between sulfur in the egg white and iron in the yolk, caused by overcooking. Our precise timing and immediate ice bath method are designed to prevent this, ensuring beautifully golden yolks every time.
Mel Gunnell
Recommended Products
Troubleshooting Common Hard-Boiled Egg Problems
Even with the best method, sometimes issues arise. Here’s how to tackle them:
- Green Ring Around the Yolk: This is a tell-tale sign of overcooking. The sulfur in the egg white reacts with iron in the yolk, forming ferrous sulfide, which has a greenish hue. To prevent this, stick to the exact cooking times (15-17 minutes) and always use an immediate ice bath to stop the cooking process quickly.
- Cracked Shells During Boiling: Cracks usually happen when cold eggs are suddenly plunged into hot water, causing rapid expansion. To minimize this, always start with cold water covering your eggs and bring them to a boil together. Some people also gently pierce a tiny hole in the wide end of the egg with a thumbtack before boiling to release air and prevent cracking, though this isn’t strictly necessary with our method.
- Still Hard to Peel Even After the Ice Bath: If you’ve followed all steps and still struggle, the most likely culprit is very fresh eggs. Remember, the older the egg, the easier it will peel. Give your newly purchased eggs a week or two in the fridge before boiling them for best results.
Storage Tips for Hard-Boiled Eggs
Proper storage ensures your perfect hard-boiled eggs stay fresh and safe to eat:
- Unpeeled Eggs: Store unpeeled hard-boiled eggs in their shells in the refrigerator for up to 7 days. Keeping the shells on helps protect them from absorbing odors and drying out.
- Peeled Eggs: If you peel your eggs in advance, store them in an airtight container in the refrigerator, preferably covered with a damp paper towel or in a bowl of cold water (changing the water daily) to prevent them from drying out. Peeled eggs are best consumed within 5 days.
Always store hard-boiled eggs in the coldest part of your refrigerator.
Creative Ways to Enjoy Your Perfect Hard-Boiled Eggs
Once you’ve mastered the art of easy-peel hard-boiled eggs, a world of culinary possibilities opens up:
- Classic Deviled Eggs: The quintessential party appetizer. Simply halve your hard-boiled eggs, scoop out the yolks, mix with mayonnaise, mustard, and seasonings, then pipe back into the whites.
- Egg Salad Sandwiches: Chop peeled eggs, mix with your favorite egg salad dressing (mayo, mustard, celery, onions), and serve on bread or lettuce wraps. Try our Lightened Up Egg Salad Sandwich recipe!
- Salad Topping: Add sliced or chopped hard-boiled eggs to green salads, Cobb salads, or tuna salads for an extra boost of protein and texture.
- Ramen Topping: A soft-boiled egg is often preferred for ramen, but a perfectly hard-boiled egg can also add richness and protein.
- Simple Snack: A sprinkle of salt and pepper is all you need for a satisfying, healthy snack.
- Nicoise Salad: A French classic featuring tuna, green beans, potatoes, and of course, hard-boiled eggs.
- Breakfast Power Bowl: Combine with quinoa, avocado, and vegetables for a nutritious start to your day.
Other Recipes Like This:
Conclusion: Your Journey to Perfect Hard-Boiled Eggs Begins Now
Say goodbye to frustratingly difficult peeling and green-tinged yolks. With this comprehensive, no-fail method, you’re now equipped to make perfect hard-boiled eggs with effortless peeling every single time. Remember the key takeaways: older eggs are your best friend, an immediate ice bath is non-negotiable, and precise timing is crucial for that ideal yolk consistency.
Experiment with the cooking times to find your personal preference, and don’t hesitate to incorporate these versatile gems into your weekly meal rotation. From quick breakfasts to elegant appetizers, perfect hard-boiled eggs are a simple pleasure that enhances countless dishes. Give this method a try, and prepare to be amazed by the consistent, delightful results!
Recipe Source: Mel’s Kitchen Cafe