
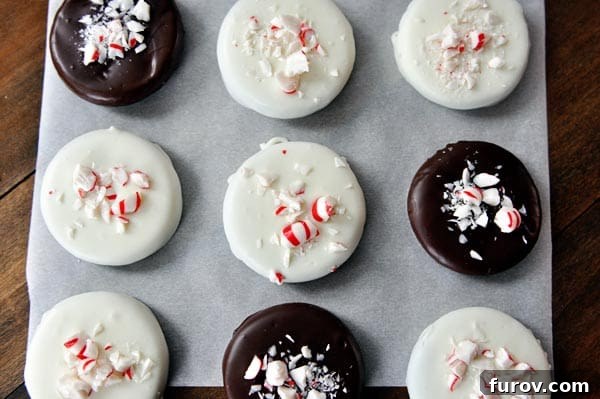
Indulge in the unparalleled delight of homemade thin mint cookies, a truly exceptional take on the beloved classic. These mint chocolate masterpieces are not just delicious; they are a sensational experience!
Hello, fellow cookie enthusiasts! My name is Mel, and I freely admit to a profound, perhaps even obsessive, love for Girl Scout Thin Mint cookies. Their crisp texture, rich chocolate, and invigorating mint flavor create an irresistible combination that I find incredibly hard to resist. In fact, during their fleeting selling season, I often have to exercise extreme self-control to keep myself from buying them in bulk. It’s a testament to their addictive quality when a single cellophane-wrapped roll disappears far too easily, if you catch my drift!
My passion for these iconic treats led me on a quest to create a homemade version that captures all the magic of the original, but with the added joy of baking them fresh in my own kitchen. The holiday season, especially, becomes the perfect excuse to whip out my trusty knockoff recipe. While these delectable homemade thin mint cookies make fantastic gifts, I must confess that very few ever make it out the door. The aroma alone is enough to send anyone into a cookie-craving frenzy!
Why Bake Your Own Thin Mints? The Ultimate Homemade Advantage
Beyond the sheer indulgence, there are numerous compelling reasons to embark on your own homemade thin mint cookie journey. First and foremost, you gain year-round access to these beloved cookies. No more waiting anxiously for the Girl Scout cookie season to roll around! Imagine a sudden craving for that perfect mint-chocolate crunch in the middle of summer – with this recipe, it’s just a few steps away.
Secondly, making them yourself means you’re in control of the ingredients. You can opt for high-quality cocoa, real butter, and pure peppermint extract, ensuring a superior flavor profile that rivals, and often surpasses, the store-bought version. This also allows for customization; perhaps you prefer a darker chocolate, a bolder mint, or even a different type of sprinkle. The possibilities are endless!
Finally, there’s an undeniable joy in the baking process itself. From mixing the fragrant chocolate-mint dough to carefully dipping each cookie in a luxurious coating, it’s a therapeutic and rewarding experience. And let’s be honest, the satisfaction of sharing (or secretly hoarding!) a batch of these exquisite cookies that you’ve crafted from scratch is truly unmatched. It’s a wonderful activity to do with family, creating lasting memories along with delicious treats.
Passing Down the Thin Mint Love
It seems I’ve successfully passed on my deep affection for Thin Mints to my children. We collectively devour these cookies with an enthusiasm that borders on legendary. And here’s a fantastic bonus: these cookies freeze beautifully, even after being dipped in chocolate, which extends their deliciousness for weeks. This makes them perfect for baking ahead for holidays, unexpected guests, or simply ensuring a steady supply for those inevitable mint-chocolate emergencies.

Crafting the Perfect Crispy Mint Chocolate Cookie Base
The foundation of these magnificent cookies is a simple yet incredibly flavorful minty chocolate cookie dough. The process begins with combining your dry ingredients: flour, cocoa powder, baking soda, baking powder, and salt. The type of cocoa powder you choose can subtly influence the final result – Dutch-process will lend a darker, richer hue and a slightly mellower chocolate flavor, while natural cocoa will provide a more intense chocolate punch with a reddish-brown tint. Both work wonderfully, so feel free to use your preference or whatever you have on hand.
Next, softened salted butter is creamed with granulated sugar until light and fluffy, creating the perfect base for our rich dough. Incorporating a large egg and an egg yolk adds moisture and richness, contributing to the desirable crispness of the final cookie. A crucial step, and perhaps the most exciting for mint lovers, is beating in pure peppermint extract. This is where the signature mint flavor comes alive, transforming the chocolate dough into something truly special.
Once the flour mixture is slowly incorporated, the dough is shaped into two discs and chilled. This chilling process is vital; it prevents the cookies from spreading too much during baking, ensuring they maintain their delicate, thin shape. After chilling, the dough is rolled out to a precise 1/8-inch thickness. This thinness is key to achieving that satisfying snap when you bite into a homemade thin mint. Using a 2-inch round cutter, perfect circles are created, ready for their final chilling stage in the freezer before baking. Freezing the cut cookies ensures they hold their shape impeccably and bake up perfectly crisp.
Baking the frozen cookie rounds until they are dry to the touch, typically between 12-14 minutes, is another critical step. The goal is a thoroughly baked cookie that’s crisp, not soft or chewy, mirroring the texture of the classic Thin Mint. Once cooled on a wire rack, these undipped chocolate mint cookies are already a treat in themselves, but the true magic happens next: the dipping station!
The Art of Dipping: Chocolate Coatings and Festive Flourishes
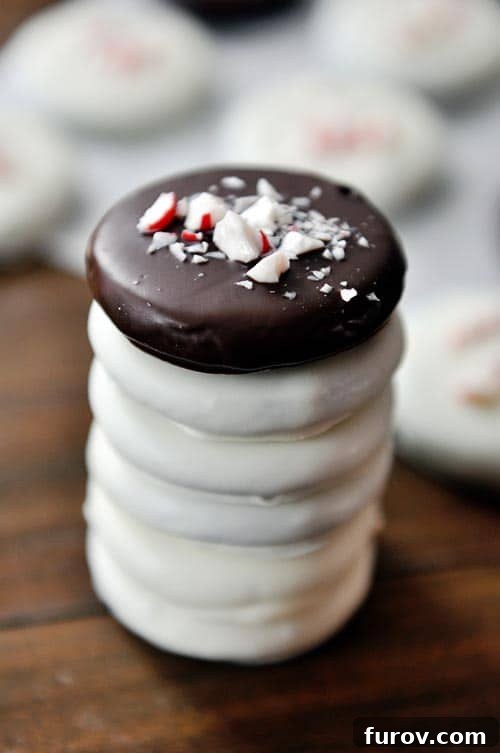
Over the years, after countless batches baked for every holiday season and many impromptu cravings, I’ve refined this recipe to simplify the process while elevating the flavor. A significant enhancement has been adding dark chocolate as a dipping option alongside the original white chocolate. This offers a delightful contrast and caters to different chocolate preferences, ensuring there’s a perfect thin mint for everyone.
Melting the chocolate is a delicate art. Whether you choose the microwave at short intervals with 50% power and frequent stirring, or a classic double boiler on the stove, patience is key to achieving a smooth, glossy consistency. If you’re using both white and dark chocolate, remember to melt them separately to maintain their distinct flavors and appearances.
Dunking the cooled, crispy cookies one by one into the luxurious melted chocolate is the most satisfying part. A fork is your best friend here, helping to fully submerge each cookie and then gently lift it, allowing any excess chocolate to drip away. A light scrape against the edge of the bowl ensures a clean finish. Carefully transfer the dipped cookies onto parchment or wax paper. This is also the opportune moment to add any optional crushed peppermint candies, creating a festive visual and an extra burst of minty crunch.
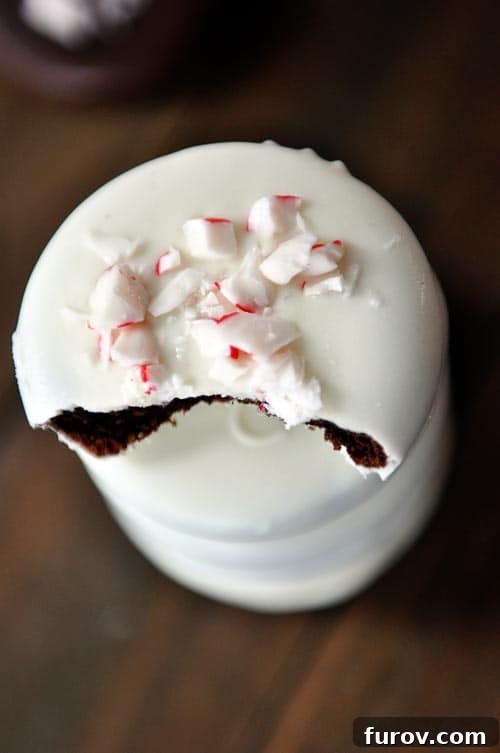
Allowing the chocolate to harden completely, either at room temperature or expedited in the refrigerator, is the final step before you can truly savor your homemade creations. These dipped cookies are pure perfection, boasting a harmonious blend of rich chocolate and refreshing mint in every crispy bite. They are truly one of my very favorite cookies to make and enjoy!
Gifting and Enjoying Your Homemade Thin Mints
While the taste and appearance of these divine cookies are more than enough to win anyone over, thoughtful packaging can elevate them into truly special gifts. You don’t need elaborate boxes or ribbons; even a simple presentation on a decorative plate, wrapped in cellophane, will highlight their homemade charm. For more creative ideas, you can explore various packaging suggestions found in our Sugar Rush series, many of which would work beautifully with these cookies. The fabulous taste and exquisite looks alone will be enough to impress!
These thin mint cookies are not just for gifting; they’re perfect for any occasion that calls for a delightful treat. Serve them at parties, enjoy them with a cup of coffee or tea, or simply keep a stash in the freezer for whenever a craving strikes. Their robust flavor holds up exceptionally well, ensuring every cookie is as fresh and flavorful as the first.

Homemade Thin Mint Cookies
36
Cookies
1 hour
25 minutes
14 minutes
1 hour
39 minutes
Pin
Ingredients
-
1 cup
(142 g)
all-purpose flour, plus more for dusting surface -
½ cup
(43 g)
unsweetened Dutch-process cocoa powder or natural cocoa powder (see note) -
½ teaspoon
baking soda -
½ teaspoon
baking powder -
½ teaspoon
salt -
5 tablespoons
salted butter, softened to room temperature -
¾ cup
(159 g)
granulated sugar -
1 large
egg -
1 large
egg yolk -
¾ teaspoon
pure peppermint extract - Peppermint candies, crushed (optional, for garnish)
-
2 pounds
white or dark chocolate, coarsely chopped (or a combination for varied dipping)
Instructions
-
Preheat your oven to 325°F (160°C).
-
In a small bowl, thoroughly whisk together the flour, cocoa powder, baking soda, baking powder, and salt. Set aside.
-
In a medium bowl, or using the bowl of an electric stand mixer, beat the softened butter and granulated sugar together on medium-high speed for about 1 minute until creamy. Reduce the speed to medium-low, then add the large egg and egg yolk, mixing until well combined. Beat in the pure peppermint extract.
-
Gradually add the whisked flour mixture to the wet ingredients, beating just until incorporated and a dough forms. Divide the dough into 2 equal disks, wrap each tightly in plastic, and refrigerate until firm, which will take at least 1 hour (or up to 2 days for make-ahead convenience).
-
On a lightly floured surface, roll out one disk of chilled dough to an even 1/8-inch thickness. Using a 2-inch round cutter, cut out as many circles as possible and arrange them about 1 inch apart on parchment-lined baking sheets. Gather the dough scraps, gently re-roll them once or twice, and cut out more cookies (note: re-rolled dough may yield slightly drier cookies). Place the baking sheet of cut cookies into the freezer until they are firm, approximately 15 minutes. Repeat this process with the second disk of dough.
-
Bake the frozen cookie rounds in the preheated oven until they feel dry to the touch and are crisp, typically 12-14 minutes. It’s crucial to ensure they are fully baked through to achieve the desired crispy texture, not soft or chewy.
-
Once baked, transfer the cookies immediately to a wire rack to cool completely. The undipped cookies can be stored, covered, for up to 3 days.
-
Prepare your chocolate for dipping. Melt the chosen chocolate (white or dark, or both separately) in a heatproof bowl. You can do this in the microwave by heating at 1-minute intervals at 50% power, stirring well after each interval until smooth, or use a double boiler on the stove for a gentler melt.
-
One at a time, dunk the completely cooled cookies into the melted chocolate. Use a fork to gently press the cookie until it is fully submerged. Lift the cookie with the fork, allowing any excess chocolate to drip back into the bowl. Lightly scrape the bottom edge of the cookie against the bowl to remove drips. Using the flat edge of a knife or another fork, carefully push the dipped cookie onto parchment or wax paper. If desired, sprinkle immediately with crushed peppermint candies. Let the cookies sit undisturbed until the chocolate has completely hardened, which may take an hour or so. To speed up this process, you can refrigerate them.
-
The finished dipped cookies will keep beautifully in an airtight container in the refrigerator for up to a week, or in the freezer for up to a month.
Notes
Chocolate Quality: The quality of your chocolate will significantly impact the final taste and texture of your dipped cookies. I highly recommend using a good quality chocolate for dipping. For tips on melting chocolate like a pro, consider watching a quick video on tempering/melting chocolate and another on dipping items in chocolate to achieve a smooth, professional finish.
Preferred Brand: For consistent and excellent results, my preferred brand of chocolate for melting and dipping is Ghirardelli. Their chocolate melts smoothly and offers a superior flavor.
Mel
Dessert
American
Bake
Serving:
1
Cookie
,
Calories:
177
kcal
,
Carbohydrates:
23
g
,
Protein:
2
g
,
Fat:
11
g
,
Saturated Fat:
6
g
,
Cholesterol:
14
mg
,
Sodium:
74
mg
,
Fiber:
2
g
,
Sugar:
17
g
Recommended Products
Recipe Source: This updated and adapted recipe draws inspiration from an earlier post on this site, which was originally adapted from Martha Stewart Living.