
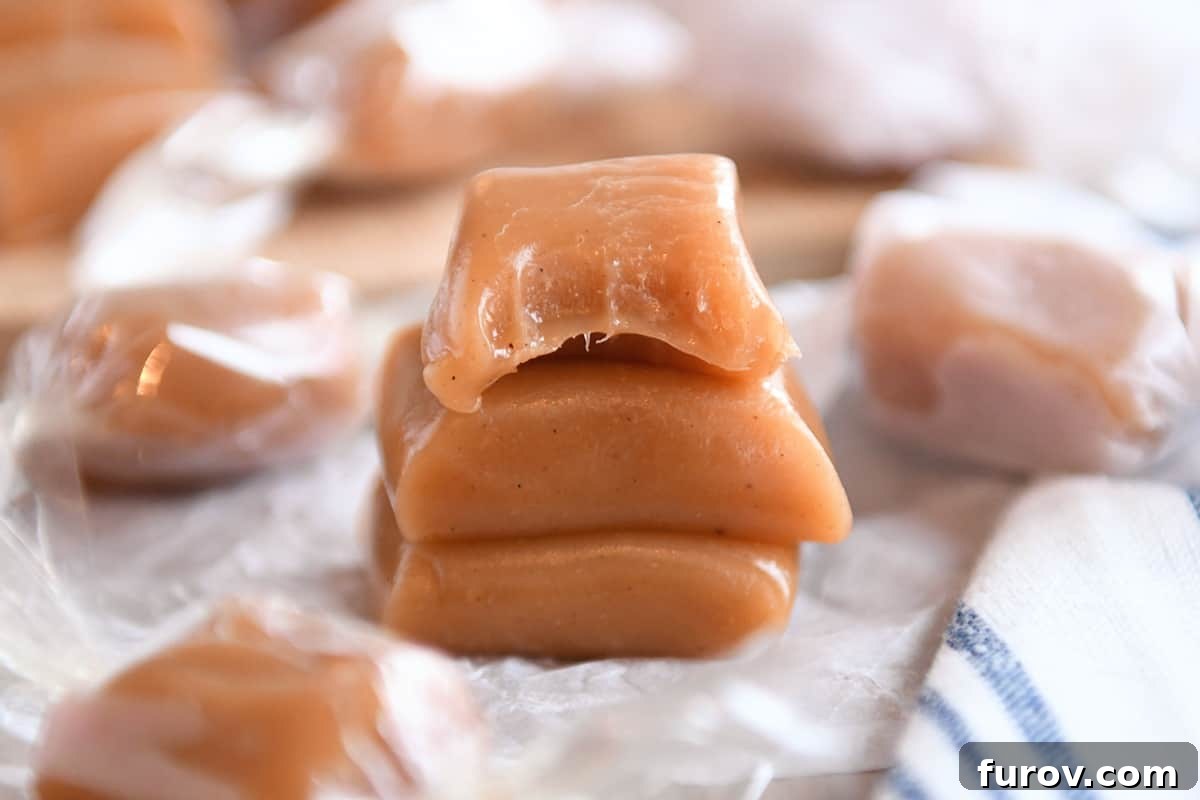
Soft and chewy, these delicious apple cider caramels capture the quintessential taste of autumn in every bite. Thanks to the magic of reducing fresh apple cider until it’s a rich, syrupy concentrate, these homemade treats boast an incredible caramel apple flavor that’s both comforting and sophisticated. If you’ve ever dreamt of crafting your own gourmet candies, these caramels are a fantastic place to start. Forget the intimidation; I’m here to equip you with all the tips and tricks to ensure your apple cider caramels turn out perfectly every single time, from the first simmer to the final wrapped candy.
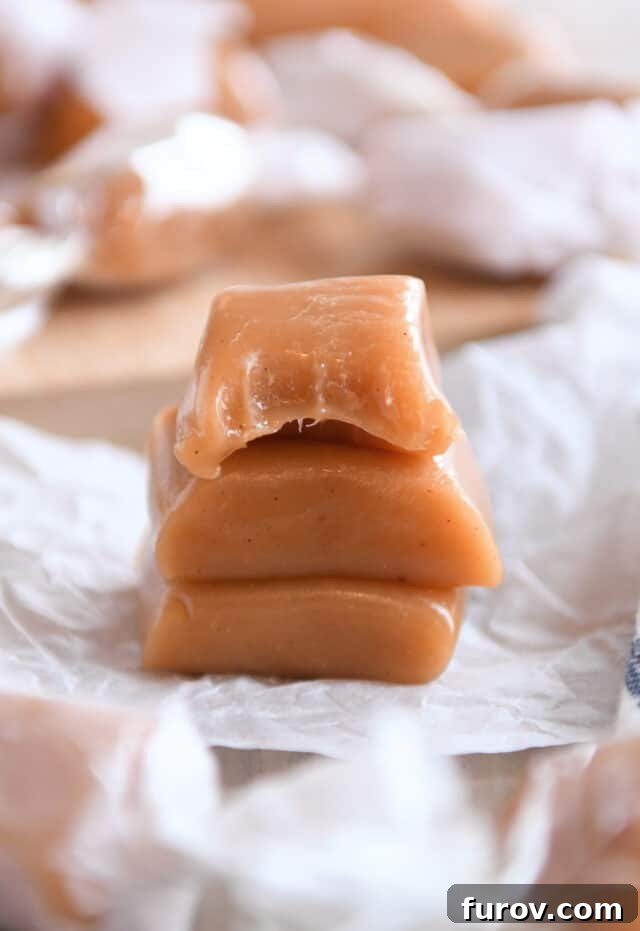
Why Homemade Apple Cider Caramels Are a Must-Try
There’s something uniquely satisfying about homemade caramels. They offer a depth of flavor and a tender, chewy texture that store-bought versions often can’t replicate. When you infuse that classic caramel goodness with the vibrant, fruity essence of apple cider, you elevate it to an entirely new level. These aren’t just any caramels; they’re a celebration of fall, bringing together the crispness of apples and the buttery sweetness of caramel in a harmonious blend.
This particular base caramel recipe is my absolute favorite, a tried-and-true method that I turn to for almost every flavor variation I create. Its reliability makes it perfect for incorporating the delicate notes of apple cider without compromising on that beloved soft, chewy consistency. I wholeheartedly recommend it as the foundation for what might just be the best caramels you’ll ever make.
However, I understand that many home bakers have their own cherished caramel recipes, passed down through generations or perfected over years. Caramel making can be a deeply personal endeavor! If you have a go-to recipe you adore, there’s no need to abandon it. With a simple modification, you can transform almost any classic caramel recipe into an enchanting apple cider version.
Pro Tip for Adapting Caramel Recipes:
In my extensive testing for the perfect apple cider caramel, I discovered a universal truth: most classic caramel recipes can be successfully converted into apple cider caramels. The secret lies in one crucial step: reducing the apple cider until it’s thick and syrupy, then incorporating it into your chosen recipe.
- Integrate the reduced apple cider with the cream and/or corn syrup, ensuring it’s added before the main caramel mixture undergoes a long cooking period. This allows the apple flavor to meld seamlessly without scorching.
- As a general guideline, for a recipe yielding an 8×8-inch or 9×9-inch pan of caramels, aim for approximately 1/2 cup of boiled and reduced apple cider. If you’re making a larger batch, such as for a 9×13-inch pan, increase the reduced apple cider to about 3/4 to 1 cup.
Of course, baking is an art, and a little experimentation goes a long way. This tip provides an excellent starting point, but feel free to adjust slightly based on your desired intensity of apple flavor and the specific characteristics of your preferred caramel base.
This adaptability means you can enjoy the unique flavor of apple cider caramels even if you’re loyal to a different caramel technique. The key is in that rich, concentrated apple essence.
The Essential First Step: Boiling Down Apple Cider for Caramels
Without a doubt, the most critical step in creating these incredible apple cider caramels is the initial reduction of the apple cider itself. This process concentrates the apple’s natural sugars and robust flavor, transforming thin cider into a thick, potent syrup that will infuse your caramels with unparalleled taste. Skipping or rushing this step will result in a less flavorful, potentially softer caramel, so embrace this crucial preparation with care.
How to Reduce Apple Cider:
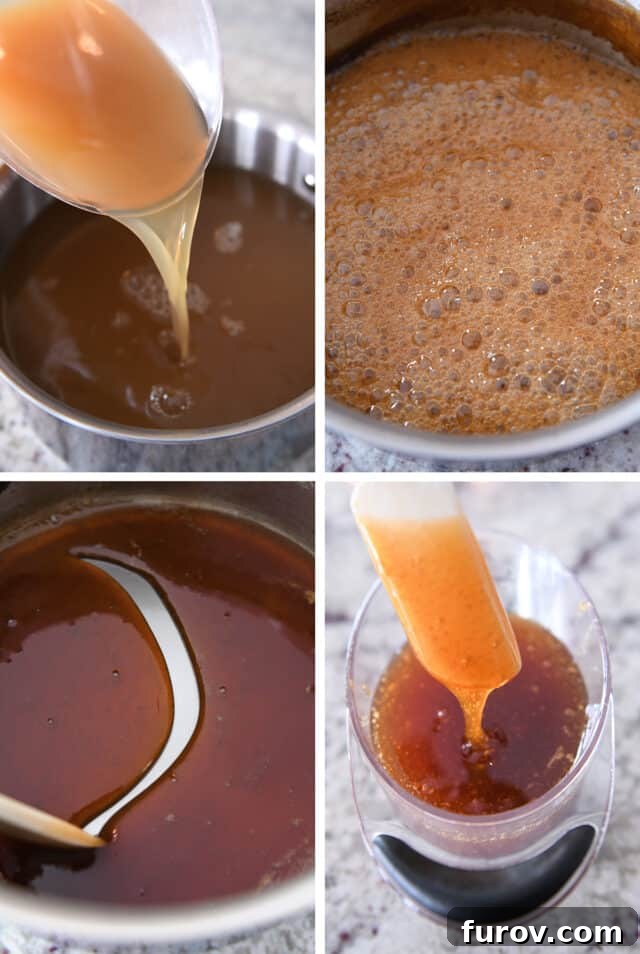
Begin by pouring four cups of unfiltered apple cider into a sturdy saucepan. Over moderate heat, allow the cider to simmer gently, stirring occasionally to prevent it from scorching, until the volume is reduced to approximately 1/2 cup. This will take some time, typically around an hour, but the result will be a beautifully thick, intensely flavored apple syrup. Its consistency should be noticeably viscous, almost like a light honey.
It’s vital not to under-reduce the cider. If it remains too thin, the excess water content will alter the final consistency of your caramels, making them too soft and difficult to set properly. Patience here pays off immensely in the chewiness and flavor of the finished candy.
Choosing the Best Apple Cider:
For the most authentic and robust flavor, opt for “fresh” apple cider, which is typically abundant during the fall months. Look for unfiltered varieties – it should appear cloudy, distinguishing it from clear apple juice. Crucially, select cider with no added sugar. The natural sugars in pure apple cider are exactly what you need for this reduction, and added sugars can interfere with the caramelization process and overall sweetness balance.
Prepare Ahead for Convenience:
This reduction step can be conveniently completed several days in advance. Once reduced, allow the syrupy cider to cool completely, then transfer it to an airtight container and refrigerate until you’re ready to make your caramels. When it’s time to cook, gently warm the reduced apple cider until it’s slightly warm and pourable. Adding cold, thick cider straight from the refrigerator into your hot caramel mixture can cause a rapid temperature drop, potentially crystallizing the caramel or leading to aggressive boiling and splattering. A little pre-warming ensures a smooth, safe, and successful incorporation.
How to Make Homemade Apple Cider Caramels: The Main Event
With your apple cider perfectly reduced and ready, it’s time for the main act: crafting the caramel itself. This process requires attention and a good candy thermometer, but with the right guidance, it’s incredibly rewarding.
In a large, heavy-bottomed saucepan (essential for even heat distribution and preventing scorching), combine the granulated sugar, light corn syrup, and water. Bring this mixture to a simmer over medium heat. As it begins to boil, use a pastry brush dipped in water to gently wash down any sugar crystals clinging to the sides of the pan. This preventative measure is critical; even a single errant sugar crystal can cause the entire batch of caramel to crystallize and become grainy. Continue to cook, undisturbed, until the sugar syrup transforms into a beautiful golden amber color and reaches a temperature of 345 degrees F on your candy thermometer.
A quick note on thermometers: accurately gauging temperature is paramount in candy making. If you’re looking for more in-depth information on selecting and using candy thermometers, as well as a comprehensive guide to essential caramel-making equipment, I highly recommend checking out this detailed post. It covers everything from my favorite thermometer setups to troubleshooting common issues, ensuring your caramel-making journey is as smooth as possible.
Once your sugar mixture has reached the target temperature and color, slowly and carefully pour in the pre-warmed heavy cream, butter, and salt. Be prepared for the mixture to bubble up vigorously during this step – this is normal! Continue stirring gently as it settles down.
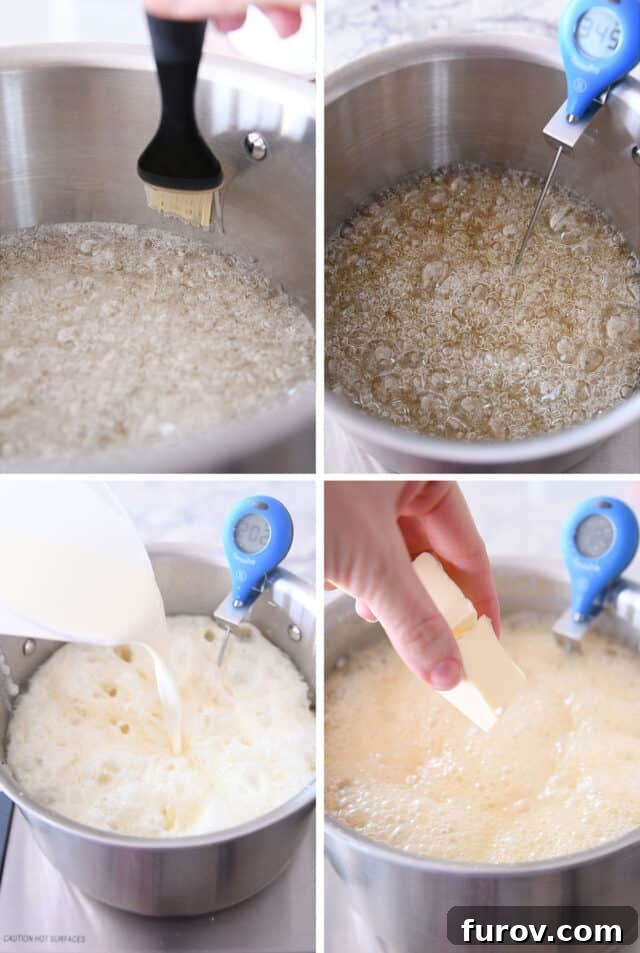
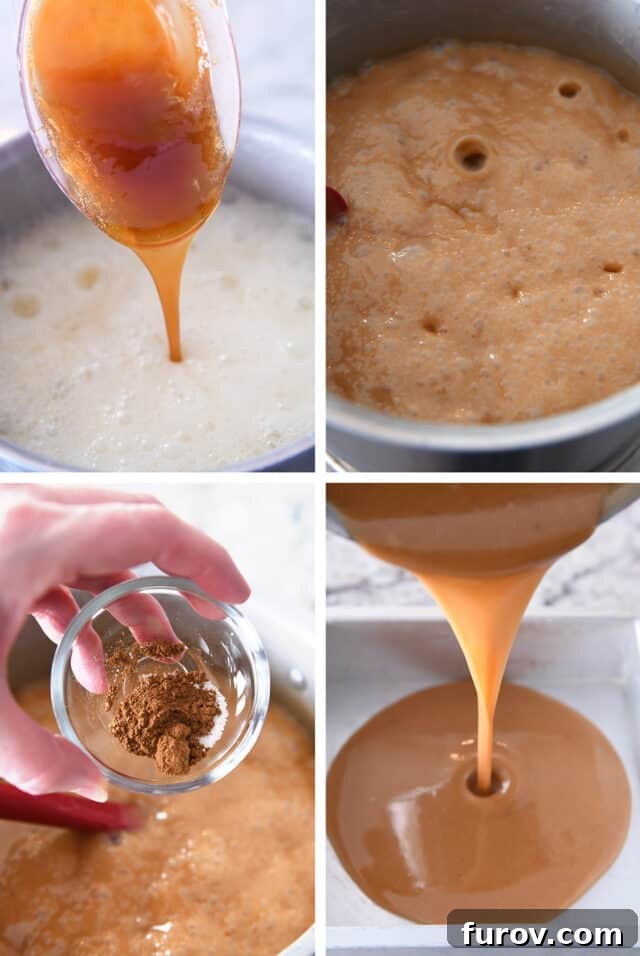
Now, it’s time to add that glorious, syrupy reduced apple cider. Stir it in thoroughly. Continue to cook the caramel, stirring constantly with a heatproof silicone spatula (a flat-edged spatula is excellent for preventing burning on the bottom of the pan). Maintain a steady, moderate heat until the caramel mixture registers between 245 to 248 degrees F on your thermometer. This is the crucial stage for achieving that perfect chewy texture. For these apple cider caramels, which tend to be a touch softer due to the cider, aiming for the higher end (248F) can yield a firmer chew if preferred.
How to Calibrate a Candy Thermometer for Precision Baking
An accurately calibrated candy thermometer is your best friend in caramel making. Here’s how to ensure yours is giving you true readings:
Bring a small pan of water to a rolling boil. Insert the tip of your thermometer into the boiling water, making sure it doesn’t touch the bottom of the pan, and leave it for a full minute. Note down the exact temperature your thermometer registers.
Key Calibration Rules:
- We assume most candy recipes are written and tested at sea level, where water boils at 212 degrees F (100 degrees C). We’ll address elevation adjustments if this isn’t your scenario.
- Adjusting for Thermometer Inaccuracy:
- If your thermometer reads below 212 degrees F in boiling water, you’ll need to subtract the difference from the target cooking temperature specified in the recipe. For example, if your thermometer shows 205 degrees F (a 7-degree difference), and the recipe calls for 245 degrees F, you would cook your caramel to 238 degrees F (245 – 7 = 238).
- If your thermometer reads above 212 degrees F, you’ll need to add that difference to the recipe’s cooking temperature. For instance, if it reads 215 degrees F (a 3-degree difference), you would cook to 248 degrees F (245 + 3 = 248).
- Important: Whatever temperature your thermometer registers in boiling water effectively becomes your “new” 212 degrees F mark for all subsequent calculations.
Further Adjustments for Elevation:
Beyond thermometer calibration, elevation significantly impacts boiling points and thus candy temperatures. Water boils at lower temperatures at higher altitudes. If a recipe was tested at an elevation different from yours, further adjustments are needed. The general rule of thumb is:
- Add 2 degrees F to the target temperature for every 1,000 feet decrease in elevation from where the recipe was tested.
- Subtract 2 degrees F from the target temperature for every 1,000 feet increase in elevation from where the recipe was tested.
Example 1: If a caramel recipe was developed at 3,000 feet elevation and suggests cooking to 238 degrees F, but you live at sea level (which is a 3,000-foot decrease), you would add an additional 6 degrees F (2 degrees per 1,000 feet). So, your new target temperature would be 244 degrees F (238 + 6 = 244). This adjustment is in addition to any adjustments made for your thermometer’s calibration.
Example 2: Conversely, if a recipe was tested at sea level (0 feet) and instructs cooking to 245 degrees F, but you reside at 5,000 feet elevation (a 5,000-foot increase), you would subtract 10 degrees F (2 degrees per 1,000 feet). Your adjusted target temperature would then be 235 degrees F (245 – 10 = 235). Again, this is compounded with your thermometer calibration.
Remember: Candy-making, especially caramel, often involves a bit of trial and error to truly perfect. Even with these precise adjustments, you might find that a difference of 2-3 degrees F in the final cooking temperature can fine-tune the chewiness to your exact preference. Don’t let this discourage you; a slight variance won’t typically ruin a batch. Do your best to apply these guidelines, keep notes, and have fun with the process! Each batch brings you closer to your ideal homemade caramel.
Once the caramel reaches its precise target temperature, immediately remove the pan from the heat to halt the cooking process. Swiftly stir in the vanilla extract and ground cinnamon. These additions provide a beautiful aromatic finish and enhance the apple cider flavor without being cooked away. Finally, pour the glorious, bubbling caramel into your prepared, buttered pan. Resist the urge to touch or stir it further; let it cool completely and undisturbed to room temperature. This patience is key to achieving its signature smooth texture and chew.
Cutting and Wrapping Your Perfect Caramels
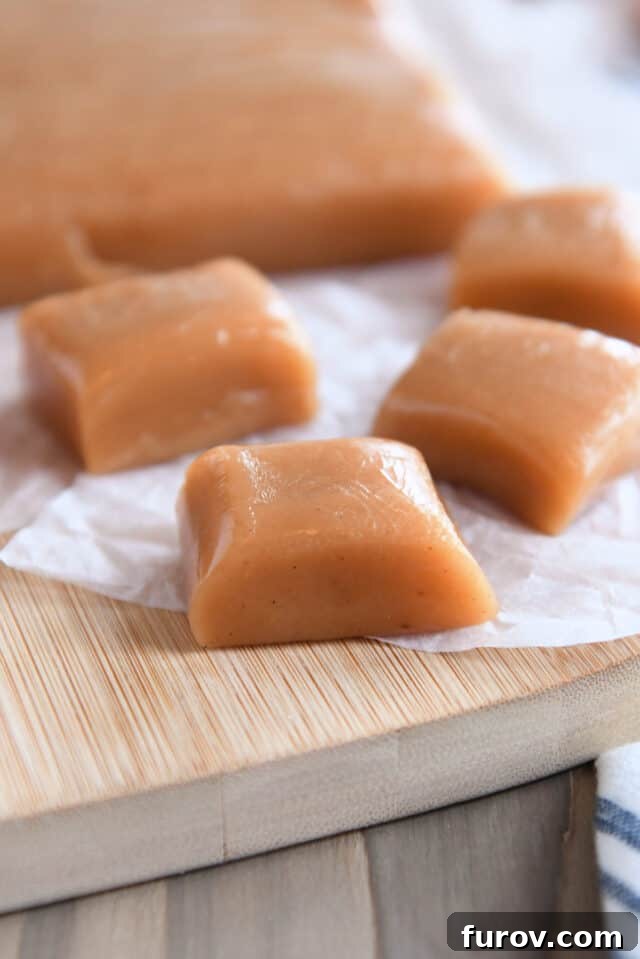
After all your careful work, the final steps of cutting and wrapping your apple cider caramels are incredibly satisfying. Ensure the caramel has completely cooled and set – this might take several hours, or even overnight, depending on your room temperature.
- Gently lift the cooled caramel slab from the baking pan. If you lined your pan with parchment paper (a highly recommended step!), this will be exceptionally easy. Otherwise, a flat metal spatula can help you carefully loosen and peel it out in one piece, transferring it to a clean cutting board.
- For perfectly uniform squares, use a bench knife or a very sharp, lightly oiled knife. Work methodically to create neat rows and columns.
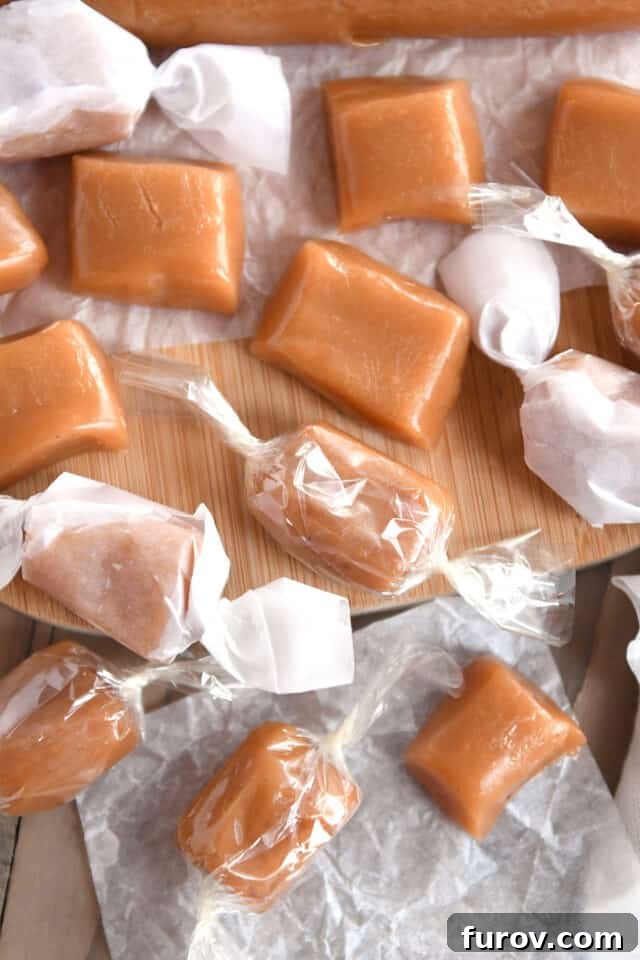
- Once cut, wrap each individual caramel. Options include squares of wax paper, parchment paper, or cellophane. Many find that cellophane wrappers hold their twisted ends best, keeping your caramels fresh and neatly packaged.
Once wrapped, store your homemade apple cider caramels in a covered, airtight container at a cool room temperature. They will maintain their delightful flavor and chewy texture for several weeks. Of course, “several weeks” is often an optimistic estimate when you have such tempting treats on hand! The rich, creamy notes of classic caramel are beautifully uplifted by the sweet-tartness of the apple cider and the comforting warmth of cinnamon. These caramels are truly incredible and have quickly become one of my absolute favorite caramel variations.
Conquering Caramel Making: Your Questions Answered
If the thought of making homemade caramels still feels a little daunting, please know you’re not alone. I’ve been there! I used to dread the process, consistently ending up with batches that were either too hard, too soft, or grainy. The mess, the effort, and the ensuing disappointment were enough to make me give up for a while.
However, once I invested in the right tools and, more importantly, discovered and refined this foolproof recipe, everything changed. Caramel making transformed from a stressful chore into a genuinely enjoyable experience. Now, homemade caramels are one of my favorite things to make, regardless of the season!
Remember, this comprehensive guide is packed with a multitude of helpful tips designed to make your caramels absolutely foolproof. But if you encounter any specific challenges or still have lingering questions, please don’t hesitate to **comment below**. I am dedicated to helping you succeed and will gladly share further insights. There’s a certain “rock star” status that comes with whipping up a pan of perfect homemade caramels, and the reward of delectable, custom-flavored treats at the end is absolutely worth it!
I genuinely hope you love this delightful new spin on classic caramels. Happy cooking!
More Sweet Indulgences:
- Perfect Vanilla Bean Caramels
- Cinnamon Caramels (with optional chocolate dip!)
- Festive Gingerbread Caramels
- Foolproof No-Stir Homemade Caramels
Apple Cider Caramels
60 caramels
Pin Recipe
Ingredients
- 4 cups apple cider (see note)
- 2 cups heavy cream
- 2 ½ cups (530 g) granulated sugar
- ½ cup light corn syrup
- ½ cup water
- 6 tablespoons (85 g) salted butter
- ¼ teaspoon coarse, kosher salt
- 1 teaspoon vanilla extract
- ½ teaspoon ground cinnamon
Instructions
- Pour the apple cider in a medium saucepan and simmer over moderate heat, stirring occasionally, until reduced to 1/2 to 2/3 cup, about 1 hour.
- Butter the bottoms and sides (get into the corners, too!) of a 9X9-inch square baking pan. (Alternately, you can line with parchment and butter the parchment – this may make it easier to pull the slab of caramels out of the pan after they have cooled in order to cut and wrap them.) Set aside.
- Heat the cream in a saucepan or in the microwave until steaming. Keep warm.
- For the caramels, in a large, heavy-bottomed pot (at least 5- or 6-quarts), stir together the sugar, corn syrup, and water, taking care to not splash the mixture up the sides of the pot. Clip a candy thermometer onto the side of the pan.
- Bring the mixture to a boil over medium heat WITHOUT STIRRING or moving the pan. As it begins to boil, fill a cup with water and use a pastry brush to wash down the sides of the pan so there are no granules of sugar sticking to the sides of the pan (you probably won’t need to repeat this after the sides have been well-cleaned). This prevents the caramel mixture from crystallizing in later steps.
- Cook until the boiling sugar turns a light-to-medium amber color and registers 325 to 345 degrees F on the thermometer, about 15-20 minutes.
- Slowly and carefully pour the warm cream into the caramel. Add the reduced apple cider, butter and salt. The mixture will bubble high during this step but will go down after a few minutes.
- Begin stirring the caramel with a heatproof silicone spatula with a flat top (a flat edge does better at preventing the caramel from burning than a rounded edge). Avoiding scraping the edges of the pan, and continue to cook, stirring constantly and slowly, until the mixture reaches 245 to 248 degrees F, about 10-15 minutes (these caramels tend to be softer than a *normal* caramel, likely due to the apple cider, so if you want a firmer caramel, consider adding 2 to 3 degrees to the cooking temperature).
- Off the heat, stir in the vanilla and cinnamon.
- Immediately pour the caramel mixture into the prepared pan.
- Let the caramels cool completely. Lift the caramels from the pan and transfer to a cutting board (I use a large, metal spatula to gently peel the whole slab of caramel out of the pan).
- Cut into squares using a sharp knife or bench scraper, wrap, and store in an airtight container at cool room temperature for up to two weeks.
Notes
Double Batch: This recipe can be doubled (for a 9X13-inch pan of caramels). Use a larger pan so it doesn’t boil over. A double batch will take longer to come to temperature at each step.
Time: The exact time for each step will depend on how low or high you moderate the heat – as well as if you have a gas or electric stove.
Elevation: I live at 2,400 feet elevation which is where this recipe has been tested. If you live at higher or lower elevation, you may need to adjust the final cooking temperature 2 degrees for every 1,000 feet elevation difference (subtracting for higher elevation and adding for lower elevation). For instance, if you live at sea level, you may need to add 4 degrees to the final cooking temperature. If you live at 5,000 feet elevation, you may need subtract 4 to 5 degrees from the final cooking temperature. A lot depends on the desired firmness/chewiness of the caramels, so there is some leeway in the exact number of degrees for cooking the caramel. In my experience, a difference of 2 to 4 degrees won’t make or break a caramel recipe, so don’t stress too much about this. Just keep track of the outcome and make adjustments in subsequent batches as needed.
Several people have commented that these apple cider caramels turn out softer than “normal” caramels (likely due to the apple cider). Given that, I suggest adding a few degrees to the cooking temperature if you want a firmer caramel.
Calories: 27kcal,
Carbohydrates: 0.2g,
Protein: 0.2g,
Fat: 3g,
Saturated Fat: 2g,
Cholesterol: 9mg,
Sodium: 2mg,
Sugar: 0.2g