
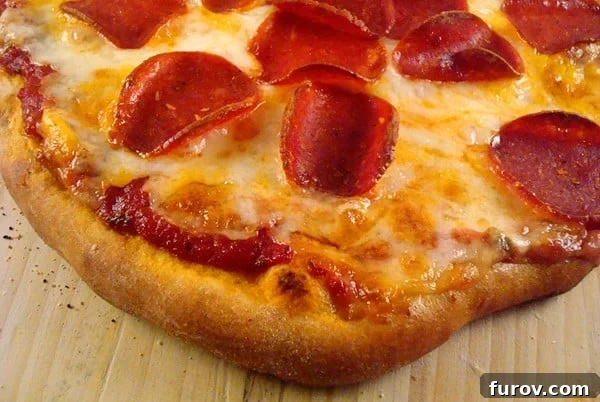
Say goodbye to expensive, greasy takeout! Once you master this incredible homemade pizza, you’ll never look back. Experience the joy of crafting your perfect pizza right in your own kitchen.
For many families, pizza night is a cherished tradition. In our home, it’s practically a Saturday staple, a delicious ritual that brings everyone together. This frequent appearance on our menu means that the foundation of any great pizza – the dough – is absolutely paramount. A truly exceptional crust can transform a simple meal into an unforgettable culinary experience.
After countless experiments and tweaks, I’ve perfected my favorite pizza dough recipe, adapted slightly from this fantastic original. And honestly, it’s nothing short of incredible. This dough delivers a remarkable combination of chewiness and rich flavor, creating a crust that’s both satisfyingly crispy on the outside and wonderfully tender within. It has become my undisputed go-to recipe, consistently delivering outstanding results for a long time.
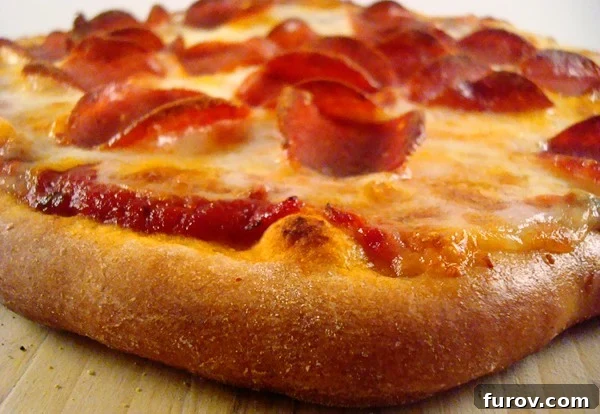
Achieving this level of perfection with the dough does require a minor amount of forethought and planning. The recipe truly benefits from an extended, slow rise, ideally made the night before or in the early morning. This longer fermentation process allows the yeast to develop deeper flavors and a more complex texture, making the wait entirely worthwhile. However, if spontaneous pizza cravings strike and you haven’t planned ahead, don’t despair! I still keep a reliable Fast and Easy pizza dough recipe in my arsenal, which also produces a delicious pizza in a pinch, though this longer-rise version remains truly superb for its unparalleled depth.
One of the secrets to this dough’s incredible character lies in the inclusion of whole wheat flour. Far from just a nutritional add-in, whole wheat flour contributes a fantastic depth of flavor, introducing subtle nutty undertones that complement the rich toppings beautifully. It also enhances the crust’s texture, giving it a delightful chewiness and a more robust structure once baked to golden perfection. This creates a more substantial and satisfying bite, elevating the entire pizza experience. While the dough is the star, a great pizza also needs a vibrant sauce. You can find my favorite homemade pizza sauce recipe here, designed to perfectly complement this exceptional crust.
Making pizza from scratch is undoubtedly one of the most rewarding culinary endeavors, and for my family, it’s a source of immense satisfaction. The taste difference between a homemade pizza and a restaurant-bought one is simply astounding – it’s a hundred times better, fresher, and bursting with flavors you control. Beyond the superior taste, it’s a wonderful activity that involves the whole family. My kids love getting their “grubby little hands” right in there, helping to knead the dough, spread the sauce, and sprinkle the cheese and toppings. And whether their hands are grubby or not, their enthusiasm and help are always cherished.
Over many years of perfecting this homemade pizza, I’ve accumulated a treasure trove of tips and tricks that I’m excited to share with you, including some valuable insights into revamping your pizza sauce for an even more exquisite flavor profile. These small adjustments can make a significant difference in your homemade pizza’s overall quality and enjoyment.
A few game-changing tips I’ll mention here:
1) **Always use freshly grated mozzarella cheese for topping your pizzas.** This is a non-negotiable for me, and I’ve stressed this point countless times. As someone who’s, let’s say, half-scientist (and whose husband even worked for a cheese company, albeit in a desk job, which still counts as industry insight!), I can confidently assure you that freshly grated mozzarella melts far, far better than pre-shredded varieties. Pre-shredded cheese often contains anti-caking agents like cellulose or potato starch, which prevent the cheese from clumping in the bag but also inhibit it from melting into that beautifully gooey, stretchy, golden pool of deliciousness we all crave on a pizza. Fresh mozzarella, on the other hand, melts cleanly, creating that desirable even coverage and incredible cheese pull. Do a side-by-side comparison, and I promise you’ll be converted. Then, you too can proudly classify yourself as a half-scientist of pizza!
2) **Elevate your pizza with a sprinkle of Parmesan.** While we typically keep our pizza toppings relatively simple – usually just cheese and turkey pepperoni – I’ve discovered a quick and easy way to elevate the entire pizza to a delicious new level. Right before baking, generously sprinkle freshly grated Parmesan cheese over all of the toppings. The slightly salty, intensely flavorful hit of the Parmesan cheese as it melts and crisps provides a fantastic umami boost and a layer of sophistication that truly transforms the pizza. It adds a wonderful depth and a slight tang that beautifully complements the mozzarella and other toppings, making each bite even more satisfying.
Frequently Asked Questions for Homemade Pizza
Absolutely, this dough freezes beautifully! For best results, freeze the dough after its initial rise. Once the dough has risen, gently punch it down to release the air. Then, divide it into the portions you’ll need for individual pizzas and place each portion into greased freezer-safe ziploc bags, pressing out as much air as possible before sealing. When you’re ready to use it, plan ahead: take the dough out of the freezer the night before and let it defrost slowly in the refrigerator, still in its bag. About an hour or two before you plan to bake, remove the dough from the refrigerator and let it come to room temperature on the counter, keeping it lightly covered. This gradual warming allows the gluten to relax, making the dough much easier to work with before you proceed with shaping and baking.
Yes, absolutely! While a stand mixer makes the kneading process quicker and less strenuous, this dough can be mixed and kneaded entirely by hand. The process involves combining the ingredients and then kneading the dough on a lightly floured surface until it becomes soft, smooth, and elastic. This typically takes about 10-15 minutes of continuous kneading by hand. It’s a fantastic arm workout and a very satisfying, tactile experience that connects you directly with the food you’re preparing. Don’t be afraid to get your hands a little sticky at first; with enough kneading, the dough will transform.
If your pantry only stocks active dry yeast, you can certainly substitute it for instant yeast, but you’ll need to make a slight adjustment to the preparation. Active dry yeast requires “proofing” to activate it before it’s incorporated into the rest of the ingredients. To do this, increase the amount of active dry yeast to 2 ¾ teaspoons. Then, combine the yeast with a couple of tablespoons of the warm water (from the total amount in the recipe) and a pinch of sugar in a small bowl. Let this mixture sit for 5-10 minutes until it becomes foamy and bubbly. This indicates that the yeast is active and ready to work. Once proofed, proceed with the recipe as directed, adding this yeast mixture along with the remaining water, sugar, honey, and oil. For more detailed information on different types of yeast and their uses, I’ve put together a comprehensive tutorial on working with yeast that explains the differences and best practices.
Yes, absolutely! A great pizza crust deserves an equally great sauce. I have a dedicated recipe for a delicious and easy Homemade Pizza Sauce that is specifically designed to complement the rich flavors of this dough. It’s simple to make and tastes infinitely better than store-bought options. I highly recommend giving it a try to complete your homemade pizza experience.
This is a common frustration, and it’s usually a clear sign that the gluten in your dough needs a little time to relax. When you knead dough, you develop the gluten strands, which give the dough its elasticity and structure. However, if you try to stretch it too much too quickly, the gluten can become too taut, causing it to spring back. When this happens, simply roll the dough out as far as it comfortably goes, even if it contracts back a little. Then, lightly cover it with plastic wrap or a clean kitchen towel and let it rest for 10-15 minutes. This short rest allows the gluten strands to relax, and when you return to roll it out again, you’ll find it much more pliable and cooperative, holding its shape without excessive springing back. Another effective method is to separate your dough into the individual portions or “balls” you’ll use for each pizza and let these rest for 10-15 minutes before you even begin rolling. This preempts the problem by allowing the gluten to relax before you apply any significant stretching force. Additionally, be mindful of how much flour you’re using: an overly floured or dry dough can be stiffer and more prone to contracting, so a slightly softer, properly hydrated dough tends to be easier to roll out.
What to Serve With This Homemade Pizza
- Crisp, refreshing cut carrots and cucumbers served with a creamy, zesty Homemade Ranch Dressing for a delightful contrast.
- A vibrant medley of Fresh Fruit, adding a light, sweet, and healthy balance to the savory pizza.
- Warm, sweet Cinnamon and Sugar Breadstick Twists, perfect for a delectable dessert or a unique side indulgence.
One Year Ago: Pesto Pizza with Pine Nuts and Feta
Two Years Ago: Red Berry Risotto Oatmeal

Homemade Pizza – New and Improved
Pin
Rate
Ingredients
- 1 ¼ cups warm water
- 2 teaspoons instant yeast
- 2 tablespoons sugar
- 1 tablespoon honey
- 1 tablespoon olive oil
- 2 teaspoons salt
- 1 ½ cups (213 g) all-purpose flour
- 1 ½ cups (213 g) whole wheat flour
Instructions
-
**Prepare the Dough in Advance:** For optimal flavor and texture, it is highly recommended to prepare this pizza dough the night before or early in the morning on the day you plan to bake your pizza. In a large mixing bowl (or the bowl of a stand mixer fitted with a dough hook), combine the warm water, instant yeast, sugar, honey, and olive oil. If you are using active dry yeast, you’ll need to adjust by using 2 ¾ teaspoons of active dry yeast and proof it first: mix the active dry yeast with a couple of tablespoons of the warm water and a pinch of sugar, then let it sit until foamy (about 5-10 minutes) before adding it to the bowl with the remaining liquid ingredients. Next, add 1 cup of all-purpose flour and the salt to the mixture. Continue adding the remaining all-purpose flour and the whole wheat flour gradually, mixing until a cohesive, soft dough forms. Knead the dough until it is soft, smooth, and elastic. This should take approximately 10 minutes if kneading by hand, or about 5 minutes using a stand mixer on medium-low speed.
-
**First Rise and Refrigeration:** Once kneaded, shape the dough into a smooth ball. Lightly grease a clean bowl with a little olive oil, place the dough ball inside, and turn it once to coat. Cover the bowl tightly with a lid or plastic wrap to prevent the dough from drying out. Place the covered bowl in the refrigerator to allow the dough to slowly rise and develop flavor. This slow fermentation is key to a truly exceptional crust. Keep it refrigerated until about three hours before you intend to bake your pizzas.
-
**Bring to Room Temperature and Preheat Oven:** Three hours prior to baking, remove the dough from the refrigerator. Keep it lightly covered in its bowl and let it sit on your countertop to come to room temperature. This step is crucial for the dough to relax and become pliable. About 45-60 minutes before you plan to bake, prepare your oven for maximum heat: move an oven rack to the lowest position possible (if your lowest rack is almost touching the oven floor, raise it one notch to prevent burning the bottom of the crust). Place your pizza stone (if using) onto this rack and preheat the oven to a blistering 500 degrees Fahrenheit (260°C). Don’t be intimidated by such a high temperature! While it might feel daunting, baking pizza at 500°F is truly the secret to achieving that coveted crispy crust and perfectly cooked toppings. If your oven tends to be unreliable at this extreme temperature, you can bake at 475°F (245°C) instead, though 500°F is highly recommended for the best results.
Notes
**Exploring Different Methods for Making Great Pizza:** Achieving the perfect homemade pizza can be approached in a few different ways, depending on your tools and preferences. Here are some of my go-to methods:
**Using a Pizza Paddle/Peel:** This is the most traditional method for transferring your pizza to a hot stone. I use a wooden pizza paddle, similar to this one. To prepare, I generously sprinkle the paddle with cornmeal, which acts as tiny ball bearings, allowing the dough to slide effortlessly. I then carefully place the stretched pizza dough onto the cornmeal-dusted paddle, layer on all my desired toppings, and then, with a swift and confident motion, I quickly slide the assembled pizza directly onto the preheated pizza stone in the oven. After approximately 8 to 9 minutes, the pizza emerges baked to perfection, with a beautifully golden and crispy crust. I then use the paddle to retrieve it and transfer it to a cutting board for slicing and immediate enjoyment.
**Alternative Pizza Paddle/Peel Techniques:** If you don’t own a dedicated pizza paddle, there’s no need to run out and buy one. You can easily improvise! The underside of a sturdy baking sheet (an 11×17 inch size works great) or a large, flat cutting board makes an excellent makeshift pizza paddle. Just like with a traditional peel, cover your chosen surface lightly with cornmeal, a dusting of flour, or lay down a piece of parchment paper. Build your pizza directly on this floured baking sheet or cutting board. When your oven and stone are perfectly preheated, gently slide the pizza off of your makeshift paddle onto the hot baking stone. If you’re using parchment paper, you can simply let the parchment paper slide onto the baking stone along with the pizza; it’s oven-safe and will make transfer even easier. Bake for 8-9 minutes, or until the crust is beautifully browned and the cheese is bubbly and golden. To retrieve the finished pizza, use a pair of long tongs or a wide spatula to swiftly slide it onto a waiting cooling rack to prevent the bottom from becoming soggy.
**Baking on a Rimmed Baking Sheet (My Mess-Free Favorite):** For those who find the cornmeal-everywhere situation a bit too messy (I admit, my oven often needs a good vacuuming after a pizza session!), this method offers a fantastic alternative. Often, I still preheat my pizza stone as usual to ensure a hot baking surface. However, instead of using my wooden pizza paddle, I stretch the dough directly onto a lightly greased rimmed baking sheet. I don’t fuss about pressing it perfectly into the corners; embracing an irregular, rustic shape adds to its charm. After adding all the toppings, I then slide the entire baking sheet, with the pizza on it, directly onto the preheated pizza stone. This allows the hot stone to still contribute to a wonderfully crisp bottom crust, even with the baking sheet acting as a barrier. Bake the pizza for 9-10 minutes, or until the crust is nicely browned and the toppings are cooked through. This method still ensures a delicious, browned crust, and while it might not deliver the ultra-authentic, blistered crust of a direct-stone bake, it is incredibly delicious and often more practical for making multiple pizzas since you can slide them in and out more easily than one at a time with a peel. It’s a fantastic compromise for convenience without sacrificing much flavor or texture.
Recommended Products
**Pizza Dough Recipe Source:** adapted slightly from Emily at Savory Seasonings