
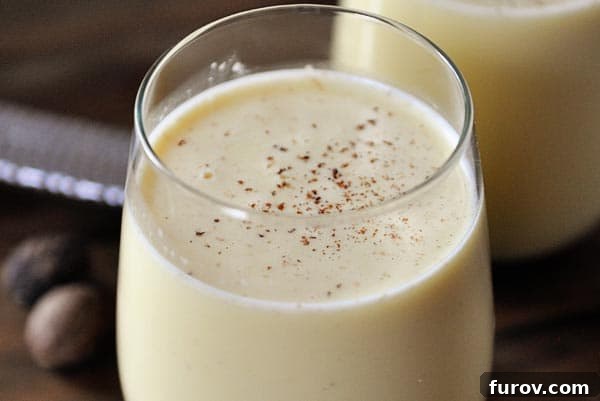
The Ultimate Homemade Eggnog Recipe: Creamy, Fresh, and Family-Friendly
Whether you’re an eggnog enthusiast or a hesitant sipper, prepare to be converted by this homemade eggnog recipe. It’s not just delicious; it’s incredibly fresh, wonderfully creamy, and surprisingly easy to make!
Embracing the Eggnog Season: A Family Tradition
For me, the arrival of eggnog season is marked by an unusual domestic event: my husband, Brian, volunteers to go grocery shopping. This is a rare occurrence during the rest of the year, signaling the undeniable start of his annual eggnog ritual. Brian’s love for store-bought eggnog is legendary in our household; I sometimes suspect his veins circulate more nog than blood from early November straight through mid-January.
His passion for the holiday drink is so profound that even our boys have eagerly joined the fan club. It seems that eggnog season conveniently coincides with wrestling season, leading to a rather curious—and entirely unfounded—superstition among them. They’ve somehow linked eggnog consumption to enhanced athletic performance, believing it ensures faster takedowns, better whizzers, swifter double legs, and tighter gut wrenchers. While I’m still trying to decipher what half of those terms even mean, their enthusiasm for eggnog is undeniable.
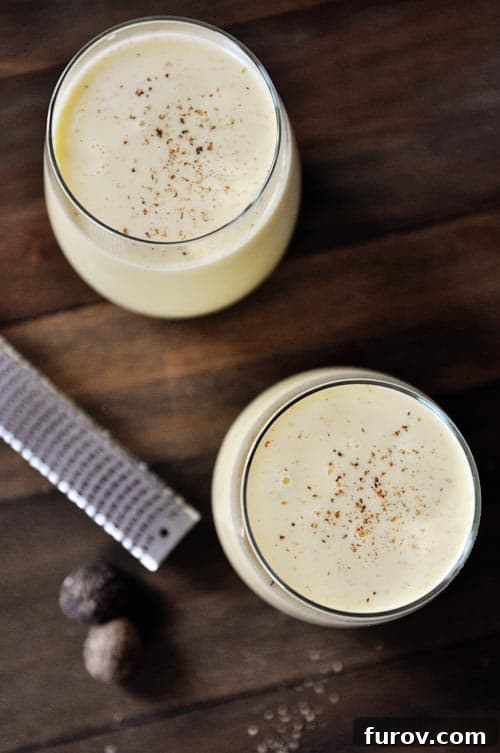
Why Homemade Eggnog is a Game-Changer
Despite my family’s devotion to store-bought varieties, I’ve always been a skeptic. The artificial flavors and overly sweet, sometimes cloying texture of commercial eggnog never appealed to me. This year, armed with a desire for a cleaner, fresher taste, I decided to embark on a culinary adventure: making homemade eggnog from scratch. My goal was simple yet ambitious: create an eggnog so good, so authentically flavorful, that even a lifelong skeptic like myself would fall in love.
One of my primary motivations for crafting my own eggnog was the desire for a safer, more wholesome beverage. Many traditional eggnog recipes call for raw eggs, which can pose a health risk, especially for young children or elderly individuals. I wanted a version I could confidently serve to my kids and my dear 80-year-old Yugoslavian friend without any concerns about salmonella. Therefore, my recipe prioritizes safety through a proper cooking process, ensuring the eggs are thoroughly tempered and heated to a safe temperature.
Furthermore, I aimed for a non-alcoholic rendition. As someone who doesn’t consume alcohol, and with young children in the house, a family-friendly drink was essential. This recipe focuses on pure, unadulterated flavor, allowing the rich dairy and aromatic spices to truly shine without the addition of spirits. Of course, for those who prefer an alcoholic twist, I’ll share tips on how to easily incorporate your favorite liquor later. But for this foundational recipe, it’s all about celebrating the delightful, comforting taste of classic eggnog, enjoyed by everyone.
The Secret Ingredient: The Irresistible Aroma of Freshly Grated Nutmeg
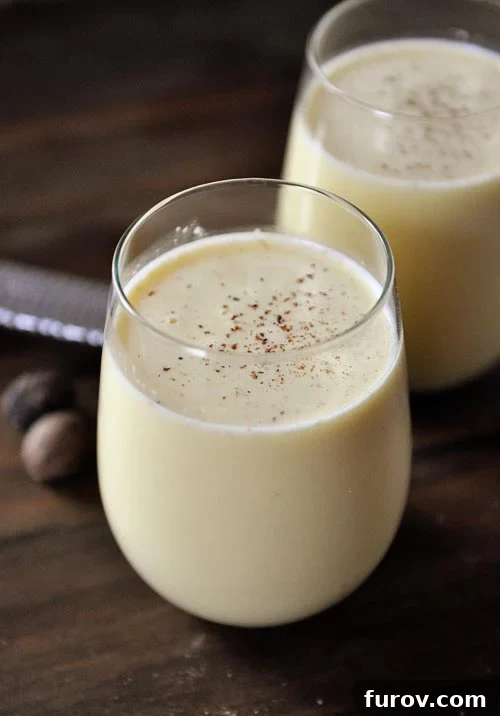
After several trials and a few adjustments, I finally landed on a recipe that exceeded all my expectations. This homemade eggnog is wonderfully thick, luxuriously creamy, and boasts a rich, profound flavor thanks to the egg yolks. But what truly elevates it is the fragrant, delicious taste of nutmeg. In this recipe, nutmeg isn’t just a supporting player; it’s the star of the spice show, making its quality paramount.
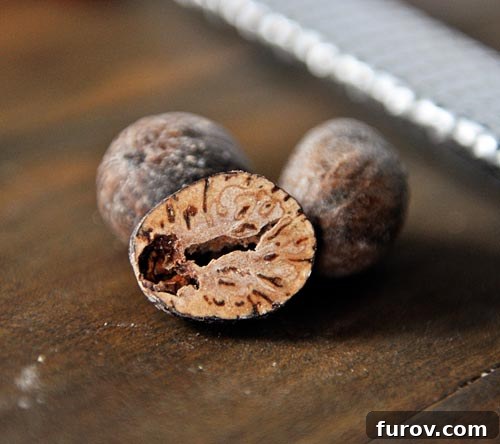
I cannot emphasize this enough: please, *please* grate your own nutmeg. The difference between pre-ground nutmeg and freshly grated whole nutmeg is nothing short of astounding. Pre-ground nutmeg often loses much of its volatile aromatic compounds, resulting in a muted, sometimes dusty flavor. Freshly grated nutmeg, however, releases a vibrant, warm, and intensely fragrant spice that transforms the eggnog from good to extraordinary. I use a rasp grater – the same tool I use for zesting lemons and limes – and small spice jars of whole nutmeg are readily available in most well-stocked grocery stores. This simple step will dramatically impact the final taste, creating a truly exceptional homemade eggnog experience.
The Family Verdict: A Connoisseur’s Critique and a Sneaky Experiment
Naturally, the ultimate test was the family’s reaction. The kids, as expected, gulped it down with pure joy. It’s sweet, creamy, and undeniably delicious – what’s not to love for a child? Brian, our resident eggnog connoisseur, offered a more nuanced opinion. He admitted he liked it but felt it was “missing the classic taste” he had grown accustomed (and perhaps addicted) to. I chuckled inwardly, knowing that the “classic taste” he cherishes is likely a cocktail of artificial flavors and preservatives designed to give store-bought eggnog its extended shelf life and distinct, albeit synthetic, profile. My homemade version tastes clean, pure, and genuinely fresh, allowing the natural flavors of dairy and nutmeg to truly shine.
I find immense satisfaction in creating a homemade version that my entire family can enjoy together, knowing exactly what ingredients went into it. It fills me with a nerdy happiness to have perfected this recipe. In fact, I’m contemplating a little experiment: once Brian finishes his current carton of store-bought eggnog, I plan to refill it with my homemade concoction to see if he can truly tell the difference. The only real giveaway might be if he catches me chugging it straight from the carton – a behavior unheard of for me with eggnog, though I’ve certainly been known to do it with chocolate milk!
How to Make the Best Homemade Eggnog (Cooked Egg Version)
Creating this rich and creamy eggnog at home is a rewarding process. The key steps involve tempering the egg yolks to prevent scrambling and cooking the mixture to a safe temperature, ensuring both safety and a smooth, velvety texture. Follow these instructions carefully for a perfect batch every time.
Homemade Eggnog
Yield:
3-4 cups of eggnog
Prep Time:
10 mins
Cook Time:
10 mins
Total Time:
20 mins
Pin
Ingredients
- 6 large egg yolks
- ½ cup (106 g) granulated sugar
- 1 cup heavy cream
- 2 cups milk
- 1 ½ teaspoons freshly grated nutmeg
- Pinch of salt
- ¼ teaspoon vanilla extract
- ⅛ teaspoon rum extract, optional
Instructions
-
In a medium bowl, whisk together the egg yolks and sugar until the mixture is light in color and has a creamy consistency. This process incorporates air and begins to dissolve the sugar.
-
In a saucepan, combine the heavy cream, milk, freshly grated nutmeg, and salt. Heat this mixture over medium heat, stirring frequently, until it reaches a bare simmer (small bubbles just begin to form around the edges of the pan). Do not allow it to boil vigorously.
-
To temper the eggs (prevent them from scrambling), slowly ladle about ½ cup of the hot milk mixture into the egg yolk and sugar mixture, whisking vigorously and continuously. The goal is to gradually raise the temperature of the egg yolks without cooking them. Ladle in another ½ cup, whisking all the while. Continue this process until approximately half of the hot milk mixture has been incorporated into the eggs, and the combined mixture feels warm to the touch.
-
Carefully pour the tempered egg mixture back into the saucepan with the remaining hot milk mixture on the stove. Whisk quickly to ensure everything is thoroughly combined. Continue to cook the mixture over medium-low heat, stirring constantly with a whisk or a rubber spatula, until it thickens slightly and reaches 160°F (71°C) on an instant-read thermometer. This temperature ensures the eggs are safely cooked. Do not let it boil, as this can cause the eggnog to curdle.
-
Immediately remove the saucepan from the heat once it reaches the target temperature. Stir in the vanilla extract and, if using, the rum extract. The residual heat will help infuse these flavors.
-
Pour the finished eggnog into a clean bowl or pitcher. Cover the surface directly with plastic wrap to prevent a skin from forming. Refrigerate for at least 4 hours, or preferably overnight, until thoroughly chilled. Homemade eggnog tastes best when it’s well-chilled, allowing the flavors to meld and deepen.
-
Serve cold, garnished with an extra sprinkle of freshly grated nutmeg. Enjoy!
Notes for Perfect Eggnog
Milk Choice: I typically use 1% milk for this recipe, which yields a rich yet balanced consistency. However, you have flexibility here. You could use anything from skim milk for a lighter version to whole milk for an even richer, more indulgent drink. The fat content will slightly alter the final texture, but the core flavor remains delicious.
Nutmeg Level: I am genuinely passionate about nutmeg, and the recipe calls for 1½ teaspoons to truly highlight its aromatic qualities. If you’re new to freshly grated nutmeg or prefer a more subtle spice profile, I recommend starting with 1 teaspoon. You can always taste the chilled eggnog before serving and add a little more if you feel it needs an extra kick. Freshly grated is key for that vibrant flavor.
Adding Alcohol (Optional): For an adult version, you can stir in 1/2 to 1 cup of your preferred spirit after the eggnog has been removed from the heat and slightly cooled, but before chilling. Brandy, rum, or bourbon are classic choices that complement eggnog beautifully. Adjust to your taste.
Chilling is Crucial: While it’s tempting to try your eggnog right away, the flavors truly develop and mellow after several hours or overnight in the refrigerator. The chilling process allows the spices to meld with the dairy and eggs, creating a more harmonious and refreshing beverage.
Author:
Mel
Course:
Drink
Cuisine:
American
Method:
Stovetop
Nutrition Information (per 1 Cup serving, approximately):
- Serving: 1 Cup
- Calories: 584 kcal
- Carbohydrates: 45g
- Protein: 12g
- Fat: 40g
- Saturated Fat: 23g
- Cholesterol: 485mg
- Sodium: 116mg
- Fiber: 1g
- Sugar: 42g
Recommended Products for Homemade Eggnog
Final Thoughts: Are You an Eggnog Lover or Hater?
So, now that you’ve discovered the wonders of homemade eggnog – a version that’s fresh, safe, non-alcoholic (unless you choose otherwise!), and utterly delicious – I’m genuinely curious: where do you stand on the great eggnog debate? Are you a passionate eggnog lover, eagerly awaiting its seasonal return, or do you typically shy away from it? Perhaps this recipe will sway even the most ardent eggnog hater to the side of creamy, nutmeg-infused bliss. Give it a try, and let me know!
One Year Ago:
The Best Shrimp Cocktail
Two Years Ago:
Queso Blanco Dip
Three Years Ago:
Rocky Mountain Cookies
Recipe Source: This recipe was lovingly adapted from various sources until perfected, drawing inspiration from notable chefs like Alton Brown’s recipe and culinary insights from Cuisine at Home. My aim was to combine the best techniques and flavors into one foolproof, family-friendly recipe.