
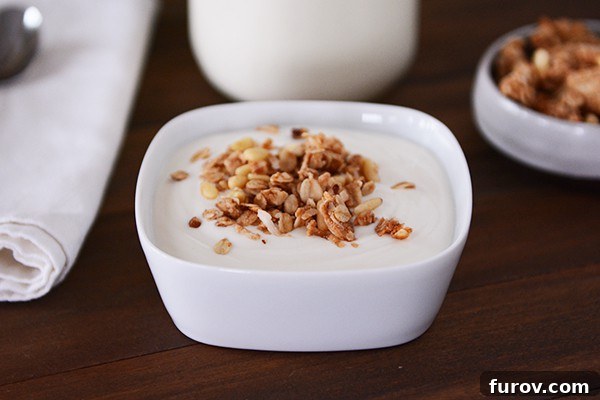
Mastering Homemade Yogurt: Your Ultimate Guide to Creamy Perfection
Unlock the secrets to crafting your own incredibly delicious, silky-smooth homemade yogurt with this comprehensive, step-by-step guide. You’ll be amazed at how simple and rewarding it is to make!
Are you ready to transform your breakfast routine and elevate your snacking game? For years, countless readers have embarked on their journey to homemade yogurt, and it’s a culinary adventure that promises immense satisfaction. While many have been perfecting their technique for ages, my personal foray into the world of DIY yogurt began just a couple of years ago. What started as an experiment quickly evolved into a cherished household staple.
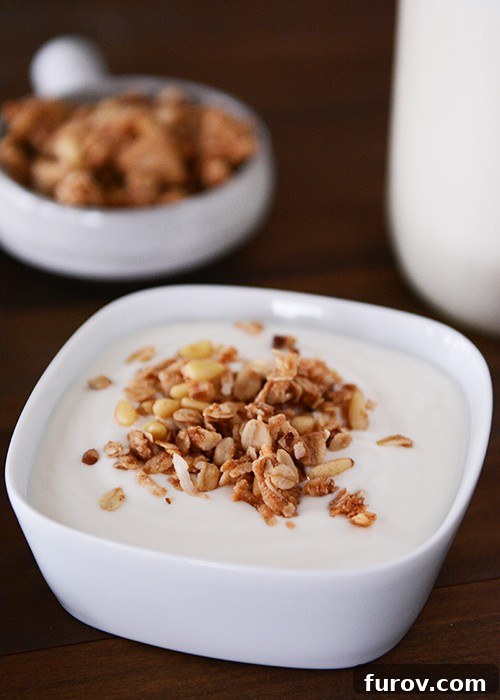
I’m thrilled to share that homemade yogurt has become a religious practice in our home over the past two years. We consume it regularly, and it undeniably contributes to our overall happiness. (Alright, maybe it’s not a complete panacea for toddler tantrums or brotherly squabbles – someone still typically ends up in time-out multiple times a day, and sadly, it’s rarely me. So perhaps homemade yogurt isn’t the ultimate cure-all for every family challenge, but it certainly brings joy to our taste buds!)
Through the consistent practice of making yogurt at least three times a month for two years, my approach has naturally evolved and significantly improved. My current method is not only streamlined but also notably faster, easier, and requires less active effort than my original process.
While the slow cooker remains an excellent option for a truly hands-off approach, I understand that time is often a premium commodity. If your goal is to complete the entire yogurt-making process within a single day, then this refined technique is tailor-made for you. Beyond just the cooking method, I’ve also discovered more efficient tools for straining and incubating, which I’m excited to share.
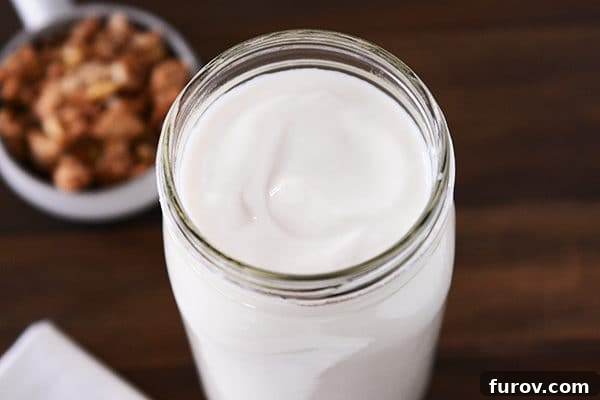
Why Make Homemade Yogurt? The Irresistible Benefits
Beyond the simple pleasure of a creamy, delicious snack, making your own yogurt offers a multitude of benefits that elevate it far above store-bought alternatives. Firstly, it’s incredibly **cost-effective**. A gallon of milk and a small amount of starter yogurt can yield several quarts of fresh yogurt, significantly cheaper than buying individual containers.
Secondly, you gain **complete control over the ingredients**. No more worrying about hidden sugars, artificial thickeners, or preservatives. You decide the type of milk, the level of sweetness, and any flavorings you wish to add, making it perfect for those with dietary restrictions or specific health goals. This customization also allows you to enjoy the full benefits of live and active cultures without unnecessary additives.
Finally, there’s an undeniable **freshness and superior taste** to homemade yogurt. The flavor is often richer, creamier, and more nuanced than anything you can find on supermarket shelves. Plus, the sense of accomplishment you get from creating something so wholesome and delicious from scratch is truly gratifying.
Essential Ingredients for Your Perfect Homemade Yogurt:
Milk: The Foundation of Flavor and Texture
The type of milk you choose plays a significant role in the final consistency and richness of your homemade yogurt. I frequently alternate between 2% and whole milk, sometimes even combining them for a balanced texture. Whole milk typically yields a thicker, creamier yogurt, while 2% milk still produces excellent results with a slightly lighter feel. I haven’t personally experimented with fat-free milk or non-dairy alternatives such as almond, coconut, or soy milk. However, the comments section of my original post contains valuable feedback from other makers who have successfully used these options. Generally, I process one gallon of milk at a time. Depending on factors like the milk’s fat content, brand, and how long it’s strained, a single gallon usually yields about 3 quarts of delicious, creamy yogurt. This ensures a fresh supply for several days without overwhelming my refrigerator.
Yogurt Starter: The Key to Live, Active Cultures
The yogurt starter is arguably the most crucial component, as it introduces the beneficial bacteria necessary for fermentation. You can use various types of yogurt for your starter: plain, Greek, or even vanilla. However, it’s best to steer clear of fruit-based yogurts, especially those containing actual fruit pieces, as they can interfere with the culturing process. The absolute most important characteristic of your starter yogurt is that it must contain **live and active cultures**. Always check the ingredient list to confirm the presence of specific bacterial strains like *Lactobacillus bulgaricus* and *Streptococcus thermophilus*. These are the workhorses that convert milk into yogurt. Once you successfully make your first batch of homemade yogurt, you can use a portion of it as the starter for subsequent batches, creating a self-sustaining cycle of deliciousness.
Sweetener (Optional): Customize Your Flavor Profile
Because my family and I enjoy most of our homemade yogurt for snacks, breakfast, and other eating occasions, I almost always add a touch of sweetener and vanilla extract during the culturing process. However, about once a month, I’ll prepare a plain batch specifically for cooking or baking recipes, or for those who prefer to sweeten their yogurt individually with low-sugar jam or fruit syrup. If you intend to use your yogurt exclusively as a plain base, a sour cream substitute, or prefer to sweeten it portion by portion, then you can certainly omit adding sweetener during the initial cooking and culturing. I personally favor agave nectar for sweetening, primarily because I appreciate its subtle taste and its slightly lower glycemic index. Feel free to experiment with other sweeteners like granulated sugar, honey, or maple syrup to find what best suits your palate.
Thermometer: Precision for Perfect Fermentation
An instant-read thermometer is an absolutely critical tool for successful yogurt making. The good news is that these devices are not overly expensive and offer incredible versatility for many other culinary tasks (think perfectly cooked pork tenderloin!). I wholeheartedly recommend the Thermapen I own; while it’s on the pricier side (it was a Mother’s Day gift years ago, and I adore it!), it’s the only one I’ve ever used, and its accuracy is unparalleled. Alternatively, many friends have recently praised this more affordable brand of thermometer, which also boasts excellent reviews. Achieving the correct temperatures is vital: you must heat the milk to precisely 180°F (82°C) in the first step, then allow it to cool to a specific range of 110-120°F (43-49°C). Maintaining this range throughout the incubation period is key, and trying to judge these temperatures by simply dipping a finger into the milk is far too unreliable.
Straining Mechanism: Achieving Your Desired Thickness
While “straining mechanism” might sound technical, it simply refers to having an effective way to remove excess whey from your yogurt. In the past, I would line a colander with cheesecloth or coffee filters (some restaurant supply stores reportedly carry oversized coffee filters, which would be incredibly convenient). However, after a friend, Deb, introduced me to nut milk bags (typically used for making almond milk), I gave them a try and have been completely won over! These bags are reusable, incredibly easy to wash, and they strain yogurt much faster than traditional methods. What used to take a couple of hours in a cheesecloth-lined colander now takes only 20-30 minutes with a nut milk bag. I keep two on hand, and each can comfortably hold about 3 quarts of yogurt. They are an inexpensive investment and, in my opinion, well worth it (plus, as I’ve mentioned before, I use them for efficiently wringing out zucchini, which has revolutionized that task!).
Jars and Lids: For Storage and Incubation
Quart-sized canning jars are ideal for making and storing homemade yogurt. I particularly prefer the wide-mouth variety for ease of filling and cleaning, but regular-mouth jars work just as well. Ultimately, any type of container with a secure lid that fits within your chosen cooler for the incubation period will suffice. I also highly recommend investing in plastic lids designed for canning jars. They eliminate the hassle of dealing with separate rings and lids, making storage and access much more convenient. I purchased several boxes specifically for yogurt making and now use them extensively for other preserved goods like jams, syrups, and canned peaches.
Cooler: Your DIY Incubation Chamber
Instead of monopolizing the oven (with the light on) all day or night to maintain the yogurt’s warmth, I’ve successfully transitioned to using an insulated cooler. I’m fairly certain many of you suggested this ingenious method in the comments of my original yogurt post, so thank you for the brilliant idea! My 13-year-old cooler (a wedding gift from over a decade ago) is the perfect size – you don’t need anything fancy, just a well-insulated, moderately-sized cooler. It easily accommodates six quart jars, and the lid seals tightly. I fill the cooler with hot water, using my trusty thermometer to ensure the water temperature is precisely between 110-120°F (43-49°C), reaching up to the neck of the jars. After closing the lid, I place it in a warm, draft-free spot and allow the yogurt to incubate undisturbed for 8-12 hours.
Tips for Success and Streamlined Yogurt Making
A few additional quick notes: I no longer add powdered dry milk to my yogurt, and haven’t for quite some time, as I find it unnecessary for a thick, creamy texture with my updated method. However, you can certainly incorporate it if you desire a little extra protein boost.
One of the most appealing aspects of this process is its efficiency. If I begin the yogurt-making around 8 a.m., I can have the entire batch – cooked, cultured, and strained – completed by the time I go to bed. The truly dreamy part is that for approximately 9 hours of that day, I’m doing absolutely nothing but letting a closed cooler work its magic. It’s an incredibly hands-off incubation period!
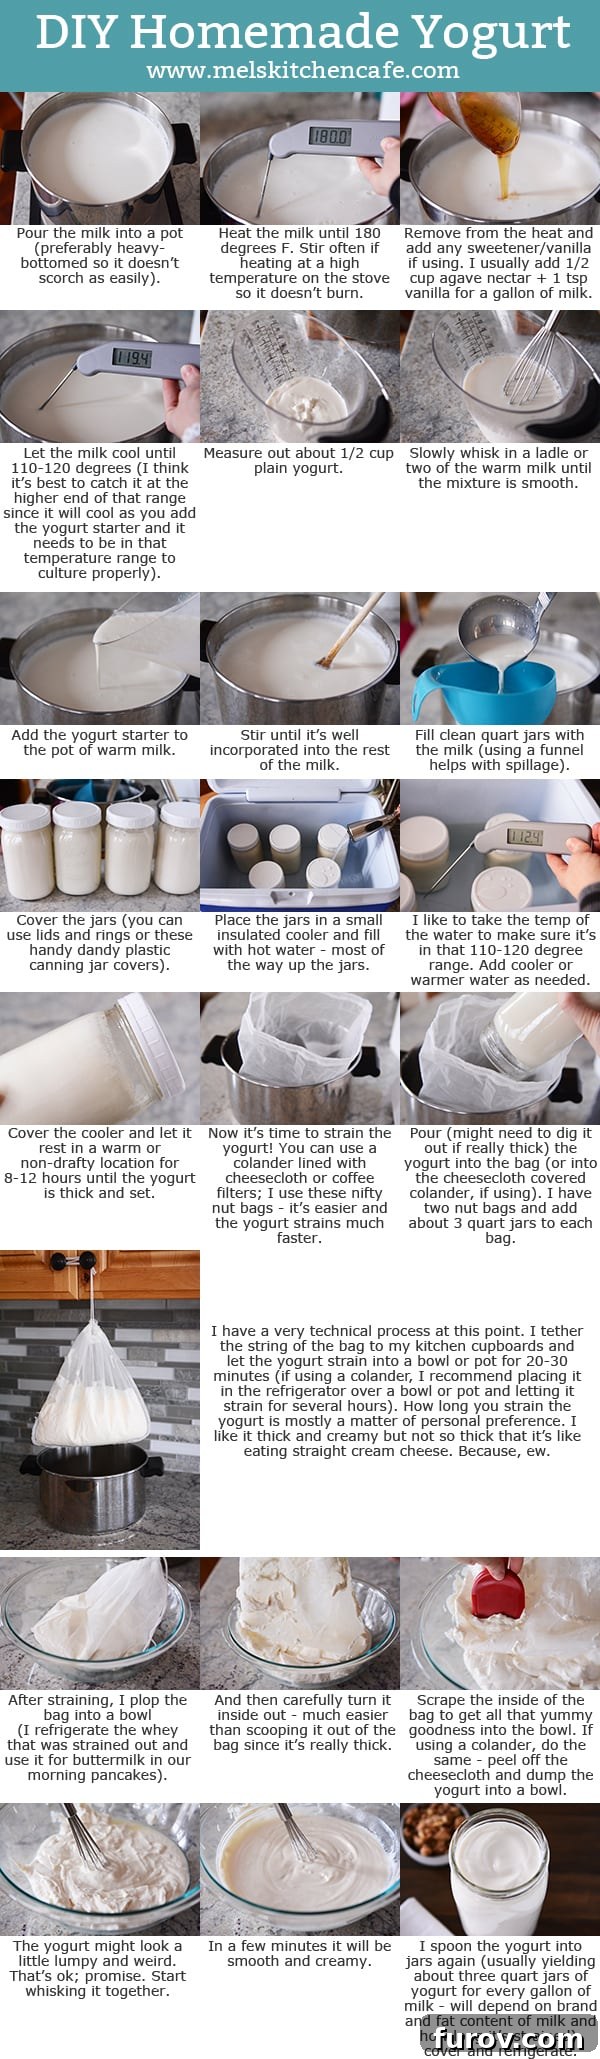
I believe that covers all the essential details. If you have any further questions, please feel free to leave them in the comments section below. Additionally, be sure to review the notes beneath the recipe title for extra information, as well as the accompanying picture tutorial for a visual guide.
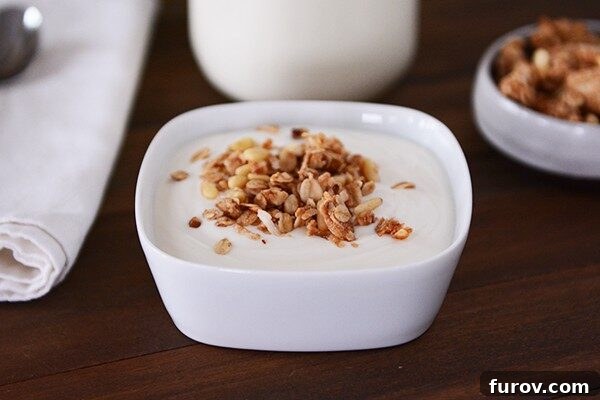
There are few breakfasts I anticipate more eagerly than a generous bowl of creamy, thick homemade yogurt, generously topped with a large smidgen of crunchy granola. As long as you allow ample time for the natural culturing process, crafting your own homemade yogurt is surprisingly simple and completely stress-free. It’s a truly rewarding culinary experience that brings a touch of wholesome goodness to your everyday life.
One Year Ago: Slow Cooker Beef and Barley Soup
Two Years Ago: Honey Lime Tilapia
Three Years Ago: Macaroni Grill Rosemary Bread

DIY Homemade Yogurt {New and Improved + Updated Tutorial}
Pin
Ingredients
- 1 gallon milk
- ½ cup plain yogurt with live and active cultures, look at the ingredient list to make sure it includes Lactobacillus bulgaricus and Streptococcus thermophilus
Instructions
-
**1. Heat the Milk:** Pour your chosen milk into a large pot and heat it over medium heat until it reaches exactly 180°F (82°C). It’s crucial to stir the milk frequently to prevent it from scorching and sticking to the bottom of the pot.
-
**2. Add Sweetener (Optional):** Once the milk reaches 180°F, remove it from the heat. If you plan to sweeten your yogurt or add vanilla extract, now is the time to stir them into the hot milk until well combined.
-
**3. Cool the Milk:** Allow the milk to cool down to a temperature between 110-120°F (43-49°C). I generally aim for the higher end of this range, around 119°F (48°C), because the temperature will drop slightly when you add the cooler yogurt starter. Maintaining this specific temperature range is vital for the active cultures to thrive and properly ferment the milk.
-
**4. Prepare the Starter:** In a separate liquid measuring cup or small bowl, measure out your yogurt starter. Slowly whisk in a couple of ladlefuls of the warm milk from the pot into the starter until the mixture is completely smooth and free of lumps. This tempering step prevents the starter from shocking and separating when added to the larger volume of warm milk.
-
**5. Combine and Stir:** Pour the tempered yogurt starter mixture back into the pot with the remaining warm milk. Stir thoroughly until the starter is evenly incorporated throughout the milk.
-
**6. Jar the Yogurt:** Carefully ladle the inoculated milk mixture into clean, quart-sized jars. A funnel can be very helpful here to avoid spills. Secure each jar with a lid and ring, or with a convenient plastic canning lid.
-
**7. Set Up the Incubation:** Place the filled jars into an insulated cooler. Fill the cooler with hot water, ensuring it comes most of the way up to the neck of the jars. Use your thermometer to check the water temperature; it must also be within the 110-120°F (43-49°C) range. If the water is too hot or too cool, the yogurt will not thicken properly. Adjust by adding warmer or cooler water as needed.
-
**8. Incubate:** Close the cooler tightly and place it in a warm, non-drafty location. Let the yogurt rest undisturbed for 8-12 hours. During this time, the active cultures will work their magic, thickening the milk into yogurt. The longer it incubates, the tangier and often thicker the yogurt will become.
-
**9. Strain for Desired Thickness:** After incubation, it’s time to strain your yogurt. You can use a nut milk bag or a colander lined with several layers of cheesecloth or large coffee filters. Gently spoon the thickened yogurt into your chosen straining device; depending on its initial thickness, pouring might not be feasible. If using a nut milk bag (which I highly recommend for its speed and efficiency), tie it to a kitchen cabinet knob, allowing the whey to drip into a pot or bowl placed underneath. I use two nut bags, putting about 3 quarts of yogurt in each, and find that 20-30 minutes of straining is usually sufficient. If using cheesecloth in a colander, place it over a large pot or bowl and refrigerate for a couple of hours. The total straining time varies based on your desired thickness: strain longer for a thicker, Greek-style yogurt, and less for a looser, traditional consistency. If it becomes too thick, simply whisk in a little of the reserved whey (or milk) to achieve the perfect texture.
-
**10. Finish and Store:** Once strained to your liking, scrape the yogurt into a clean bowl and whisk it vigorously until it’s smooth and wonderfully creamy. Spoon the finished yogurt back into clean jars, cover them, and refrigerate. The yogurt will continue to thicken slightly as it chills.
-
**11. Enjoy and Store:** Your homemade yogurt should remain fresh for 1-2 weeks in the refrigerator. Using well-sanitized jars helps extend its shelf life, as does starting with milk that is far from its expiration date.
Notes
Milk Choices: I regularly make this yogurt using either whole milk or 2% cow’s milk. I have not personally experimented with alternative milk products (such as almond, coconut, or soy milk), but I know from comments on the original post that others have successfully used them.
Sweetener & Extract Guidance: While I don’t provide precise sweetener amounts within the main recipe, the accompanying picture collage includes this information for clarity. For every gallon of milk, I typically add 1/2 cup of agave nectar and 1 teaspoon of vanilla extract. Feel free to experiment with different sweeteners (like honey or sugar) and various extracts (such as coconut, which is delicious!). Adding sweetener or vanilla is entirely optional, especially if you plan to use the yogurt as a plain base in recipes or as a substitute for sour cream. Given that we consume our yogurt directly about 99% of the time, I prefer a lightly sweetened version.
Yogurt Starter Quantity: Many online resources suggest using less starter yogurt, but in my experience, reducing the amount results in a noticeably thinner yogurt. Therefore, I consistently stick with 1/2 cup of starter to achieve the desired consistency. Remember, you can also use a portion of your freshly made homemade yogurt as the starter for your very next batch!
Efficient Timeline: One final note on timing: if I initiate the yogurt-making process around 8 a.m. in the morning, I can typically have the entire batch completed, including straining, by bedtime that same day. This makes it a very manageable project for a weekend or a day at home.
Recommended Products
Recipe Source: Adapted and updated from the original post by Mel’s Kitchen Cafe (find the original method here).