
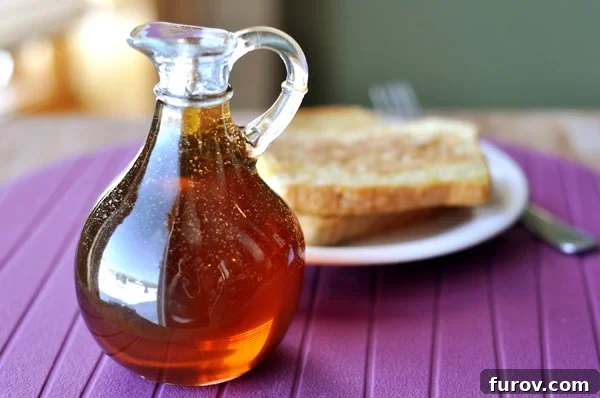
Homemade Maple Syrup: The Easy, Affordable & Delicious Alternative
Crafting your own maple syrup at home is surprisingly simple, incredibly economical, and yields a flavor that truly rivals expensive store-bought pure maple syrup.
Solving the Breakfast Syrup Dilemma
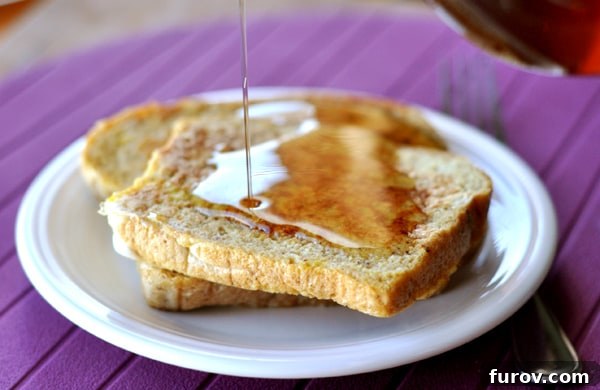
For many of us, breakfast isn’t complete without a generous pour of golden syrup over our favorite hot dishes. Whether it’s a stack of fluffy pancakes, perfectly golden French toast, or crispy waffles, syrup is the quintessential accompaniment that transforms a good breakfast into a great one. Yet, this seemingly simple condiment has often been the source of a minor, ongoing breakfast conundrum in my own kitchen.
The quest for the ideal syrup has led to years of deliberation. Mornings are already hectic enough without the added stress of finding a syrup solution that meets all the criteria: delicious, wholesome, and budget-friendly. This struggle to find the perfect pour has, at times, made me even grumpier before my first cup of coffee has had a chance to kick in!
The Unsweetened Truth About Store-Bought Syrups
My primary reservation with many store-bought “pancake syrups” stems from their ingredient lists. Often laden with high-fructose corn syrup, artificial flavors, and preservatives, these syrups stray far from the natural goodness one expects from a breakfast staple. I simply can’t bring myself to compromise on quality when it comes to feeding my family, especially when there are better alternatives available.
This leaves two main paths for a syrup enthusiast: indulging in pure maple syrup or venturing into the world of homemade options. While pure maple syrup, with its rich, distinctive flavor, is undoubtedly the gold standard, its premium price tag can be a significant deterrent. For a household that enjoys hot breakfasts almost daily, the cost of pure maple syrup quickly adds up, becoming a substantial drain on the grocery budget. After relying on bulk purchases of pure maple syrup for a year, the necessity to tighten our household budget meant this luxury had to be reconsidered.
My past attempts at homemade syrups also presented their own set of challenges. Many recipes resulted in syrups that formed an unappetizing film on the surface, particularly those heavy on buttermilk. Others leaned too heavily on corn syrup, defeating the purpose of making syrup at home to avoid such additives. The goal was clear: I needed a maple-flavored syrup that was free from undesirable ingredients, didn’t break the bank, and offered a consistent, appealing texture. Was that truly too much to ask for?
Discovering the Perfect Homemade Maple Syrup
After much experimentation and a dash of stubborn determination, I finally landed on a recipe that not only met but exceeded all my expectations! This homemade maple syrup is incredibly simple to prepare, requires minimal ingredients, and, most importantly, tastes authentically like maple syrup – a true culinary triumph!
Unlike many overly thick commercial syrups, this homemade version boasts a consistency that is delightfully reminiscent of pure maple syrup. It’s on the thinner side, which my family has grown to appreciate, having accustomed ourselves to the delicate flow of natural maple. In fact, this recipe typically yields a syrup that is perhaps just a touch thicker than genuine pure maple, offering a satisfying mouthfeel without being overly viscous.
From a nutritional standpoint, particularly concerning sugar content, this homemade recipe holds its own. When I last calculated the figures, pure maple syrup contains approximately 50 grams of sugar per 1/4 cup serving. My homemade rendition comes in at a comparable 48 or 49 grams for the same amount. This demonstrates that you’re getting a rich, sweet syrup without significantly altering the sugar profile compared to its pure counterpart, all while avoiding the artificial elements found in many store-bought pancake syrups.
While I haven’t purchased conventional pancake syrup in years, making direct comparisons difficult, I suspect even “light” or “low-sugar” brands likely contain a host of processed additives. With this homemade recipe, you maintain complete control over what goes into your family’s food, ensuring a cleaner, more natural option.
The Magic Behind Authentic Maple Flavor: Pure Maple Extract
The secret to achieving that irresistible, genuine maple flavor without using actual maple sap (unless you happen to have a tapping-savvy neighbor!) lies in pure maple extract. This potent ingredient is the cornerstone of this recipe, infusing your homemade syrup with an authentic taste that will fool even the most discerning palates.
When selecting maple extract, I highly recommend opting for “pure” maple extract whenever possible. Pure extracts typically contain minimal additives, often just a touch of caramel coloring to enhance visual appeal, alongside the natural maple flavor. This ensures a cleaner flavor profile and fewer unwanted ingredients. While I source my pure maple extract from Cook’s Vanilla, you might find excellent local brands in specialty food stores or online. If pure maple extract proves difficult to locate, artificial “Mapleine” extract can be used as a substitute, yielding similar results, though always check the ingredient list if you’re trying to avoid certain additives.
Vanilla extract also plays a supporting role, adding depth and a subtle warmth that complements the maple beautifully. Together, these extracts create a symphony of flavors that elevate simple sugars and water into something truly special.
Mastering Your Homemade Maple Syrup: Tips and Variations
Making this syrup is incredibly straightforward, but a few tips can help ensure perfect results every time:
- Storage is Key: Once your syrup has cooled to room temperature, transfer it to airtight jars or containers. Stored in the refrigerator, this homemade maple syrup will stay fresh and delicious for up to two months, making it perfect for meal prepping your breakfast essentials.
- Gentle Reheating: If you prefer your syrup warm, gently reheat it on the stovetop over low heat or briefly in the microwave. Be careful not to boil it excessively, as this can alter the consistency.
- Adjusting Consistency: If, after cooling, you find the syrup a little too thick for your liking, you can thin it out by stirring in a tablespoon or two of hot water. Conversely, for a thicker syrup, you can gently simmer the sugar mixture for a few extra minutes before removing it from the heat, ensuring to cool completely before judging final thickness.
- Enhance the Flavor: For an even richer flavor, consider adding a tiny pinch of salt to the sugar mixture while it simmers. A whisper of molasses (about half a teaspoon) can also add a delightful complexity and darker hue, mimicking some deeper maple notes.
- Creative Serving Ideas: This versatile syrup isn’t just for pancakes and waffles! Drizzle it over oatmeal, yogurt, ice cream, or even use it as a sweetener in coffee and tea. It can also be incorporated into glazes for roasted vegetables or meats, adding a sweet and savory dimension to your dishes.
Homemade Maple Syrup
Prep Time: 1 hr
Cook Time: 15 mins
Total Time: 1 hr 15 mins
Ingredients
- 8 cups granulated sugar
- 1 cup packed light or dark brown sugar
- ½ cup honey
- 4 cups water
- 2 teaspoons pure maple extract
- 2 teaspoons pure vanilla extract
Instructions
-
In a large 5-6 quart pot, combine the granulated sugar, brown sugar, honey, and water. Bring the mixture to a boil over medium-high heat, stirring occasionally until the sugars are fully dissolved. Once boiling, reduce the heat to low so the mixture gently simmers.
-
Cover the pot with a lid and allow the mixture to simmer gently for 15 minutes. This simmering time helps to thicken the syrup slightly and meld the flavors. After 15 minutes, remove the pot from the heat and let it cool, still covered, for 20 minutes before stirring in the pure maple and vanilla extracts.
-
After adding the extracts, let the syrup continue to cool in the pot for another 40 minutes or so, stirring occasionally. This cooling period allows the flavors to deepen and the syrup to thicken further. Once sufficiently cooled, fill clean jars or other airtight containers. Let the containers cool to room temperature uncovered before sealing.
-
Store the covered syrup in the refrigerator. It will keep well for up to 2 months. For an optimal experience, gently reheat the syrup before serving, if desired, to restore its flowing consistency and enhance its aroma.
Notes
Maple Extract: I prefer pure maple extract for its minimal additives and authentic flavor, but if it’s unavailable, artificial Mapleine extract can be used with similar results. Always check labels for preferred ingredients.
Author: Mel
Course: Breakfast
Cuisine: American
Method: Stovetop
Recommended Products
Recipe Source: Mel’s Kitchen Cafe