
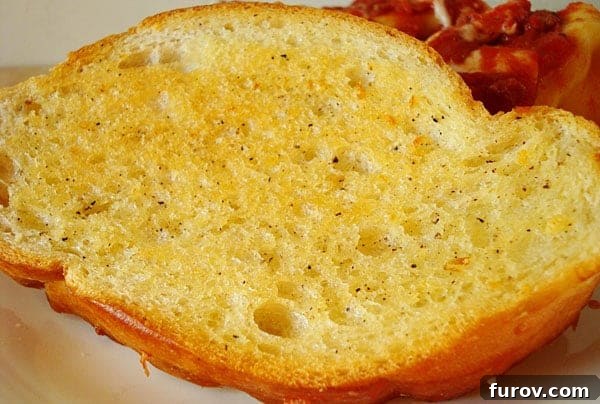
Effortless Entertaining: Master the Make-Ahead Crispy, Buttery Garlic Bread
Transform your spaghetti nights and any meal into a culinary delight with this incredible make-ahead crispy, buttery garlic bread. Prepare it in advance, freeze the slices, and bake when ready for a perfectly golden, garlicky crunch every single time!
There’s nothing quite like the comforting aroma and irresistible taste of warm, buttery garlic bread. It’s the ultimate companion to a hearty pasta dish, a comforting bowl of soup, or even a simple fresh salad. However, the spontaneity of enjoying truly fantastic garlic bread often clashes with the reality of daily life. How many times have you craved that perfect slice, only to realize your fresh French bread is long gone, or worse, stale? This common dilemma is precisely what inspired my quest for the ultimate make-ahead solution, leading me to this revelation from Cook’s Country magazine.
I distinctly remember making this garlic bread specifically to pair with my Manicotti. But the magic of this recipe is that the actual prep work was done weeks in advance! I had already created, portioned, and frozen the slices, ready to be quickly baked on the night I planned my Manicotti feast. This simple strategy fundamentally changed how I approach meal planning and side dishes.
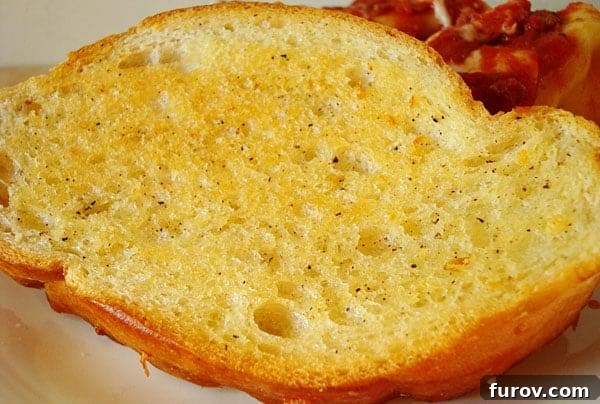
My freezer downstairs is now a treasure trove, consistently stocked with this “manna from garlic-bread heaven!” It’s a game-changer for busy evenings, impromptu dinners, or whenever the craving for warm, savory bread strikes. No more scrambling for fresh bread, no more settling for mediocre store-bought versions. This recipe guarantees a consistently delicious, buttery, and incredibly garlicky result with a satisfyingly crispy crust that is a thousand times better than any last-minute improvisation.
Why This Make-Ahead Garlic Bread Will Become Your Go-To Recipe
This isn’t just another garlic bread recipe; it’s a culinary hack that delivers exceptional flavor and unparalleled convenience. Here’s why you’ll fall in love with it:
- Unmatched Convenience: Prepare a large batch whenever you have time, then simply pull out a few slices from the freezer and bake. Perfect for busy weeknights, holiday gatherings, or unexpected guests.
- Perfect Texture Every Time: The freezing process helps lock in moisture and allows the butter mixture to fully permeate the bread, resulting in an incredibly crispy exterior and a wonderfully tender interior.
- Superior Flavor: Freshly minced garlic, softened butter, a hint of sugar, and perfectly balanced seasonings create a rich, savory, and irresistible flavor that far surpasses any store-bought option. The sugar aids in caramelization, giving the bread a beautiful golden-brown finish.
- Reduces Waste: No more stale bread! You can buy a fresh loaf, make this recipe, and freeze the portions, ensuring you always have fresh-tasting garlic bread without worrying about spoilage.
- Economical: Making your own garlic bread is generally more cost-effective than buying pre-made versions, especially when you buy bread on sale.
The Heart of the Recipe: Ingredients for Perfection
Great garlic bread starts with quality ingredients. Here’s a closer look at what you’ll need and why each component is vital:
- Butter: Use a good quality unsalted butter, softened to room temperature. Softened butter is crucial for easy mixing with the garlic and seasonings, ensuring a smooth, spreadable mixture. If you only have salted butter, reduce the added salt in the recipe slightly. The fat in the butter is key to that golden, crispy texture.
- Garlic Cloves: Fresh is best! Four cloves provide a robust garlic flavor. Finely mincing the garlic is essential so it distributes evenly and doesn’t create large, overpowering chunks. A garlic press works wonders here, or you can finely chop it with a sharp knife.
- Sugar: A small amount of sugar might seem unusual for garlic bread, but it plays a vital role. It helps to balance the pungency of the garlic, enhances the savory notes, and contributes to the beautiful caramelization and golden-brown crust during baking. Don’t skip it!
- Salt and Pepper: These essential seasonings elevate all the other flavors. Adjust to your taste, but the recommended ¼ teaspoon of each provides a well-rounded profile.
- Italian or French Bread: The foundation of our garlic bread! Choose a loaf with a good crusty exterior and a relatively soft interior. A 1-pound loaf will typically yield about 12 (1-inch thick) slices, perfect for this recipe. A fresh loaf will absorb the butter mixture beautifully.
Mastering the Make-Ahead Method: Step-by-Step Instructions
This recipe is straightforward, designed for maximum flavor with minimal effort when it’s time to serve. Follow these steps for perfect crispy, buttery garlic bread every time:
Make-Ahead Crispy, Buttery Garlic Bread
Yield: 6 Servings
Prep Time: 45 mins
Cook Time: 15 mins
Total Time: 1 hr
Ingredients
- 12 tablespoons butter, softened
- 4 garlic cloves, very finely minced
- ¼ teaspoon sugar
- ¼ teaspoon salt
- ¼ teaspoon pepper
- 12 (1-inch slices) Italian or French bread
Instructions
- Using a fork, combine the softened butter, finely minced garlic, sugar, salt, and pepper in a small bowl. Beat until all ingredients are well combined and the mixture is smooth and evenly incorporated.
- Evenly spread the butter mixture over both sides of each bread slice. Ensure a generous and consistent coating on all surfaces to maximize flavor and crispiness.
- Arrange the buttered bread slices on a large baking sheet or plate in a single layer. Place them in the freezer until they are firm, which usually takes about 15 minutes. This step prevents them from sticking together.
- Once the slices are firm, transfer them to a freezer-safe ziploc bag. Remove as much air as possible from the bag before sealing to prevent freezer burn. Store in the freezer for up to one month.
- To serve, preheat your oven to 425 degrees Fahrenheit (220 degrees Celsius). Arrange the frozen bread slices on a rimmed baking sheet.
- Bake the bread until it’s golden brown and crispy on the first side, which typically takes about 10 minutes.
- Carefully flip the slices and continue to bake for another 6-7 minutes, or until the second side is also golden brown and perfectly crispy. Serve immediately and enjoy!
Notes
Baking the Bread Immediately: If you wish to serve the bread immediately instead of freezing, bake the buttered bread on a rimmed baking sheet at 425 degrees Fahrenheit (220 degrees Celsius) for 8 minutes. Then, flip and bake for an additional 5 minutes on the second side until golden brown and crispy.
Author: Mel
Course: Bread
Cuisine: American
Method: Bake
Nutrition Information (Approximate Per Serving)
Serving: 1 Slice, Calories: 575kcal, Carbohydrates: 73g, Protein: 15g, Fat: 25g, Saturated Fat: 15g, Cholesterol: 60mg, Sodium: 954mg, Fiber: 3g, Sugar: 3g
Recommended Products
Tips for Garlic Bread Perfection
Achieving that dream-like crispy, buttery garlic bread is easier than you think with a few expert tips:
- Quality of Bread Matters: Start with a good quality French or Italian bread. A loaf that is fresh but a day old can also work well, as it might absorb the butter mixture even better without becoming soggy. Look for a loaf with a nice, sturdy crust and a soft, open crumb.
- Finely Mince Your Garlic: This is non-negotiable for the best flavor distribution. Large chunks of garlic can burn or be too intense. A garlic press is your best friend here, or use a microplane for an almost paste-like consistency.
- Softened Butter is Key: Ensure your butter is truly at room temperature and soft enough to easily mix with a fork. This creates a smooth, spreadable paste that coats the bread evenly. Hard butter will be difficult to spread and won’t adhere as well.
- Don’t Skip the Initial Freeze: Freezing the slices individually on a baking sheet before transferring them to a bag prevents them from sticking together. This ensures you can pull out just the right number of slices without wrestling with a frozen block of bread.
- Even Spreading: Take a moment to spread the garlic butter evenly from edge to edge on both sides of each slice. This guarantees maximum flavor and a consistent crispiness.
- Watch Your Oven: Ovens can vary. Keep an eye on the bread, especially during the last few minutes of baking, to prevent burning. You’re looking for a beautiful golden-brown color and a crispy texture.
Creative Variations to Elevate Your Garlic Bread
While this classic recipe is perfect as is, feel free to experiment and customize it to your liking:
- Cheesy Garlic Bread: For an indulgent twist, sprinkle shredded mozzarella, Parmesan, or a blend of Italian cheeses over the garlic bread during the last 5 minutes of baking. The cheese will melt and become bubbly and golden.
- Herby Garlic Bread: Add a tablespoon of finely chopped fresh parsley, chives, or a half teaspoon of dried oregano or Italian seasoning to the butter mixture for an extra layer of aromatic flavor.
- Spicy Garlic Bread: A pinch of red pepper flakes mixed into the butter will give your garlic bread a subtle, warming kick.
- Roasted Garlic Bread: For a milder, sweeter garlic flavor, roast your garlic cloves first. Simply cut off the top of a garlic head, drizzle with olive oil, wrap in foil, and roast at 400°F (200°C) for 30-40 minutes until soft. Squeeze out the softened garlic and mix it into the butter.
Perfect Pairings and Serving Suggestions
Garlic bread is incredibly versatile and pairs beautifully with a wide array of dishes. Beyond the classic Manicotti, here are some ideas:
- Pasta Dishes: The quintessential pairing! Serve alongside spaghetti with marinara, lasagna, fettuccine alfredo, chicken parmesan, or any creamy pasta dish.
- Soups and Stews: A hearty slice of garlic bread is perfect for dipping into minestrone, tomato soup, beef stew, or French onion soup.
- Salads: Complement a crisp Caesar salad or a vibrant garden salad with a side of warm garlic bread.
- Grilled Meats: Enhance grilled chicken, steak, or pork chops with this flavorful side.
- Sandwiches: Use thicker slices as the base for open-faced sandwiches or bruschetta-style toppings.
- Breakfast/Brunch: While unconventional, a slice of savory garlic bread can be surprisingly good with scrambled eggs or alongside a frittata.
Storing and Reheating Your Homemade Garlic Bread
The beauty of this make-ahead recipe lies in its freezer-friendliness. Proper storage ensures you have delicious garlic bread on demand:
- Freezing Raw Slices: After spreading the butter mixture, freeze slices individually on a baking sheet until firm (about 15 minutes). Then transfer to a freezer-safe ziploc bag, pressing out as much air as possible. Store for up to one month. Baking from frozen is covered in the main instructions.
- Storing Leftovers (Baked): If you have leftover baked garlic bread, allow it to cool completely. Wrap individual slices tightly in aluminum foil or place them in an airtight container. Store at room temperature for up to 2 days, or in the refrigerator for up to 4 days.
- Reheating Leftovers: For best results, reheat leftover baked garlic bread in a toaster oven or a regular oven at 350°F (175°C) for about 5-10 minutes, or until heated through and crispy. You can also quickly reheat in a dry skillet over medium heat for a few minutes per side, being careful not to burn the garlic. Microwaving is not recommended as it can make the bread soggy.
Frequently Asked Questions About Make-Ahead Garlic Bread
Here are answers to some common questions about this versatile recipe:
Q: Can I use different types of bread for this recipe?
A: Yes! While French or Italian bread is traditional and highly recommended for its texture, you can experiment with other sturdy loaves like ciabatta, sourdough, or even a thick-sliced baguette. Just ensure the slices are thick enough to hold the butter mixture and stand up to baking.
Q: How long does this garlic bread last in the freezer?
A: When properly wrapped and stored in an airtight freezer bag, the buttered and frozen garlic bread slices can last for up to one month. Beyond that, the quality might start to decline, though it would likely still be safe to eat.
Q: Can I bake the bread without freezing it first?
A: Absolutely! The “Notes” section in the recipe card provides instructions for baking the bread immediately if you prefer not to freeze it. It’s a slightly shorter baking time, but the result is still delicious, though the freezing step contributes to a uniquely crispy texture.
Q: What if I don’t have a garlic press?
A: No problem! You can finely mince the garlic using a sharp knife. For an even finer paste, mash the minced garlic with the side of your knife or a fork against the cutting board, adding a pinch of salt to help break it down.
Q: Can I make this recipe dairy-free?
A: Yes, you can substitute dairy-free butter (like a good quality plant-based butter stick) for regular butter. The texture and flavor will be very similar.
Q: My garlic bread turned out soggy. What went wrong?
A: Soggy garlic bread can happen if too much butter is used, if the bread wasn’t thick enough, or if it wasn’t baked long enough to crisp up. Ensure you spread the butter mixture evenly and don’t overload the bread. Also, ensure your oven is at the correct temperature and bake until truly golden and crispy, flipping as instructed.
Recipe Source: slightly adapted from Cook’s Country