
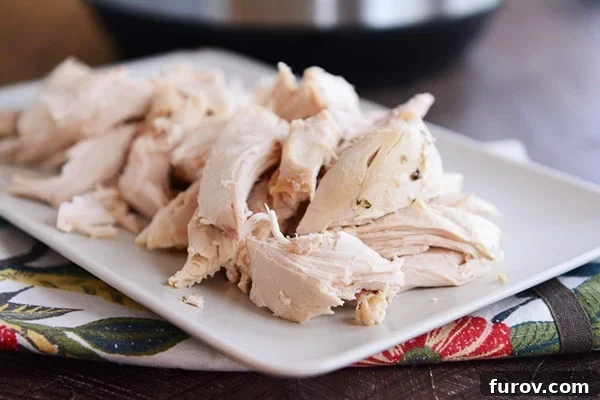
Experience the rich flavor of a perfectly roasted chicken without the lengthy cooking time or complicated steps. This easy pressure cooker whole chicken recipe is your ultimate solution for tender, juicy poultry that’s ready faster than you ever imagined!
Welcome to a culinary revelation that will transform your weeknight dinners and meal prep! We’re diving deep into the art of cooking a whole chicken in your pressure cooker. Forget the hours spent waiting for oven-roasted perfection; this method delivers an incredibly tender, flavorful chicken that rivals traditional roasting, all thanks to the magic of high-pressure cooking.
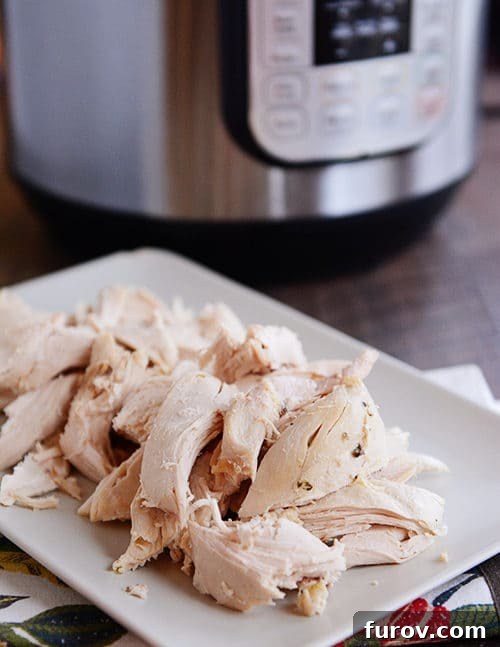
Unlock Unrivaled Tenderness: Why Pressure Cook Your Whole Chicken?
Prepare to be amazed! The chicken cooked using this pressure cooker method often turns out to be the most succulent, flavorful poultry you’ve ever tasted. The high-pressure environment forces moisture deep into the meat, ensuring every bite is infused with flavor and utterly fall-off-the-bone tender. But the benefits extend far beyond just taste and texture.
Economical and Efficient Meal Solutions
- Cost-Effective Protein: Buying a whole chicken is typically more economical per pound than purchasing individual cuts. Pressure cooking makes it incredibly easy to break down, giving you a versatile protein source for multiple meals throughout the week. It’s an intelligent way to stretch your food budget without compromising on quality or flavor.
- Significantly Faster Than Oven Roasting: The pressure cooker dramatically cuts down cooking time. While an oven-roasted chicken can take upwards of an hour and a half (plus resting time), a pressure-cooked chicken can be ready in a fraction of that, often within 30-50 minutes, depending on its size and your pressure cooker type. This speed makes it a perfect solution for busy weeknights when you crave a hearty, home-cooked meal without the wait.
- Effortless Meal Prep: Cooking a whole chicken in your pressure cooker is a game-changer for meal preparation. Once cooked, the tender meat can be easily shredded or pulled, providing a foundational ingredient for countless recipes. Think quick lunches, speedy dinners, and healthy snacks all prepped in advance.
Beyond the Main Course: The Magic of Homemade Broth
One of the most valuable advantages of cooking a whole chicken is the opportunity to create rich, flavorful homemade chicken broth from the leftover bones. After you’ve enjoyed the tender meat, simply return the bones and any remaining scraps to the pressure cooker with some aromatic vegetables (like carrots, celery, onion) and water. In under an hour, you’ll have a deeply nourishing, homemade broth far superior to anything store-bought. This broth can be used for soups, stews, gravies, or simply enjoyed on its own, adding another layer of value to your initial chicken purchase.
Presentation vs. Practicality: A Juicy Decision
Admittedly, a pressure cooker whole chicken might not boast the picture-perfect, crispy-skinned exterior of a traditionally roasted bird. However, if your priority is unbelievably juicy, perfectly cooked chicken that can be effortlessly incorporated into a multitude of dishes, then this method is for you. This recipe is designed for utility and maximum flavor, providing a delicious base for everything from sandwiches and salads to tacos and casseroles. Check out our extensive collection of recipes that use cooked chicken here to get inspired!
Your Guide to Pressure Cooker Whole Chicken: Step-by-Step
Let’s get down to the delicious details. Here’s how to create the most succulent pressure-cooked whole chicken.
1. Selecting and Seasoning Your Chicken
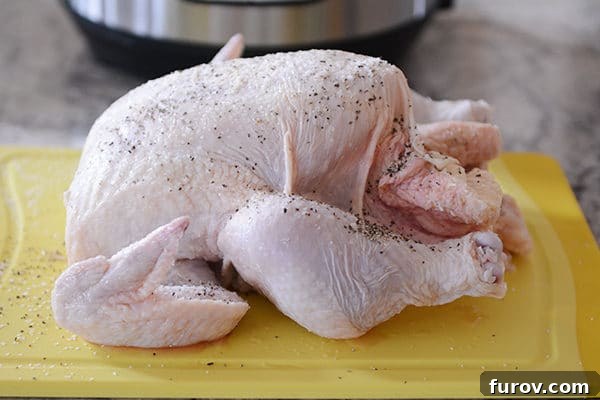
Start with a fresh, whole chicken, ideally between 3 to 5 pounds. Make sure to remove any giblets or neck from the cavity, then pat the chicken thoroughly dry with paper towels. Drying the skin helps achieve better browning in the initial step. Now, it’s time to season! Don’t be shy; liberally salt and pepper the inside and outside of the chicken. Coarse kosher salt and freshly ground black pepper are your best friends here, as they adhere well and impart incredible flavor. Generally, about 1 tablespoon of kosher salt and 1/2 tablespoon of coarse pepper is a good starting point for a medium-sized bird, but feel free to adjust to your taste.
2. The Browning Benefit: Adding Depth of Flavor
While you won’t achieve truly crispy skin like a rotisserie chicken, browning the chicken before pressure cooking is a crucial step for developing a deeper, more complex flavor profile. This process, known as the Maillard reaction, creates rich, savory notes that permeate the meat. I’m demonstrating with an Instant Pot today, using its convenient “Saute” function, but a stovetop pressure cooker works just as wonderfully. Heat about 2 tablespoons of oil in your pressure cooker until it’s hot and shimmering. Carefully place the seasoned chicken breast-side down into the hot oil. Let it brown undisturbed for 5 to 6 minutes until a beautiful golden crust forms. This initial sear locks in juices and enhances the overall taste significantly. Once browned, carefully remove the chicken from the pot.
3. Infusing Aromatics for Exceptional Taste
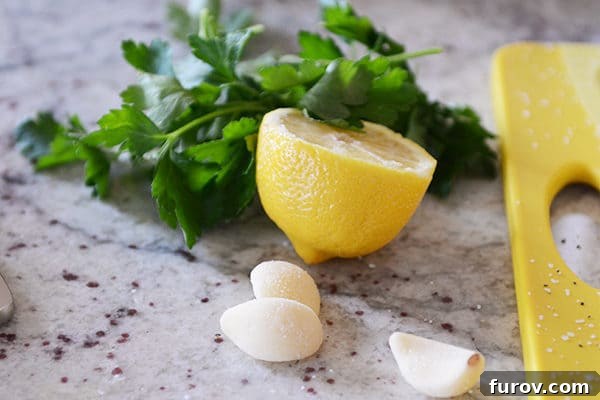
To elevate the chicken’s flavor even further, stuff its cavity with fresh aromatics. A handful of fresh parsley, half a lemon, and three cloves of fresh garlic are a classic combination that infuses the meat with bright, herbaceous notes as it cooks. The lemon adds a touch of acidity that helps tenderize and brighten the chicken, while the garlic provides a foundational savory depth. Feel free to experiment with other aromatics like quartered onions, sprigs of fresh rosemary or thyme, or even a bay leaf for varied flavor profiles.
4. Pressure Cooking to Perfection
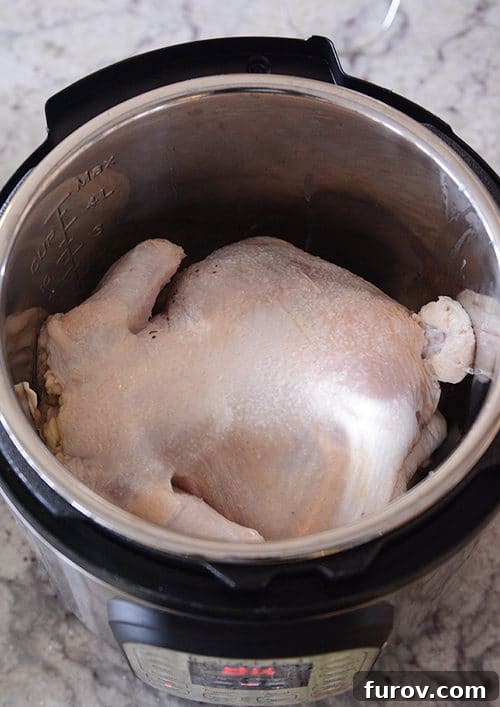
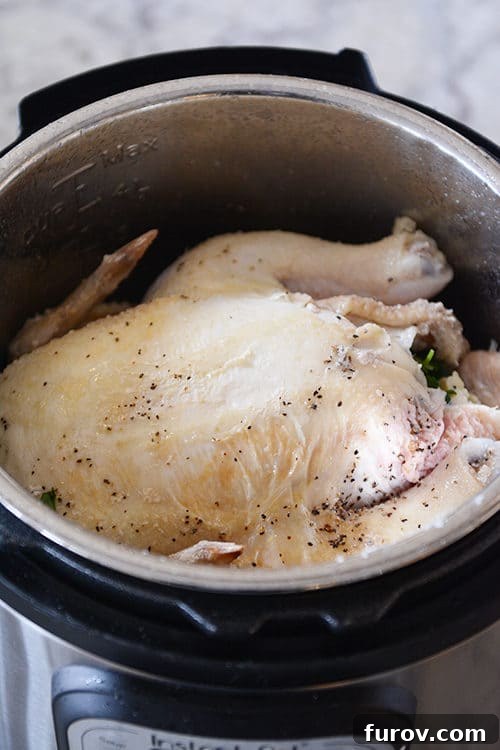
Now, carefully place the stuffed, browned chicken back into the pressure cooker, breast-side up. Add 1 cup of low-sodium chicken broth to the pot. This liquid is essential for creating the steam needed for pressure cooking and contributes to the chicken’s incredible juiciness. Secure the lid on your pressure cooker, ensuring it’s properly locked. The cooking time will vary slightly depending on your specific pressure cooker model and the size of your chicken:
- **For Electric Pressure Cookers (like Instant Pot):** Set to high pressure for approximately 8 minutes per pound of chicken. For example, a 4-pound chicken would cook for 32 minutes, while a 5-pound chicken would require about 40 minutes.
- **For Stovetop Pressure Cookers:** These typically reach a higher PSI (pounds per square inch) and cook faster. Plan for about 6 minutes per pound of chicken. So, a 4-pound chicken would cook for 24 minutes, and a 5-pound chicken for 30 minutes. Start timing once high pressure is fully reached.
Once the cooking time is complete, allow the pressure cooker to naturally release pressure for 15 minutes. This natural release method is crucial for larger cuts of meat like a whole chicken, as it allows the internal temperature to equalize, preventing the meat from drying out. After 15 minutes, you can carefully quick-release any remaining pressure. Your chicken will be incredibly tender and juicy.
5. Checking for Doneness and Resting
Always verify your chicken’s doneness with an instant-read thermometer. Insert it into the thickest part of the thigh, avoiding the bone. The internal temperature should register 165 degrees F (74 degrees C). If it’s not quite there, simply secure the lid and cook for a few more minutes under high pressure until it reaches the safe temperature. Once cooked, carefully remove the chicken from the pressure cooker and let it rest for 10-15 minutes on a cutting board before carving or shredding. Resting allows the juices to redistribute throughout the meat, ensuring maximum tenderness and flavor.
Versatile Uses for Your Pressure Cooked Chicken
The beauty of pressure cooking a whole chicken lies in its versatility. Once you’ve got this tender, flavorful meat, the culinary possibilities are endless:
- Shredded Chicken: Easily shred the meat for quick tacos, burritos, quesadillas, or as a topping for nachos.
- Chicken Salads: Dice or shred the chicken for classic chicken salad sandwiches, or add it to green salads for a protein boost.
- Soups and Stews: A natural fit! Use the cooked chicken in your favorite chicken noodle soup, hearty stews, or comforting chili.
- Casseroles and Bakes: Incorporate into casseroles like chicken and rice bake, chicken pot pie, or cheesy pasta dishes.
- Stir-Fries and Curries: Add diced chicken to your favorite stir-fry recipes or use it as the protein in a quick curry.
- Sandwiches and Wraps: Layer with your favorite toppings for a satisfying lunch.
Making the Most of the Bones: Quick Pressure Cooker Chicken Broth
Do not discard those bones! As mentioned, they are the secret to incredible homemade chicken broth. After de-boning your chicken, return the carcass, any skin, and scraps to the pressure cooker. Add a few cups of water (enough to cover), a splash of apple cider vinegar (helps extract minerals), and optional aromatics like a quartered onion, a couple of celery stalks, and a carrot. Cook on high pressure for 30-45 minutes, then allow for a natural release. Strain the liquid, and you’ll have a nutrient-rich, flavorful broth that’s perfect for sipping or cooking.
Embrace the pressure cooker for a whole new level of chicken deliciousness. It’s fast, efficient, and yields results that will impress even the most discerning palates!
One Year Ago: Chocolate Covered Strawberries Tuxedo-Style
Two Years Ago: Cinnamon and Sugar Breadstick Twists
Three Years Ago: Cheesecake Stuffed Chocolate Chip Cookie Bars
Pressure Cooker “Roasted” Whole Chicken
Pin
Ingredients
- 3-5 pound whole chicken
- Coarse kosher salt, to taste
- Coarse black pepper, to taste
- 2 tablespoons oil (e.g., olive oil or vegetable oil)
- Handful of fresh parsley sprigs
- Half of a fresh lemon
- 3 garlic cloves, peeled
- 1 cup low-sodium chicken broth
Instructions
-
Remove anything from inside the cavity of the chicken. Pat the chicken dry with paper towels. Liberally salt and pepper the inside and outside of the chicken. A good starting point is about 1 tablespoon kosher salt and 1/2 tablespoon coarse pepper, but adjust according to your chicken’s size and desired seasoning.
-
In an Instant Pot (using the Saute function) or a stovetop pressure cooker, heat the oil until it’s hot and shimmering. Carefully place the chicken, breast-side down, in the hot oil. Let it brown for 5-6 minutes to develop flavor. Carefully remove the chicken from the pot.
-
Stuff the cavity of the chicken with the fresh parsley, half a lemon, and garlic cloves.
-
Place the chicken breast-side up into the pressure cooker and add the 1 cup of low-sodium chicken broth.
-
Secure the lid on the pressure cooker. For an Instant Pot, select Manual (or Pressure Cook) and set to high pressure for approximately 8 minutes per pound of chicken (e.g., a 5-pound chicken cooks for 40 minutes). For a stovetop pressure cooker, cook for about 6 minutes per pound of chicken (e.g., a 5-pound chicken cooks for 30 minutes), starting your timer once high pressure is reached.
-
Once the cooking time is complete, remove the stovetop pressure cooker from heat, or hit the Cancel button on your Instant Pot. Let the pressure naturally release for 15 minutes. After 15 minutes, carefully quick-release any remaining pressure.
-
Carefully remove the chicken from the pressure cooker. Use an instant-read thermometer to ensure the internal temperature of the thickest part of the chicken (avoiding bone) reads 165 degrees F (74 C). If not, secure the lid and cook for a few more minutes under high pressure.
-
Allow the chicken to rest for 10-15 minutes before carving or shredding the meat from the bones. Remember to save the bones for making delicious homemade pressure cooker chicken broth!
Notes
Recommended Products
Recipe Source: Adapted from Mel’s Kitchen Cafe