
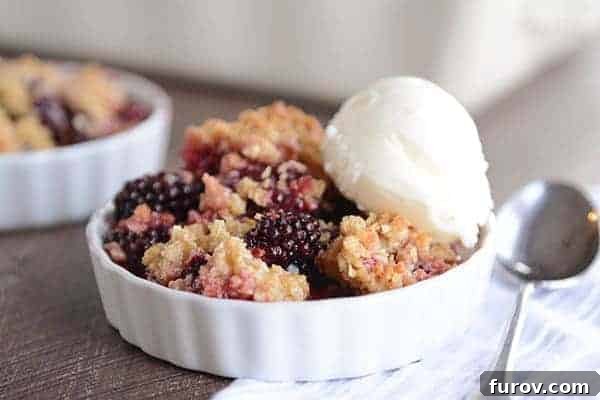
Welcome to the ultimate guide for crafting the most irresistible homemade dessert: The Best Blackberry Crisp. Bursting with the vibrant flavors of fresh, juicy blackberries nestled beneath a golden, buttery, and perfectly crumbly topping, this recipe is a true crowd-pleaser. Forget complicated baking projects; this crisp is not only incredibly delicious but also remarkably simple to assemble, making it an ideal treat for any occasion, from casual family dinners to elegant gatherings. And here’s a secret – while blackberries shine as the star, this recipe is incredibly versatile, adapting beautifully to other seasonal berries, making it your go-to “all-purpose” fruit crisp!
Why You’ll Adore This Blackberry Crisp Recipe
There’s something inherently comforting and utterly delightful about a warm fruit crisp. But among all the fruit-filled desserts, the blackberry crisp holds a special place in many hearts. Its unique balance of sweet and tart, combined with that glorious streusel topping, creates a dessert experience that is truly unforgettable. This particular recipe elevates the classic crisp to new heights, promising an effortless baking journey with spectacular results.
What makes this blackberry crisp stand out? It’s the perfect harmony between its two main components. The fruit base is a symphony of fresh blackberries, gently tossed with a touch of sugar, flour, and a hint of lemon juice. This simple preparation ensures the berries remain succulent and form a wonderfully bubbly, flavorful filling as they bake. The lemon juice is crucial here; it brightens the berry flavor and prevents the dessert from becoming overly sweet, adding a refreshing zing that complements the blackberries beautifully.
Once the fruit mixture is layered into a baking dish, it’s crowned with a lavish streusel topping. This isn’t just any topping; it’s a rich blend that transforms into a golden, crisp, and utterly addictive layer during baking. As it bakes, your kitchen will fill with an aroma that’s pure bliss – a promise of the deliciousness to come.
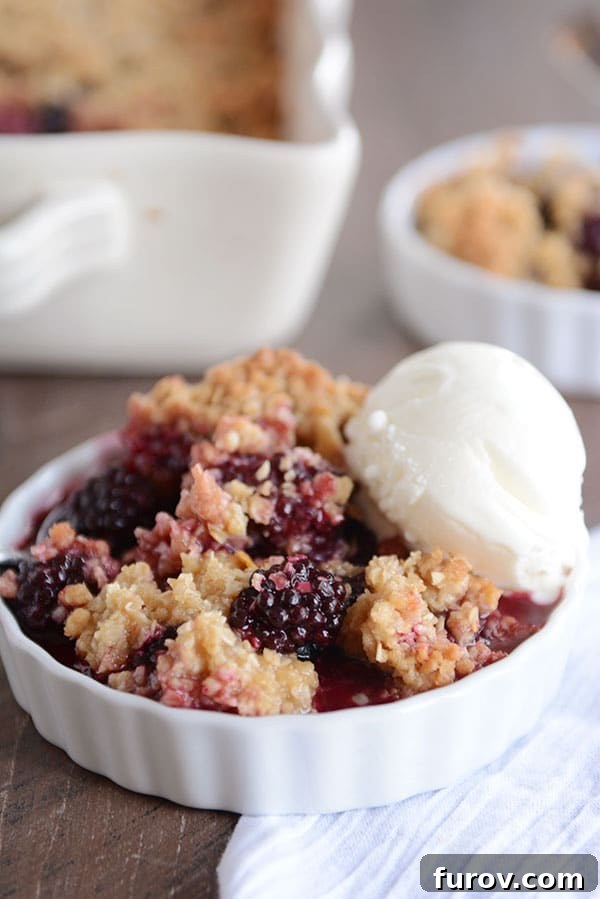
Crafting the Perfect Fruit Filling: More Than Just Blackberries
While blackberries are the star of this particular crisp, their vibrant flavor and juicy texture make them an ideal candidate for baking. When choosing your berries, look for plump, firm, and deep-colored blackberries. Freshness is key to achieving that optimal burst of flavor and texture in your crisp. Gently wash and dry them to ensure no excess moisture dilutes the flavor or makes the crisp watery.
The fruit filling in this recipe is deceptively simple, yet perfectly balanced:
- Fresh Blackberries: The foundation of flavor.
- Sugar: Sweetens the fruit and helps create that desirable juicy syrup.
- All-Purpose Flour: Acts as a thickener, preventing the filling from becoming too runny.
- Lemon Juice: A secret weapon that brightens the fruit’s natural sweetness and adds a touch of tang.
These ingredients are lightly tossed together before being spread into your baking dish, ensuring every berry is coated and ready to transform into a bubbly, fragrant delight.
Adapting for Other Berries and Fruits
One of the most appealing aspects of this recipe is its incredible versatility. While designed for blackberries, it can easily be adapted for other berries or even a mix of fruits. Consider these delicious alternatives:
- Blueberry Crisp: Substitute all or half of the blackberries with fresh blueberries for a classic taste. Blueberries tend to release a good amount of juice, so the flour thickener works perfectly.
- Raspberry Crisp: Fresh raspberries create a beautifully tart and fragrant crisp. Like blackberries, they hold their shape well and contribute a wonderful tang.
- Mixed Berry Crisp: A medley of blackberries, blueberries, and raspberries offers a complex flavor profile and stunning visual appeal. Maintain the total fruit volume to ensure proper crisp-to-fruit ratio.
- Strawberry Crisp: While strawberries are notoriously watery, you can still use them! If opting for strawberries, consider increasing the amount of flour in the fruit mixture to ½ cup to absorb extra moisture. Slicing larger strawberries can also help them cook more evenly.
- Seasonal Fruit Crisps: Beyond berries, this crisp topping works wonders with other fruits. Imagine a peach crisp, apple crisp, or even a delightful pear crisp using this same topping. You might need to adjust sugar levels based on the fruit’s sweetness and add spices like cinnamon or nutmeg for warmth.
The key is to maintain the overall fruit volume as specified in the recipe (8-10 cups) to ensure the proportions with the topping remain balanced. This adaptability truly makes it a “best-ever” fruit crisp, allowing you to enjoy seasonal fruits throughout the year.
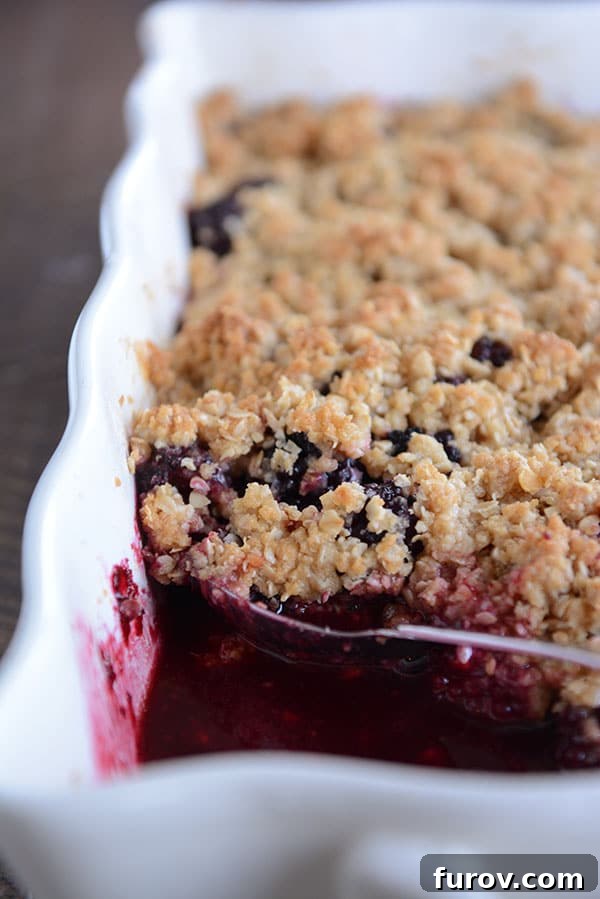
The Star of the Show: That Glorious Topping
Let’s be honest: for many, the crisp topping is the absolute highlight of any fruit crisp. And this particular topping is a game-changer. It’s the reason why this recipe stands out, offering a perfect textural contrast to the soft, warm fruit below. This topping isn’t merely an afterthought; it’s a buttery, golden, and richly textured streusel that conjures the best qualities of a homemade oatmeal cookie.
Crafting this exceptional topping is simple, combining a few pantry staples:
- Oats: Whether you prefer old-fashioned or quick oats, they provide that essential chewy texture. Quick oats often result in a slightly finer, more integrated crumble, which many find delightful.
- All-Purpose Flour: Forms the structural base of the crumble, ensuring it bakes up crisp and golden.
- Packed Light Brown Sugar: Contributes deep, molasses-rich sweetness and helps achieve that irresistible caramelization on top.
- Salt: A pinch of salt is vital for balancing the sweetness and enhancing all the other flavors.
- Butter: Cut into tablespoon-sized pieces, cold butter is essential for creating those distinct crumbles. When cut into the dry ingredients, it creates pockets of butter that melt and steam during baking, resulting in a tender yet crisp topping.
The method involves blending the cold butter into the dry ingredients until a coarse, crumbly mixture forms. A pastry blender is ideal for this, but two forks or even your fingertips can achieve the desired texture. This hands-on process ensures the butter is evenly distributed, leading to an incredibly satisfying crunch in every bite.
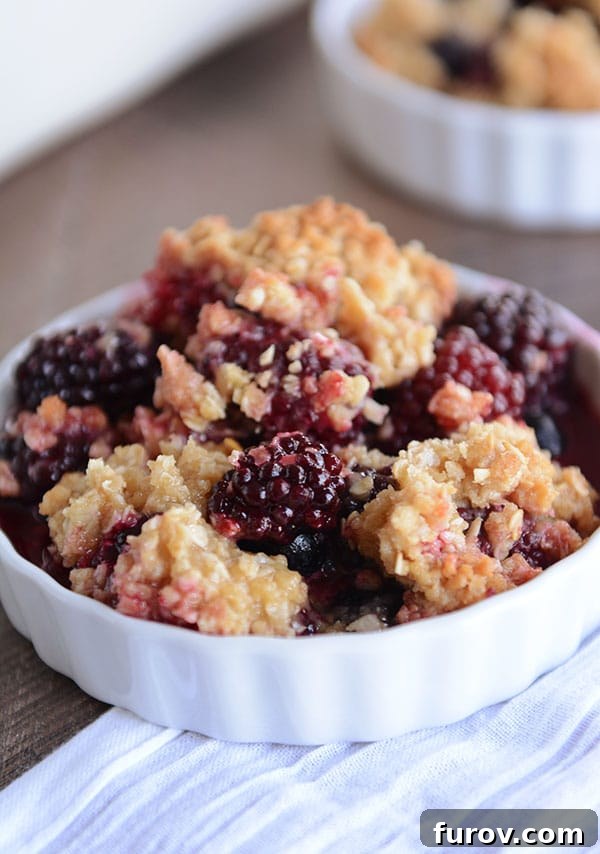
Baking Your Blackberry Crisp to Perfection
The magic happens in the oven. Preheat your oven to a moderate 350°F (175°C), which is ideal for allowing the fruit to bubble gently and the topping to brown beautifully without burning. Once assembled, the crisp bakes for approximately 45 minutes. You’ll know it’s ready when the fruit filling is visibly bubbly around the edges, and the streusel topping has achieved a deep golden-brown hue and feels crisp to the touch. If your crisp needs a little more time to reach that perfect golden color, don’t hesitate to add a few extra minutes.
A crucial step often overlooked is allowing the crisp to rest after baking. A brief 10-15 minute rest period out of the oven allows the fruit juices to settle and thicken, ensuring your crisp isn’t too runny when served. This patience is rewarded with a more cohesive and delicious dessert.
Serving Suggestions & Creative Pairings
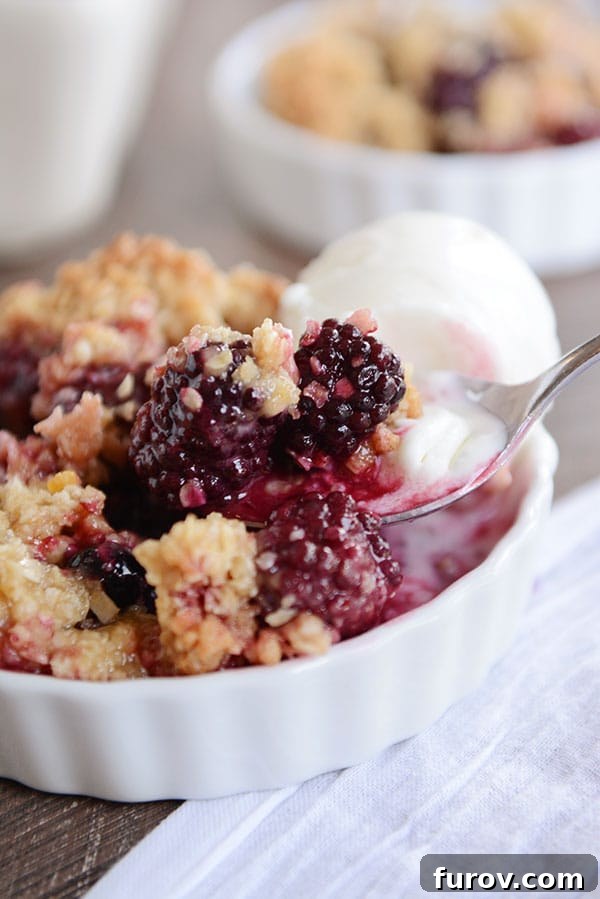
A warm blackberry crisp is exquisite on its own, but pairing it with the right accompaniment elevates the experience to another level. While vanilla ice cream is a classic and universally loved choice, don’t be afraid to experiment.
For an unexpected twist, consider serving your crisp with a scoop of lemon frozen yogurt. The tangy brightness of the lemon cuts through the richness of the butter and complements the blackberries in a truly spectacular way, creating a dessert experience that is both refreshing and indulgent. Other fantastic options include:
- Sweetened Whipped Cream: Light and airy, whipped cream adds a touch of elegance and balances the crisp’s textures.
- Crème Fraîche: For a sophisticated touch, crème fraîche offers a slightly tart and creamy counterpoint.
- Greek Yogurt: A dollop of plain or vanilla Greek yogurt can offer a healthier, protein-rich pairing.
- A Drizzle of Honey or Maple Syrup: For an extra layer of sweetness and depth.
Serve your crisp warm or at room temperature, depending on your preference. There’s truly nothing quite like a spoonful of warm, bubbling fruit and crunchy topping, especially when paired with something cool and creamy.
The Best Blackberry Crisp
Yield: 12 servings (9×13-inch pan)
Prep Time: 45 mins
Cook Time: 45 mins
Total Time: 1 hr 30 mins
Rating: 4.61 stars (658 ratings)
Pin Recipe
Rate Recipe
Save Recipe
Ingredients
Topping:
- 1 ½ cup (150 g) old-fashioned or quick oats (quick oats preferred for texture)
- 1 cup (142 g) all-purpose flour
- 1 cup (212 g) packed light brown sugar
- ¼ teaspoon salt
- 1 cup (227 g) butter, cut into tablespoon-size pieces
Fruit:
- 8-10 cups (680-1020 g) fresh blackberries, washed and dried well
- ⅓ cup (71 g) granulated sugar
- ⅓ cup (47 g) all-purpose flour
- 1 tablespoon fresh lemon juice
Instructions
- Preheat the oven to 350 degrees F (175°C).
- In a medium bowl, whisk together the oats, flour, brown sugar, and salt.
- Add the butter and cut it into the dry ingredients with a pastry blender or two forks until the mixture is crumbly and the butter is evenly cut in. Set aside.
- In another bowl, add the blackberries, sugar, flour, and lemon juice. Stir until combined.
- Lightly grease a 9×13-inch pan and spread the fruit mixture on the bottom.
- Sprinkle the crisp topping evenly over the top.
- Bake for 45 minutes until the fruit is bubbly and the crisp topping is golden (add time, if needed).
- Remove from the oven and let the fruit crisp rest for 10-15 minutes before serving (the fruit layer will thicken as it cools). Serve warm or at room temperature with ice cream (or lemon frozen yogurt!) or sweetened, whipped cream, if desired.
Recipe video will go here.
Notes
Fruit: This recipe has not been tested with frozen fruit. If using frozen fruit, do not thaw before using and consider increasing the flour in the fruit mixture to 1/2 cup to account for extra moisture.
Author: Mel
Course: Dessert
Cuisine: American
Method: Bake
Nutrition Information (per serving)
Serving: 1 serving, Calories: 357kcal, Carbohydrates: 50g, Protein: 4g, Fat: 17g, Saturated Fat: 10g, Cholesterol: 41mg, Sodium: 191mg, Fiber: 6g, Sugar: 28g
Recommended Products
Troubleshooting Common Crisp Issues
Even the simplest recipes can sometimes present challenges. Here are a few common issues you might encounter with fruit crisps and how to troubleshoot them:
- Watery Filling: If your crisp turns out too watery, it could be due to overly juicy fruit (like very ripe strawberries), not enough thickener (flour), or not baking long enough. Ensure your fruit is well-drained, and if using high-moisture fruits, increase the flour by 1-2 tablespoons. Baking until the fruit is visibly bubbling and thickened is key.
- Soggy Topping: A soggy topping is often a sign of insufficient baking time or too much moisture from the fruit. Make sure your oven temperature is accurate and bake until the topping is deeply golden and crisp. If the topping is browning too quickly, you can loosely tent the dish with foil for the last 10-15 minutes of baking.
- Topping Not Holding Together: This might mean your butter wasn’t fully incorporated, or there wasn’t enough fat to bind the dry ingredients. Ensure you cut the butter into small pieces and work it into the mixture until it forms a cohesive crumbly texture.
Make-Ahead and Storage Tips
This blackberry crisp is best enjoyed warm and fresh from the oven, but it can certainly be prepared in advance or stored for later enjoyment:
- Make-Ahead: You can assemble the crisp a few hours before baking. Prepare the fruit mixture and the topping separately. Store the fruit covered in the refrigerator and the topping in an airtight container at room temperature. Assemble just before baking. Alternatively, you can fully assemble the crisp and refrigerate it for up to 24 hours. Let it come to room temperature for about 30 minutes before baking, and you might need to add an extra 5-10 minutes to the baking time.
- Storage: Leftover crisp can be stored, covered, in the refrigerator for up to 3-4 days.
- Reheating: To reheat, simply warm individual servings in the microwave or place the entire dish back in a preheated oven (around 300°F/150°C) until warmed through and the topping is crisp again.
Explore More Delicious Crisp & Crumble Recipes:
Whether you’re celebrating a special occasion or simply craving a comforting homemade dessert, this blackberry crisp recipe delivers every time. Its ease of preparation, versatility, and undeniably delicious flavors make it a cherished addition to any baker’s repertoire. So go ahead, gather your ingredients, and prepare to bake the best blackberry crisp you’ve ever tasted!