
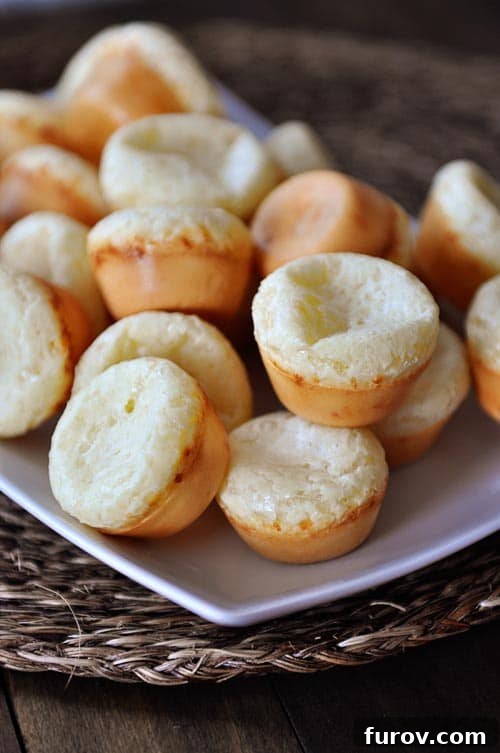
Get ready to discover an utterly delightful and surprisingly simple recipe for gluten-free Brazilian cheese bread, affectionately known as Pao de Queijo! These chewy, cheesy little balls of bread are pure magic, a savory snack that’s impossible to resist and wonderfully addictive.
I was absolutely thrilled by how many of you correctly identified these beauties when I shared a sneak peek on Facebook. It’s clear we share a mutual love for incredible food, and Pao de Queijo is definitely a standout!
Discover the Irresistible Charm of Pao de Queijo: Easy Gluten-Free Brazilian Cheese Bread
Long live Pao de Queijo! For those of us who aren’t fluent in Portuguese, that means “Brazilian cheese bread.” And not just any cheese bread – this is an easy, gluten-free, and incredibly delicious version that will quickly become a household favorite. These small, puffy, and impossibly cheesy bites are a staple in Brazil, enjoyed at any time of day, from breakfast to an afternoon snack, and they are gaining popularity worldwide for good reason.
My husband, Brian, who spent several years living in Brazil, is a self-proclaimed Pao de Queijo expert. He often reminisces about the authentic street food versions he enjoyed there. While this recipe is a simplified, quick knockoff, it perfectly captures the essence and satisfies those deep cravings for the chewy, cheesy goodness. In fact, I wouldn’t be surprised if he could polish off an entire batch of these miniature delights all by himself if given the chance!
What Exactly is Pao de Queijo?
Pao de Queijo translates directly to “cheese bread.” It’s a traditional Brazilian snack or breakfast food made from tapioca flour, milk, eggs, oil, and cheese. Unlike traditional bread, Pao de Queijo is naturally gluten-free due to its reliance on tapioca flour instead of wheat flour. This unique flour gives it a distinctively chewy and elastic texture that sets it apart from other cheese breads around the world.
The beauty of Pao de Queijo lies in its simplicity and versatility. They are perfect as an appetizer, a side dish, or simply a comforting snack with a cup of coffee. Once you try these warm, savory puffs, you’ll understand why they’re so beloved in Brazil and quickly becoming a global sensation.
Why This Pao de Queijo Recipe Will Become Your Favorite
This particular recipe stands out for several reasons, making it a must-try for both Pao de Queijo aficionados and newcomers alike:
Gluten-Free Goodness
For those with gluten sensitivities or anyone looking for a delicious gluten-free alternative, this recipe is a dream come true. The primary flour used is tapioca flour (also known as tapioca starch), which provides a naturally gluten-free base. This means everyone can enjoy these savory treats without compromise, making them a fantastic addition to any snack rotation or gathering.
Irresistible Chewy Texture
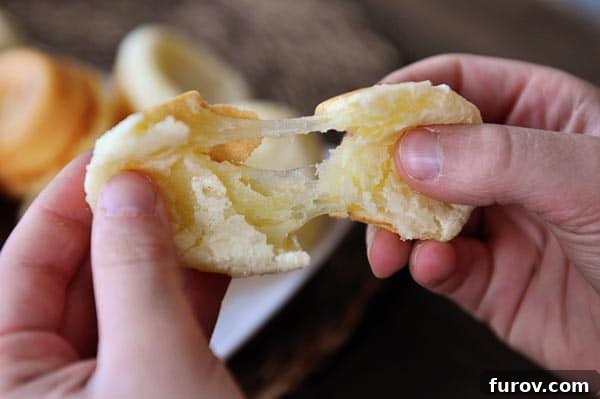
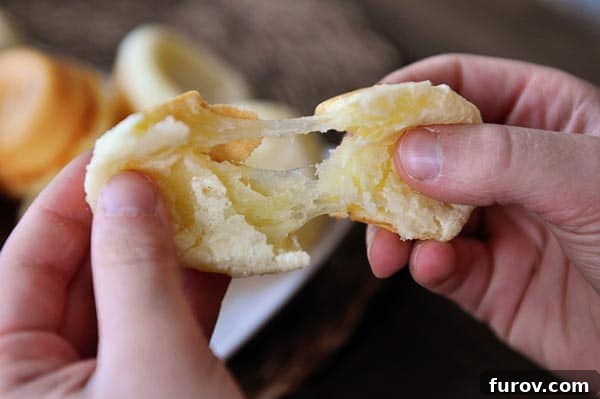
The hallmark of a great Pao de Queijo is its unique, chewy texture. This is primarily achieved through the use of tapioca flour, which gives the bread its signature elastic and satisfying bite. The cheese also plays a crucial role, melting and stretching to create a truly delicious mouthfeel. When you pull one apart, you’ll notice the delightful stretchiness of the cheese, a testament to its perfect consistency.
Quick and Simple Preparation
Despite its exotic name, Pao de Queijo is incredibly easy to make. This recipe streamlines the process by using a blender, which mixes all the ingredients into a smooth batter in just minutes. Pop them into a mini muffin tin, and in less than half an hour, you’ll have a batch of warm, golden-brown cheese breads ready to devour. It’s a perfect last-minute snack or an impressive, yet effortless, appetizer for guests.
The Essential Ingredient: Tapioca Flour
The texture of Pao de Queijo is distinctly chewy, cheesy, and utterly delicious. This unique quality is largely due to the specific type of flour used: tapioca flour, which is also referred to as tapioca starch. This ingredient is truly non-negotiable for achieving the authentic chewiness of Pao de Queijo.
You might be wondering if there are any substitutions for tapioca flour. The short answer is, unfortunately, no. Other flours simply won’t yield the same elastic and chewy result. However, the good news is that tapioca flour has become widely available in most grocery stores these days, thanks to its popularity in gluten-free cooking and baking. We’ve come so far in accessibility! If you have trouble finding it locally, it’s also readily available online; I often purchase the Bob’s Red Mill brand from Amazon, which works perfectly for us since we make these easy cheesy puffs all the time.
Selecting the Perfect Cheese for Your Pao de Queijo
The type of cheese you choose can significantly impact the flavor and texture of your Pao de Queijo. While Parmesan is a fantastic choice for its sharp, salty notes, feel free to experiment with other cheeses to find your favorite blend. My personal favorite combination often involves a mix of Parmesan and queso fresco, a widely available Mexican cheese that adds a lovely mild creaminess. Other hard, salty cheeses like Asiago or even Pecorino Romano can work beautifully. However, be aware that softer cheeses like cheddar or Monterey Jack may result in a slightly different, less chewy texture.
A crucial tip for the best flavor: always use freshly grated Parmesan cheese. Avoid the pre-grated Parmesan found in green cans or even the pre-shredded varieties in bags. I’ve found that these often have an artificial, plasticky taste that detracts from the Pao de Queijo’s deliciousness. Grating your own from a block of Parmesan ensures a superior, authentic cheesy flavor that truly shines in this recipe.
Achieving Pao de Queijo Perfection: Expert Tips
To ensure your Brazilian cheese bread turns out perfectly every time, keep these essential tips in mind. They are what I affectionately call the Official Pao de Queijo Rules:
- Serve Them Warm: Pao de Queijo is absolutely best when eaten fresh out of the oven, still warm and delightfully chewy. The cheese is soft, and the texture is at its peak.
- Avoid Over-Browning: Keep a close eye on them in the oven. While a lightly golden-brown exterior is ideal, letting them get too dark on the bottom can make them overly crusty and diminish their signature chewiness.
- Double the Batch: Trust me on this one. These cheese breads are so incredibly addictive that a single batch rarely lasts long. You might as well bite the bullet and double the recipe from the start!
- Use a Mini Muffin Tin: While not strictly a rule, using a mini muffin tin helps create perfectly portioned, bite-sized Pao de Queijo that cook evenly and have that classic, appealing shape.
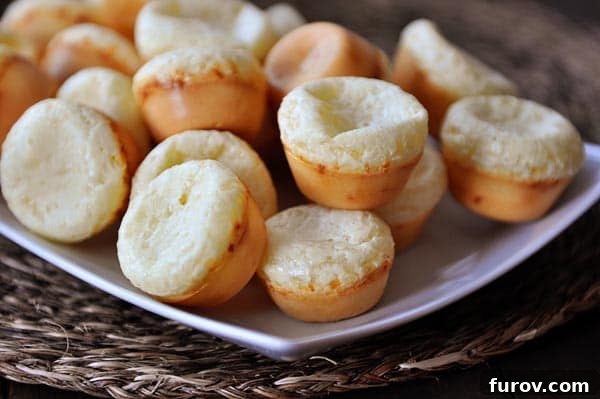
- Don’t Worry About Falling Puffs: It’s completely normal for the cute little puffs to fall slightly in the middle after coming out of the oven. This doesn’t affect their delicious taste or texture.
Serving Suggestions for Pao de Queijo
Pao de Queijo is incredibly versatile and can be enjoyed in many ways. Traditionally, they are served as a breakfast item with coffee or as a quick snack throughout the day. However, their savory cheesy flavor makes them perfect for:
- An appetizer at parties, especially when served warm.
- A delightful side dish with soups or salads.
- Part of a brunch spread, perhaps alongside some scrambled eggs or fresh fruit.
- A delicious addition to a charcuterie board.
No matter how you choose to enjoy them, these gluten-free Brazilian cheese breads are guaranteed to bring a unique and satisfying flavor to your table.
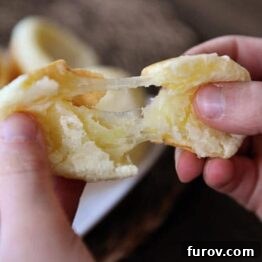
Easy Brazilian Cheese Bread {Pao de Queijo}
Average Rating: 4.71 stars (104 ratings)
Print Recipe | Pin Recipe
Ingredients
- 1 large egg
- ¼ cup canola or vegetable or olive oil
- ⅔ cup milk
- 1 ½ cups (177 g) tapioca flour, fluff the flour before measuring
- ¾ teaspoon salt
- ½ cup (57 g) packed shredded cheese, like Parmesan or Asiago (see note)
Instructions
-
Preheat the oven to 400 degrees F. Lightly grease a mini muffin tin (this recipe makes about 16-24 little breads, so if you don’t have a muffin tin large enough, you can bake in separate batches).
-
In a blender, combine the egg, oil, milk, tapioca flour, and salt. Process until the mixture is smooth, scraping down the sides of the blender once or twice. Add the shredded cheese and process for just a short bit, about 5-10 seconds or a few short pulses, until the cheese is incorporated into small bits throughout the batter.
-
Give the batter a good stir to ensure any solids are off the bottom, then pour the mixture into the prepared mini muffin tin, filling the cups nearly to the top.
-
Bake the Pao de Queijo until very lightly golden brown, typically 15-20 minutes. Be careful not to let them get too brown on the bottom, as this can make them too crusty and less chewy.
-
Remove them from the oven and let them cool for just a minute or two. They are truly best eaten warm! Don’t worry if the cute little puffs fall a bit in the middle – that’s completely normal for Pao de Queijo.
Notes
Parmesan Quality: For the best flavor, do not substitute pre-grated Parmesan from a can or even pre-shredded Parmesan in bags or tubs. I’ve tried these, and the flavor can be artificial and plasticky. Freshly grated Parmesan from a block is always the superior choice for this recipe.
Tapioca Flour (Starch): Just in case you’re wondering, there isn’t a good substitution for tapioca flour (which is the same as tapioca starch). It’s crucial for the unique chewy texture of Pao de Queijo. We make these often enough that I go through many bags of it. I find it readily available on Amazon (the Bob’s Red Mill brand is excellent) or typically in the baking aisle of most well-stocked grocery stores these days.
Recommended Products
Recipe Source: This recipe has been thoughtfully tweaked from this base recipe, incorporating insights from Brian’s extensive experience enjoying these delectable treats during his time living in Brazil, ensuring an authentic and irresistible flavor.
Ready to Bake Your Own Batch?
Now that you have all the tips, tricks, and the complete recipe, there’s no reason to delay. Get yourself some tapioca flour, a block of good Parmesan cheese, and a mini muffin tin, and you will be all set to embark on a delicious culinary journey. I promise you’ll want to make these Pao de Queijo over and over again. They’re not just food; they’re an experience – a little bite of Brazil right in your own kitchen.
Don’t be surprised if these easy gluten-free Brazilian cheese breads become your new go-to snack. Happy baking, and enjoy every chewy, cheesy bite!