
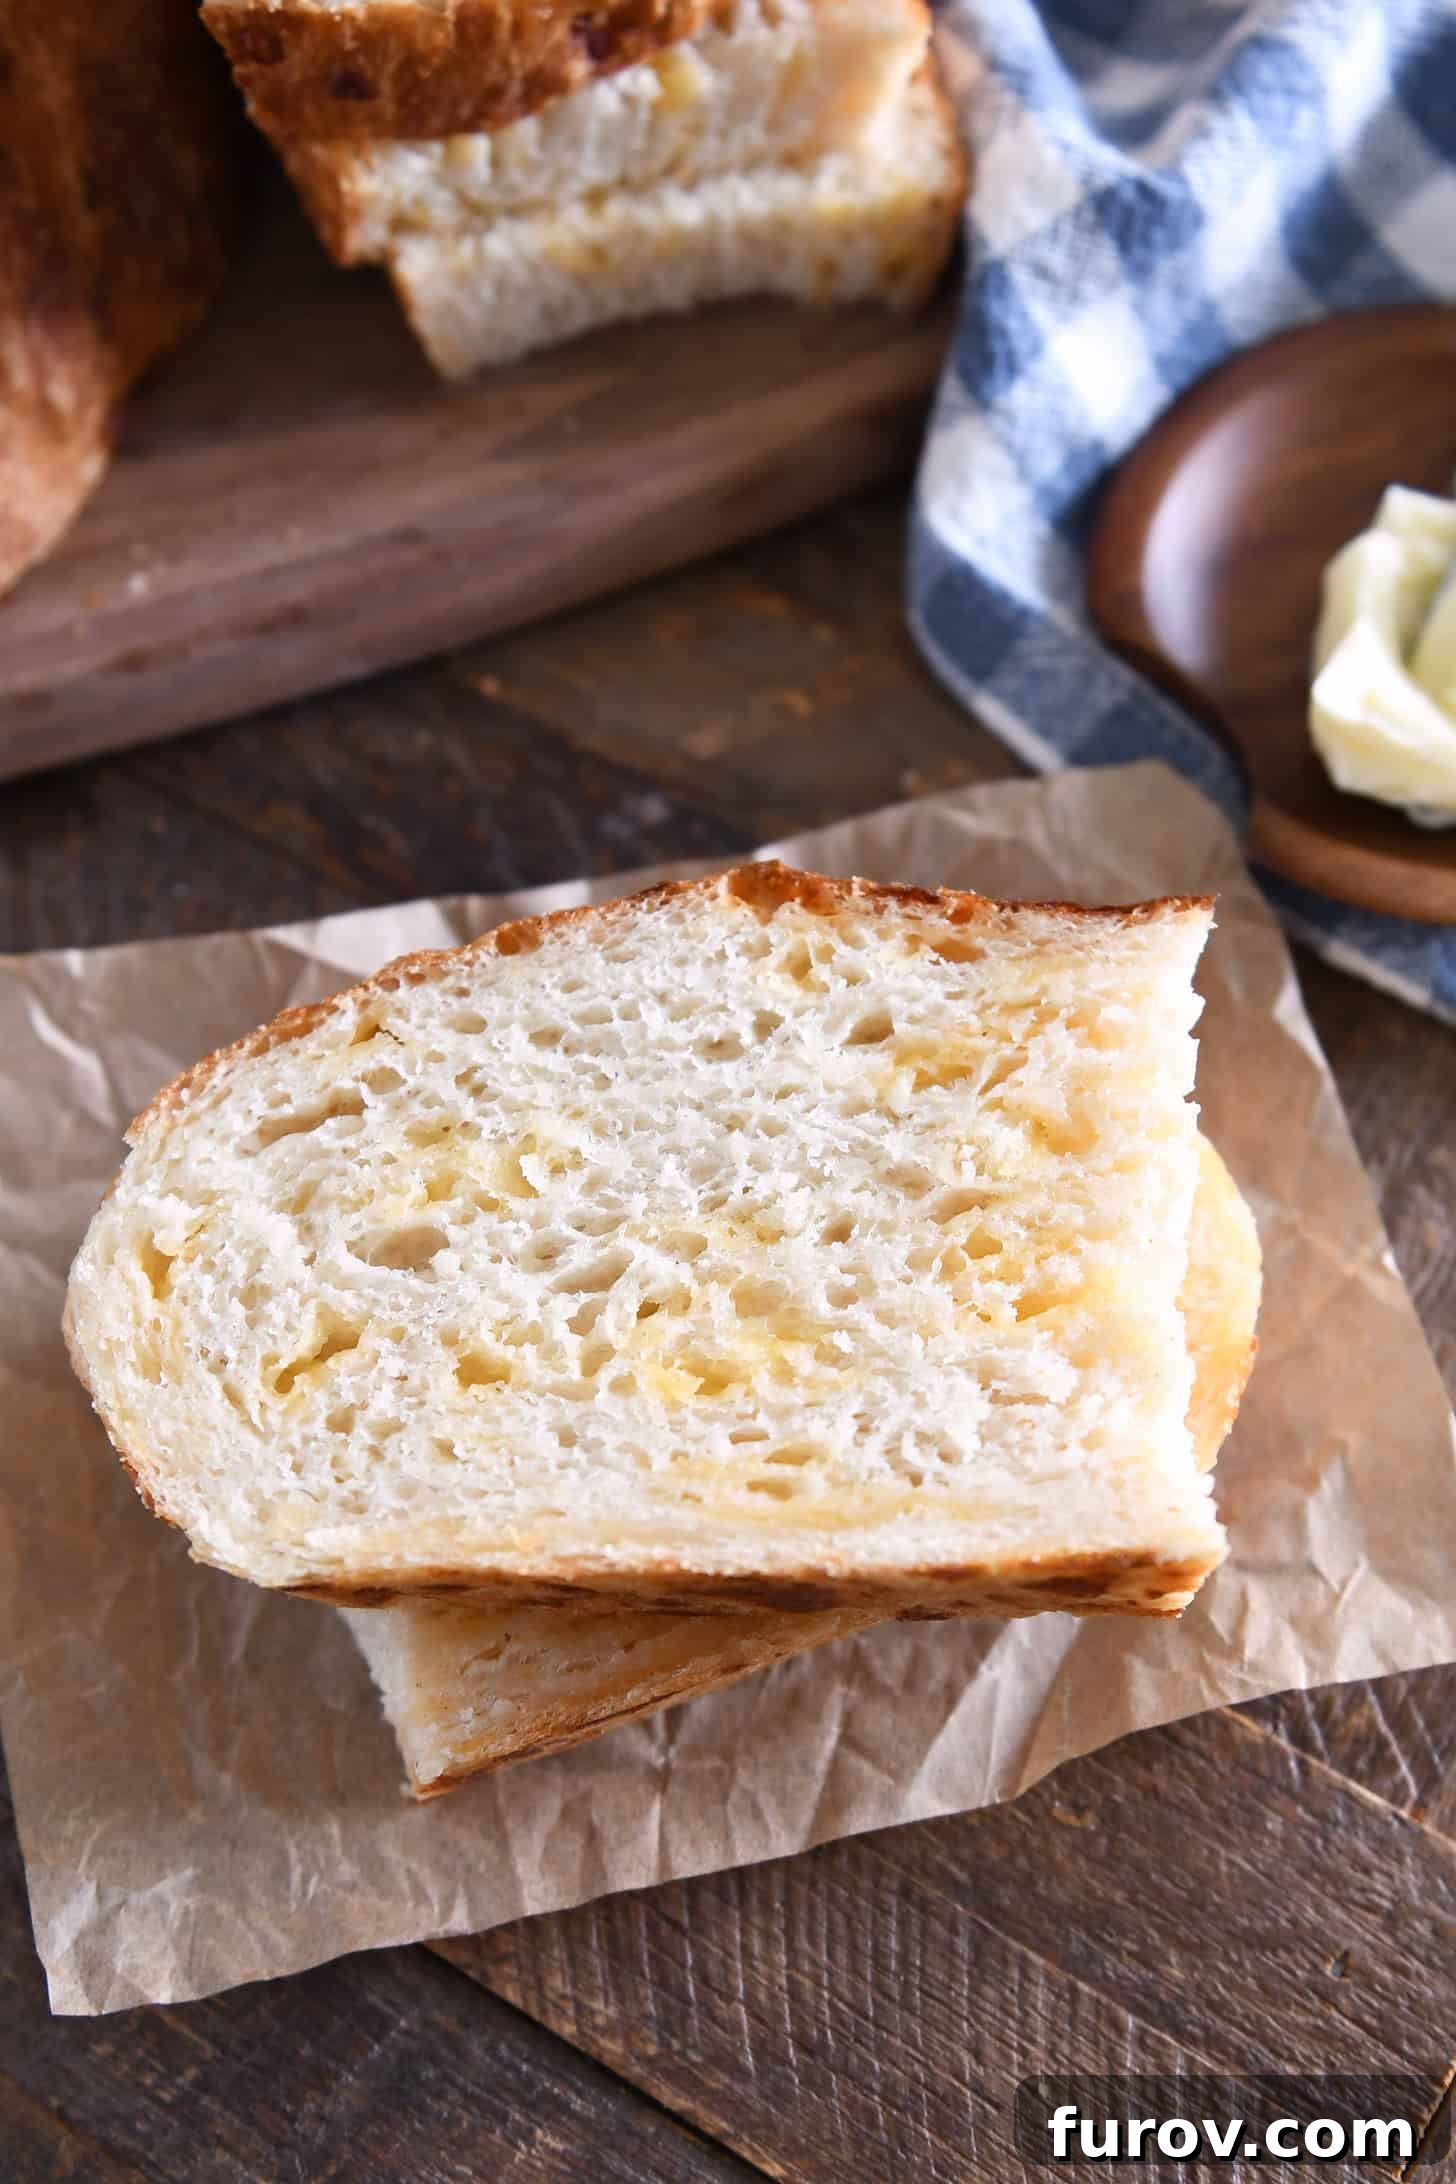
Welcome to the ultimate guide for creating the most incredible, easy-to-make, no-knead cheesy peasant bread you’ll ever taste! Baked simply in a pie plate, this bread boasts a delightfully soft and chewy interior perfectly complemented by a crisp, golden crust. Prepare to clear your schedule, because once you try this recipe, you’ll agree it’s one of the best culinary decisions you’ll make all year. Forget complicated techniques and endless kneading; this recipe is designed for maximum flavor with minimal effort, making gourmet bread baking accessible to everyone.
The Magic of No-Knead Cheesy Peasant Bread
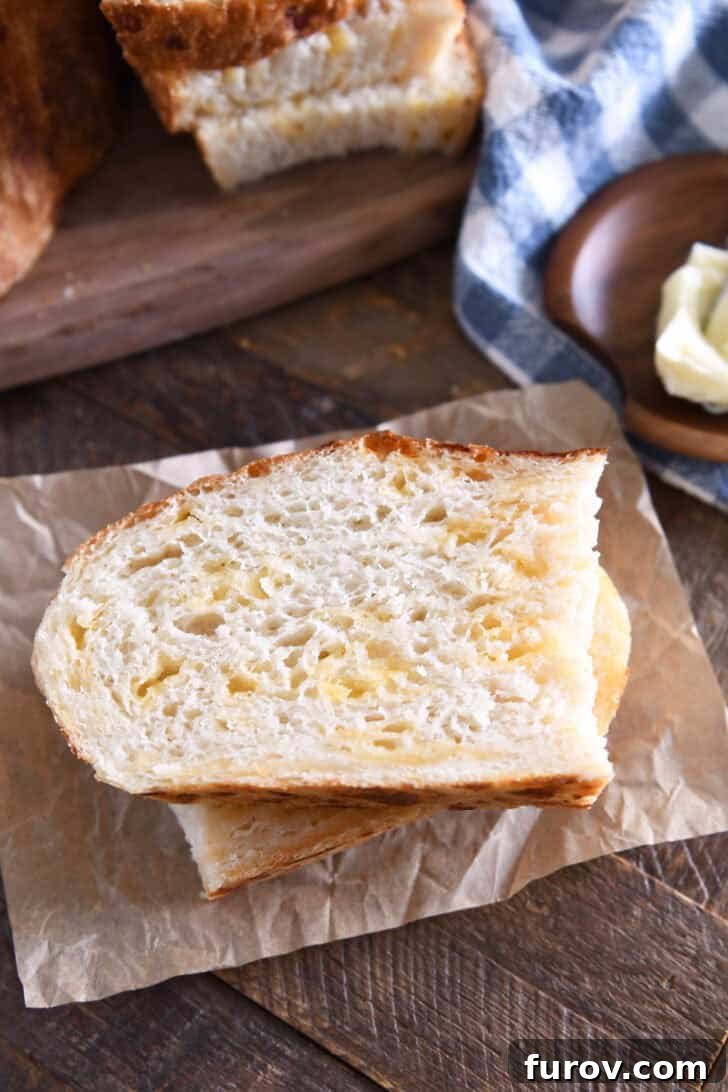
The beauty of this cheesy peasant bread lies in its simplicity. This isn’t just any bread; it’s a testament to how effortless baking can be when you embrace the no-knead method. This revolutionary technique eliminates the need for a stand mixer and the arduous task of kneading, making it perfect for novice bakers and seasoned pros alike who appreciate convenience without compromising on quality. The secret is a higher hydration dough, which develops its gluten structure through time rather than manual labor. This passive process allows you to achieve an unbelievably airy, tender crumb with those coveted squishy air bubbles that are the hallmark of artisanal bread.
Imagine fresh, warm bread, bursting with savory cheese, ready to be devoured with your favorite meal or as a delightful snack. This recipe delivers exactly that, making it a regular staple in your kitchen. From mixing the dough to pulling a golden loaf from the oven, the entire experience is streamlined, proving that extraordinary homemade bread doesn’t have to be intimidating.
Mixing Your Cheesy Bread Dough by Hand
One of the most appealing aspects of this no-knead cheesy peasant bread is that the dough is mixed entirely by hand in a single bowl. No special equipment is required – just your hands and a sturdy spatula or wooden spoon. The process is straightforward and incredibly satisfying, leading you closer to that heavenly aroma of baking bread.
- Begin by combining your dry ingredients: flour, salt, sugar, and yeast. A quick whisk ensures everything is evenly distributed.
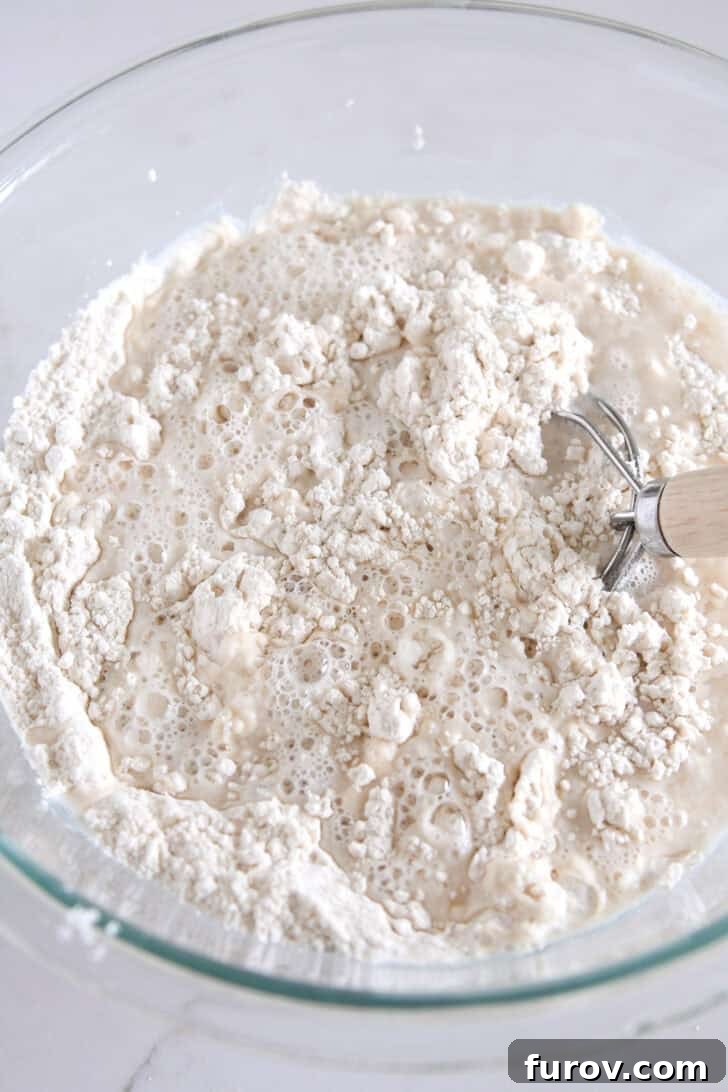
- Pour in the warm water, then mix until a shaggy, cohesive mass forms. Don’t worry about perfection at this stage; a rough texture is exactly what you want.
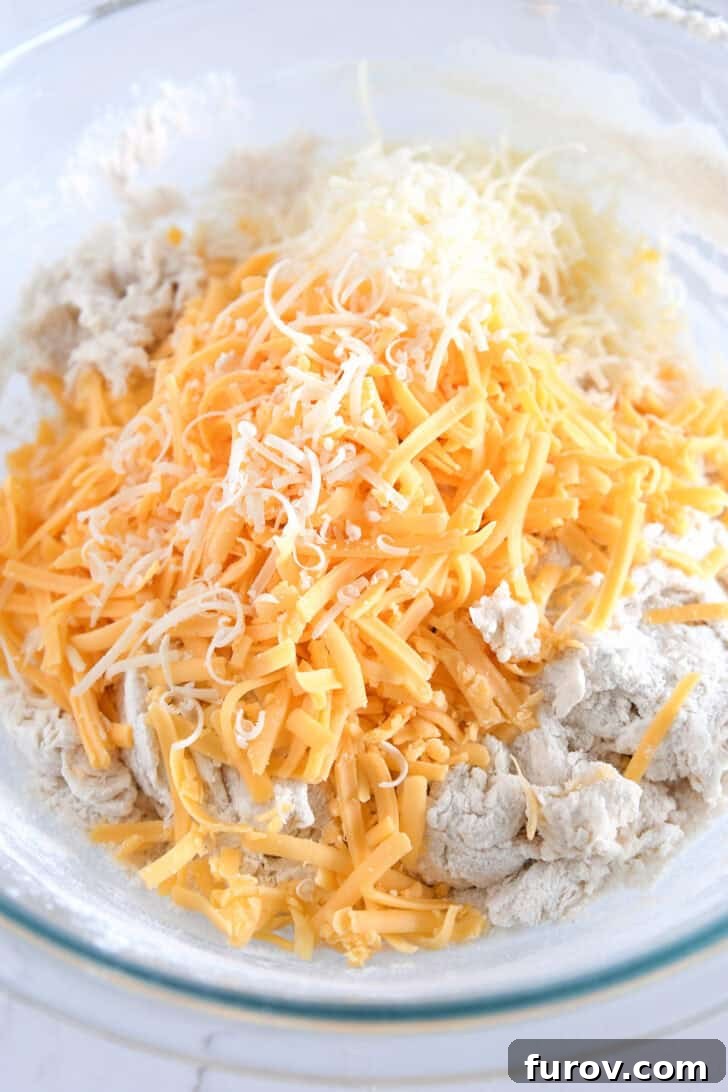
- Finally, add the star of the show – your flavorful cheeses. Mix them thoroughly into the dough until they are fairly evenly dispersed, creating pockets of cheesy goodness throughout.
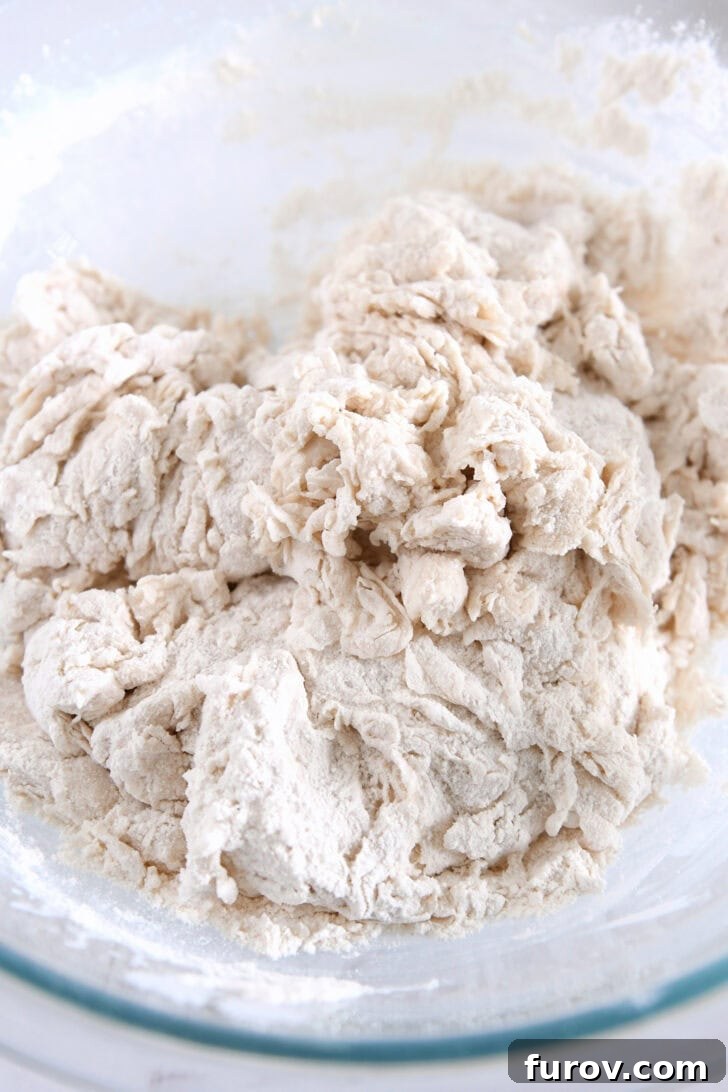
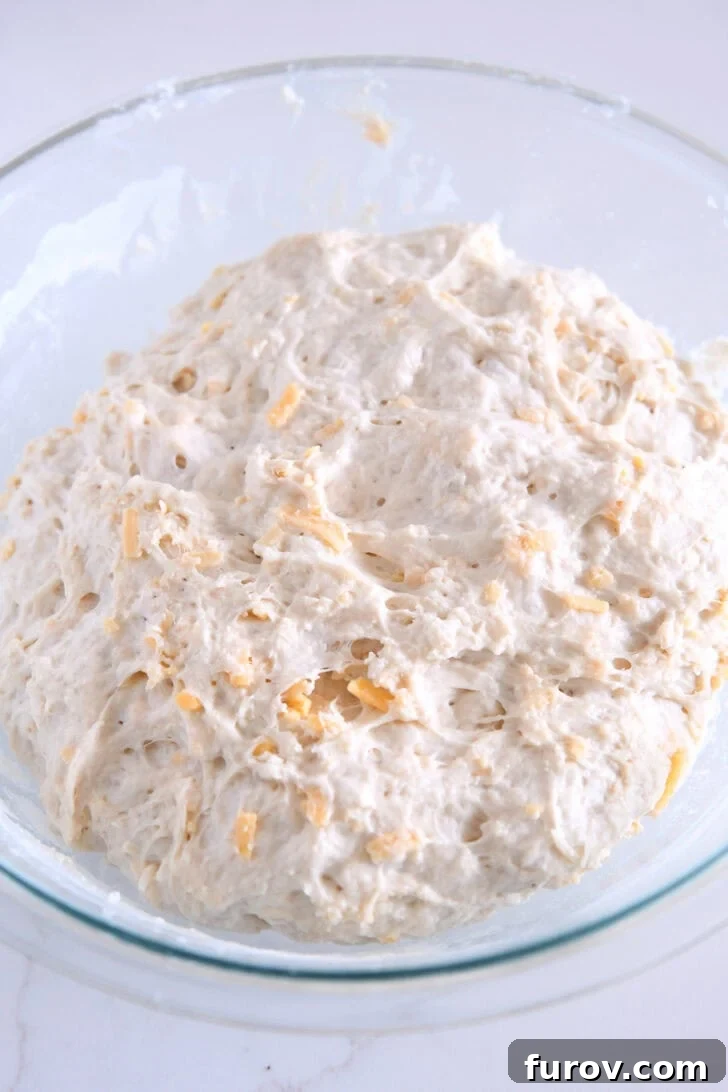
Embrace the Stickiness! It’s crucial to understand that this dough will be significantly stickier than traditional bread doughs. This high hydration is by design, essential for achieving the incredibly soft, airy crumb that defines this peasant bread. Don’t be alarmed or tempted to add too much extra flour.
While a sticky dough is the goal, some environmental factors (like humidity, temperature, and elevation) can affect its consistency. If the dough feels absolutely unmanageable, you can add an additional 1/4 cup of flour, but resist adding more. Over-flouring will result in a denser, tougher loaf, losing that delightful softness and the signature squishy air bubbles that make this bread so irresistible. Trust the process, and let the dough do its magic!
The Best Cheese for an Irresistible Cheesy Peasant Bread
When it comes to cheesy bread, the choice of cheese isn’t just a detail; it’s a game-changer. For this particular no-knead peasant bread, selecting the right cheese is paramount to achieving that unforgettable flavor and texture. The goal is a bold, savory punch that permeates the soft interior and creates delightful, crunchy pockets bursting through the golden crust.
Therefore, always opt for cheeses with a robust flavor profile. The recipe specifically calls for sharp cheddar cheese and aged Parmesan. Sharp cheddar provides a classic, tangy depth that melts beautifully, while aged Parmesan offers a salty, umami kick that elevates the entire loaf. When considering substitutions, choose wisely, leaning towards cheeses that are equally flavorful and melt well, such as Gruyere, fontina, or even a strong Monterey Jack. Avoid mild cheeses that might get lost in the bread’s comforting texture.
Another non-negotiable tip for maximum deliciousness is to grate that block of cheese yourself. Pre-shredded cheeses often contain anti-caking agents that prevent them from melting and melding as effectively into the dough. Freshly grated cheese, on the other hand, delivers superior flavor and integrates seamlessly, contributing to the “deliciously delightful crumb” that makes this bread truly special. You’ll notice the difference in both taste and texture, with more even cheese distribution and a richer flavor.
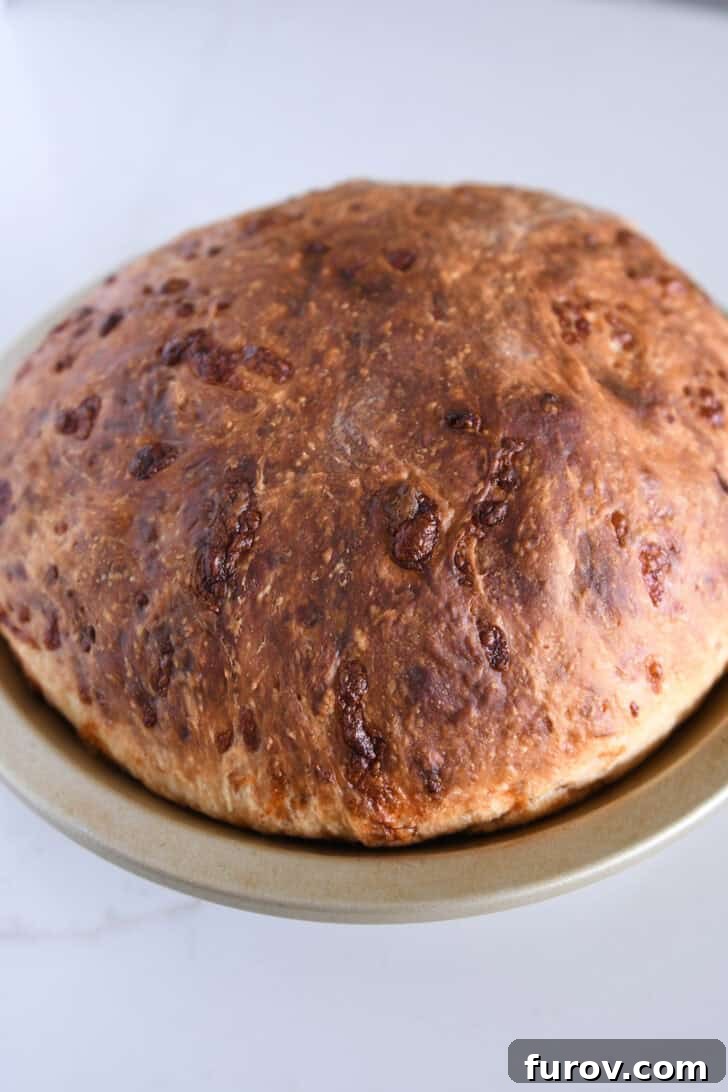
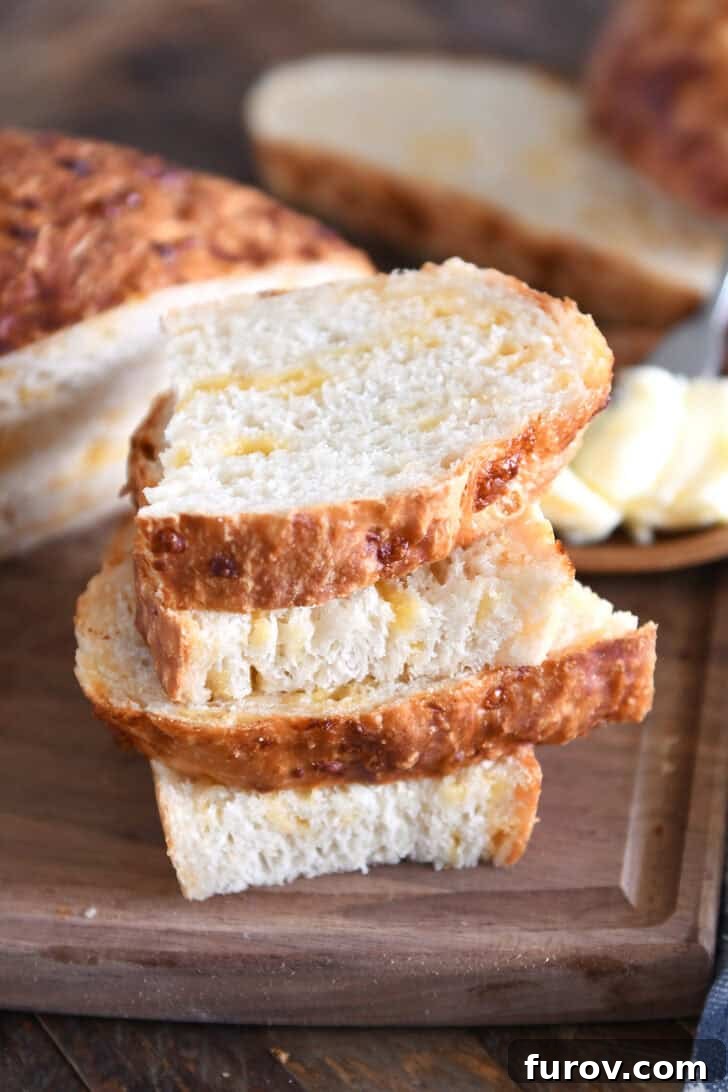
While the soft, squishy middle of this otherworldly cheesy peasant bread is undeniably a highlight (YES, WE’RE EMBRACING SOFT, SQUISHY MIDDLES HERE 🙌🏼 🎉), let’s not overlook the equally impressive golden crust. Achieving that perfect balance – a tender interior and a crisp, savory exterior – is what elevates this simple bread to a gourmet experience. The slight crunch of caramelized cheese on the crust is a textural marvel that will have you reaching for another slice before the first one is even finished.
Sourdough Version of Cheesy Peasant Bread: A Tangy Twist
For those who love the distinctive tang and depth of sourdough, adapting this cheesy peasant bread recipe is incredibly simple and yields spectacular results. The sourdough starter not only adds a wonderful complexity of flavor but also contributes to the bread’s excellent texture and keeping qualities.
To create an easy sourdough version: decrease both the water and flour by 3/4 cup each from the original recipe. In their place, add 1 1/2 cups of either active, fed sourdough starter or sourdough discard. I recommend using a starter that has been fed at a 1:1:1 ratio, which typically results in a thick but still pourable consistency, ideal for this dough. Incorporate the sourdough starter along with the warm water in the initial mixing step. Adjust the yeast quantity based on your starter’s activity: use 1 teaspoon of instant yeast if you’re using a fed, active starter, or increase to 2 teaspoons if you’re using sourdough discard, which provides less leavening power. This simple adaptation allows you to enjoy the same ease of preparation with an added layer of delightful sourdough flavor.
Enjoying Your Homemade Cheesy Peasant Bread
This easy cheesy peasant bread truly is a dream to make. Its quick preparation and minimal fuss mean you can have fresh, homemade bread on the table in just a few hours. It’s no exaggeration to say that this cheesy bread is a HUGE family favorite, consistently disappearing almost as soon as it emerges from the oven. I often find myself doubling the recipe – one loaf for immediate gratification, and another to be devoured shortly after!
The versatility of this bread is astounding. It pairs beautifully with virtually everything:
- With Pasta: Its rich, cheesy flavor makes it the perfect accompaniment to any Italian dish, soaking up sauces beautifully.
- With Soup: A hearty slice is ideal for dipping into warm, comforting soups or stews.
- As a Snack: Enjoy it simply sliced with butter, or lightly toasted for a quick, satisfying bite.
- Sandwiches: Elevate your sandwich game with this flavorful bread as the base.
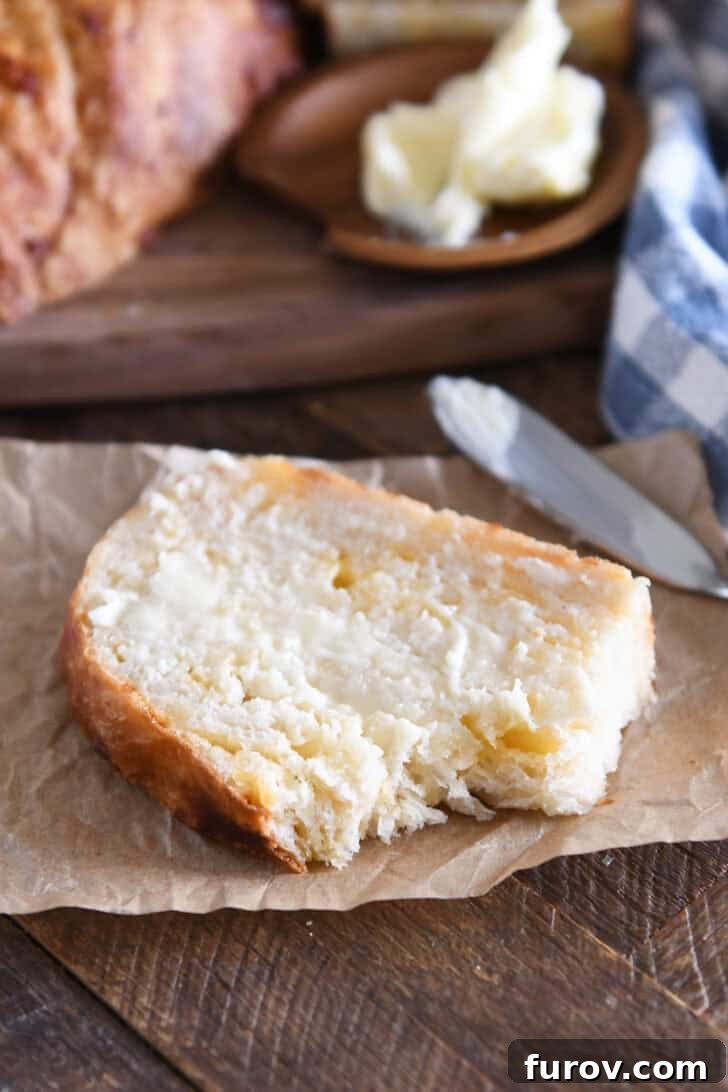
Beyond its immediate appeal, this bread also stays incredibly fresh-tasting for days. And if you think freshly baked is good, just wait! Day-old cheesy peasant bread, when sliced and lightly toasted, becomes unbelievably delicious, especially when slathered with a generous pat of butter. It transforms into a crunchy-on-the-outside, soft-on-the-inside delight.
Building on the immense popularity of the original no-knead peasant bread recipe, this cheesy version takes it to an entirely new level of wild deliciousness. I genuinely can’t wait for you to experience the joy and flavor of baking and sharing this bread!
Baking Secrets for the Perfect Crust and Crumb
Achieving that perfect balance of a crackling golden crust and a soft, airy interior is simpler than you might think with this no-knead method. It starts with the right environment and temperature.
A crucial step for a beautiful crust is to begin baking at a higher temperature (425 degrees F) for the first 15 minutes. This initial burst of heat helps the dough rapidly expand (oven spring) and quickly sets the crust, trapping moisture inside for a tender crumb. After this initial phase, reducing the temperature to 375 degrees F allows the bread to bake through evenly without over-browning the exterior. Keep a close eye on the loaf, and if you notice the crust browning too quickly, simply tent it loosely with aluminum foil. This prevents scorching while the interior finishes cooking to perfection.
For an extra touch of indulgence and a truly professional finish, consider brushing the top of the bread with melted butter immediately after it comes out of the oven. This simple trick not only adds a lovely sheen but also contributes to a softer, richer crust, enhancing the overall sensory experience of this delightful cheesy bread.
Easy No-Knead Cheesy Peasant Bread
10
slices (1 loaf)
20
mins
35
mins
1
hr
20
mins
2
hrs
15
mins
Pin
Rate
Ingredients
-
4
cups
(
568
g)
all-purpose or bread flour -
1
tablespoon
instant yeast (or rapid-rise/bread machine yeast) -
2
teaspoons
granulated sugar -
1 ½
teaspoons
table salt -
2
cups
(
484
g)
warm water (110 to 115 degrees F) -
1 ½
cups
(
170
g)
freshly grated sharp cheddar cheese (large holes of box grater) -
½
cup
(
45
g)
freshly grated Parmesan cheese (small holes of box grater)
Instructions
-
In a large bowl, combine the flour, salt, sugar, and yeast. Whisk them together until well mixed. Add the warm water and stir with a rubber spatula or wooden spoon until the ingredients form a shaggy, sticky ball, ensuring no dry streaks of flour remain.
-
Add both the sharp cheddar and Parmesan cheeses to the dough. Using your hands, gently lift and turn the dough to evenly combine the cheese throughout. Form the dough into a rough ball shape within the bowl.
-
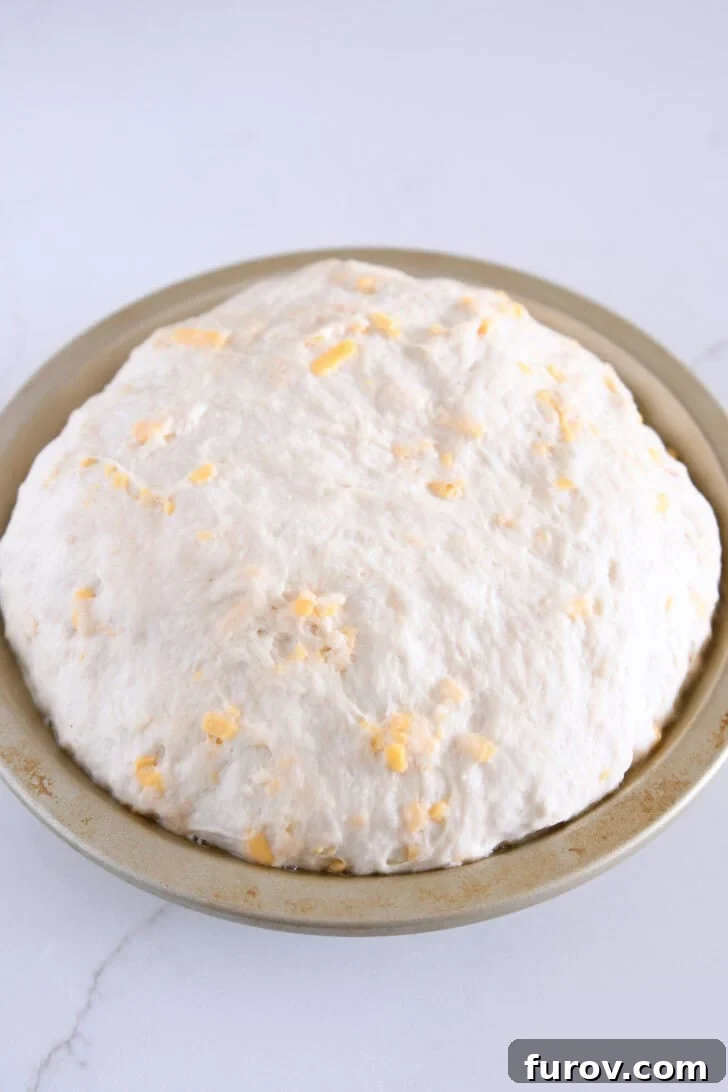
Cover the bowl with plastic wrap or a clean kitchen towel and let the dough rise in a warm spot until it is very puffy and has nearly doubled in size. This typically takes about 1 to 1 1/2 hours, depending on your kitchen’s temperature.
-
Position an oven rack in the center of your oven. Preheat the oven to 425 degrees F (220 degrees C).
-
Generously grease a 9-inch pie plate or an 8 1/2-by-4 1/2-inch loaf pan with cooking spray or butter.
-
Using a rubber spatula, gently scrape the risen dough away from the sides of the bowl, guiding it into a rough ball in the center. Lightly grease your hands with cooking spray or a little oil, then carefully shape the dough into a round loaf (for a pie plate) or a rectangular loaf (for a loaf pan), tucking the edges underneath. Place the shaped dough into your prepared pan. The loaf may not be perfectly smooth or perfectly shaped, and that’s perfectly fine – it adds to its rustic charm!
-
Let the shaped dough rest, uncovered, in the pan for an additional 15-20 minutes. It should become noticeably puffier during this time.
-
Bake in the preheated oven at 425 degrees F (220 degrees C) for 15 minutes. After 15 minutes, reduce the oven temperature to 375 degrees F (190 degrees C) and continue baking for another 15-20 minutes, or until the loaf is deep golden brown and sounds hollow when tapped on the bottom. If the crust begins to brown too quickly, loosely tent the top of the loaf with aluminum foil.
Notes
Flour: Remember, the dough is meant to be sticky! It should be softer and more hydrated than typical bread dough. If, however, it is absolutely too sticky to handle even with greased hands (factors like humidity can play a role), you may add an additional 1/4 cup of flour. Exercise caution and resist the urge to add too much more, as this can result in a dry, dense loaf.
Cheese: For the best flavor and texture, I highly recommend using freshly grated cheese for this recipe. Unlike pre-shredded varieties, freshly grated cheese melts and incorporates more smoothly into the dough, yielding a more pronounced flavor and a superior crumb. When measuring the shredded cheese, lightly pack it into the measuring cup for accuracy, but don’t stress too much about exactness – a little extra cheese never hurt anyone!
Yeast: If you are using active dry yeast instead of instant yeast, you’ll need to activate it first. Dissolve 1 tablespoon of active dry yeast in 1/4 cup of the warm water specified in the recipe. Let it sit for 5-10 minutes until it becomes foamy and bubbly, indicating it’s active. Then, decrease the remaining warm water in the recipe by 1/4 cup and proceed by adding the yeast mixture along with the rest of the water.
Buttered Top: For an even softer, shinier, and more delicious crust, brush the top of the hot bread with melted butter immediately after removing it from the oven. This adds a lovely finish and an extra layer of flavor.
Sourdough Version: To adapt this recipe for sourdough, reduce both the water and flour by 3/4 cup each. In their place, add 1 1/2 cups of fed sourdough starter or sourdough discard (a 1:1:1 fed starter provides a good thick, pourable consistency). Add the sourdough starter at the same time as the warm water. Adjust the yeast: use 1 teaspoon of instant yeast for a fed starter, or 2 teaspoons for sourdough discard to ensure proper rise.
Mel Gunnell
Bread
American
Bake
Serving:
1
slice
,
Calories:
265
kcal
,
Carbohydrates:
40
g
,
Protein:
10
g
,
Fat:
7
g
,
Saturated Fat:
4
g
,
Cholesterol:
18
mg
,
Sodium:
532
mg
,
Fiber:
1
g
,
Sugar:
1
g
Recommended Products
Recipe Source: Adapted from Mel’s Kitchen Cafe
Frequently Asked Questions About Cheesy Peasant Bread
Here are some common questions you might have about making this delicious no-knead cheesy peasant bread:
-
Can I use different types of cheese?
Absolutely! While sharp cheddar and aged Parmesan are recommended for their robust flavor, you can experiment with other meltable, flavorful cheeses. Good alternatives include Gruyère, Monterey Jack, provolone, or even a smoked cheddar for a different twist. Just ensure they are block cheeses that you can grate yourself for the best results. -
What if my dough isn’t rising?
Several factors can affect dough rising. Ensure your warm water is between 110-115°F (43-46°C); water that’s too hot can kill the yeast, and too cold won’t activate it. Check the expiration date of your yeast to ensure it’s still active. Also, make sure your kitchen is not too cold during the rising period; a warm, draft-free spot is ideal. Patience is key – sometimes dough just needs a little more time. -
How should I store leftover cheesy peasant bread?
Once completely cooled, store the bread in an airtight container or a plastic bag at room temperature for up to 2-3 days. For longer storage, you can wrap individual slices or the whole loaf tightly in plastic wrap, then foil, and freeze for up to 3 months. Thaw at room temperature and refresh in a warm oven or toaster. -
Can I add other mix-ins to the dough?
Yes, get creative! Beyond cheese, you can fold in chopped fresh herbs like chives or rosemary, a pinch of garlic powder, or even some finely diced jalapeños for a spicy kick. Add these with the cheese to ensure even distribution. -
Why is my bread dense?
A dense loaf is often a result of too much flour being added to the dough, or insufficient rising time. Remember, this dough is meant to be sticky. Resist adding excess flour, and allow the dough ample time to proof in a warm environment until it’s visibly puffy and nearly doubled. Over-working the dough after the first rise can also expel too much air, leading to a denser texture.