
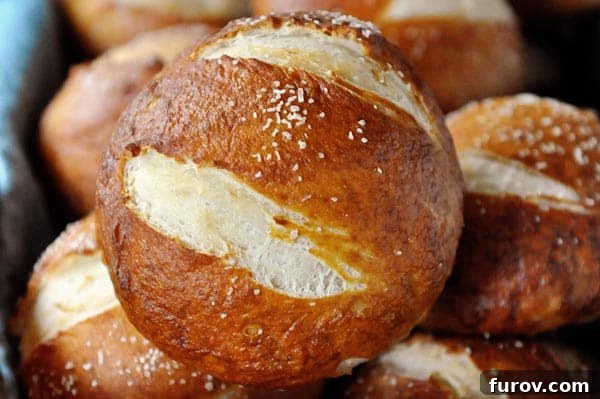
Amazing Soft Pretzel Rolls: Your New Favorite Homemade Bread
Fresh from the oven, these soft pretzel rolls boast a perfectly puffed texture, a wonderfully salty crust, and an irresistible chewiness. They’re so authentic, they look like they came straight from a gourmet bakery!
Prepare to be amazed! While I might sometimes get a little overly enthusiastic about food, I can genuinely say that these soft pretzel rolls are easily among the best breads I’ve ever baked in my kitchen. And believe me, I’ve baked a lot of bread over the years, exploring countless recipes and techniques.
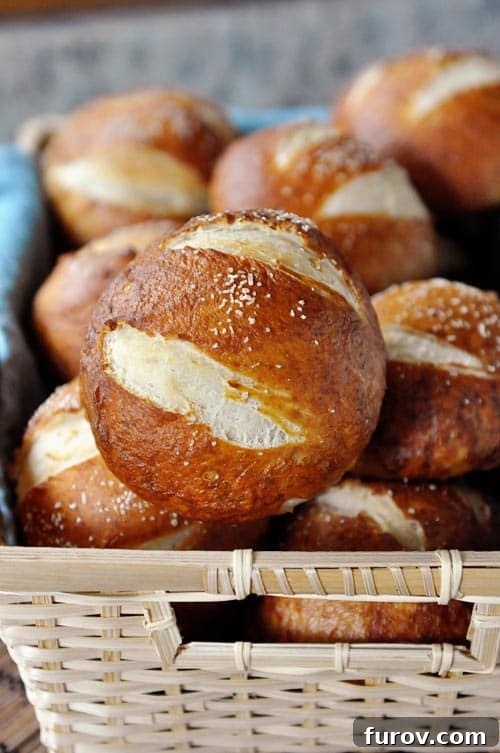
My husband, Brian, was so surprised by their professional appearance that he didn’t even believe I made them myself! He thought they must have come from a high-end bakery or a fancy restaurant – neither of which is a common find in our charming small town. In his defense, I must admit I let out a genuine squeal of joy when I first pulled these beauties from the oven, looking exactly like the perfect pretzel rolls I had envisioned.
Imagine: a rich, dark brown color, a wonderfully puffed shape, and that unmistakable salty, chewy texture. I promise you, not only are these rolls entirely achievable for any home baker (they’re much simpler than you might think!), but they will also solidify your status as a culinary rockstar. Just take one look, and you’ll understand. In fact, I just looked again, and now I’m craving about fifty of them!
The Secret to Unforgettable Pretzel Rolls: The Alkaline Bath
For anyone feeling a slight hesitation about venturing into the world of pretzel rolls, let me reassure you: don’t be! The crucial step that elevates these rolls from good to absolutely phenomenal is the boiling of the dough in a baking soda water bath just before baking. This seemingly simple step is where the magic truly happens.
This alkaline bath is responsible for developing that signature chewy texture and helps create the distinct, crisp, dark brown crust that defines a true pretzel. The baking soda reacts with the surface of the dough, creating a unique chemical change that enhances both flavor and texture, mimicking the traditional lye bath used in professional pretzel making, but in a much safer and more accessible way for home kitchens. The longer you boil them, within reason, the chewier and more pronounced that pretzel character will be. It’s a game-changer you won’t want to skip!
Mastering the Dough: Tips for Perfect Texture
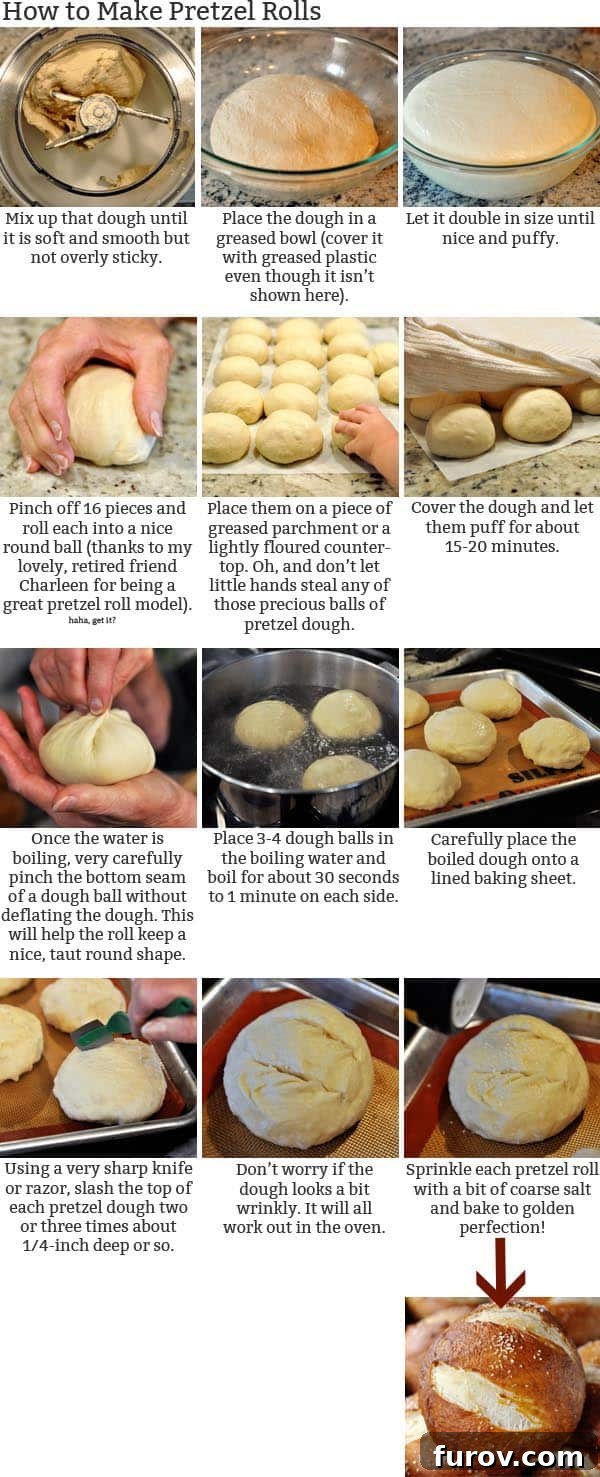
Making yeast dough can sometimes feel intimidating, but it doesn’t have to be. For these amazing soft pretzel rolls, achieving the right dough consistency is key. When mixing your dough, remember that the amount of flour can vary based on factors like humidity, altitude, and even the type of flour you use. Instead of sticking rigidly to a specific measurement, pay close attention to the feel and appearance of the dough.
You’re aiming for a soft dough that pulls away cleanly from the sides of your mixing bowl. It should be slightly stiffer and less sticky than typical dinner roll dough, yet still soft and pliable, never dry or overfloured. Kneading for 3-4 minutes will help develop the gluten, giving your pretzel rolls that wonderful structure and chew. Don’t rush the rising process either; letting the dough double in size creates a light, airy base before the boiling process adds its unique texture.
From Oven to Table: Serving Suggestions & Pairings
Oh, my heavens, I simply have to emphasize again: these rolls are truly amazing! Through countless revisions of this recipe, we’ve enjoyed these delectable creations with almost everything imaginable. They’re perfect alongside a hearty bowl of soup, an Italian classic like spaghetti, or as an elevated bun for sandwiches and grilled hamburgers. Their versatility makes them a fantastic addition to any meal.
However, I must confess, more often than not, these perfectly irresistible pretzel rolls don’t even make it to a full meal. Our absolute favorite way to devour them is straight out of the oven, still slightly warm, paired with a thick wedge of sharp cheddar cheese. The combination of the salty, chewy bread and the tangy cheese is simply divine. They’re also incredible with a smear of mustard, especially a grainy Dijon or a sweet and spicy variety. Consider serving them with a creamy beer cheese dip for an ultimate appetizer experience, or even plain with a sprinkle of extra coarse salt for a simple, satisfying snack. Rockstar status, baby, absolute rockstar status.
Storage & Reheating Tips for Freshness
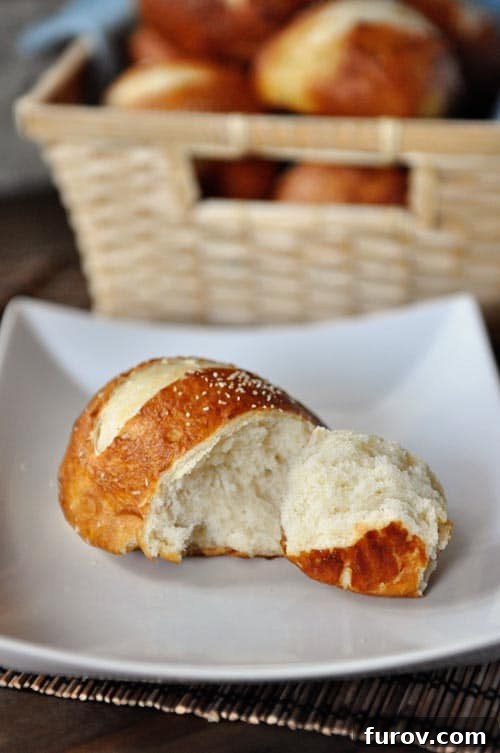
While these pretzel rolls undeniably taste best the same day they are made – warm and fresh from the oven – they can certainly be enjoyed for a day or two afterward. To keep them as fresh as possible, store them in an airtight container at room temperature. If they start to lose a little of their initial softness, a quick reheat in the microwave for a few seconds can work wonders, bringing back some of that delightful warmth and chewiness. Alternatively, you can pop them in a preheated oven at 300°F (150°C) for about 5-7 minutes to crisp up the exterior.
Creative Variations for Your Pretzel Rolls
Once you master the basic recipe, don’t hesitate to get creative with your pretzel rolls! While coarse salt is the classic topping, you can experiment with other additions to customize your batch. Try sprinkling them with everything bagel seasoning for an extra flavor boost, or a mix of poppy and sesame seeds. For a cheesy twist, finely grate some Parmesan or cheddar cheese over the rolls before baking. You could even incorporate a small cube of cheese into the center of each dough ball before shaping for a surprise melty interior. These variations can transform your pretzel rolls to suit any palate or occasion.
Explore More Delicious Recipes
Here are some other fantastic recipes you might enjoy:
Sweet Treats: Glazed Chocolate Chip Scones
Hearty Meals: Hearty Turkey and Bean Chili
Comforting Soups: Autumn Minestrone Soup
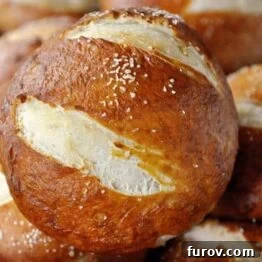
Amazing Soft Pretzel Rolls
Pin
Rate
Ingredients
Dough:
- 1 tablespoon instant yeast
- 2 tablespoons canola or vegetable oil
- 2 cups warm milk, about 100-110 degrees F
- 1 ½ cups warm water, about 100-110 degrees F
- 2 teaspoons salt
- 6 ½ – 8 cups unbleached all-purpose flour
Water Bath and Extras:
- 3 quarts water
- 1 tablespoon sugar
- ¼ cup baking soda
- Coarse salt for sprinkling
Instructions
-
In the bowl of an electric mixer (or you can do this by hand in a large bowl), stir together the yeast, oil, milk and water. Add the salt and two cups of the flour. Add the rest of the flour gradually until a soft dough is formed and knead for 3-4 minutes. You may not need to use all the flour depending on many different factors (see the note) – add the flour until a soft dough is formed that clears the sides of the bowl. It is similar in texture to bagel dough and should be slightly more stiff and less sticky than, say, roll dough, but definitely still soft and not overfloured.
-
Transfer the dough to a lightly greased bowl, cover it with greased plastic wrap and let it rise until doubled in size (1-2 hours).
-
Portion the dough into 16 pieces and roll each piece of dough into a lovely little round ball. Here’s a great tutorial on how to do that quickly and efficiently.
-
Lay out the rolls on lightly greased parchment or a lightly floured counter. Make sure the dough balls won’t stick! Let them rest for 15-20 minutes.
-
While the dough rests, bring the water, sugar and baking soda to a boil in a large 5-6 quart saucepan.
-
Working with one piece of dough at a time, carefully take it off the parchment or counter, flip it over in your hand and pinch the bottom to form a little pucker and help the dough form a nice, taut ball. Take care not to deflate the dough; you should pinch just the very edge of the dough.
-
Place 3-4 dough balls in the boiling water and boil for 30 seconds to 1 minute on each side (the longer you boil, the chewier the baked pretzel roll will be).
-
With a spatula, remove the dough from the boiling water and let the excess water drip off into the pan. Place the boiled dough balls onto lined baking sheets (lined with lightly greased parchment or a silpat liner).
-
Preheat the oven to 425 degrees F.
-
Using a very sharp knife or razor, slice 2-3 cuts into the top of each unbaked roll about 1/4-inch deep or so. It’s important to use a very sharp blade so that it cuts the dough without deflating it. It’s ok if the dough looks wrinkly and kind of funny. It will work itself out during baking. Lightly sprinkle each dough ball with coarse salt.
-
Bake for 20-22 minutes until the rolls are deep golden brown. These rolls definitely taste best the same day they are made; however, lightly warmed in the microwave for a few seconds will do wonders for pretzel rolls 1-2 days old.
Notes
Yeast: this tutorial on yeast may help identify how a perfectly floured dough should be. For this pretzel dough, you are going for a slightly stiffer dough than regular roll dough (but it should still be soft and not overfloured).
Recommended Products
Recipe Source: Mel’s Kitchen Cafe (This recipe was originally inspired by many online versions, which led me to create my own unique variation. My aim was to incorporate more milk than water in the dough, adjust the salt content, simplify the mixing method using instant yeast, and fine-tune various other factors to achieve the perfect pretzel roll.)