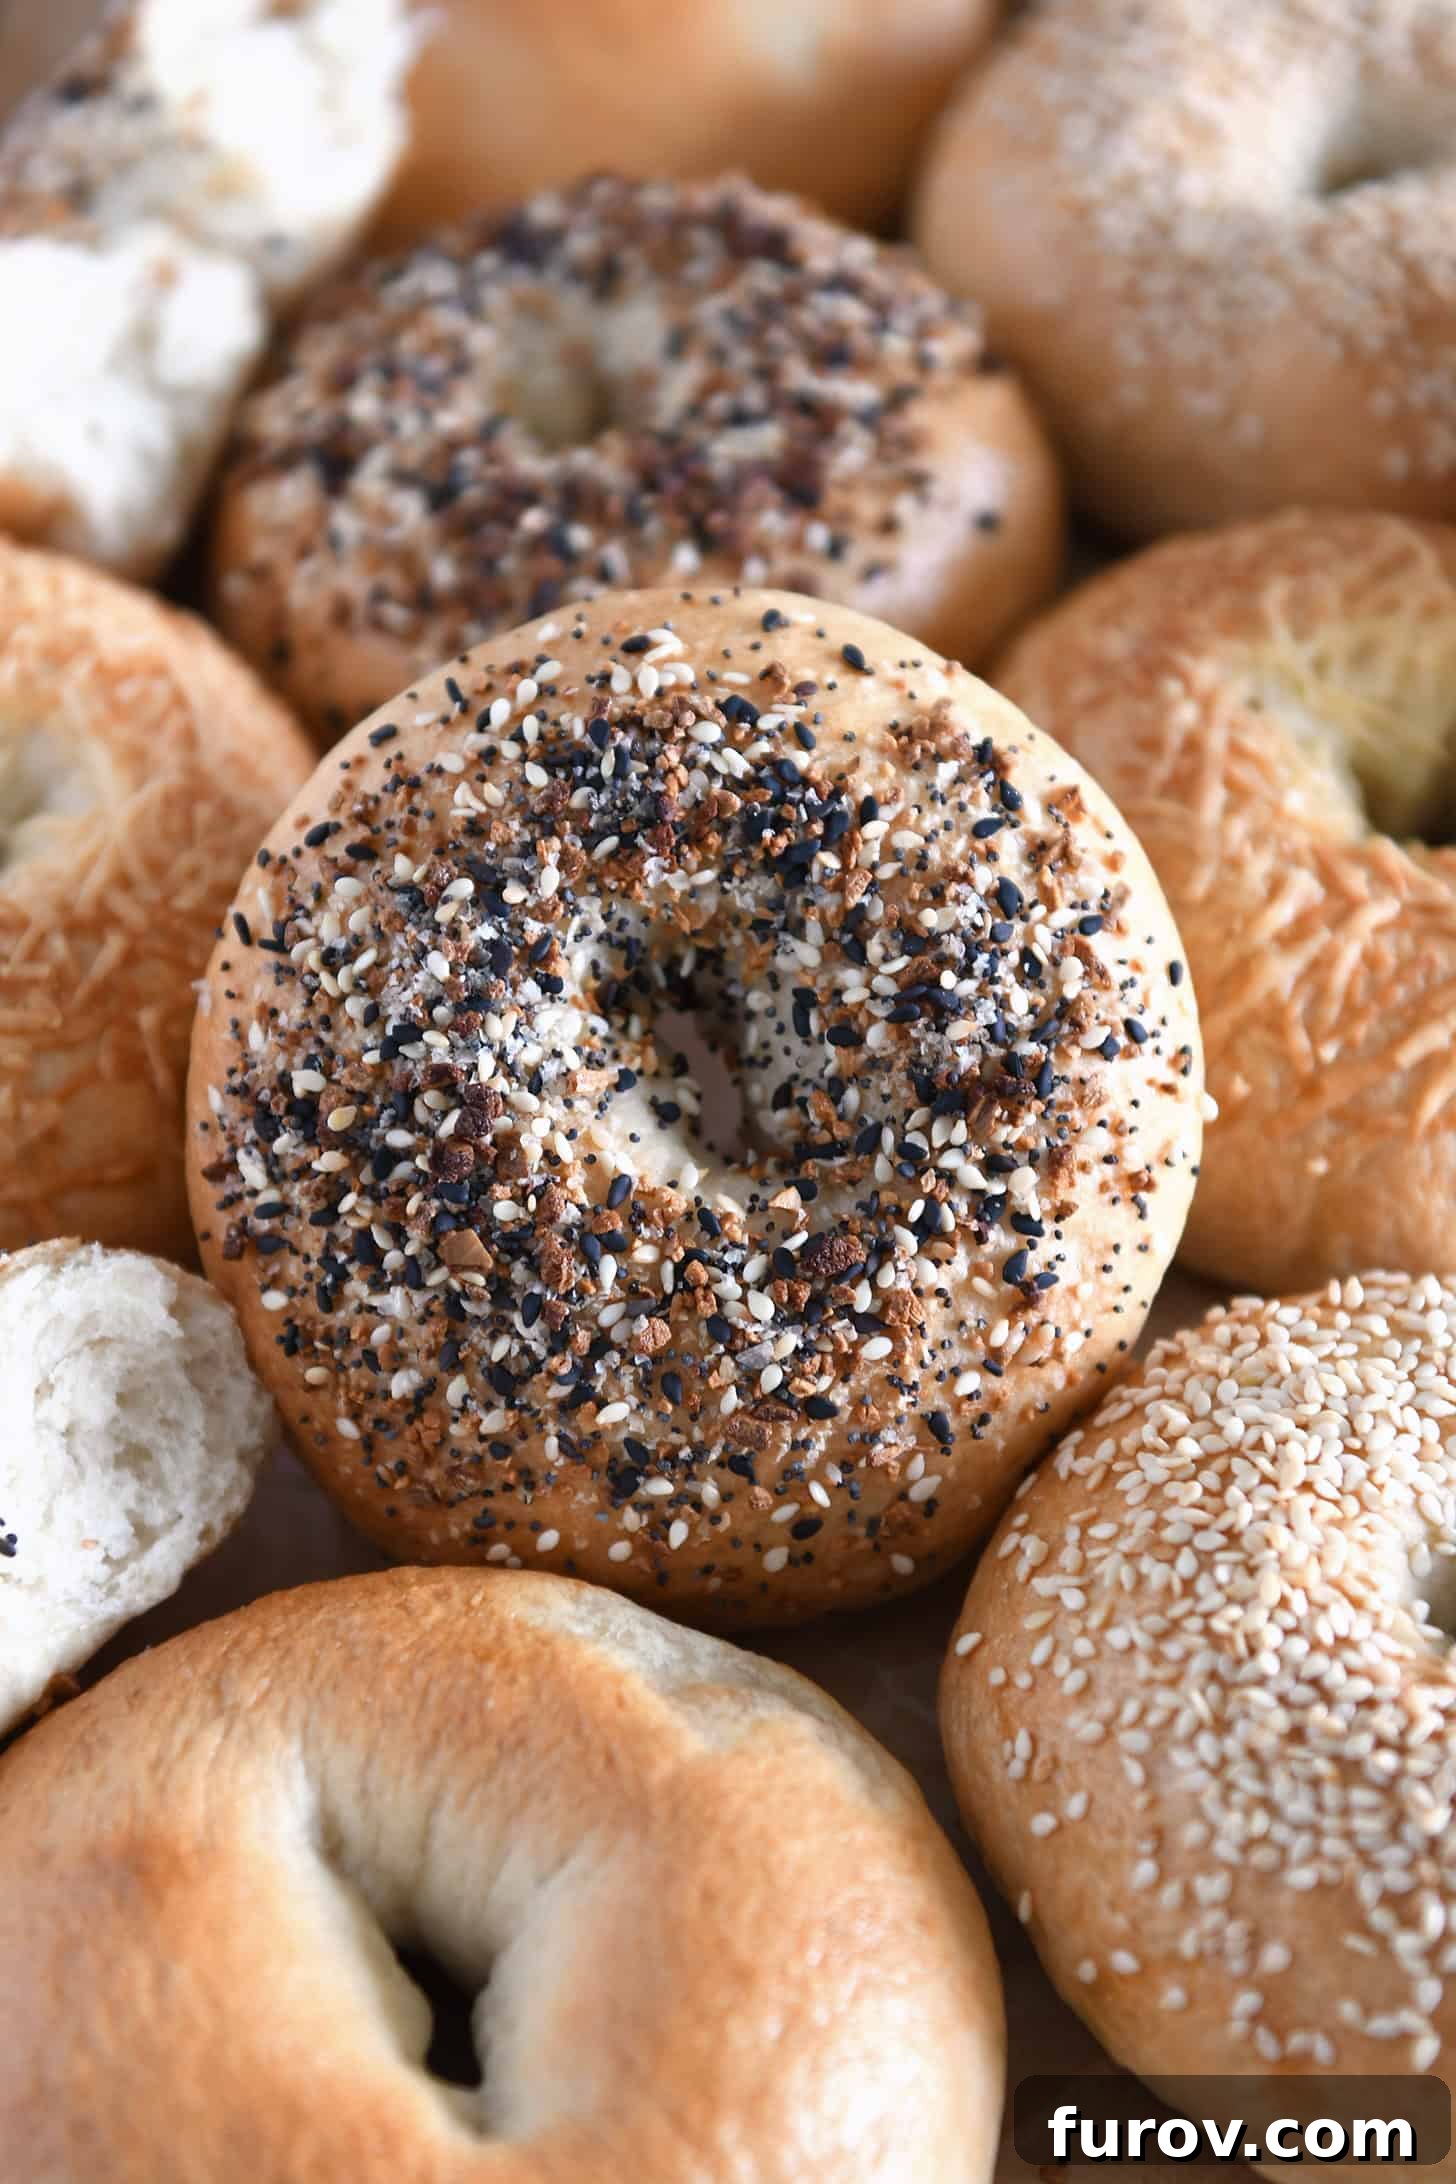
Unlock the secret to bakery-quality bagels right in your own kitchen! This easy-to-follow, step-by-step recipe guarantees perfect homemade bagels with a delightfully chewy interior and a beautifully crisp crust. Plus, they’re incredibly customizable with all your favorite toppings!
First shared in 2011, this beloved recipe has been continuously refined and enhanced over the years. We’ve added fresh photography and comprehensive notes, incorporating valuable feedback and insights to make this guide to perfect homemade bagels better than ever before. Whether you’re a seasoned baker or new to the world of yeast doughs, prepare to be amazed by the delicious results you can achieve.
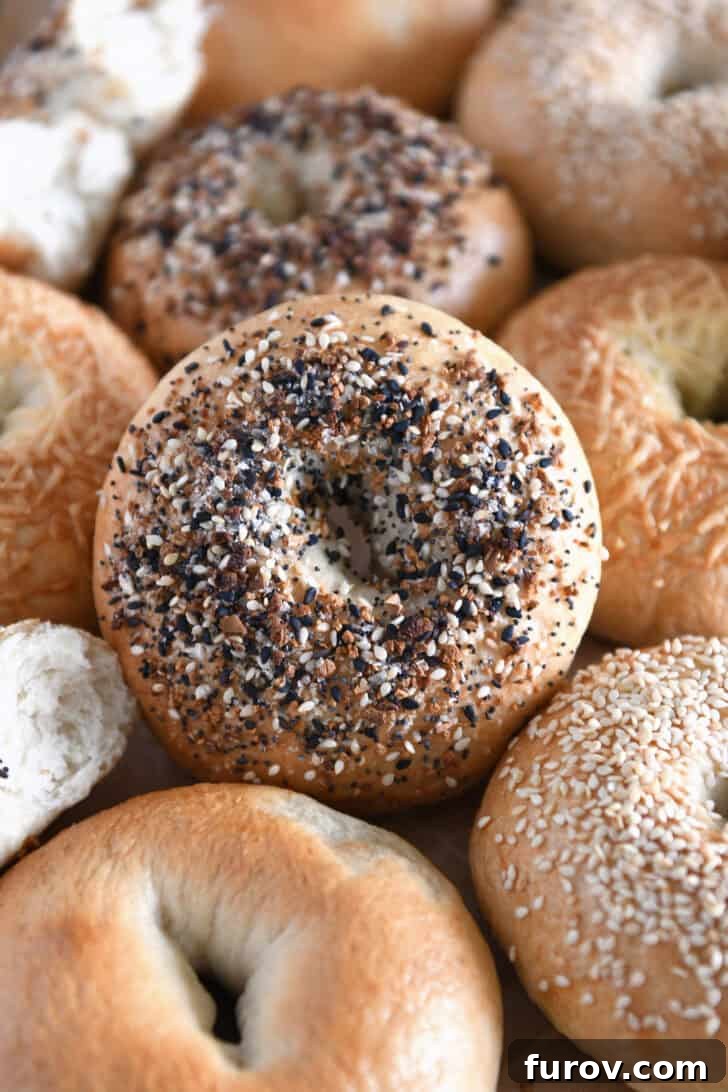
Our readers consistently rave about this recipe! Here’s what Nancy had to say: “Thanks so much for this absolutely delicious recipe! Followed your recipe exactly, (used sesame seeds as the topping), and they are every bit as good as any bagel shop we’ve ever been to, and oh-so-much better than any grocery store brand. ⭐️⭐️⭐️⭐️⭐️”
Why This Is Your Go-To Homemade Bagel Recipe
- Effortless Process: Forget complicated overnight starters or lengthy, intimidating instructions. This recipe is designed for simplicity, allowing anyone to bake perfect bagels with minimal fuss. It’s truly a straightforward path to homemade deliciousness.
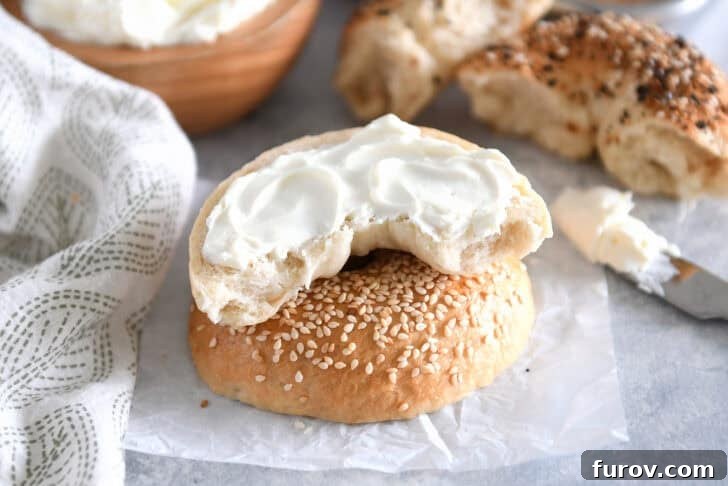
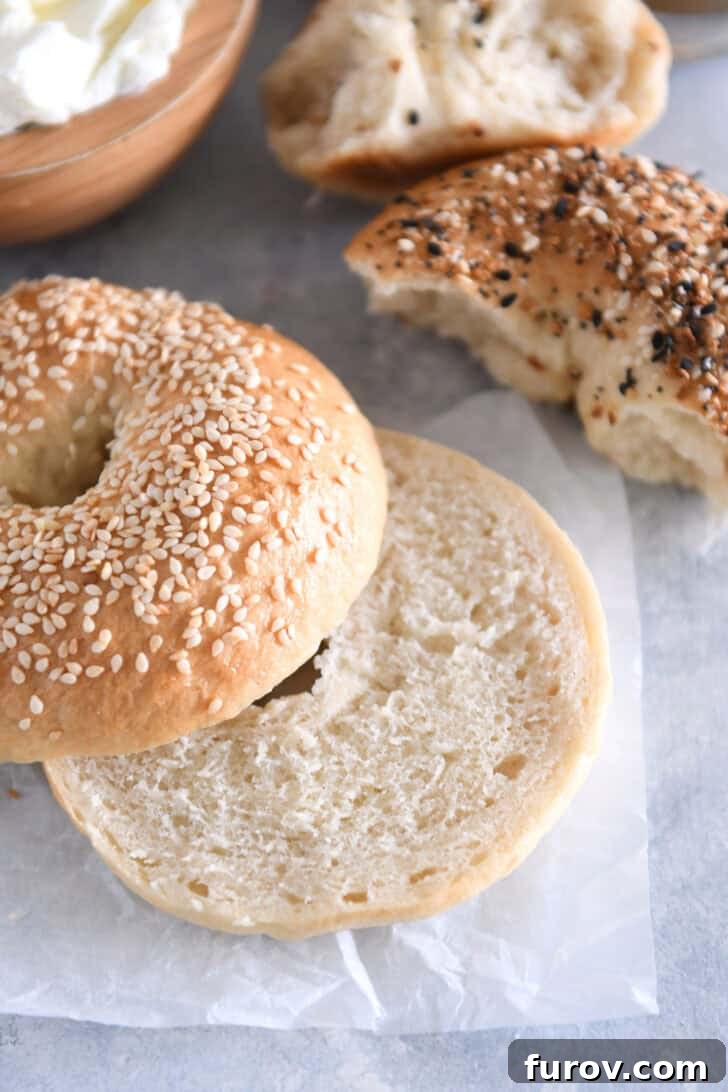
- Irresistible Texture: Prepare for a fluffy, chewy interior encased in a wonderfully crisp, golden crust—the hallmark of an authentic bagel. Each bite delivers that satisfying chewiness that sets a real bagel apart from ordinary bread.
- Endless Customization: From classic sesame to savory everything seasoning, and even sweet cinnamon sugar, the possibilities for toppings are limitless. Easily adapt these bagels to suit every craving and palate in your household.
- Freezer-Friendly Convenience: Bake a big batch and store them in the freezer! These homemade bagels freeze exceptionally well, ensuring you always have a convenient, delicious option for quick breakfasts, satisfying snacks, or whenever a bagel craving strikes.
- Perfect for Baking Beginners: Many aspiring bakers feel intimidated by yeast doughs or the idea of making bagels from scratch. This recipe is a game-changer for beginners. Countless individuals who once struggled with bread making have achieved incredible success with this exact recipe, turning out amazing bagels on their very first try! It builds confidence and delivers fantastic results.
Essential Ingredients for Perfect Bagels
Crafting the perfect bagel starts with understanding the role of each ingredient. While simple, these components work together to create that signature bagel texture and flavor:
- Bread Flour: This is non-negotiable for authentic bagels. Bread flour boasts a higher protein content than all-purpose flour, which means more gluten development. This extra gluten is crucial for achieving the characteristic chewiness that defines a great bagel. Without it, your bagels might resemble a regular roll.
- Instant or Rapid-Rise Yeast: For efficiency and consistent results, instant or rapid-rise yeast is preferred. It doesn’t require proofing in warm water first, simplifying the process and allowing for a quicker rise. This makes the recipe more accessible for beginner bakers.
- Salt: Beyond flavor, salt plays a vital role in controlling yeast activity and strengthening the gluten structure. Don’t skimp on the salt; it’s essential for both taste and texture.
- Brown Sugar (or Honey): Used both in the dough and the boiling water, sugar adds a subtle sweetness and contributes significantly to the beautiful golden-brown crust during baking. Honey can be substituted in the water bath for a slightly different flavor profile.
- Warm Water: The ideal temperature for activating yeast is crucial. Water that’s too hot can kill the yeast, while water that’s too cold won’t activate it properly, leading to a flat, dense dough. Aim for around 105-115°F (40-46°C).
Equipment You’ll Need
While the process is simple, having the right tools can make your bagel-making journey even smoother:
- Stand Mixer with Dough Hook: This makes kneading the stiff bagel dough significantly easier and more efficient, ensuring proper gluten development without tiring your arms.
- Large Mixing Bowls: For rising the dough and preparing your toppings.
- Large, Wide Pot (or Dutch Oven): Essential for the boiling step. A wider pot allows you to boil multiple bagels simultaneously without crowding.
- Slotted Spoon or Wide Spatula: To safely transfer boiled bagels from the water bath to the baking sheet.
- Parchment Paper: Prevents sticking and makes cleanup a breeze.
- Baking Sheets: For baking your shaped and boiled bagels.
- Kitchen Scale: Highly recommended for accurate ingredient measurements, especially for flour, ensuring consistent results every time.
- Pastry Brush: For applying the egg wash before toppings.
Mastering the Art of Bagel Shaping
Shaping bagels is a fun and straightforward process that adds character to your homemade creations. Follow these steps for perfectly formed bagels:
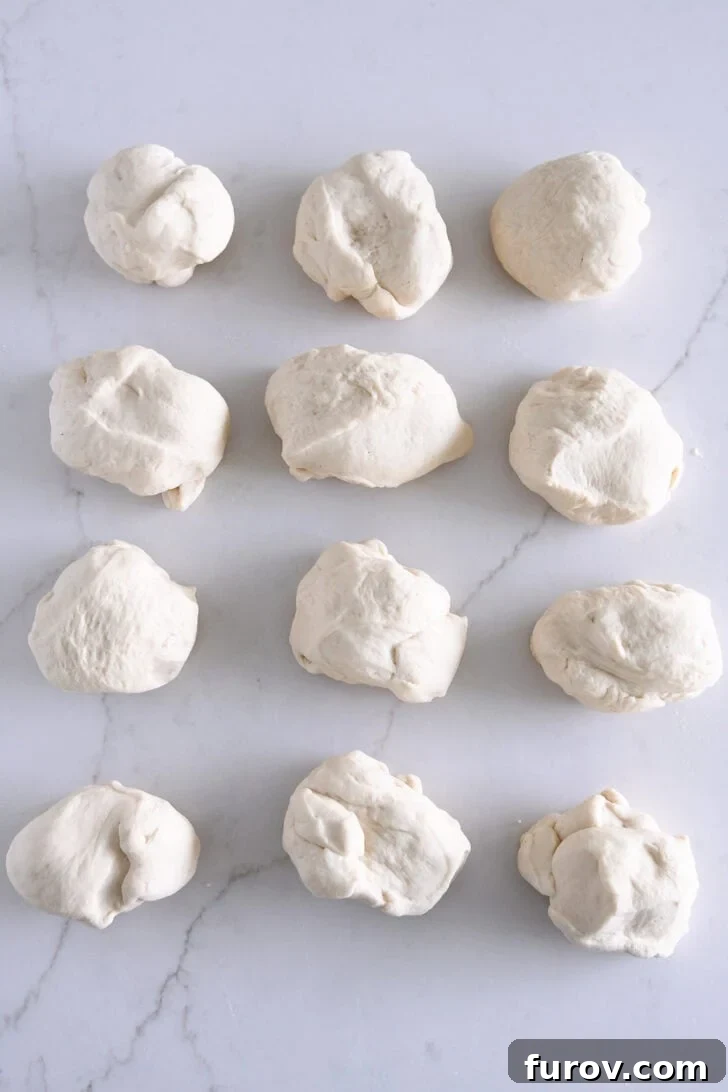
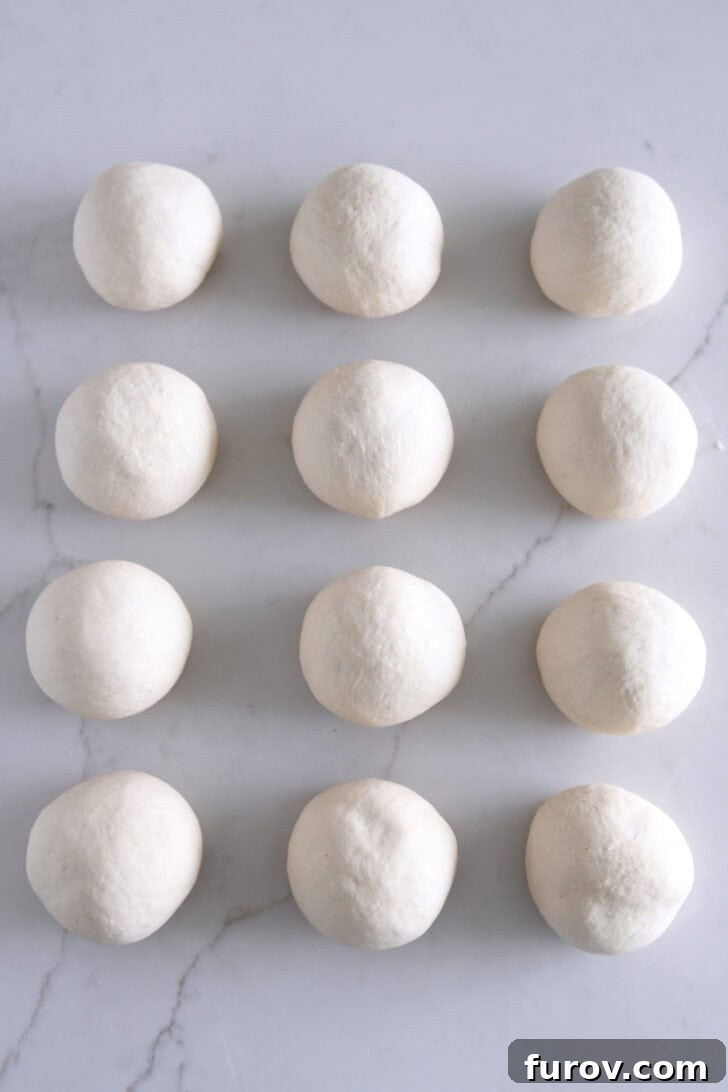
- Divide the Dough: Once your dough has risen, gently turn it out onto a lightly greased work surface. Divide the dough into eight equal pieces, aiming for about 115 grams (4 ounces) each. Precision here helps ensure even baking.
- Form Smooth Balls: Take each piece of dough and roll it into a tight, smooth ball. The goal is to create a taut surface. Allow these dough balls to rest for at least 30 minutes. This resting period is crucial as it relaxes the gluten, preventing the dough from springing back stubbornly when you try to shape it into a bagel.
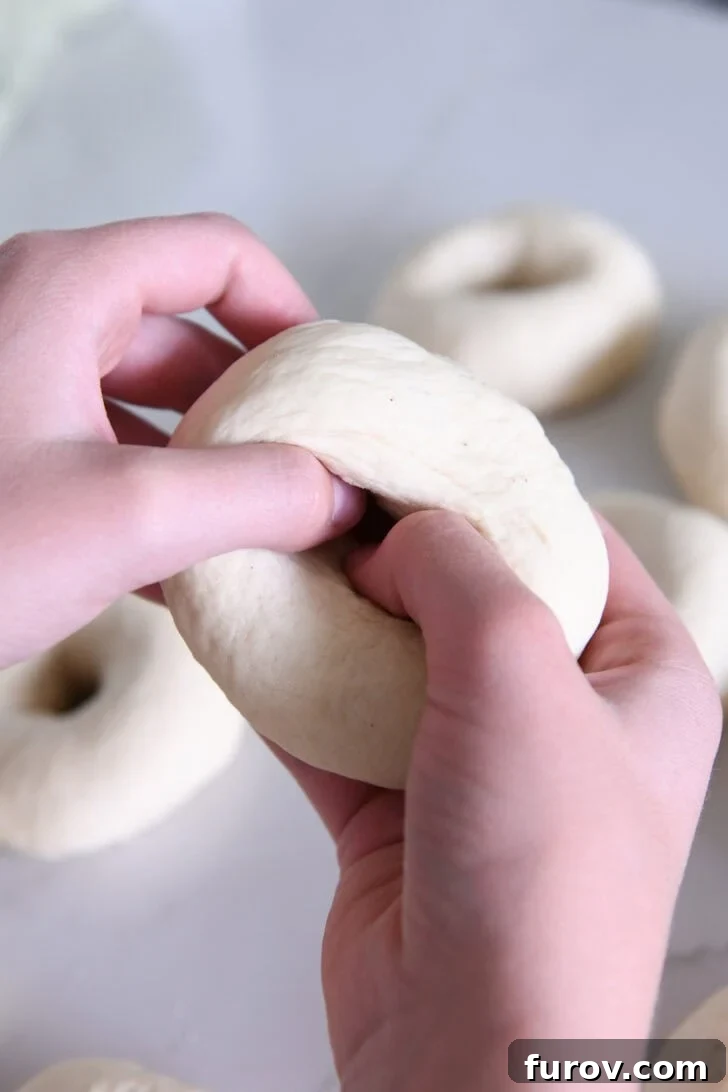
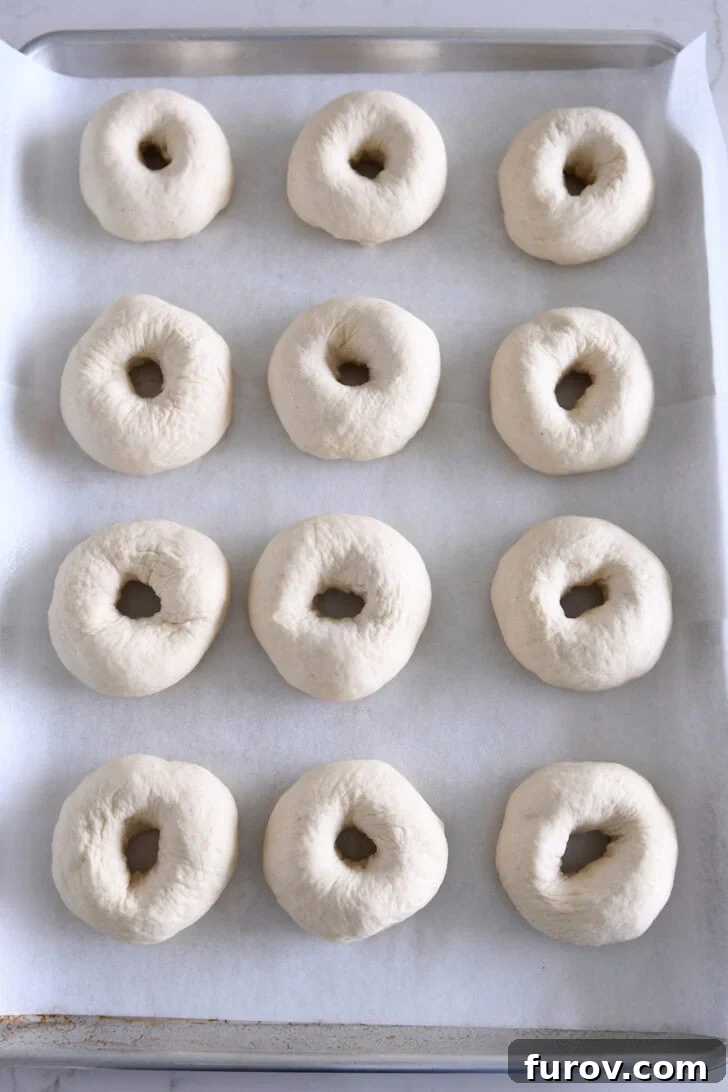
- Create the Signature Hole: Using your thumb, gently poke a hole directly through the center of each dough ball. Then, use both thumbs to carefully twirl and stretch the dough, widening the hole until it measures 1 to 2 inches in diameter. The finished bagel will be approximately 4 inches across.
Embrace Imperfection! When shaping homemade bagels, remember that perfection is overrated. Not every bagel will look identical, and some may have slight variations in thickness. This is perfectly normal and gives your bagels a unique, artisanal personality. Rest assured, they will all taste absolutely delicious, regardless of their appearance!
The Crucial Boil: Why Bagels Need a Hot Water Bath
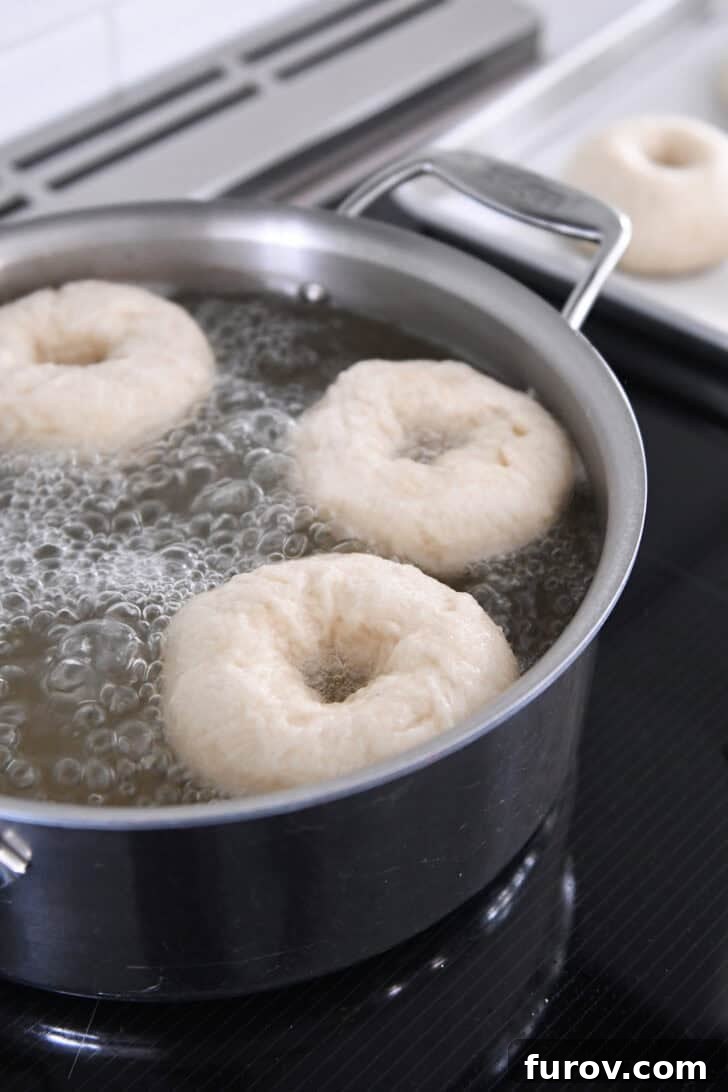
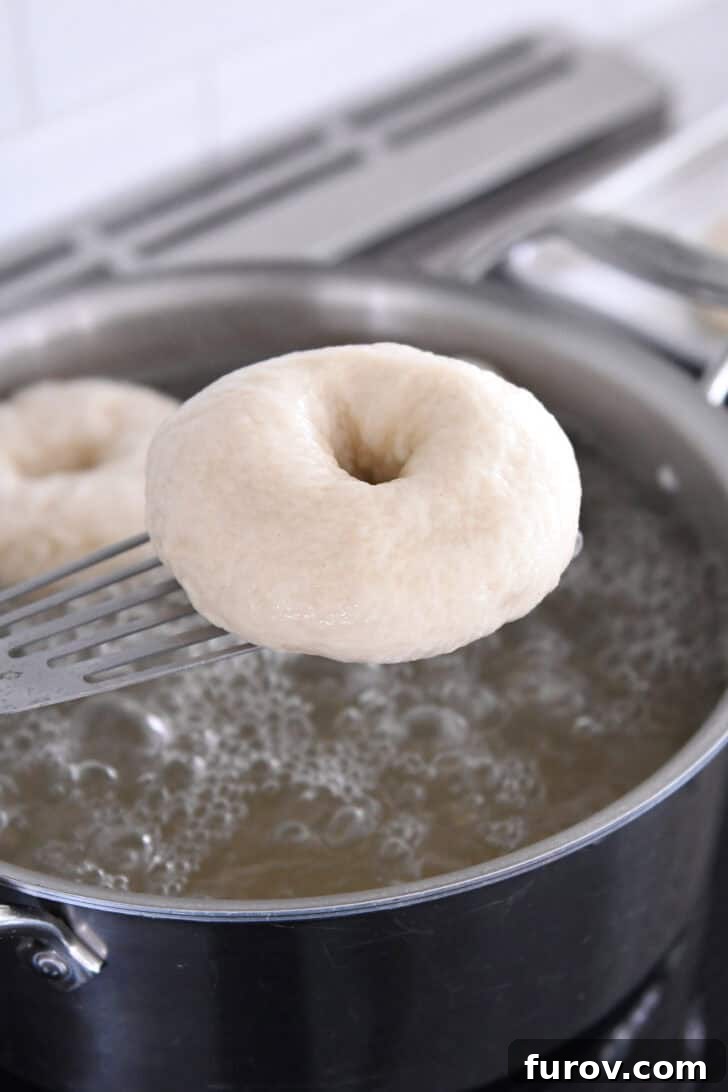
Boiling bagels before baking isn’t just a tradition; it’s a critical step that fundamentally transforms the dough into the iconic bagel we know and love. This seemingly simple water bath serves several vital purposes:
- Achieving the Signature Chewy Texture: When bagels are plunged into steaming hot water, the outer layer of the dough cooks almost instantly, creating a thin, gelatinized crust. This partial cooking sets the exterior, preventing the bagel from rising excessively in the oven. The result is a denser, incredibly chewy interior—the hallmark texture of a classic bagel. Without this step, your bagels would rise too much and have a texture closer to a regular bread roll.
- Developing a Golden, Glossy Crust: The water bath typically contains a sweetener, such as brown sugar or honey. This sugar dissolves in the hot water and adheres to the surface of the bagels. During baking, these sugars caramelize, giving the bagels their characteristic deep golden-brown color and a slightly glossy, appealing crust.
- Enhanced Flavor: The boiling process, combined with the sweetener, also contributes to a more complex and satisfying flavor profile that distinguishes bagels from other baked goods.
A Bagel’s Identity Crisis: Bagels that skip the boiling step often fall short of expectations. They tend to puff up excessively in the oven, resulting in a bread-like texture rather than the dense, chewy, and gloriously delicious bagel they are meant to be. The boil truly is what makes a bagel a bagel!
Best Bagel Toppings and How to Apply Them
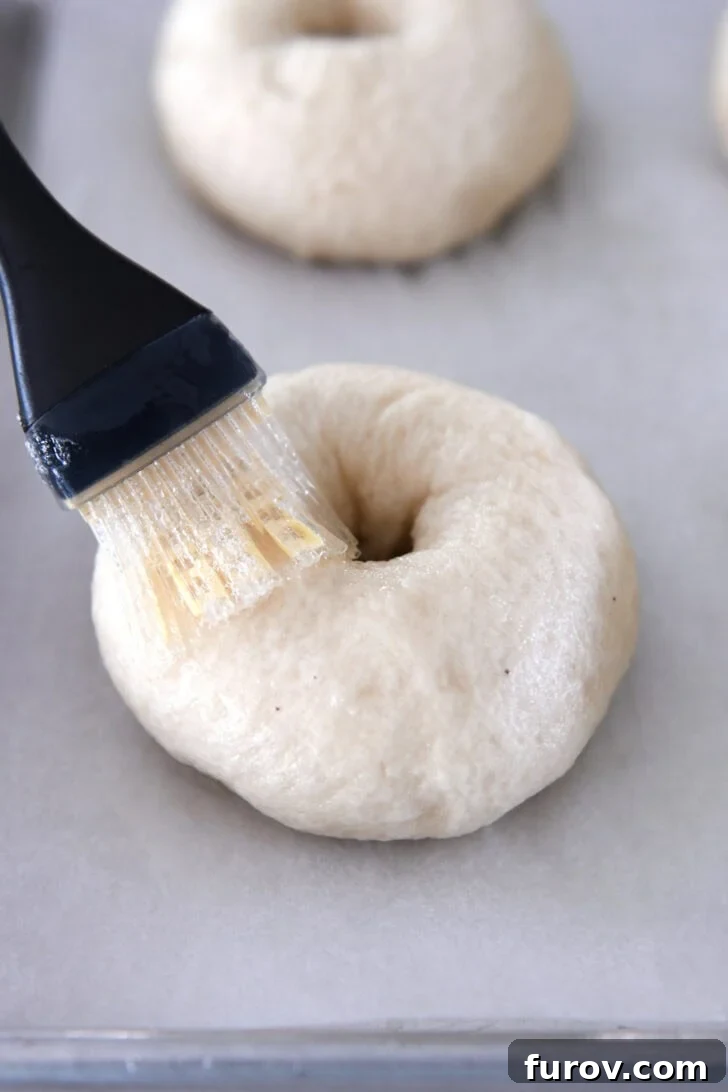
One of the joys of homemade bagels is the ability to customize them with an array of delicious toppings. To ensure your toppings adhere perfectly and create that professional bakery finish, an egg wash is your best friend. Simply whisk together one egg white with one tablespoon of water until well combined. Brush this mixture generously over the tops and sides of each boiled bagel before adding your chosen toppings.
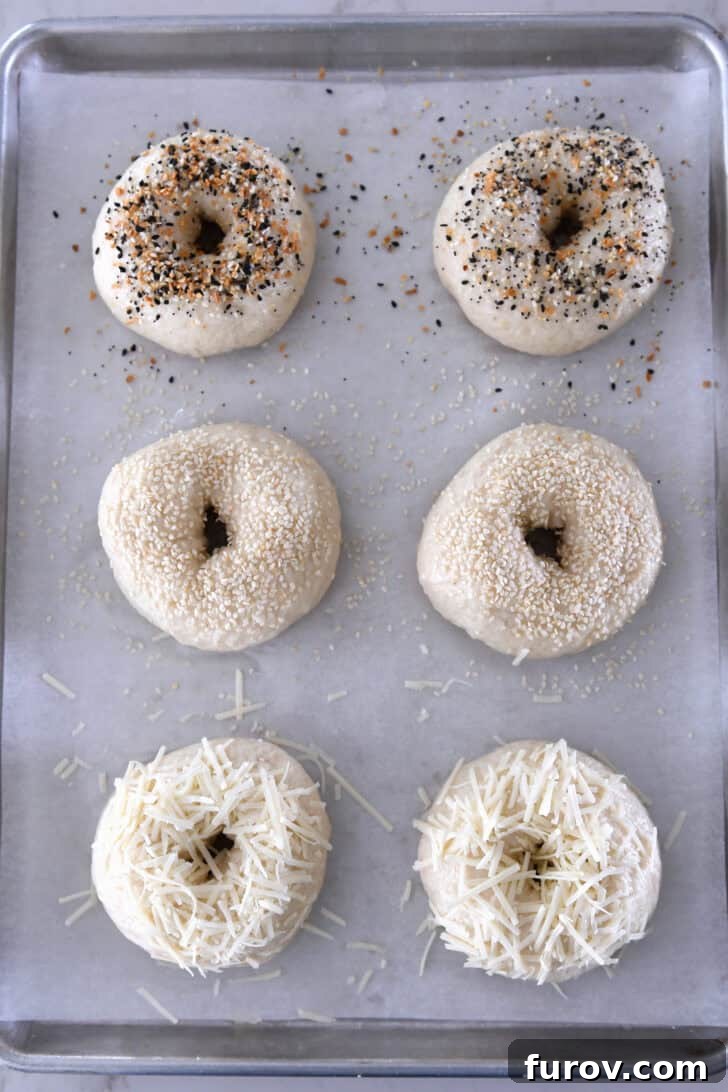
For maximum topping coverage, you can place your desired topping in a shallow bowl and gently dip the egg-washed bagels, turning them to coat the top and sides. Alternatively, a simple sprinkle will also work beautifully.
Our favorite bagel toppings include:
- Classic Sesame Seeds: A timeless choice for a slightly nutty flavor and satisfying crunch.
- Everything Bagel Seasoning: A dynamic blend of sesame seeds, poppy seeds, dried garlic, dried onion, and coarse salt – delivering a burst of savory flavor.
- Finely Grated Asiago or Parmesan Cheese: For a delightful savory, slightly salty crust that bakes up beautifully.
- Coarse Sea Salt: A simple yet impactful topping, especially delicious on plain or poppy seed bagels, offering a pleasant textural contrast.
- Cinnamon and Sugar: For those who love a sweet twist, this classic combination creates a warm, comforting topping perfect for breakfast.
Prefer a Plain Bagel? If you choose to leave your bagels unadorned, the egg wash is optional. However, applying it will still help achieve an even more beautiful golden-brown and slightly glossy crust, enhancing their appeal.
Baking and Storage Tips for Homemade Bagels
Baking to Golden Perfection
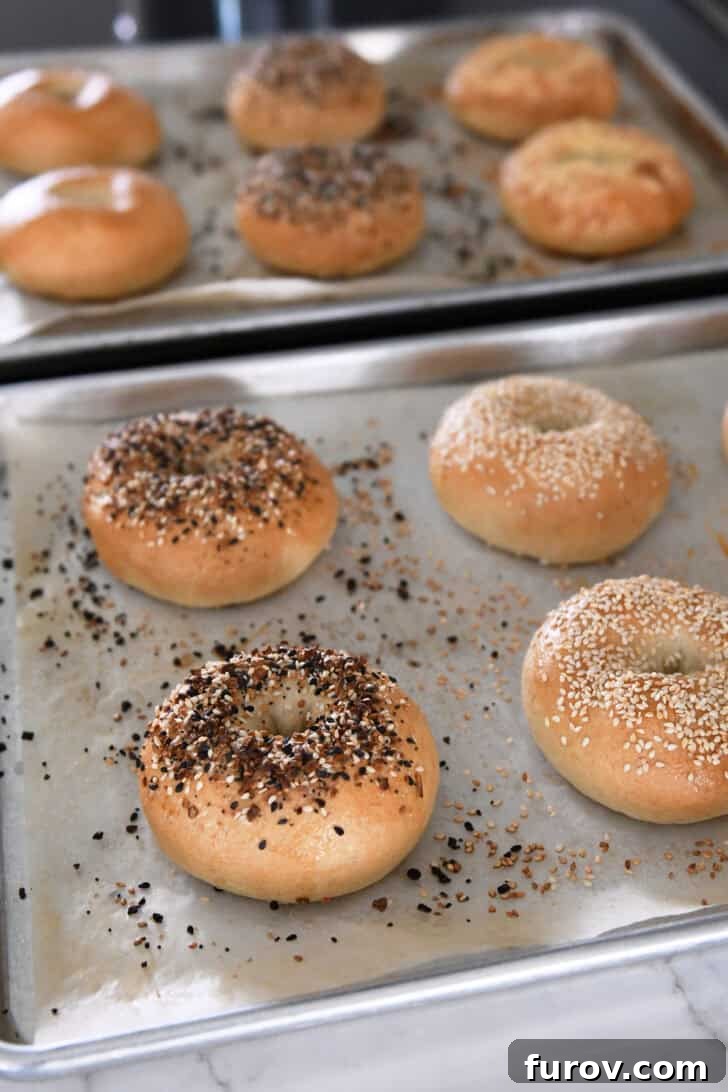
Once your bagels are boiled and topped, they are ready for their final transformation in the oven. Preheat your oven to 425°F (220°C). Bake the bagels for 20 to 25 minutes, or until they achieve a rich, golden-brown color and sound hollow when tapped on the bottom. Keep an eye on them; ovens can vary, and you want that perfect balance of crisp crust and chewy interior. Once baked, immediately transfer the bagels to a wire cooling rack to cool completely. This prevents the bottoms from becoming soggy due to condensed moisture.
Storage and Freezing Instructions
Fresh homemade bagels are best enjoyed within a day or two. Store them at room temperature in an airtight container or a large zip-top bag to maintain freshness. For longer storage, bagels are remarkably freezer-friendly!
To freeze, ensure the bagels are completely cooled. You can either slice them in half before freezing or freeze them whole. Place them in a single layer on a baking sheet to flash freeze for about 30 minutes, then transfer the frozen bagels to a freezer-safe bag or container. They will keep well in the freezer for up to 2-3 months. To enjoy, simply toast directly from frozen or thaw at room temperature before toasting.
Troubleshooting and Additional Tips for Bagel Success
While this homemade bagel recipe is designed for ease, keeping a few expert tips in mind will ensure your baking experience is consistently successful:
- Dough Consistency is Key: Bagel dough is intentionally stiffer and less hydrated than typical dinner roll or sandwich bread doughs. This firmness is crucial because it helps the bagels withstand the boiling water bath without disintegrating, leading to that perfectly chewy result. Don’t be alarmed if your dough feels quite firm – that’s exactly what you want!
- Measure with Precision: I cannot stress enough the importance of accurate ingredient measurement, especially for dry ingredients like flour. I highly recommend investing in a kitchen scale. If you measure flour by volume (cups), gently fluff the flour, then spoon it into the measuring cup and level it off with a straight edge to avoid packing too much flour.
- Adjust for Your Climate: If you reside in an excessively dry climate, consider starting with ¼ cup less flour in the dough. Only add the remaining flour if the dough consistently sticks to the sides and bottom of your mixing bowl, indicating it needs more dry ingredients.
- Mind the Boiling Time: Keep a close eye on your timer during the boiling step. It might seem counter-intuitive, but boiling the bagels for too long will not make them better. They only need about one minute per side, at most, to achieve the desired texture without becoming too dense or tough.
- Avoid Crowding the Pot: When boiling, work in batches (3-4 bagels at a time) to avoid overcrowding the pot. This ensures the water temperature remains consistent and each bagel has enough space to boil evenly.
- Single-Layer Baking: If you are baking multiple batches of bagels and only have one oven, bake one sheet at a time. Baking two sheets simultaneously, especially on different racks, often leads to uneven browning, with the bottom bagels remaining pale. It’s perfectly fine for the second batch to wait.
Most importantly, have fun with this recipe! Making homemade bagels is a rewarding experience. This recipe has been a cherished favorite in our home for over a decade. My children adore helping with the shaping, eagerly choosing their favorite toppings, and, of course, devouring the warm, fresh bagels moments after they’ve cooled (or barely cooled!). Enjoy the process and the delicious reward!

Perfect Homemade Bagels
Pin Recipe
Rate Recipe
Save
Ingredients
Dough:
- 1 tablespoon instant or rapid-rise yeast
- 4 cups (568 g) bread flour (see note)
- 2 teaspoons salt
- 1 tablespoon brown sugar
- 1 ½ cups warm water
Water Bath:
- 2 to 3 quarts water
- 2 tablespoons brown sugar
- 1 tablespoon granulated sugar (see note for honey option)
Egg Wash:
- 1 large egg white
- 1 tablespoon water
Optional Toppings:
- Sesame seeds, Everything Bagel seasoning, grated Parmesan or Asiago cheese, coarse salt, cinnamon and sugar, etc.
Instructions
-
In the bowl of a stand mixer fitted with the dough hook, combine all of the dough ingredients. Mix on low speed until the dough comes together. The dough should be fairly stiff but not dry.
-
Increase the speed to medium and knead the dough for 10 minutes. This extended kneading time is essential for developing the high-gluten structure characteristic of bagels.
-
Transfer the dough to a lightly greased bowl and cover it with lightly greased plastic wrap. Allow the dough to rise in a warm place for 1 to 1 1/2 hours, or until it is noticeably puffy.
-
Turn the dough out onto a lightly greased work surface. Divide the dough into eight equal pieces, each weighing about 115 g (4 ounces). Roll each piece into a smooth, taut ball. Let these dough balls rest for 30 minutes to relax the gluten.
-
Line two half sheet pans with parchment paper and lightly grease them with cooking spray.
-
Using your thumb, poke a hole through the center of each dough ball. Then, use both thumbs to twirl and stretch the dough until the hole is 1 to 2 inches in diameter (the bagel should be approximately 4 inches across). Place the shaped bagels on one of the prepared baking sheets.
-
For the water bath, combine the water and sugars (or honey – see notes) in a large, wide pan or pot and bring the mixture to a boil.
-
Preheat oven to 425°F (220°C).
-
Carefully transfer the bagels, three or four at a time, to the simmering water. If the center hole has closed slightly during resting, you may gently re-stretch it in the water. This is optional, but if you do, be gentle to avoid deflating the bagel.
-
Boil the bagels for 1 minute per side. Use a wide spatula to gently lift each bagel from the water, allowing excess water to drain back into the pot. Place the boiled bagels onto the prepared baking sheet, ensuring they are spaced several inches apart. (Typically, six bagels fit per half sheet pan.)
-
Repeat the boiling process with the remaining bagels.
-
Prepare the egg wash by whisking together the egg white and water. Brush the top and sides of each bagel with the wash, then sprinkle generously with your desired toppings: sesame seeds, Everything Bagel seasoning, cinnamon and sugar, coarse salt, grated Asiago or Parmesan cheese, or other choices. If you plan to leave the bagels plain, the egg wash is optional but recommended for a golden crust.
-
Bake the bagels for 20 to 25 minutes, or until they are beautifully golden brown. Remove the bagels from the oven and immediately transfer them to a cooling rack to cool completely. Avoid leaving them on the baking sheet to cool, as the sugar from the water bath can cause them to stick.
Notes
Bread Machine Dough: To use a bread machine for the dough phase, place all dough ingredients into the machine’s pan. Select the “Dough” or “Manual” cycle and start. After about 10 minutes, check the dough; it should be quite stiff and might not form a perfectly smooth ball. It will feel firm when poked. Allow the machine to complete its cycle, then proceed with shaping as instructed in the recipe.
Honey Substitution: For a slightly different flavor, you can replace the 3 tablespoons of sugar in the water bath with 3 to 4 tablespoons of honey.
Multiple Baking Sheets: If you’re baking more bagels than fit on one sheet and only have one oven, bake them in batches. It’s perfectly acceptable for the second batch of shaped and boiled bagels to rest while the first bakes. Baking two sheets simultaneously, especially on different racks, often leads to uneven browning.
Scaling the Recipe for One Dozen Bagels: To make a larger batch of 12 bagels (ideal for freezing!), adjust the ingredients as follows:
1 1/2 tablespoons instant or rapid-rise yeast
6 cups bread flour
1 tablespoon salt
1 tablespoon brown sugar
2 1/4 cups warm water
Recommended Products
Recipe Source: Adapted and expanded upon from King Arthur Flour
Recipe originally published April 2011; updated September 2025 with new photos, comprehensive notes, and enhanced instructions.