
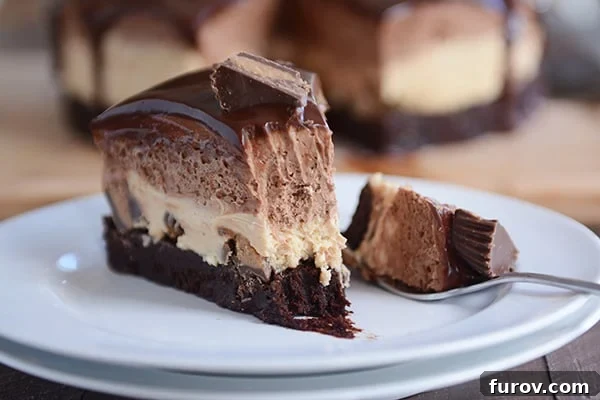
Prepare to be amazed by this show-stopping Peanut Butter Chocolate Mousse Brownie Cake recipe. This incredibly rich, utterly decadent, and thoroughly amazing dessert is perfect for any special occasion and can even be made ahead of time, making your entertaining effortless.
Today, we’re diving deep into the realm of truly extraordinary desserts. Forget everything you thought you knew about indulgence; this cake redefines it. It’s a creation that’s a little crazy, perhaps slightly over-the-top, but without a doubt, it stands as one of the most irresistible desserts I have ever had the pleasure of tasting.
Imagine a symphony of textures and flavors: a rich, fudgy brownie base providing the perfect foundation, topped with layers of light-as-air peanut butter mousse and silky chocolate mousse. Each forkful is an experience, a journey through contrasting yet harmonizing delights that will leave you wanting more.
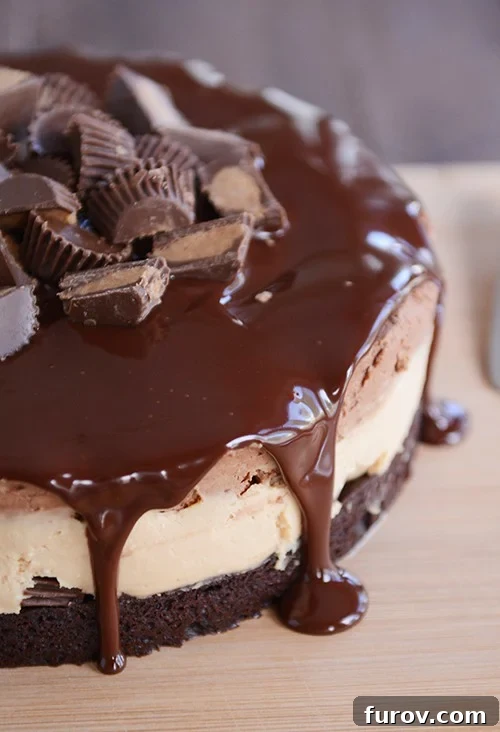
While this Peanut Butter Chocolate Mousse Brownie Cake does involve a few distinct steps to achieve each of its luscious, perfectly layered components, please don’t be intimidated. The beauty of this recipe lies in the simplicity of each individual stage. Break it down, and you’ll find that every part is straightforward and manageable, even for novice bakers. The result is a masterpiece that looks complex but is surprisingly achievable.
Considering that the combination of peanut butter, chocolate, and brownies ranks incredibly high on my husband Brian’s list of favorite flavors, this cake was a no-brainer for his Father’s Day dessert. However, I can honestly see myself finding a million excuses – big or small – to bake this spectacular cake. Birthdays, holidays, potlucks, or simply a craving for something extraordinary; it fits every bill.
It’s genuinely challenging to put into words the pure joy and profound happiness that these light and fluffy layers of peanut butter and chocolate mousse, generously piled on top of a rich, fudgy brownie, bring into my life. The contrast between the dense, chewy brownie and the ethereal, airy mousses is what truly elevates this dessert from merely delicious to utterly unforgettable.
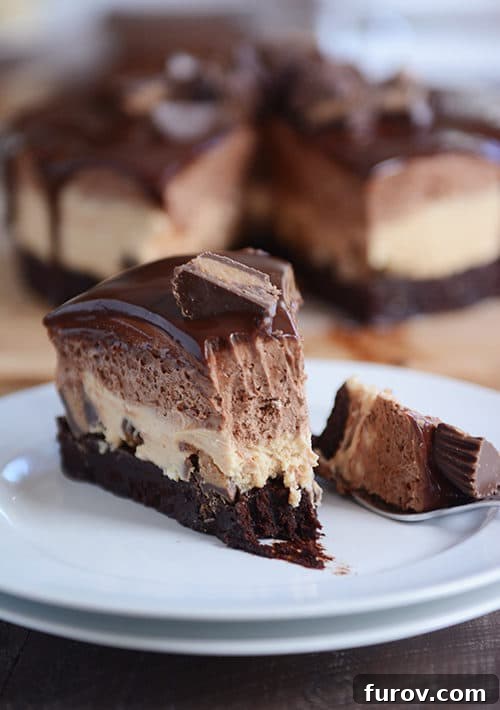
And of course, crowning this glorious creation, and nestled generously in between some of its layers, is a velvety smooth chocolate ganache and an abundance of mini Reese’s peanut butter cups. These little nuggets of peanut butter and chocolate bliss add an extra dimension of flavor and texture, transforming the cake into a true showstopper. They’re not just a garnish; they’re an integral part of the decadent experience.
Speaking of abundance, this Peanut Butter Chocolate Mousse Brownie Cake is quite generous and will easily serve a small army, or at least a very hungry crowd. Don’t make the mistake of thinking your guests will need a massive slice to feel satisfied. Its richness means that even a moderate slice is incredibly fulfilling and deeply satisfying. The sheer depth of flavor and texture in each bite ensures that a little goes a long way.
Even the slice I’ve showcased in the picture above could probably have been cut a little thinner – a testament to its intensity. Although, just for the record, I had absolutely no problem devouring it completely! This cake is designed to impress and satisfy, making it the ideal choice for gatherings where you want to serve something truly memorable.
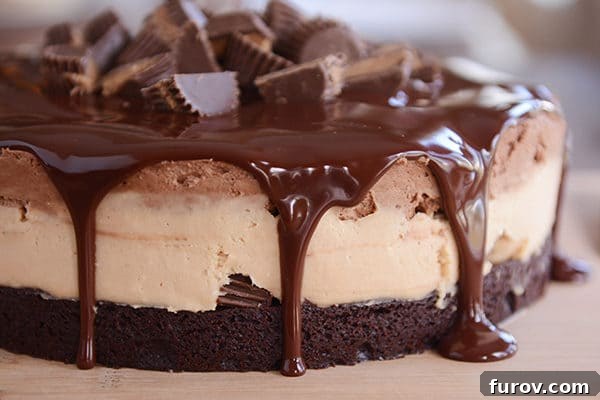
To ensure a smooth baking process and a perfect cake, it’s highly recommended to read through the entire recipe beforehand to grasp all the steps involved. While it can easily be made ahead of time – a fantastic feature for entertaining – it does require a few crucial chilling periods. These chilling times are vital for the mousses to set properly and for the layers to hold their structure beautifully. And yes, they will also test your self-control, ensuring that the mousse actually makes it onto the cake and not directly into your mouth!
I certainly don’t need to state this out loud, but I will anyway: if you’re looking to stockpile some serious “rock star” points in the kitchen, this cake will most certainly do the trick. It’s the kind of dessert that elicits gasps of delight and requests for the recipe. It’s not just a cake; it’s a statement. Its impressive appearance and unforgettable taste make it a guaranteed hit, cementing your reputation as a master baker among friends and family.
One Year Ago: Banana Bars with Browned Butter Frosting
Two Years Ago: Brown Sugar Rhubarb Muffins with A Little Bit of Streusel On Top
Three Years Ago: Thin and Crispy Oatmeal Cookies
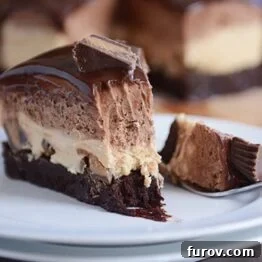
Peanut Butter Chocolate Mousse Brownie Cake
Pin
Ingredients
Brownie Base:
- 10 tablespoons 1 1/4 sticks of salted butter
- 1 ¼ cups (265 g) sugar
- ¾ cup plus 2 tablespoons unsweetened cocoa powder (natural or Dutch-process)
- ½ teaspoon salt
- ½ teaspoon pure vanilla extract
- 2 large eggs
- ½ cup (71 g) all-purpose flour
- 12 ounce (340 g) bag mini Reese’s peanut butter cups, unwrapped and cut in half
Peanut Butter Mousse:
- ¼ cup (57 g) cream cheese, softened
- ⅓ cup (38 g) powdered sugar
- ¾ cup (191 g) peanut butter
- ½ teaspoon vanilla extract
- 2 cups cold heavy whipping cream
Chocolate Mousse:
- 9 ounces (255 g) semisweet chocolate, cut into chunks (or use good-melting chocolate chips)
- ¼ cup (57 g) cream cheese, softened
- 3 tablespoons powdered sugar
- ½ teaspoon vanilla extract
- 2 cups cold heavy whipping cream
Chocolate Ganache:
- ½ cup (85 g) semisweet chocolate chips
- ½ cup heavy cream
Instructions
-
Preheat the oven to 325 degrees F. Line the bottom of a 9-inch springform pan with parchment paper and lightly grease the bottom and sides with nonstick cooking spray.
-
For the brownies, in a medium microwave-safe bowl (or in a pan on the stovetop), melt the butter, sugar and cocoa powder at 1-minute intervals, stirring in between, until the butter is completely melted and the mixture is well-combined.
-
Let the mixture cool to warm room temperature. Stir in the salt and vanilla. Add the eggs and mix until the batter is thick and smooth. Stir in the flour until combined. Spread the batter evenly in the prepared pan and bake for 30-40 minutes until the brownie is set around the edges and only moist crumbs come out when a toothpick is inserted in the center (not wet batter). Remove the pan from the oven and let the brownies cool completely (in the pan).
-
Top the cooled brownie layer with about 20-22 of the mini Reese’s peanut butter cups that have been cut in half (so about 40 halves total on top of the brownie layer).
-
For the peanut butter mousse, in a large bowl with an electric handheld mixer (or in an electric stand mixer fitted with the whisk attachment), whip the cream cheese and powdered sugar together until smooth and lump-free. Add the peanut butter and vanilla and mix until lightly and creamy, 1-2 minutes. Add 1 cup of the heavy cream and mix, starting on low speed so it doesn’t splatter everywhere, mix until well-combined. Add the remaining cup of cream and mix until the mixture is very thick, 4-5 minutes (UPDATE: according to many of your comments and depending on the type of mixer you are using, this may be too long! Stop mixing after it gets thick, even if it’s only after a minute or so). Dollop large spoonfuls of the peanut butter mousse over the mini peanut butter cups and brownie layer. Spread into an even layer. Refrigerate while making the chocolate mousse.
-
For the chocolate mousse, melt the chocolate in a microwave-safe bowl at 1-minute intervals, 50% power, until melted and smooth. Set aside to cool completely.
-
In a large bowl (I use the same one as the peanut butter mousse after I’ve quickly wiped it clean) with an electric handheld mixer (or in the bowl of an electric stand mixer fitted with the whisk attachment), whip together the cream cheese and sugar until smooth and lump-free. Add the vanilla extract and 1 cup of the heavy cream and mix, starting on slow speed so it doesn’t splatter, until smooth, 1 minute or so. Add the rest of the heavy cream and mix until thick and fluffy, 4-5 minutes.
-
When the chocolate is completely cool (this is critical! If it’s warm at all, it will make the mixture soupy – it should still be melted but cool to the touch), fold it into the whipped cream mixture using a large spoon or rubber spatula to gently stir the mixture up and over until it is well-combined. Whisking too quickly might deflate the whipped cream mixture.
-
Spread the chocolate mousse evenly over the peanut butter mousse. Cover the pan with plastic wrap or foil and refrigerate the cake for at least 2 hours (or up to overnight).
-
Run a long thin knife under hot water and wipe clean. Run the knife around the edge of the brownies to loosen from the sides of the pan. Undo the springform pan and lift off the sides. You can serve the cake on the base of the springform pan or use a wide spatula in between the parchment and pan bottom to lift off the cake and place on a serving platter.
-
For the ganache, combine the chocolate and cream in a microwave-safe bowl (you can do this in a pan on the stovetop) and microwave at 1-minute intervals, stirring in between, until the mixture is glossy and smooth (it should only take a minute or so in the microwave). Let the mixture cool slightly so it isn’t super hot but is still pourable – slightly warm room temperature is fine. Pour the ganache over the top of the cake; it doesn’t need to cover the entire top and it’s ok if it drizzles down the side. It should look a bit rustic.
-
Pile any extra peanut butter cups in the middle of the ganache. Refrigerate for an hour or so (or serve right away, the ganache will be a little soft and messy, but that’s ok). Use a long thin knife to cut into thin slices (running it under hot water and wiping clean can help with neat slices) for serving.
Notes
Serving: Given that this cake is loaded with incredibly rich and decadent layers, you can comfortably serve thinner slices. Even a small portion delivers a powerful punch of flavor and satisfaction.
Important Tips for Mousse Consistency: Please pay close attention to the instructions regarding whipping times and chocolate temperature. Many bakers encounter issues with runny or grainy mousse layers, which often stem from over-whipping the cream or incorporating chocolate that hasn’t cooled sufficiently. The “UPDATES” in the instructions (e.g., stopping mixing when thick) are crucial guidance based on collective experience.
Recipe Source: This delectable recipe was inspired by Life, Love and Sugar’s Peanut Butter Chocolate Mousse Cake. We’ve adapted it by incorporating our easy homemade brownie recipe for the base, crafting our unique peanut butter and chocolate mousse layers, and opting for a rich ganache topping instead of traditional frosting.