
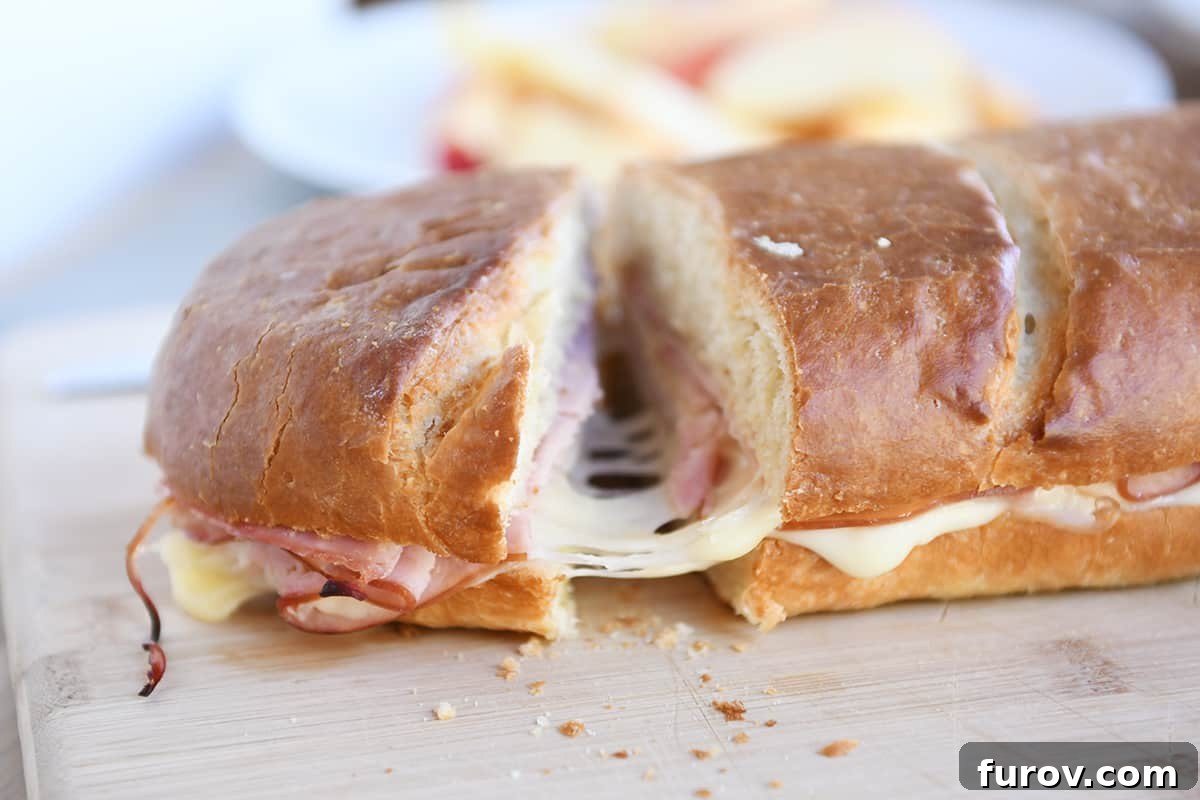
Effortless Batch Panini: The Ultimate Sheet Pan Panini Recipe for Quick Weeknight Dinners
Love toasted panini sandwiches but need to make a lot in a flash? This ingenious sheet pan panini recipe is a game-changer, simplifying meal prep and delivering perfectly melted, golden sandwiches every time. Say goodbye to your individual panini press for feeding a crowd – your oven is about to become your new best friend!
In our bustling lives, finding meals that are both delicious and incredibly simple is a culinary holy grail. This particular “non-recipe” recipe embodies that ideal, offering a meal so straightforward it barely requires instructions, yet so consistently satisfying that it’s destined to become a regular in your weeknight rotation. Forget the fuss of making one or two paninis at a time; this method allows you to effortlessly prepare a whole batch, ensuring everyone gets to enjoy a warm, cheesy, perfectly pressed sandwich simultaneously.
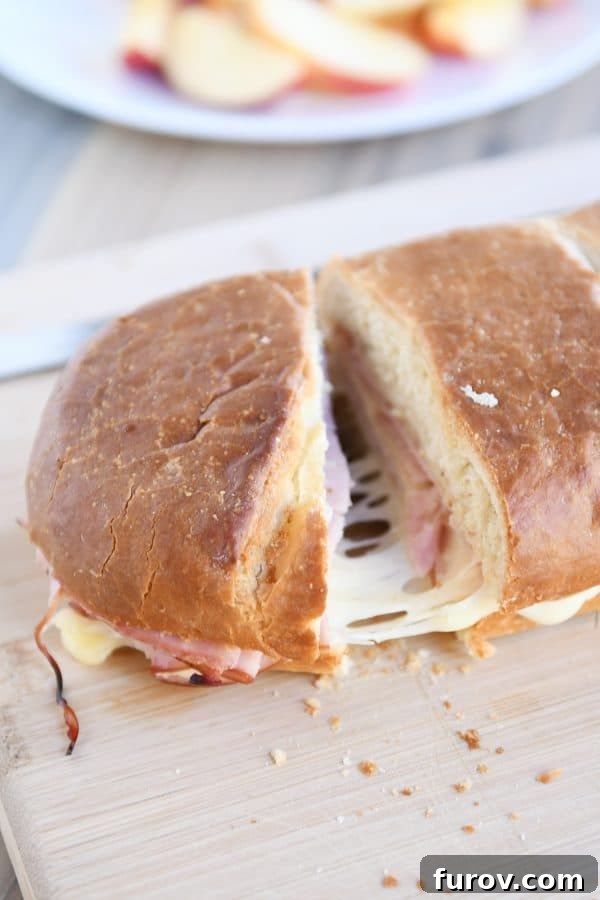
Unlock Panini Perfection: Why Sheet Pan Paninis Are a Game Changer
Paninis hold a special place in our family’s heart – that irresistible combination of warm, soft bread, savory fillings, and gooey melted cheese makes them a constant go-to for quick dinners. While I cherish my trusty panini presses (yes, I have two: this one and this one), they undeniably present a bottleneck when you’re trying to feed more than a couple of people. Cooking individual sandwiches one or two at a time simply doesn’t cut it when hunger strikes a whole family or a group of unexpected guests.
This is precisely where the brilliant concept of the sheet pan panini steps in. It’s an elegant solution to the age-old problem of batch cooking perfectly pressed, toasted sandwiches. Instead of individual grilling, you transform an entire loaf of bread into a massive, shareable panini right in your oven. This method drastically cuts down on active cooking time, minimizes cleanup, and ensures everyone can enjoy a hot, fresh panini simultaneously. It’s ideal for busy weeknights, impromptu gatherings, or simply when you’re craving multiple toasted sandwiches without the hassle.
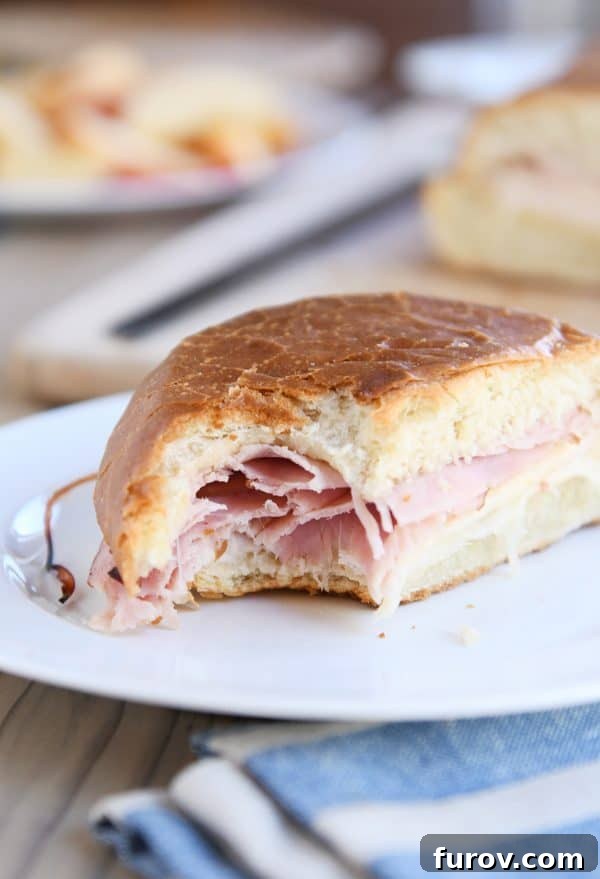
Choosing Your Canvas: The Best Bread for Sheet Pan Paninis
The foundation of any great panini is the bread, and for the sheet pan method, selecting the right loaf is key to success. I’ve experimented with both homemade French bread and store-bought varieties, and both yield fantastic results. The homemade option tends to develop a slightly crisper exterior more quickly during baking, but store-bought works wonderfully for convenience and speed, making this an even easier weeknight meal.
The most crucial tip? Opt for a soft French or Italian loaf over a dense, overly crusty artisan bread. A softer loaf will compress beautifully under weight, creating that signature panini texture, and will toast evenly without becoming overly hard or chewy. Think of a classic baguette or a soft Italian sandwich loaf that’s about 10-11 inches long. These varieties absorb the warmth and moisture from the fillings, resulting in a tender interior and a perfectly toasted exterior. I’ve also considered trying ciabatta or focaccia – their softer crumb and slight chewiness would likely be magnificent in this application, offering yet another delicious variation!
Crafting Your Masterpiece: A Simple Guide to Sheet Pan Panini Assembly
Let’s dive into the incredibly straightforward process of assembling your sheet pan panini. You’ll be amazed at how quickly this comes together, leaving you more time to enjoy your meal and less time struggling in the kitchen.
Step 1: Prepare Your Baking Sheet and Bread
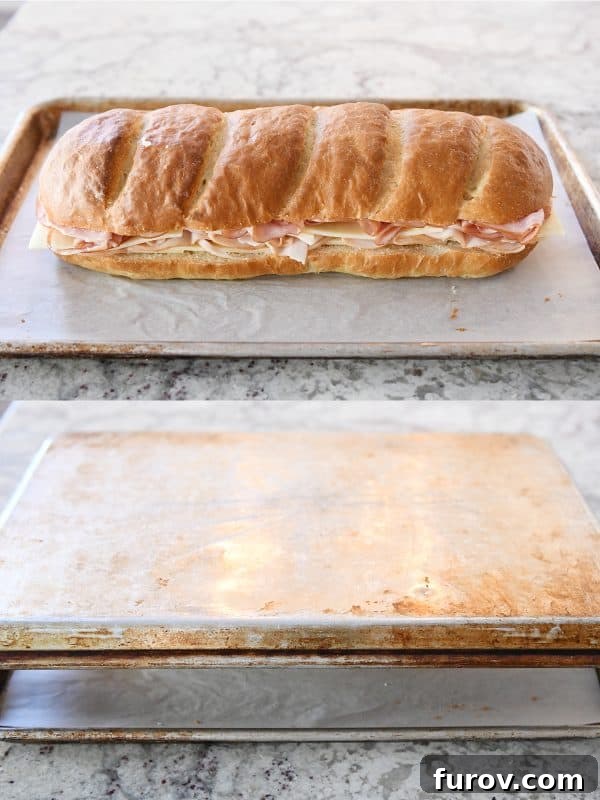
Start by lining a large, rimmed baking sheet with parchment paper or aluminum foil. While not strictly necessary for preventing sticking (especially with a good quality pan), it makes cleanup an absolute breeze – a major win on a busy weeknight! Next, take your chosen loaf of bread and slice it carefully in half lengthwise, creating two long halves. Ensure the cut is even for a stable base. Place the bottom half directly onto your prepared baking sheet, ready for its delicious transformation.
Step 2: Layering Your Delicious Fillings for Max Flavor
Now for the fun part: the fillings! Begin by laying down a generous layer of your preferred cheese slices on the bottom half of the bread. Swiss, sharp cheddar, provolone, or Pepper Jack are all excellent choices, offering distinct flavors and melting characteristics that will ooze beautifully once heated. Follow this with a hearty layer of your chosen deli meat – classic ham, savory roast beef, thinly sliced turkey, or even spicy salami work wonderfully. For thicker loaves of French or Italian bread, I highly recommend a double layer of both cheese and meat. This ensures every bite is packed with flavor and gooey goodness, creating a truly satisfying sandwich. If your loaf is on the thinner side, a single substantial layer of each should suffice to maintain balance.
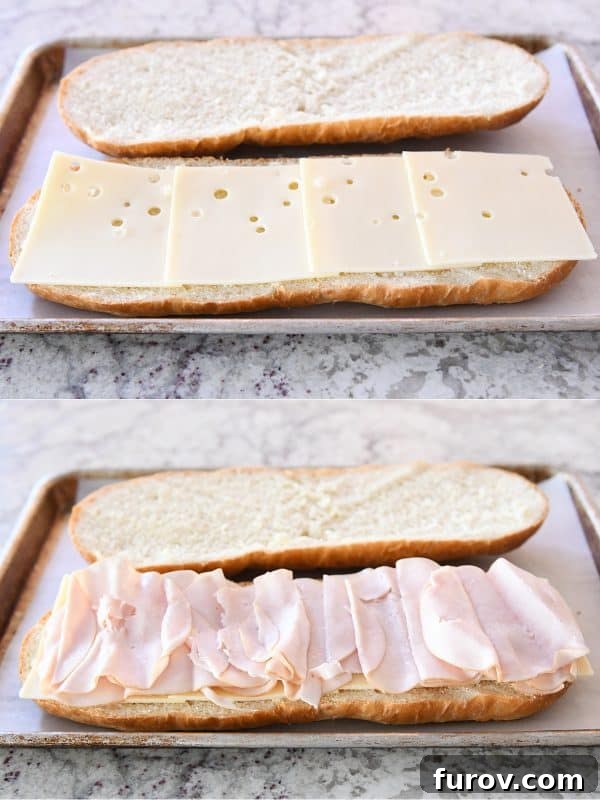
A little trick I’ve found useful is to make sure your final layer before the top bread is meat, not cheese. This prevents the top bread from sticking directly to the cheese, making it easier to lift and add additional toppings or sauces *after* baking. This allows for personalized customization at the table. However, if you prefer, feel free to add spreads, sauces, or other heat-friendly toppings (like thinly sliced roasted red peppers, caramelized onions, or a smear of pesto) *before* baking – just be mindful of ingredients that might make the bread soggy during the baking process.
Step 3: The Panini Press – Oven Style!
Once your fillings are perfectly arranged, carefully place the top half of the bread back onto the sandwich, creating a beautiful, oversized creation. Now comes the ingenious part of the “sheet pan” method: applying pressure. Take another baking sheet (preferably one that fits snugly over your sandwich) and place it on top of the assembled panini. This will act as the top plate of your makeshift panini press. To ensure a truly flat, well-compressed panini, you need to add some significant weight on top of that second baking sheet.
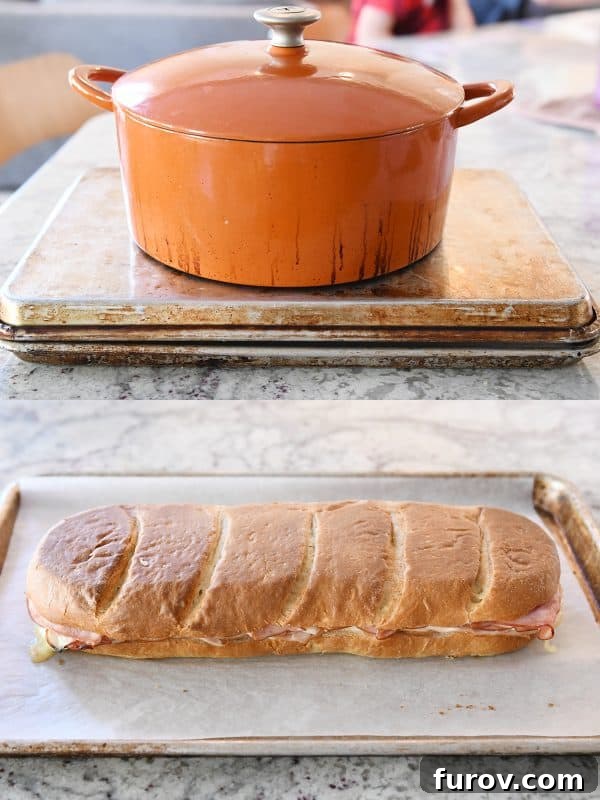
My go-to for adding weight is a heavy cast-iron pot or even a substantial Dutch oven. It does an excellent job of pressing the panini down evenly, mimicking the action of a commercial panini press. Since taking these photos, I’ve also discovered that a heavy pizza stone works wonders as a less bulky alternative! Feel free to get creative with other oven-safe, heavy items you might have on hand – just ensure they can withstand oven temperatures without issue. This pressing step is crucial for achieving that characteristic dense, toasted panini texture and ensuring the cheese melts perfectly throughout the entire loaf, binding all the delicious components together.
Baking Your Batch Panini to Golden Perfection
With your weighted panini contraption ready, it’s time to pop it into a preheated oven. Bake for approximately 20-30 minutes, or until the bread is beautifully golden brown and toasted on the outside, and the cheese inside is gloriously melted and bubbly. The exact timing can vary slightly depending on your oven’s calibration and the thickness of your bread and fillings, so keep a watchful eye on it, especially towards the end of the baking time.
Pro Tip for Speed & Texture: If you’re really short on time or prefer a slightly softer, yet still pressed, crust, you can carefully remove the heavy pot (or pizza stone) and the top baking sheet about halfway through the baking process (around 10-15 minutes in). By this point, the panini will have been sufficiently pressed and will hold its shape, having achieved its signature flattened form. Finishing the bake without the added weight allows the crust to brown a bit more directly, but it will still be incredibly delicious and warm through.
Endless Customization: Make Your Dream Panini
The beauty of the sheet pan panini method lies in its incredible versatility. While a classic ham and cheese is always a winner and a crowd-pleaser, don’t hesitate to get creative and experiment with your fillings. This is your chance to craft the panini of your dreams! Here are some ideas to inspire your next batch, catering to various tastes and dietary preferences:
- Italian Deli: Layers of prosciutto, spicy salami, provolone cheese, roasted red peppers, and a drizzle of balsamic glaze.
- Turkey Club: Sliced smoked turkey breast, crispy bacon, Swiss cheese, and a flavorful spread of pesto or a creamy garlic aioli.
- Roast Beef & Cheddar: Thinly sliced rare roast beef, sharp cheddar cheese, sweet caramelized onions, and a zesty horseradish sauce.
- Caprese Style: Fresh mozzarella slices, ripe tomatoes, fragrant basil leaves, and a balsamic reduction (for best results, add fresh tomatoes and basil after baking to maintain their vibrant flavors).
- Veggie Delight: Grilled zucchini, roasted eggplant, bell peppers, fresh spinach, and creamy feta cheese with a touch of hummus or sundried tomato spread.
- Chicken Pesto: Shredded cooked chicken, provolone, a generous layer of basil pesto, and thinly sliced red onion.
Once baked, carefully transfer your impressive, golden sheet pan panini to a large cutting board. Using a sturdy serrated bread knife, slice it into individual portions – usually 6 to 8, depending on your loaf size. Then, let everyone customize their piece with their favorite sauces (like gourmet mustard, sriracha mayo, or a vibrant chimichurri) or fresh toppings (crisp lettuce, fresh tomato slices, crunchy pickles, or spicy jalapeños). The ease with which the top bread lifts allows for perfect post-bake additions, ensuring every bite is exactly how you like it.
Leftovers? Yes, Please! Storing and Reheating Tips
While fresh is always best, this sheet pan panini surprisingly holds up well as leftovers. If you happen to have any slices remaining (a rare occurrence in our house, as they’re usually devoured!), simply allow them to cool completely before storing them in an airtight container in the refrigerator. To reheat, a quick zap in the microwave will warm them through, or for a crispier result, pop them back in a toaster oven or even a regular oven for a few minutes. The bread might lose a tiny bit of its initial crispness after refrigeration and reheating, becoming slightly softer, but the flavors remain incredibly satisfying and the melted cheese is still a delight.
Whether you’re looking for a reliable, quick weeknight dinner solution that minimizes fuss, or faced with the sudden news that your teenager has invited a dozen friends over for dinner in 20 minutes, this sheet pan panini will undoubtedly rise to the occasion. It delivers deliciousness, convenience, and a hearty meal in equal measure, making you look like a culinary superstar with minimal effort.

Easy Sheet Pan Panini: The Full Recipe
This recipe offers a quick and satisfying meal, perfect for a busy schedule. Adjust timings as needed for your oven.

Yield: 6 Servings
Prep Time: 10 minutes
Cook Time: 20-25 minutes
Total Time: 30-35 minutes
Course: Main Course | Cuisine: American | Method: Bake
Ingredients
- 1 loaf soft French or Italian bread, about 10 to 11 inches long
- Deli meat of choice (e.g., ham, roast beef, turkey, salami, etc.)
- Thin sliced cheese of choice (e.g., Swiss, cheddar, Pepper Jack, provolone, etc.)
- Optional: Sandwich toppings and sauces of choice (for serving after baking)
Instructions
- Preheat your oven to 350°F (175°C).
- Slice the loaf of bread in half lengthwise. Line a large, rimmed baking sheet with parchment paper or foil, then place the bottom half of the bread on it.
- Top the bottom half with a generous layer of cheese, followed by a layer of deli meat. Repeat these two layers for a richly filled panini.
- Carefully place the top half of the bread back onto the sandwich. Take another baking sheet and place it on top of the sandwich to press it down evenly.
- To add weight for pressing, place a heavy, oven-safe object on the top baking sheet (such as a cast iron pot, Dutch oven, or a heavy pizza stone).
- Carefully transfer the entire setup (bottom baking sheet with sandwich, top baking sheet, and weight) into the preheated oven.
- Bake for 20-25 minutes, or until the sandwich is golden brown and toasted, and the cheese is thoroughly melted and bubbly.
- Carefully remove the heavy weight and the top baking sheet (be cautious, as they will be very hot!). Transfer the baked panini to a cutting board.
- Slice the panini into individual portions using a serrated knife. The top half of the bread can be easily lifted for adding any desired sauces or fresh toppings before serving.
Notes & Tips for Success
- For a quicker bake or crispier crust: You can remove the heavy weight and the top baking sheet halfway through the cooking time (around 10-15 minutes in). The panini will already be pressed, and this allows for more direct heat to the top crust, resulting in a slightly crisper finish.
- Bread Choices: While French or Italian loaves are recommended, don’t shy away from experimenting with other soft, flatter breads like ciabatta or focaccia for varied textures and flavors.
- Add Spreads: For an extra layer of flavor and moisture, consider spreading a thin layer of pesto, mustard, mayonnaise, or a creamy garlic aioli on the bread halves before layering the fillings.
- Customization is Key: Feel free to mix and match different types of cheese and deli meats to create unique flavor combinations tailored to your preferences.
Recommended Kitchen Tools for Your Panini Adventure
- Serrated Bread Knife: Essential for clean, effortless slicing through your toasted panini.
- Half Sheet Pan (Cookie Sheet): You’ll need two – one for the base and one for pressing.
- Pizza/Baking Stone: An excellent oven-safe option for weighing down your panini during baking.
Explore More Delicious Panini & Sandwich Recipes:
In Case You Missed It: Other Popular Recipes
Looking for more delightful recipes? Check out some of these reader favorites from the past years:
Soft and Chewy Chocolate Chip Cookies
Hawaiian Brownies (Chocolate + Macadamia Nuts)
15-Minute Homemade Root Beer
Creamy Glazed Fruit Salad
Whole Grain Banana Chocolate Chip Muffins