
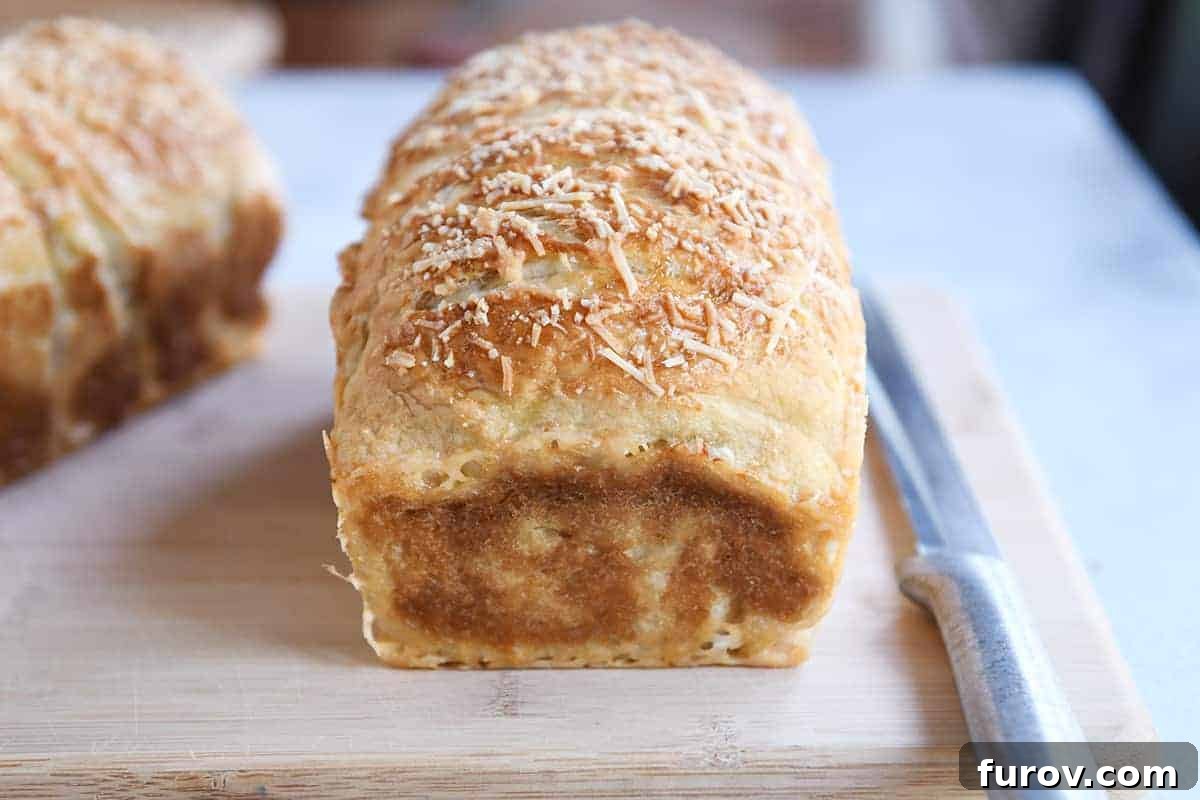
The Ultimate Homemade Bagel Bread: Chewy, Flavorful, and Life-Changing Loaves
Have you ever dreamed of a bread that combines the irresistible chewiness and distinctive flavor of a classic bagel with the convenience and versatility of a loaf? If so, prepare for your baking world to be transformed! This incredible bagel bread recipe isn’t just a delightful weekend baking project; it’s a culinary revelation that brings all the beloved qualities of your favorite bagel straight to your breakfast table, in a perfectly sliceable form. Get ready to experience a truly life-changing bread, complete with detailed step-by-step guidance and accompanying photos to ensure your success.
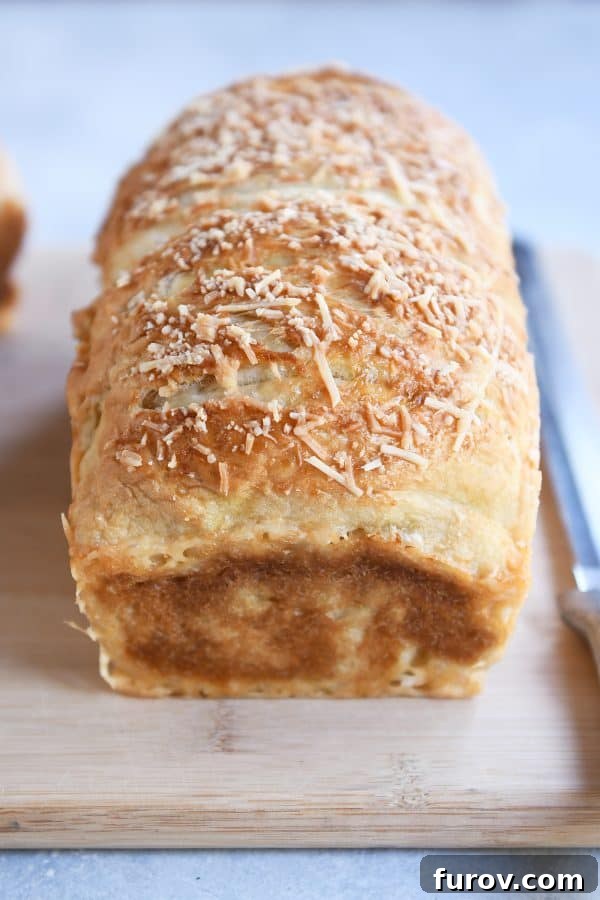
This remarkable bagel bread recipe didn’t magically appear overnight. It was the result of diligent testing, multiple trial batches, and even some strategic “negotiations” with my 14-year-old to help capture those essential step-by-step photographs. Let me tell you, attempting to gracefully flip a large, perfectly risen loaf of dough into a pot of boiling water with one hand while simultaneously taking pictures with the other is a true feat of baking dexterity! However, the countless hours, the careful refinements, and yes, even the teenage photographic assistance, were all incredibly worth it. The ultimate validation? My son, the discerning palate and primary beneficiary of this culinary endeavor, happily claimed an entire loaf for himself, sharing not even a single slice. And frankly, I didn’t blame him – it’s truly *that* irresistible.
Why This Homemade Bagel Bread Will Become Your New Obsession
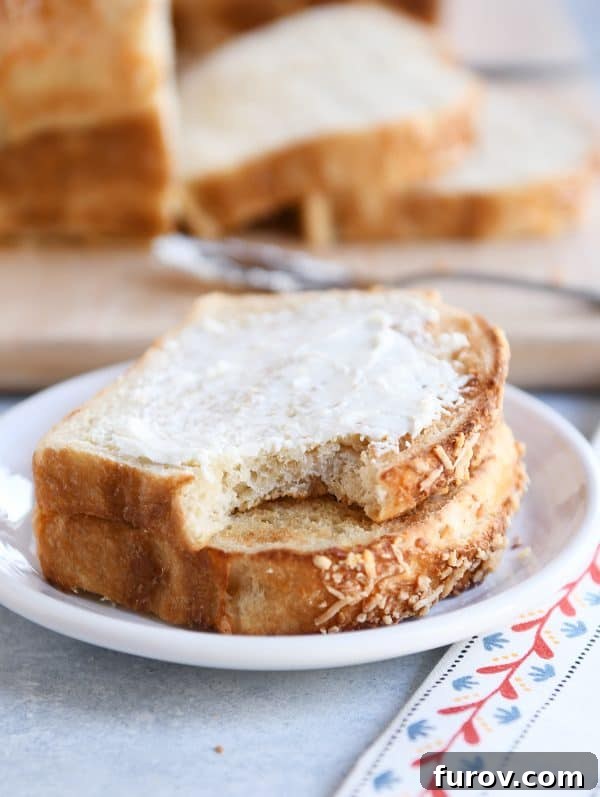
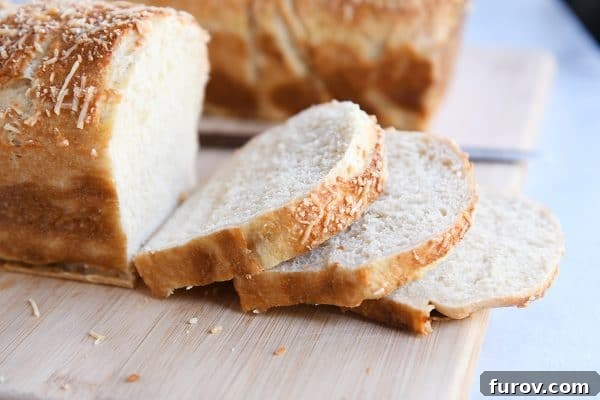
Imagine the quintessential flavor profile of a New York-style bagel: that distinct, slightly tangy taste, the glossy, perfectly chewy crust, and the dense, satisfying interior. Now, envision all of that glorious goodness perfectly encapsulated within a tender, easy-to-slice loaf of bread. This isn’t just a hybrid; it’s an elevated culinary experience. It’s a versatile bread that begs to be enjoyed in countless ways: absolutely delightful when toasted until golden and crispy, yet equally fantastic when savored in its soft, untoasted state. Whether slathered with a generous layer of creamy cream cheese, rich butter, or even used as the foundation for a gourmet sandwich, this homemade bagel bread elevates every bite.
My family, a tough panel of critics with varied tastes, consistently manages to devour two loaves of this bread in a single day. Their unbridled enthusiasm is, without a doubt, the highest recommendation I can offer! Around our household, we share a clear, undeniable preference for savory, cheesy bagels, with Parmesan and Asiago being our undisputed top contenders. All six of us unanimously agree on this savory passion, with the singular exception of my husband, Brian, who bravely (or perhaps eccentrically) opts for cinnamon raisin or blueberry bagels. We often give him a playful side-eye, but in the end, we understand that everyone is entitled to their unique bread quirks!
While this particular recipe proudly highlights the irresistible cheesy bagel bread, please don’t feel confined to this single topping. The inherent beauty of this base recipe lies in its incredible adaptability. You can effortlessly customize the topping to perfectly match your personal cravings or whatever ingredients you have on hand – imagine the savory crunch of everything bagel seasoning, the subtle pop of poppy seeds, aromatic toasted sesame seeds, a sprinkle of garlic, or even a sweet cinnamon-sugar swirl if you’re leaning towards Brian’s preferences! The core technique for crafting the perfect chewy loaf remains constant, opening up a delightful world of flavor possibilities for your homemade bagel bread.
Your Guide to Baking the Perfect Chewy Bagel Bread
While mastering homemade bagel bread involves a few steps that might initially seem a bit unconventional compared to traditional loaf bread recipes, I assure you, the entire process is incredibly rewarding and, dare I say, much simpler than it appears. Do not let the unique techniques intimidate you; the final result, a perfectly chewy and flavorful loaf, is absolutely worth every ounce of effort, and you’ll find it’s surprisingly forgiving. I’m here to walk you through each and every stage, providing helpful insights, practical tips, and reassuring guidance to ensure a foolproof bake. As always, feel free to drop any additional questions you might have in the comments section below – I’m here to help!
1. Crafting the Perfect Dough for Optimal Chewiness
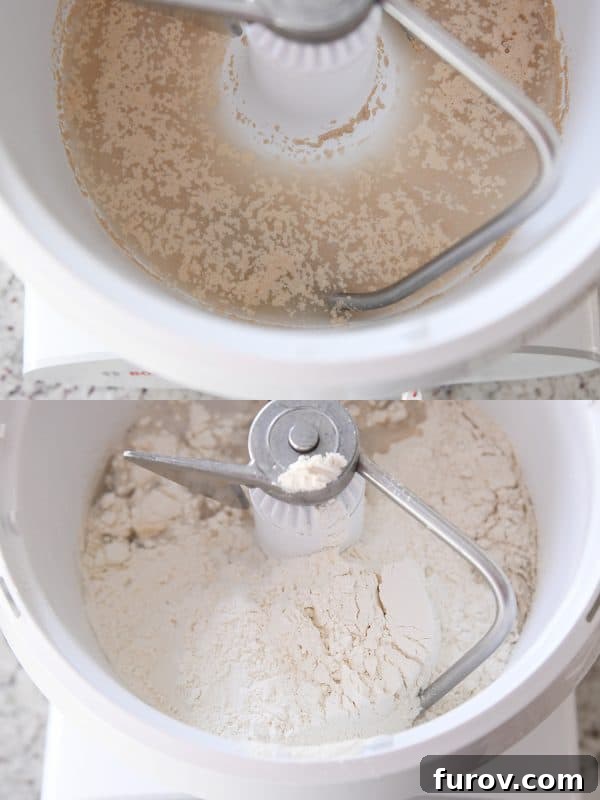
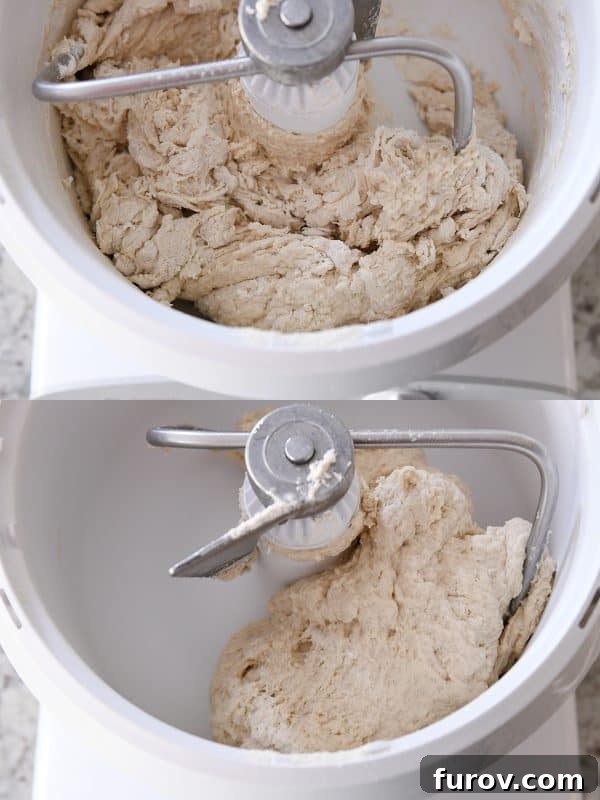
Begin your homemade bagel bread journey by combining the wet ingredients and yeast in the bowl of your stand mixer, securely fitted with a dough hook. For robust bread-making, I primarily rely on my trusty Bosch mixer {affiliate link} due to its powerful performance, but rest assured, this specific dough quantity should handle beautifully in a KitchenAid or any similar smaller stand mixer you might have. Start by thoroughly mixing the warm water, honey, yeast, and salt with about two cups of your chosen flour until well combined. With the mixer running on a low speed, gradually continue adding the remaining flour until the dough visibly comes together and pulls cleanly away from the sides of the bowl.
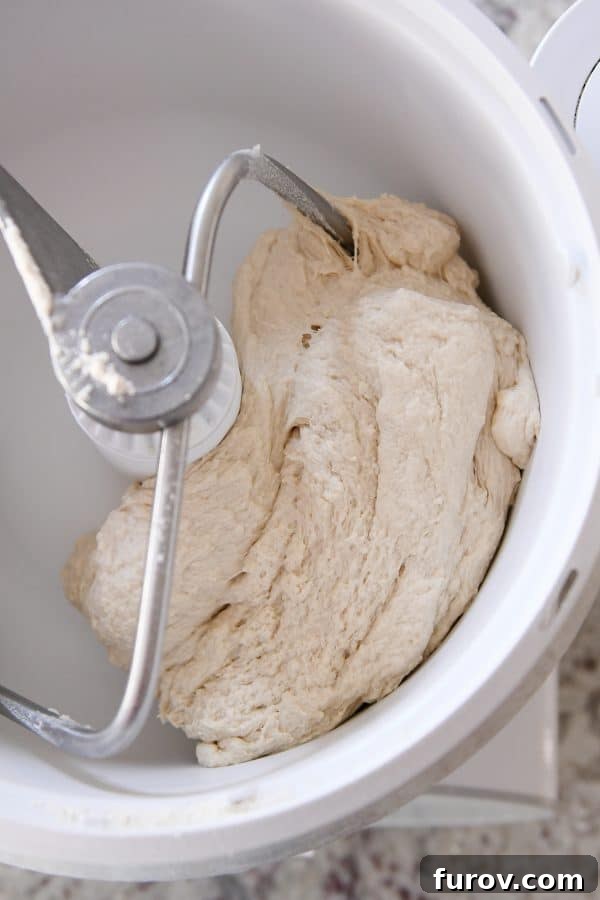
The true secret here isn’t an exact, rigid flour measurement, but rather focusing on the precise texture and feel of the dough itself. Initially, it will appear somewhat shaggy and unrefined, but as you continue to mix, it will gracefully transform into a smooth, elastic ball that demonstrates a satisfying resilience. It should feel soft and retain a slight tackiness to the touch, but crucially, it should not leave excessive sticky residue on your fingers. It’s vital to resist the tempting urge to add too much extra flour, as this common mistake can easily result in a dry, dense, and ultimately tough loaf of bread. Ensure you knead the dough for a full 5 minutes; this dedicated kneading time is essential for developing the gluten structure adequately, which is the very foundation for achieving that characteristic, desirable bagel chew.
2. Resting, Dividing, and Expert Loaf Shaping
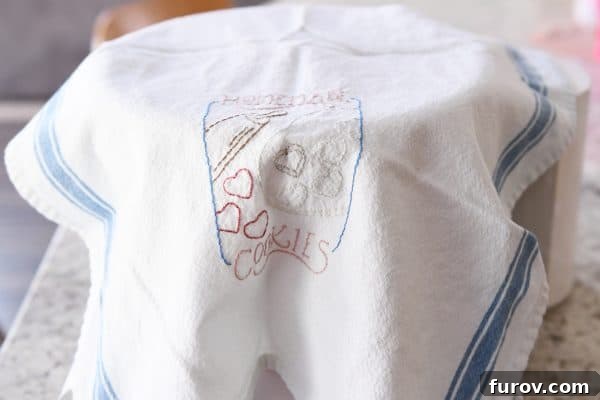
Once your bagel bread dough reaches that perfect, smooth, and slightly tacky consistency, the next important step is to cover the mixing bowl with a clean kitchen towel and allow it to rest undisturbed for approximately 10-15 minutes. This brief but crucial rest period is absolutely essential, as it permits the gluten strands within the dough to relax, which in turn makes the dough significantly easier to handle, manipulate, and ultimately shape into beautiful, uniform loaves. For optimal dough rising, I frequently utilize thin, breathable flour sack kitchen towels; they’re ideal for this purpose. (The charming, hand-embroidered towel featured in these pictures was a thoughtful birthday gift from my talented cousin, Alex, a few years back, but any clean, thin kitchen towel will function perfectly!)
Following its tranquil rest, gently turn the dough out onto a lightly greased or floured countertop. Proceed to divide the entire mass into two equal halves. For those who appreciate precision, a kitchen scale is an excellent tool here, ensuring perfectly even loaves. However, if you prefer a more intuitive approach, simply “eyeballing it” works just fine too! Next, press each half of the dough into a thick oval or, if you prefer, a roughly rectangular shape. Now, let’s get to the shaping: take the lower edge of one dough piece and fold it neatly up towards the middle. Subsequently, grab the top edge and carefully fold it down, ensuring it slightly overlaps the middle seam. Firmly pinch the seam closed to create a tight seal. Finally, flip the dough seam-side down onto your clean surface, and gently pat and roll it lightly to smooth out any edges, paying particular attention to the two shorter ends, to form an even, aesthetically pleasing loaf shape.
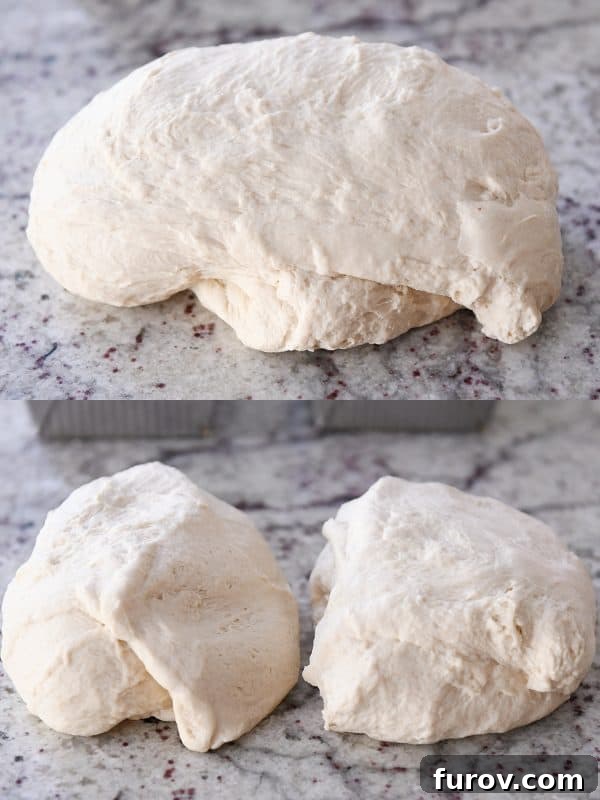
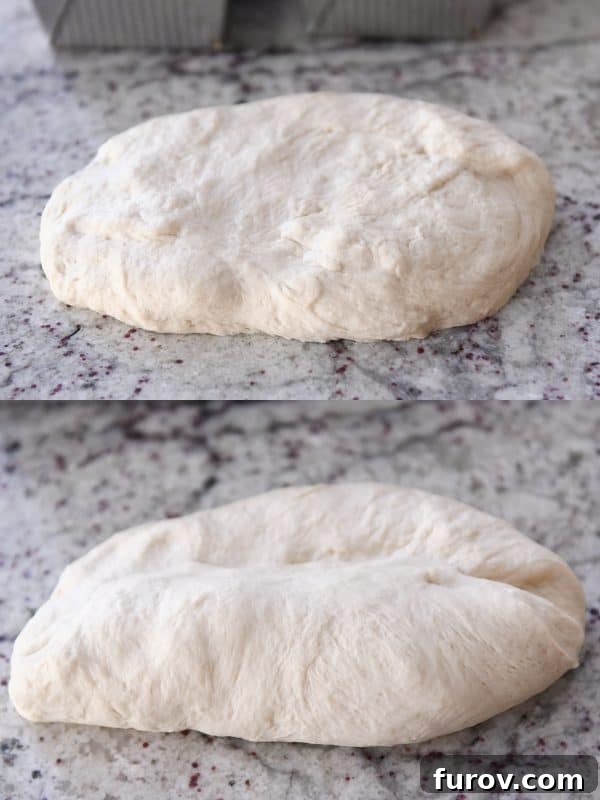
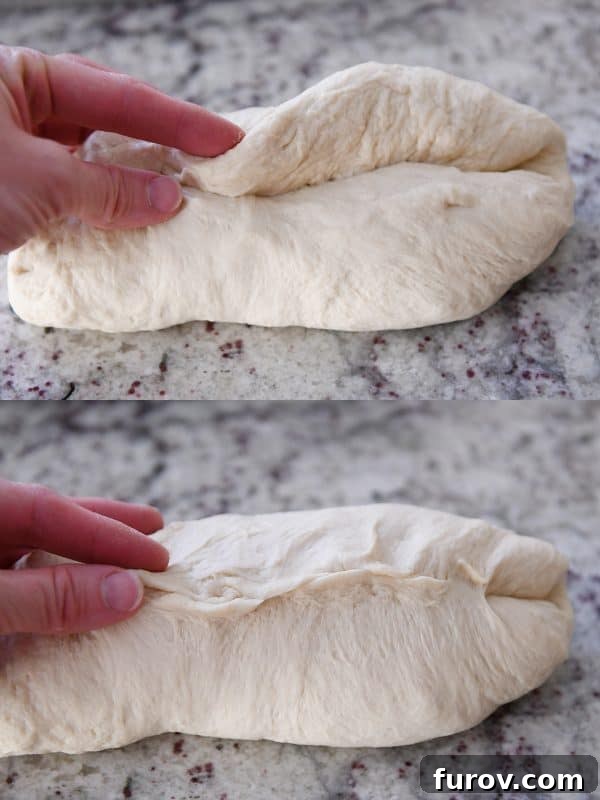
Once shaped, carefully transfer your beautiful loaves into lightly greased 8 1/2-by-4 1/2-inch baking pans. For consistently excellent results, I enthusiastically recommend using sturdy metal loaf pans, such as USA bread pans {affiliate link} or the reliable Chicago Metallic pans {affiliate link}. It’s important to note that glass or ceramic pans conduct and retain heat differently, and I haven’t specifically tested this recipe with those materials. After placing the loaves seam-side down in the prepared pans, cover them with a clean kitchen towel or greased plastic wrap. Allow the dough to undergo its final rise in a warm, draft-free environment for approximately 45 minutes to an hour, or until they have visibly puffed up and risen just above the edges of the pans, indicating readiness for the next exciting step.
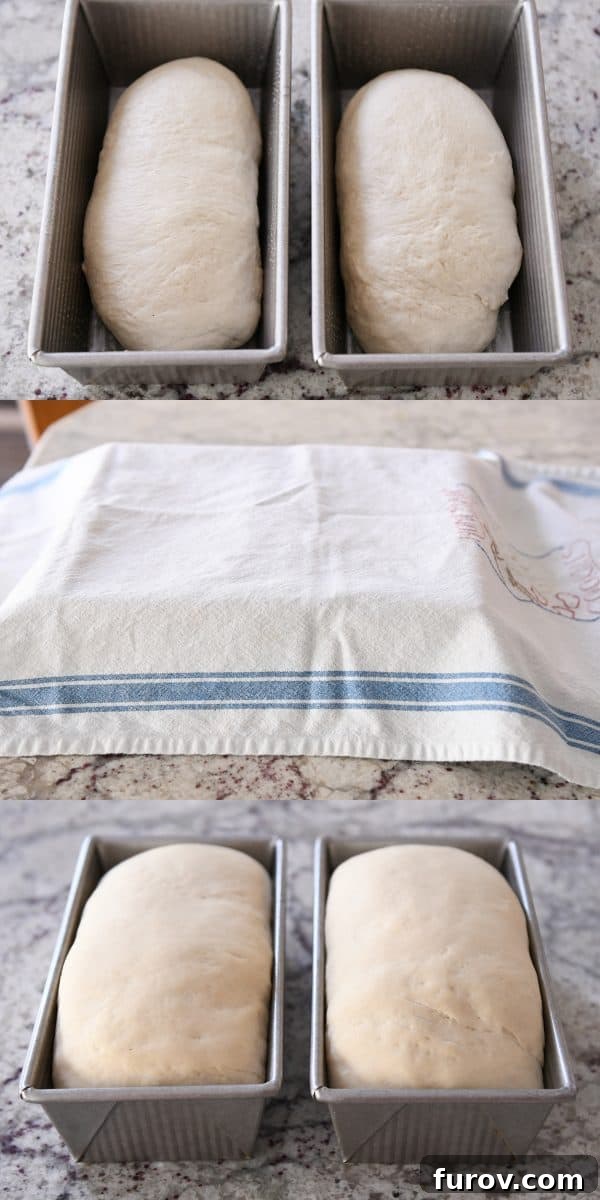
3. The Crucial Water Bath: Unleashing Bagel Magic for an Unforgettable Chew
As your bagel bread dough nears the completion of its final rising time, begin the pivotal preparation for the water bath – this is the truly transformative step that imparts bagel bread with its iconic, gloriously chewy crust! Bring approximately 4 quarts of water to a vigorous, rolling boil in a large, sturdy pot. Ideally, your pot should be at least 10 inches wide to comfortably accommodate the loaf of dough, which, wonderfully, will expand slightly when introduced to the heat. Once the water is enthusiastically boiling, carefully stir in the honey and baking soda until both ingredients are completely dissolved. The addition of baking soda is key, as it creates a distinctive alkaline environment that contributes significantly to the bagel’s signature dark, glossy crust and that much-desired dense, chewy texture.
Now, we approach the moment that might cause a tiny flutter of apprehension: you’re going to gently turn your perfectly risen loaf of bread out of its pan and directly into your hand, poised to be submerged in the boiling water. Take a deep, calming breath! This action often feels counter-intuitive, as most bakers are meticulously taught to handle delicate, risen dough with extreme caution. It’s important to understand that the loaf *will* deflate a bit, and it might momentarily appear a little misshapen or “wonky.” I completely understand that this particular stage can be a moment of genuine stress for many home bakers, but I promise you, it is an absolutely integral part of the process, and everything truly works out beautifully in the end. It’s a miraculous transformation that you’ll be proud to witness.
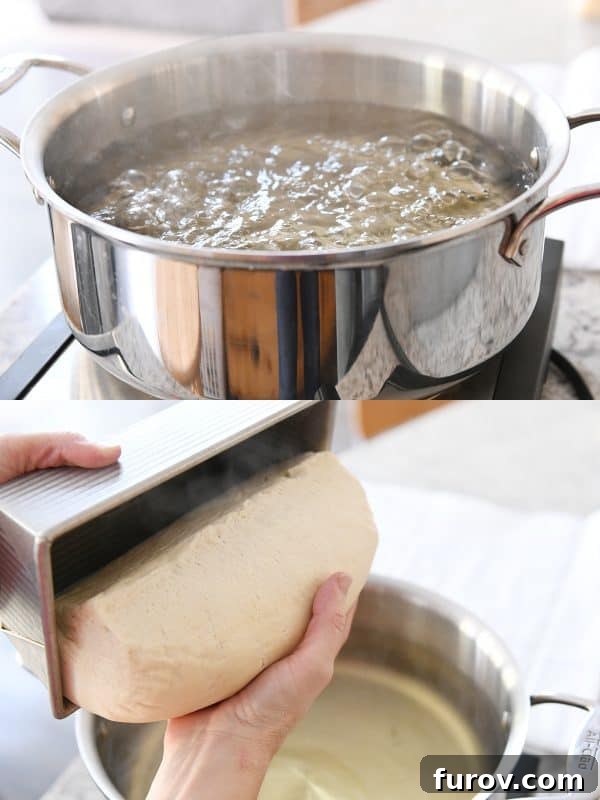
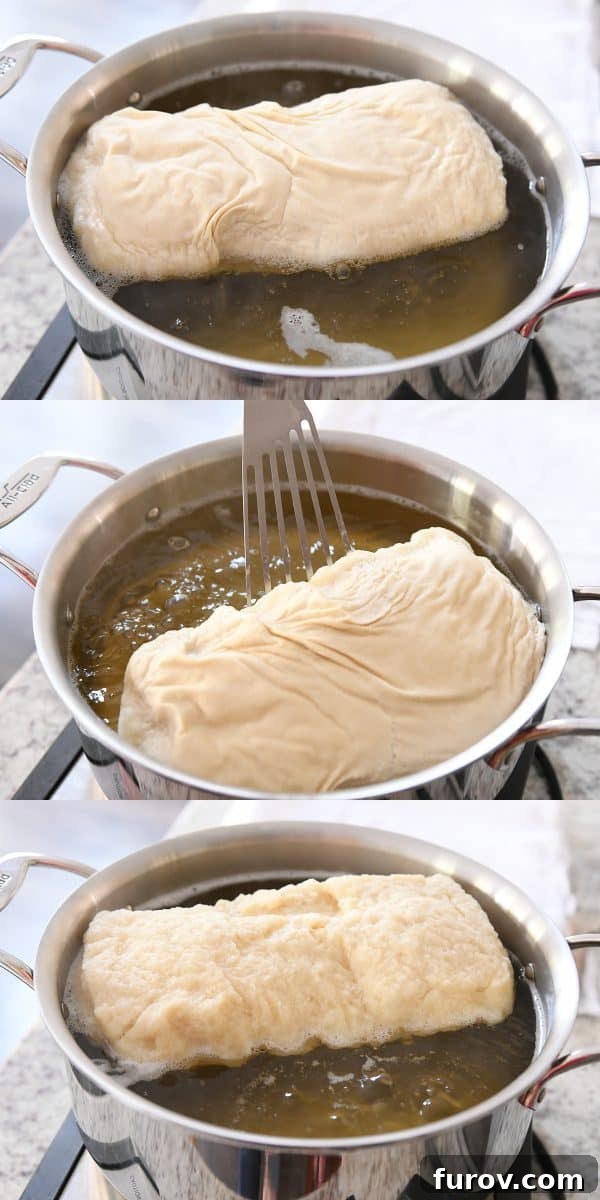
Carefully place one loaf of dough into the boiling water and allow it to simmer gently for approximately 60 seconds. Then, using a wide, flat spatula or another appropriate kitchen tool like a slotted spoon, gently flip the bread dough over and allow it to cook for an additional 45-60 seconds on the other side. This brief but impactful boil serves a vital purpose: it rapidly gelatinizes the starches present on the dough’s surface. This process not only locks in crucial moisture but also helps to prevent excessive rise during the subsequent baking stage, which is precisely what contributes to the distinctively dense, satisfyingly chewy crumb that is so characteristic of authentic bagels. This step is the heart of what makes bagel bread special.
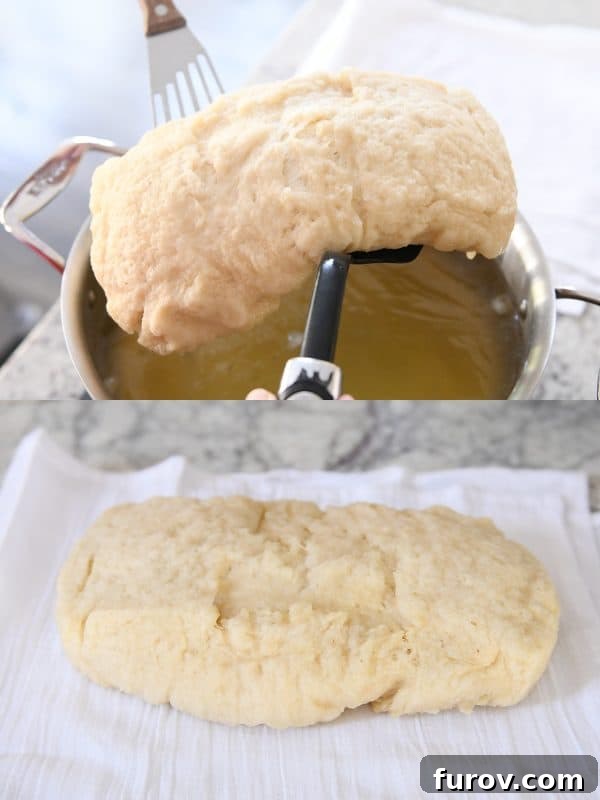
Once both sides of the dough have been thoroughly boiled, it’s time to carefully retrieve your now-sticky loaf. Using a couple of wide spatulas or sturdy spoons, carefully lift the dough out of the boiling water and gently transfer it onto a clean kitchen towel. Important alert: do NOT use paper towels for this step! I cannot stress this enough – paper towels will inevitably stick horribly and irreparably to your soft dough, creating a frustrating and messy situation. Instead, opt for a thin, clean, and highly absorbent fabric towel (like a flour sack towel) to gently and quickly dab away any excess water from the dough’s surface. Don’t worry if a little dough residue adheres to the towel; this is completely normal and will wash out easily if you allow any stuck dough to dry completely on the towel, then simply pick or flick it off before laundering.
4. Final Touches and Baking to Golden Perfection
After its brief but impactful water bath, the dough will naturally be quite sticky and might still look a bit messy or unkempt. Do not despair or let this deter you! This appearance is completely normal and expected at this stage. I’ve personally made this amazing bagel bread countless times, and I can assure you that even when it looks “hideous” or less than perfect after boiling, it invariably bakes into the most glorious and delicious bagel bread imaginable. To proceed, lightly spray your original loaf pan with a little cooking spray. If you’re creating a cheesy bagel bread, now is the moment to generously sprinkle a couple of tablespoons of your chosen cheese evenly across the bottom of the pan – this clever trick creates a wonderfully crispy and flavorful cheese crust on the underside of your loaf. Carefully transfer the boiled dough back into the prepared pan, gently tucking it around the edges to form a uniform and even shape. Repeat this entire boiling and pan-prepping process for your second loaf, allowing the first loaf to rest briefly while you prepare the second.
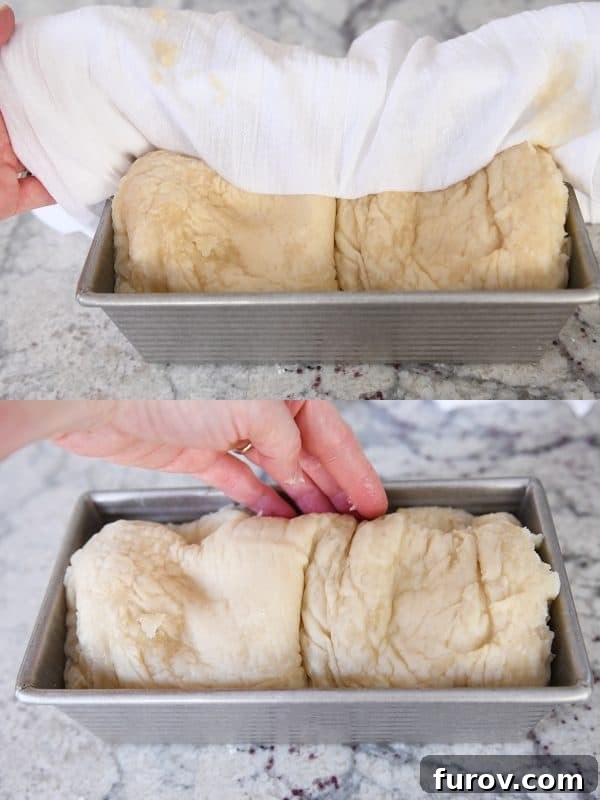
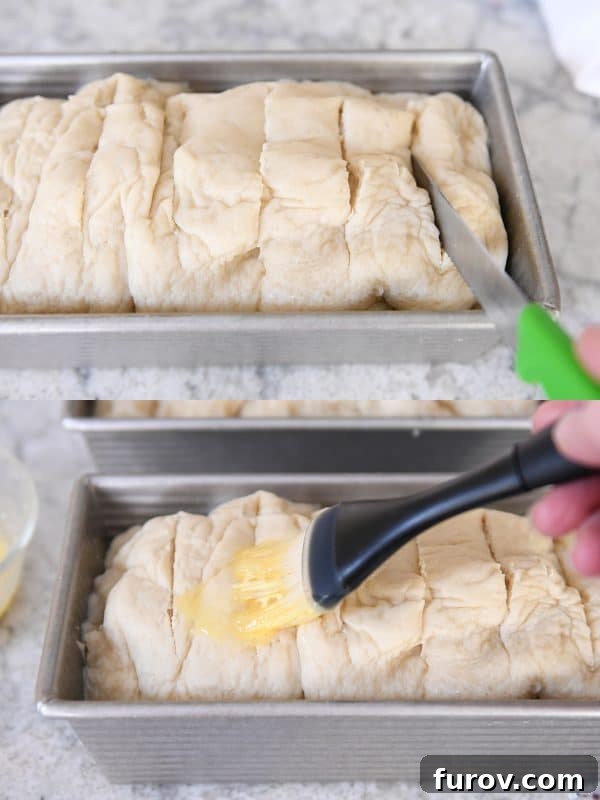
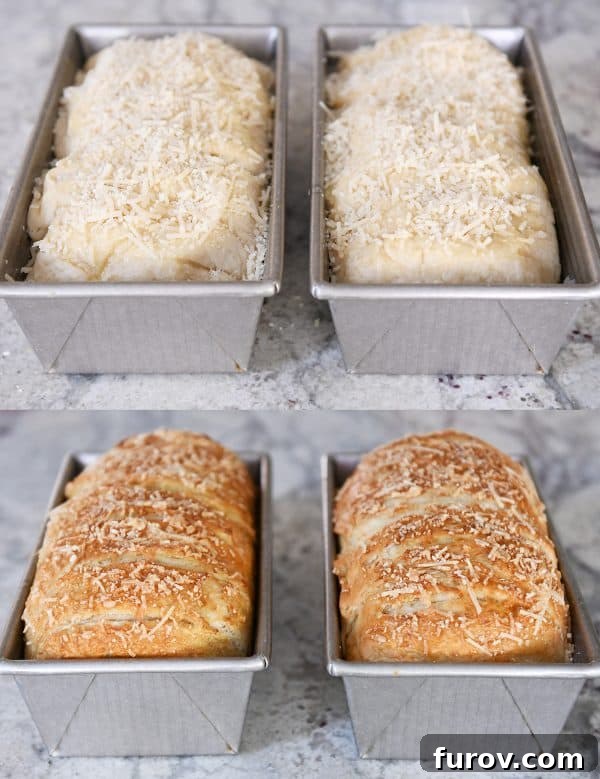
Next, grab a sharp paring or serrated knife (a simple, inexpensive one like this one {affiliate link} works perfectly for this task) and carefully make five or six shallow slashes, approximately a quarter-inch deep, crosswise across the top of each loaf. These slashes are not merely for aesthetic appeal; they serve a crucial functional purpose, allowing steam to escape evenly during the baking process, which ensures a beautiful, uniform rise and helps to prevent any unwanted cracking of the crust. Then, brush the entire top surface of each loaf with a lightly beaten egg. This egg wash is what contributes to that gorgeous golden-brown, shiny, and irresistible crust we all love. Finally, generously sprinkle a little (or a lot, if you share my passion for cheese!) more freshly grated Parmesan or Asiago cheese over the egg-washed surface. Without delay, immediately transfer the loaves to a preheated 350°F oven – there is no need for a second rise after the boiling step!
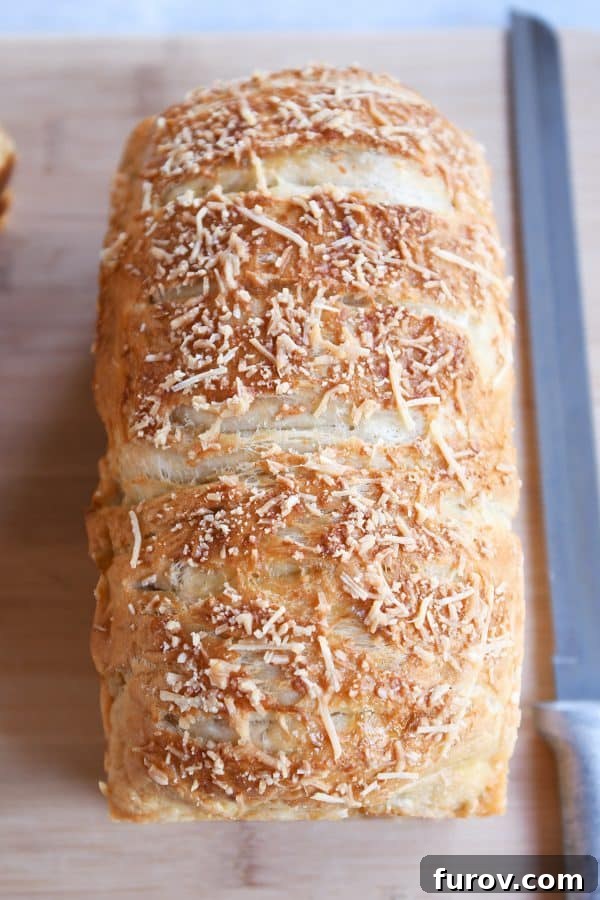
After approximately 40-45 minutes of dedicated baking, your kitchen will be enveloped in an aroma so profoundly divine, you might just discern the faint yet distinct notes of angels singing somewhere nearby. Your magnificent loaves will emerge from the oven, proudly boasting a stunning, rich golden-brown hue and a perfectly set, deliciously chewy crust. To confidently confirm their doneness, an instant-read thermometer inserted into the very center of a loaf should register a temperature of approximately 200°F. Allow the bread to cool undisturbed in its pan for a crucial 15-20 minutes before carefully turning them out onto a wire cooling rack to cool completely. While the temptation to slice immediately into that warm, aromatic loaf is almost overwhelming, exercising a little patience here is a true virtue; complete cooling allows the internal structure and intricate flavors to fully set, resulting in the absolute best possible texture and taste experience.
Enjoying and Storing Your Homemade Bagel Bread
Once your homemade bagel bread has fully cooled, feel free to dive in and enjoy it in any way your heart desires – there are absolutely no rules! This bread is an absolute dream. It’s undeniably scrumptious when sliced, expertly toasted to a golden crisp, and then lavishly slathered with your favorite creamy cream cheese or a generous pat of rich butter. However, please do not underestimate its charming qualities when enjoyed untoasted – its tender, delightfully chewy, and soft interior is equally perfect for savoring as is, offering a truly satisfying bite. It’s truly a remarkably versatile bread that will undoubtedly and quickly become a cherished staple in your household.
While making this homemade bagel bread might not be your average, everyday baking routine, I genuinely and enthusiastically encourage you to embark on this delightful culinary adventure. There’s an immense and deeply satisfying sense of accomplishment that comes from combining simple, foundational ingredients and then watching them miraculously transform into something so uniquely delicious and visually appealing. In this particular instance, this incredible bagel bread has, without question, swiftly climbed to the very top of my list of favorite homemade bread recipes, comfortably surpassing many others I’ve cherished over the years. We simply cannot get enough of it!
Here’s some great news for convenient meal prep and satisfying future cravings: baked loaves of this bagel bread freeze wonderfully. To ensure optimal freshness and prevent freezer burn, simply wrap them tightly in plastic wrap, followed by a layer of aluminum foil. When you’re ready to indulge, simply thaw the loaf at room temperature and then refresh it in a warm oven for a few minutes to revive its fresh-baked goodness. It also maintains its quality exceptionally well at room temperature for several days, particularly if you plan to enjoy it toasted. Who knew the humble bagel could inspire such a magnificent, versatile loaf? I sincerely hope you love this homemade bagel bread as much as my family and I do – happy baking!

Amazing Bagel Bread
24
slices (2 loaves)
1 hour
hr
35 minutes
mins
55 minutes
mins
30 minutes
mins
3 hours
hrs
Pin
Rate
Ingredients
Bread:
-
2 ½
cups
warm water -
4
tablespoons
honey -
1 ½
tablespoons
instant or rapid-rise yeast,
see note for active dry yeast -
1 ½
tablespoons
coarse,
kosher salt (use less for table salt) -
5 to 5 ½
cups
(709 to 780 g)
bread flour (see note for substitutions and notes about exact flour amount)
Topping:
-
1
egg,
lightly beaten -
½
cup
(57 g)
freshly grated Parmesan or Asiago cheese,
or other toppings of choice, like sesame seeds, poppy seeds, Trader Joe’s everything but the bagel seasoning, etc
Water Bath:
-
4
quarts
water -
¼
cup
(85 g)
honey -
1
tablespoon
baking soda
Instructions
-
For the bread, in the bowl of a stand mixer fitted with the dough hook, combine the water, honey, yeast, salt and 2 cups of the flour. Mix until combined. With the mixer on low speed, continue adding flour until the dough comes together and clears the sides of the bowl. The exact amount of flour doesn’t matter as much as the texture and feel of the dough. It should form a soft, smooth ball that is still a little tacky to the touch but doesn’t leave a lot of dough residue on your fingers. Knead the dough for 5 minutes.
-
Cover the mixing bowl and let the dough rest for 10-15 minutes.
-
Turn the dough out onto a lightly greased or floured counter and separate into two pieces.
-
Shape each piece into a loaf by pressing into a thick rectangle, folding the bottom edge up to the middle and then grabbing the top edge and folding it down over the dough and pinching the seam to seal. Turn the loaf seam side down and pat and roll lightly to form an even 8-inch loaf.
-
Grease two 8 1/2-X-4 1/2-inch loaf pans. Place the loaves seam side down in the prepared pans. Cover with a clean kitchen towel or greased plastic wrap and let rise in a warm, draft-free spot until the dough rises just over the edge of the pan, about 45 minutes to an hour.
-
Toward the end of rising, prepare the water bath by bringing the water to a boil in a pot (that is at least 10-inches wide). Add the honey and baking soda and stir to dissolve. Also, fold a clean kitchen towel (like a thin flour sack towel without any texture or terry cloth fabric) in half and place next to the stove.
-
Preheat the oven to 350 degrees F.
-
One at a time, carefully turn the loaf of risen dough out into your hand and place the loaf into the boiling water. It’s ok if the bread loaf deflates and looks a bit wonky. It will all work out! Promise. Cook for 1 minute and then use a wide flat spatula or other tool/spoon to flip the dough and cook for another 45 seconds to 1 minute.
-
Using a couple of wide spatulas, carefully transfer the loaf and place it on the folded towel, using extra towel length to quickly pat any water off the top and sides of the dough.
-
Spray the same loaf pan with cooking spray and sprinkle a couple tablespoons of cheese evenly across the bottom of the pan. Transfer the dough (that’s been boiled) to the pan (using the towel to help transfer the hot loaf, if needed), tucking the dough down around the edges into the pan in an even shape.
-
Repeat the boiling process with the other loaf of dough.
-
With a sharp paring or serrated knife, cut five or six slashes about 1/4-inch deep crosswise on the top of each loaf of dough. Brush the top of with the beaten egg and sprinkle each loaf with a couple more tablespoons of cheese.
-
Bake the bread in the preheated oven for 40-45 minutes until golden on top (an instant-read thermometer should read 200 degrees at the center of the loaf).
-
Let the bread cool for 15-20 minutes in the pan before turning onto a cooling rack to cool completely. Slice, toast, slather with cream cheese, devour!
Notes
Flour Substitutions: If you don’t have bread flour readily available, a fantastic substitute can be created using all-purpose flour combined with vital wheat gluten. For this recipe, aim for approximately 4 1/2 cups of all-purpose flour mixed with 1/2 cup of vital wheat gluten. This combination will help achieve a texture comparable to bread flour.
Measuring Flour: The exact quantity of flour needed can vary significantly due to a multitude of factors, including how one measures flour (scoop and level versus spoon and level), your specific elevation, ambient humidity levels, and even the precise temperature of your water. Therefore, do not rigidly adhere to the exact measurements provided in the recipe as an unchangeable rule. Instead, focus intently on the tactile texture and overall feel of your dough. If you find yourself needing to add a bit less or a bit more flour to achieve the described consistency, that is perfectly acceptable and expected.
Mel
Bread
American
Bake
Serving:
1
Slice
,
Calories:
137
kcal
,
Carbohydrates:
27
g
,
Protein:
5
g
,
Fat:
1
g
,
Saturated Fat:
1
g
,
Cholesterol:
9